


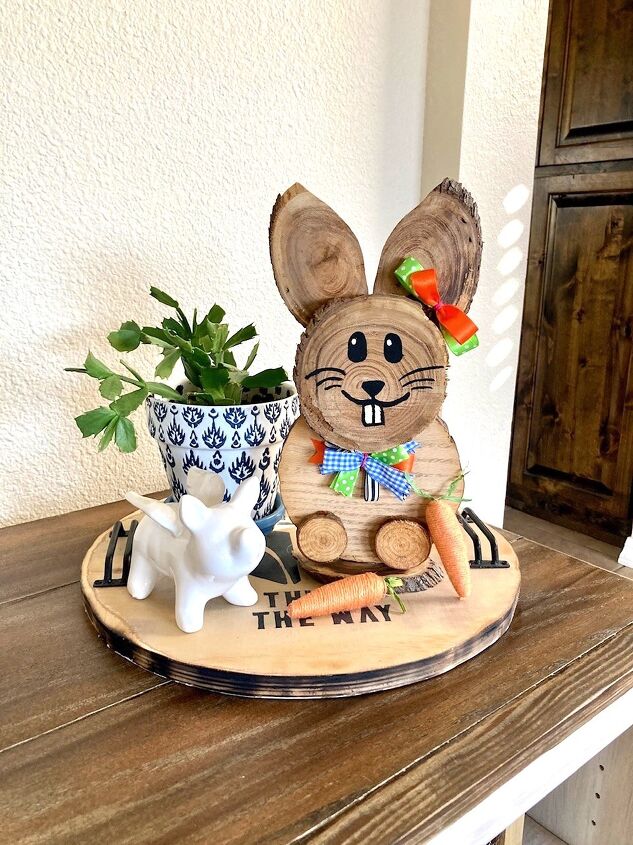
Lola Wood Bunny

Easter is approaching fast; time to start decorating! I figured, why not use some of the wood chips I had left from another project to make this super-cute Easter bunny.
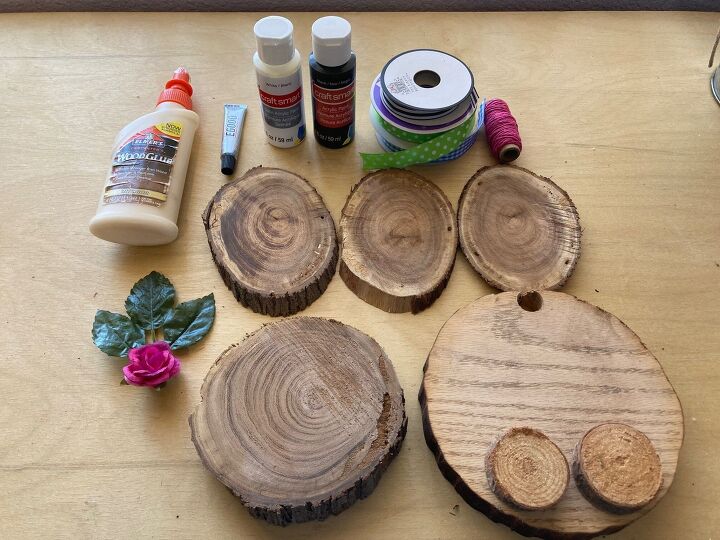
Materials used:
Wood chips, various sizes
Wood glue
E6000 glue
Black Acrylic Paint
White Acrylic Paint
Ribbon, various sizes and colors
Jute String
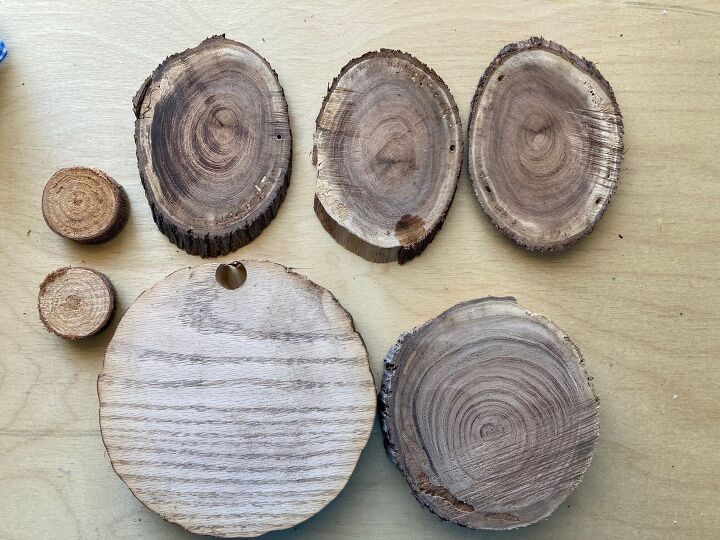
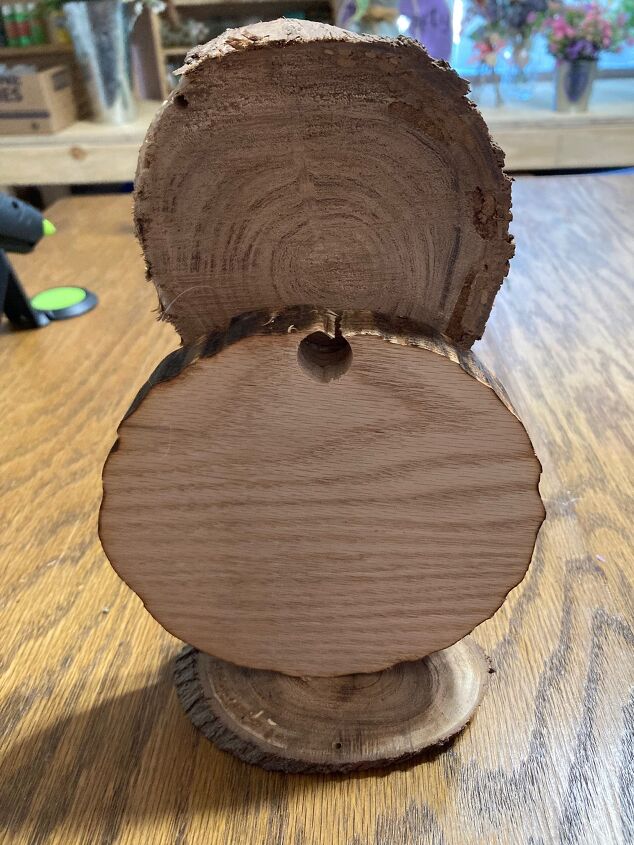
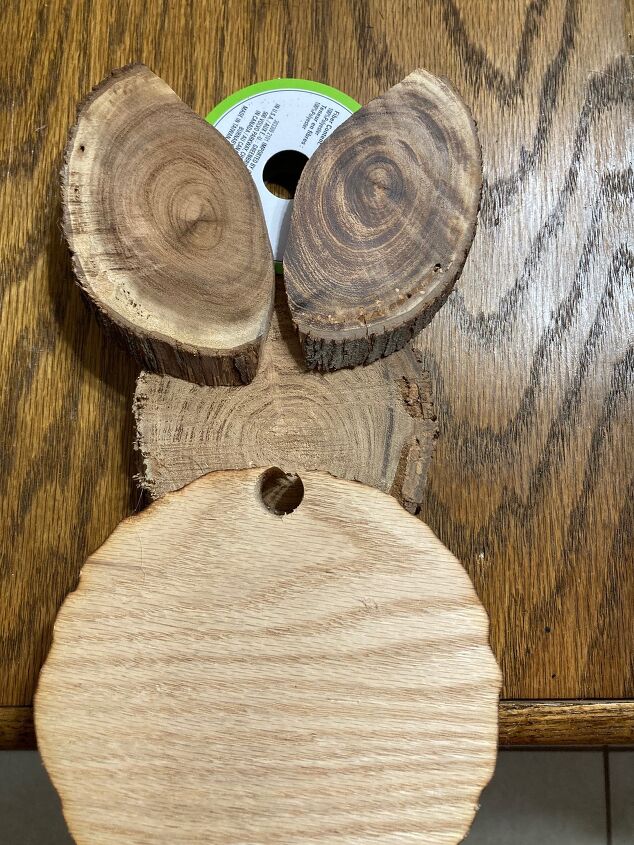
Step 1: I used a a 6" x 3/4" wood chip for the body. A 4 1/2" x 3/4" chip for the head. For the ears I used a 4 1/2" x 1/2" chip, cut in two pieces, diagonally. For the feet, I used two, 1 3/4" x 1/2" chips. And for the base, I used a 6" chip.
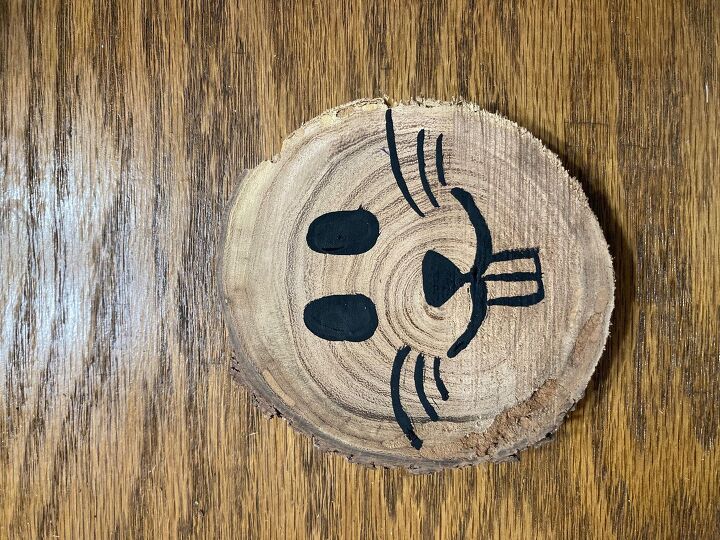
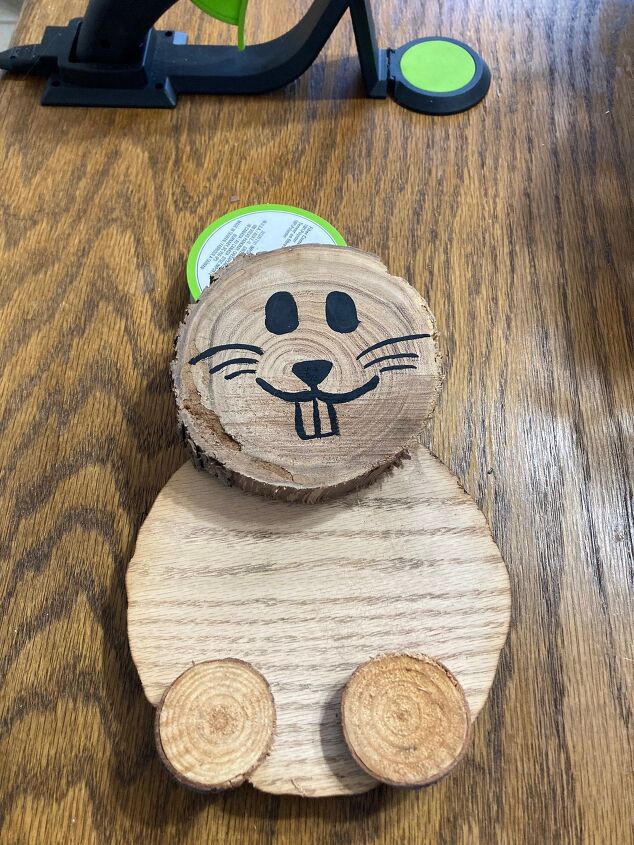
Step 2: I used black, acrylic paint to draw the face. Once the paint dried, I used white, acrylic paint to fill in the teeth and to draw the pupil of the eye.
Step 3: I glued the head to the body with a mixture of wood glue and E6000 glue.
Step 4: I glued the feet to the body with a mixture of wood glue and E6000 glue.
Step 5: Then, I glued the ears to the back of the bunny's head with a mixture of wood glue and E6000 glue. After the ears dried, I glued the body to the base with the same mixture of glue.
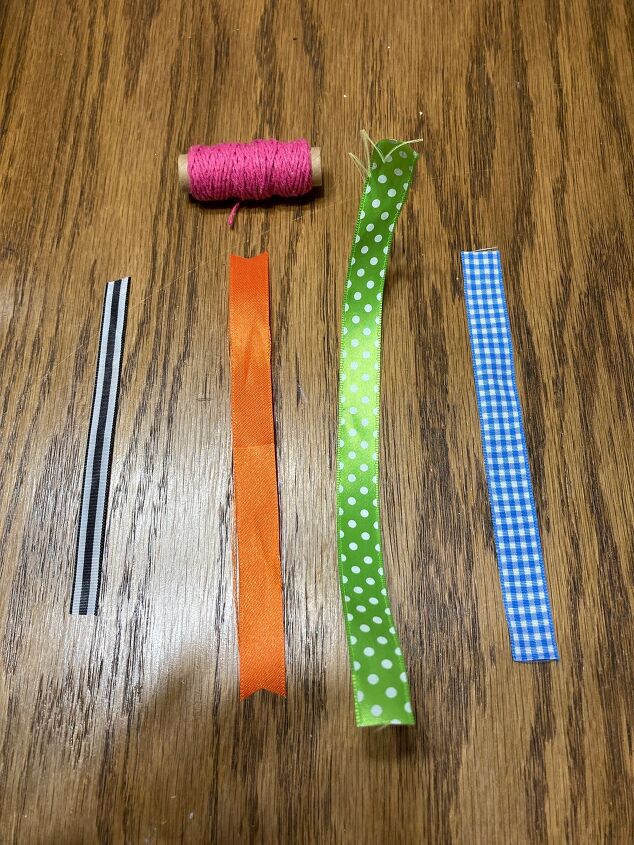
Step 6: I cut seven strips of ribbon 7" long to make two bows. The first bow, I used five strips of ribbon. I folded the five pieces of ribbon in half, and tied them in the middle with jute string. The second bow, I made two loops with the ribbon. The back loop a little bit larger than the front one. I gathered them in the middle and tied it with jute string.
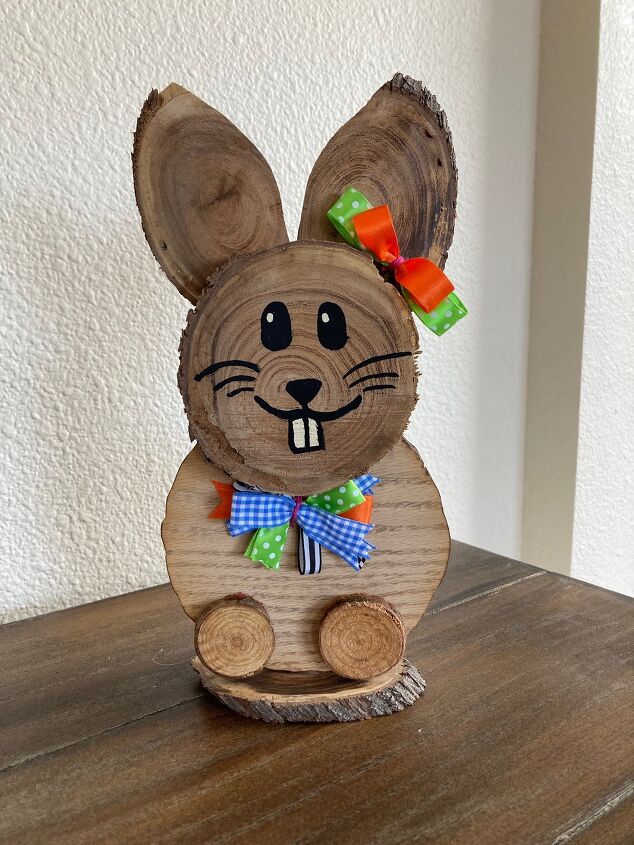
And this is what the final product looks like!


Frequently asked questions
Have a question about this project?