


Make Easter Decor Using Plastic & Wood Eggs With Transfers & Appliques

Easter is coming! So I needed some decor 🤔
Redesign With Prima products make creating unique decor so easy!
In this tutorial, I'll show you how I brought plain wooden and plastic eggs up a notch or two (or ten)!
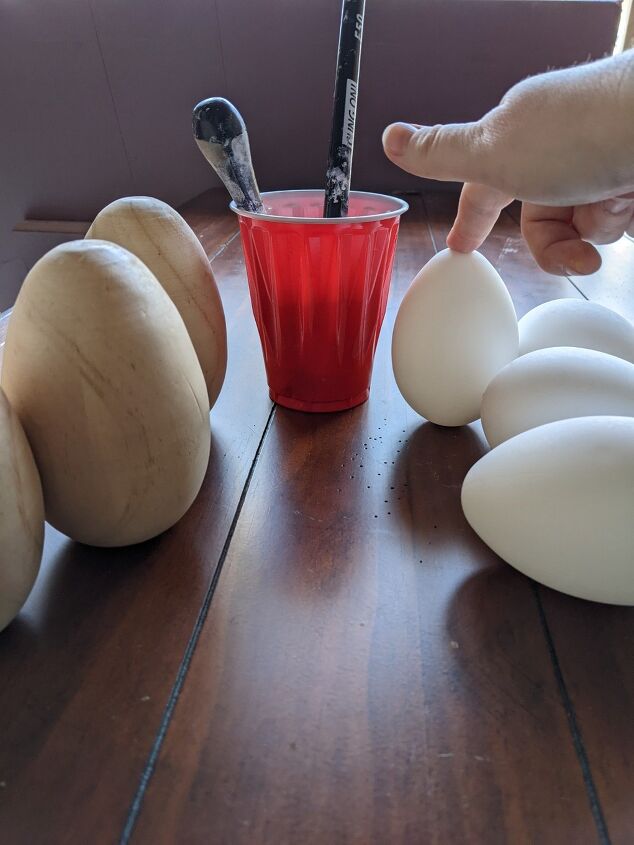
I left the solo cup to show a size comparison. The wooden eggs are 5" and the plastic ones are 2.67"
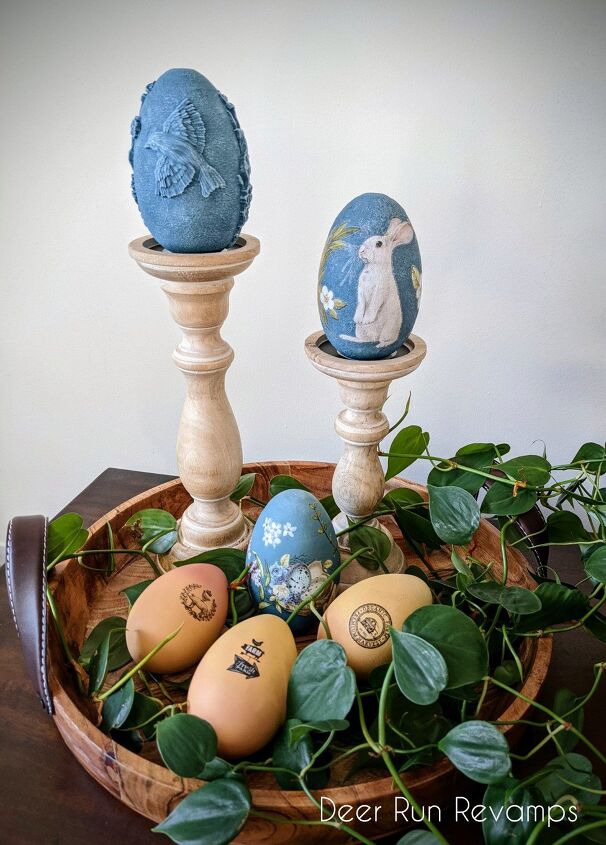
After their makeover 😍😍😍
You can even get the kids in on it with the painting!
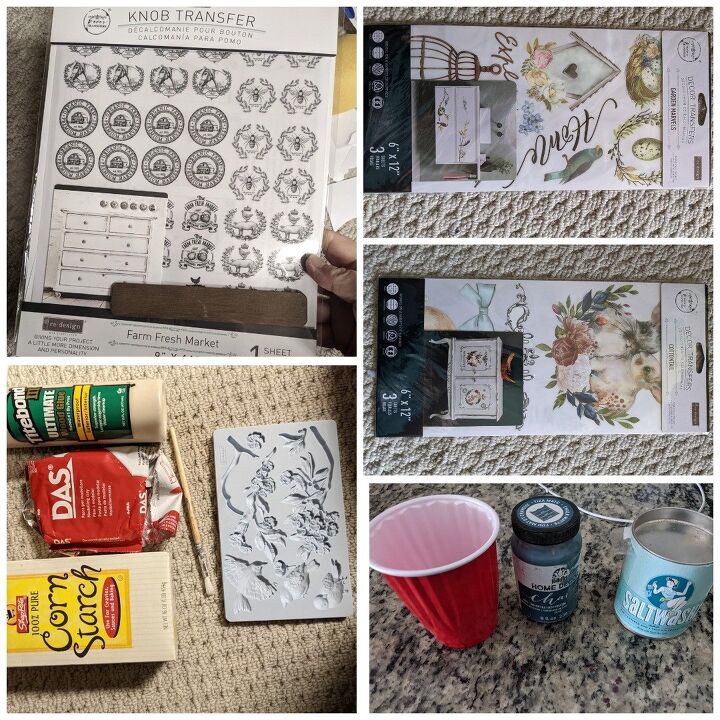
These are the products that I used, plus a few different colors of Renaissance Chalk Paint. Everything is available to purchase in my Etsy shop along with many either products and designs. There is a link to our Etsy store at the end of this tutorial.
I went all out with this project using multiple paint colors, texture additives, different transfer designs, and creating clay appliques. I already had these products on hand, so I didn't have to buy anything new, but going all out when you have none of these products on hand can get pricey.
To create unique and adorable eggs, you really only need 1-2 paint colors and one mini transfer or one silicone mould, and you'll still have a lot of product leftover for more projects.
I just wanted to show multiple ideas for this project.
First step is to paint the eggs.
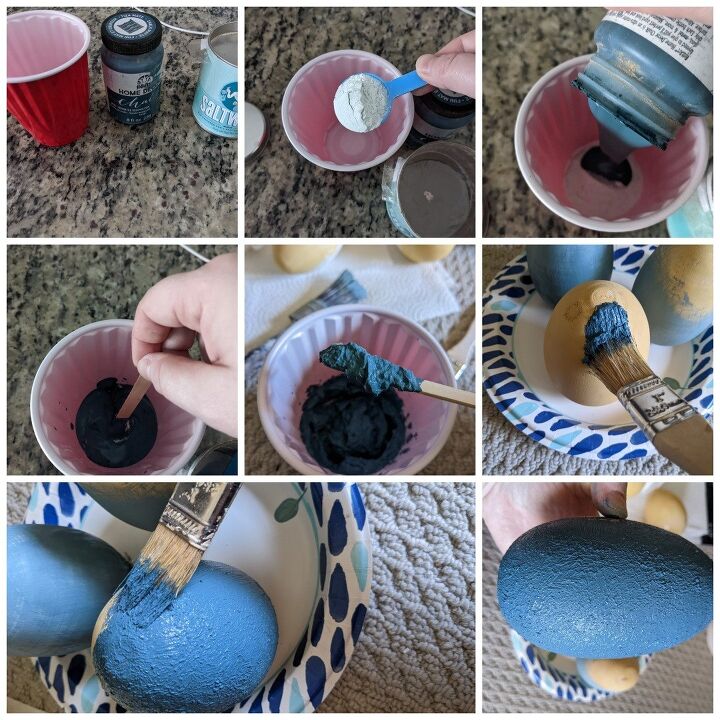
For 2 of the wooden eggs, I used texture. Saltwash is great for achieving tons of texture! The amount used depends on how thick you want the paint (thicker=more texture) and how much paint you need (more paint needed=more salt wash needed). Pour the amount of paint needed into a mixing cup, then add your saltwash powder additive and mix well. The salt wash does lighten the paint color just a tad, so keep that in mind.
Then, using a chip brush, apply the paint mixture to the egg, then go over it in a dabbing motion. This creates peaks and valleys. Then allow to dry completely.
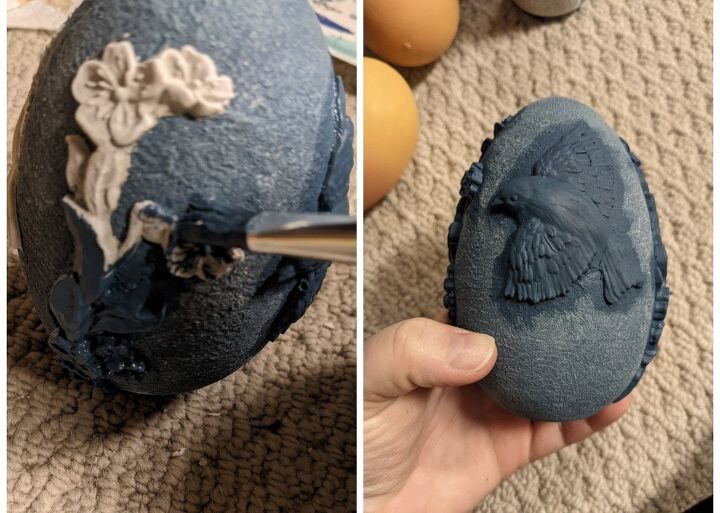
In Renaissance brand chalk paint colors, I used Ivory Tower (ivory), Lemon (yellow) and Spiced Cider (coral) for the 3 plastic eggs and blended the colors together to create a sunset type look. Then for the 3rd wooden egg, I used Ivory Tower (ivory), Celadonite (light green/blue), and Turkish Tile from folk art which is the same dark blue that I used for the other 2 wooden eggs and did a blended look.
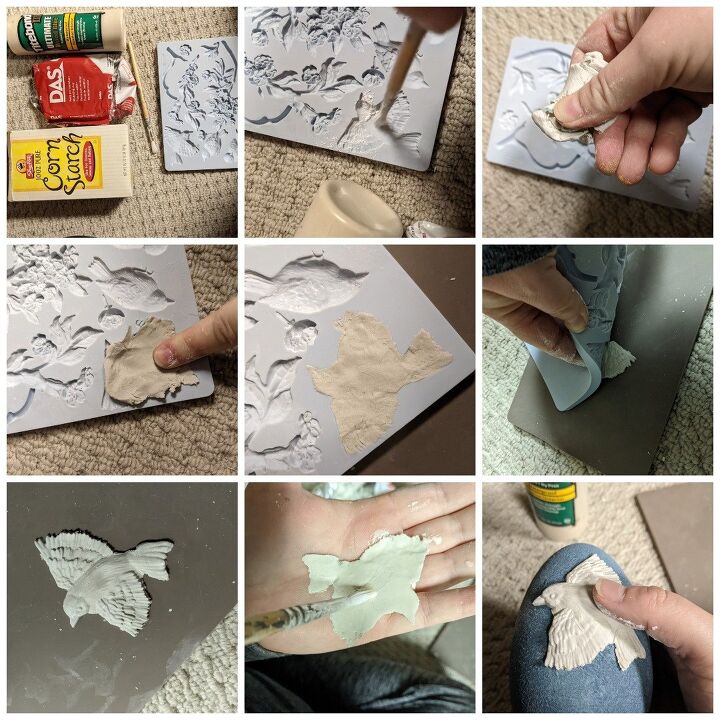
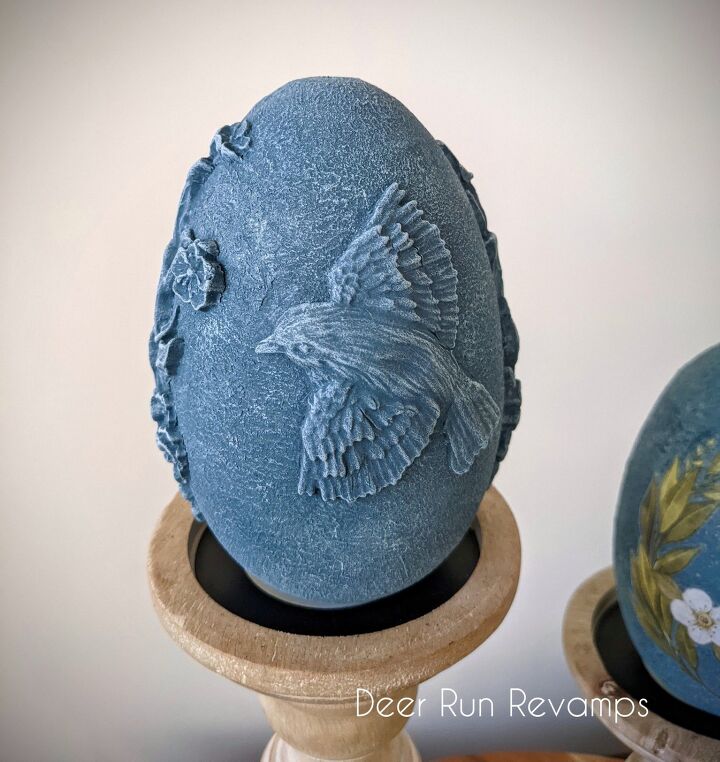
Once the paint was dry, I made and applied the clay appliques to one of the wooden eggs with the texture.
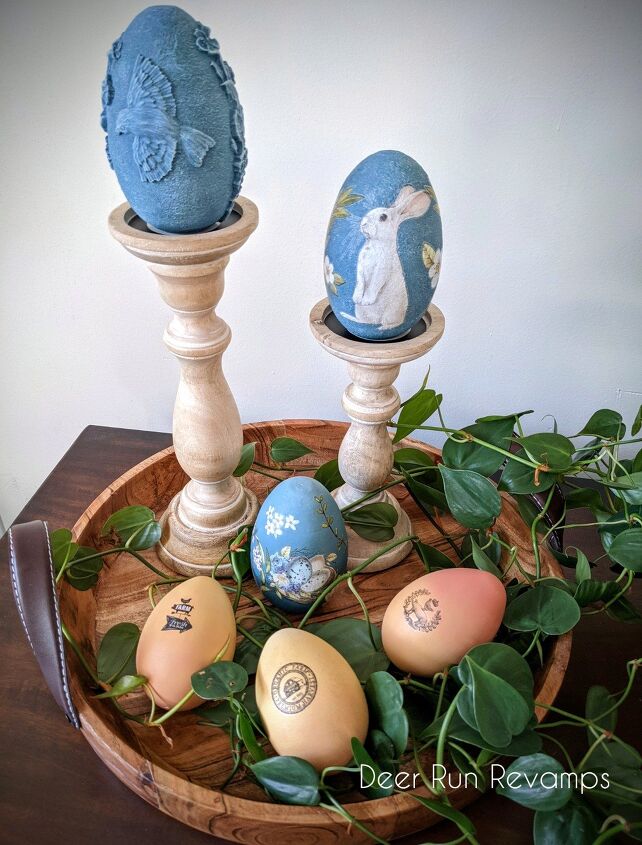
I used Redesign With Prima's "Aviary" silicone Decor Mould for the birds and flowers.
These moulds are also food safe! There are dozens and dozens of different designs all of which makes the amount of projects you can do with these endless! And they literally last forever, so it's well worth the investment.
When using paper clay, you want to lightly dust corn starch onto the mould first. This allows the clay to pop out easily. Once you've dusted the mould with corn starch, you want to remove any excess. You don't want a ton of corn starch piled up in any of the details. I usually just turn the mould upside down and tap the backside.
Place the silicone mould on a hard surface.
Then grab a ball of clay and warm it up in your hands by rolling it around and squishing it. Then, press the clay into the design you'd like to make an applique of. It might lift up easily, but just continue pressing down trying not to allow the clay to shift around in the design. Start from the middle, and press the clay evenly towards the edges of the design. Once at the edge, press down and slide the excess clay over the edge and remove (It's a bit difficult to explain, so I've linked one of my videos below showing this process on a different project)
Then, flip the mould over and slowly start to peel back the mould. The clay applique may need a little help to release from the mould. Just gently help it along as you peel back the mould.
Then apply some wood glue to the backside of the applique and gently press it onto the surface. You don't need a ton of glue, just enough to cover the entire back with a thin layer. If you add too much, it will ooze out of the sides when pressed onto the surface. If this happens, take a small paintbrush and brush that excess glue away.
Clay does crack a little as it dries. This gives it an older more worn look. You can fill in any cracks with more clay, but if you want a perfect applique, resin is the product to use. Resin doesn't have much pliability, especially after it's completely hardened. So it's extremely difficult (impossible in some cases) to get resin appliques on curved surfaces, which is why it was not our chosen medium for this project
Video showing how I make and apply clay appliques
Originally, I didn't plan on adding any clay appliques to the eggs, so I dry brushed them already (I show how to dry brush in the next step), so ignore the color difference.
Once the clay is dry and hardened (I allow it to dry overnight or about 12-24 hours), paint the appliques in your base color. Be sure to get into all the details and around the edges.

Dry brushing the appliques really makes them pop and shows off all of the details.
Apply a little bit of ivory paint to just the tip of a chip brush, then wipe most of the paint off onto a paper towel. Lightly brush over the entire egg, adding more paint as needed. If you apply too much paint, grab a damp paper towel and wipe it away immediately.
You can also use a small detail brush to get right up against the appliques.
For the other textured egg, I dry brushed it using both Ivory Tower and Celadonite, while dabbing some of these colors on in random spots.
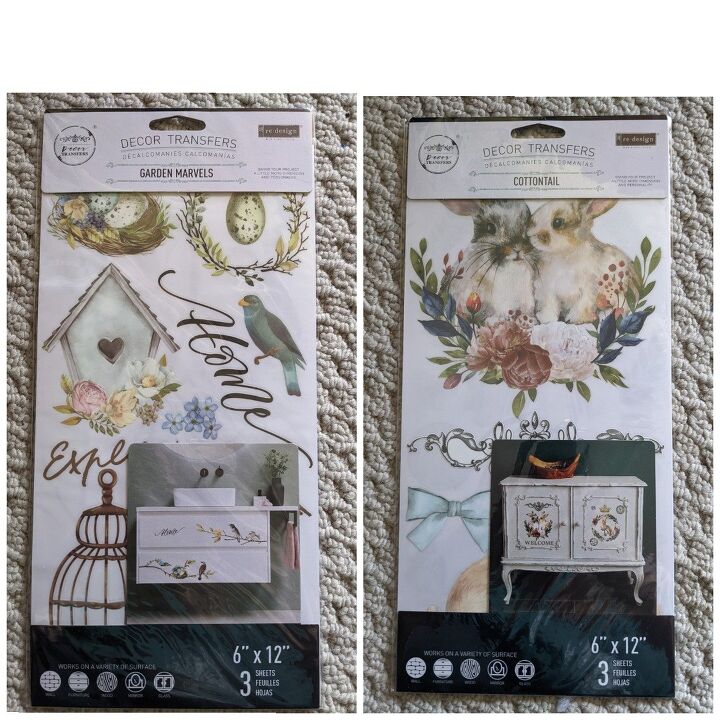
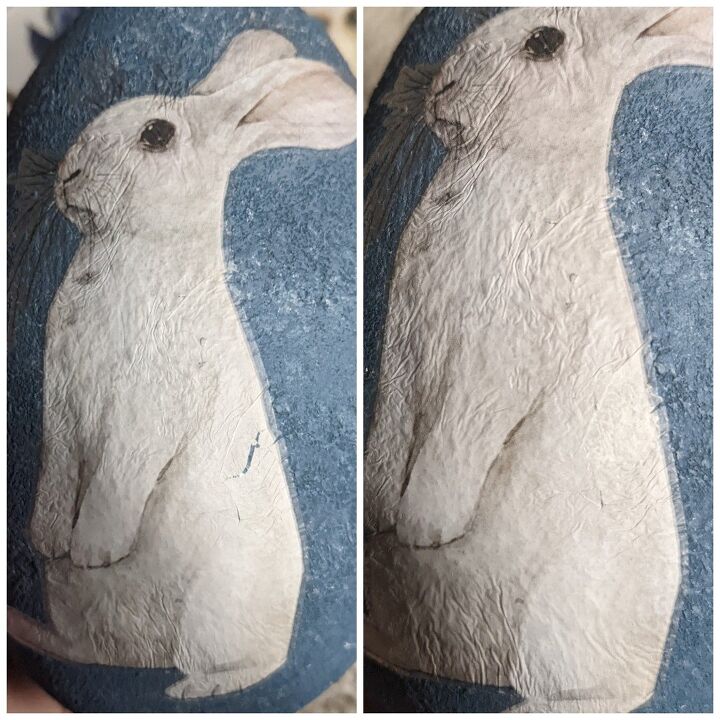
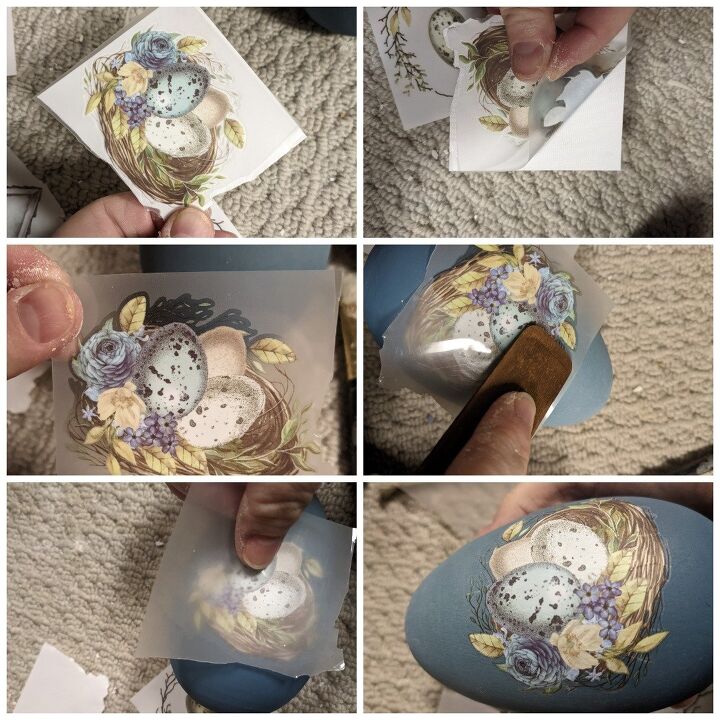
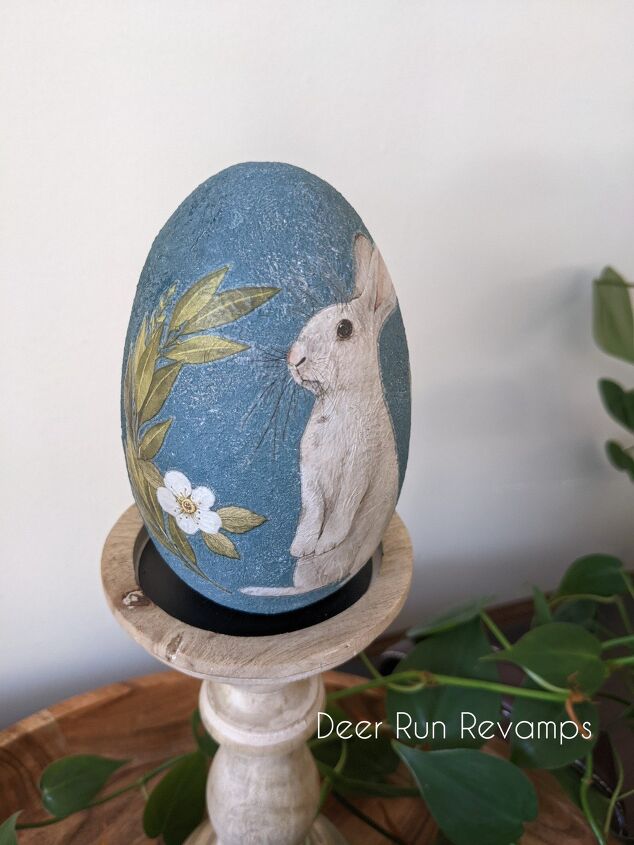
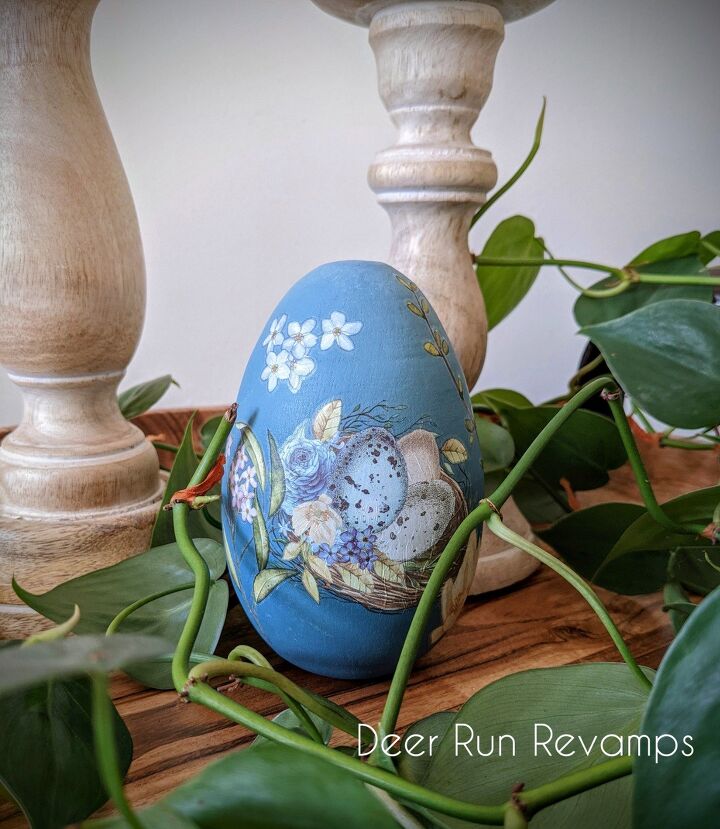
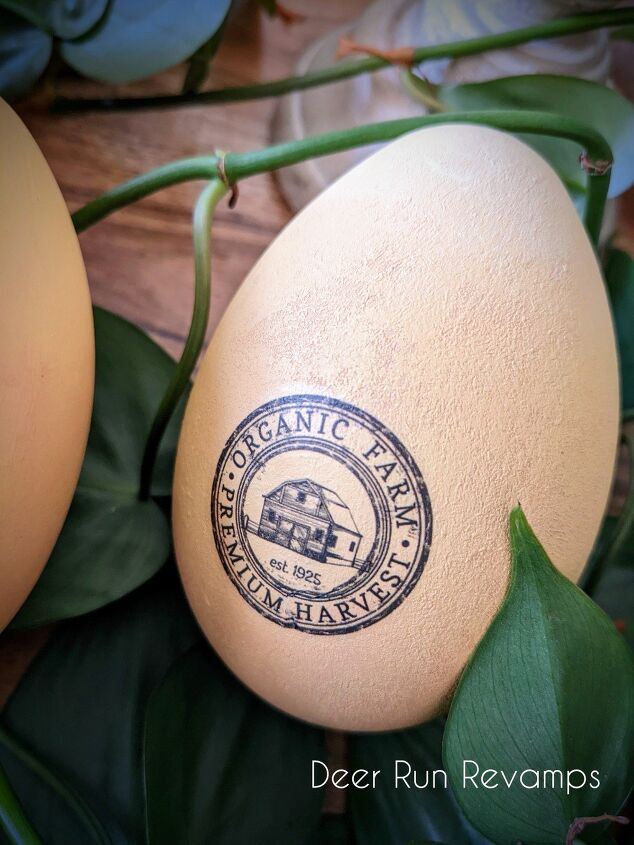
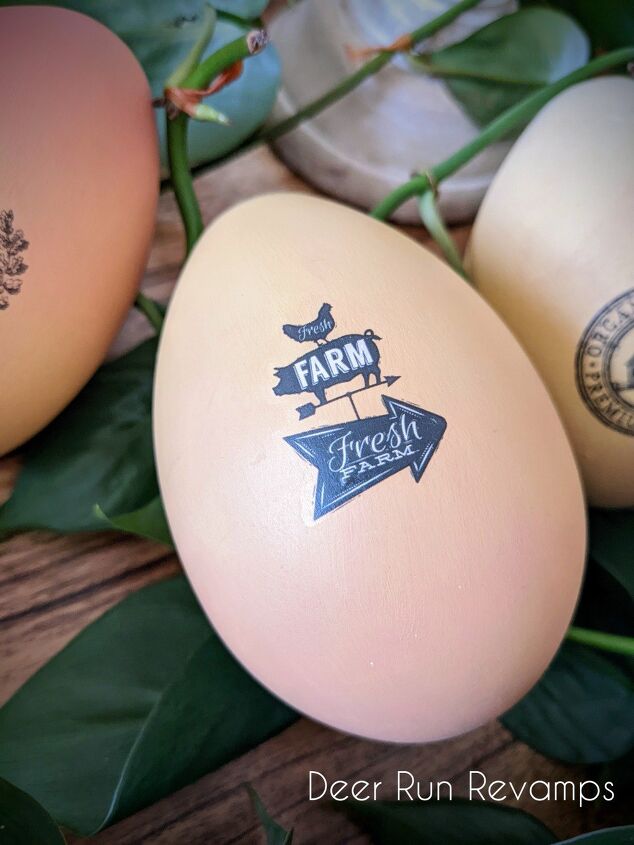
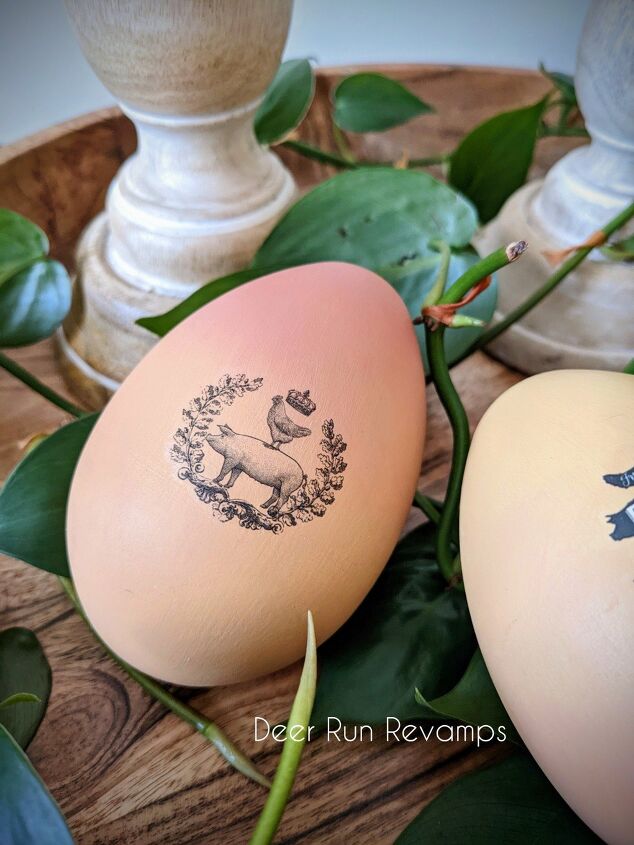
For the other two wooden eggs, I used pieces of the Garden Marvels and Cottontail Mini Decor Transfers
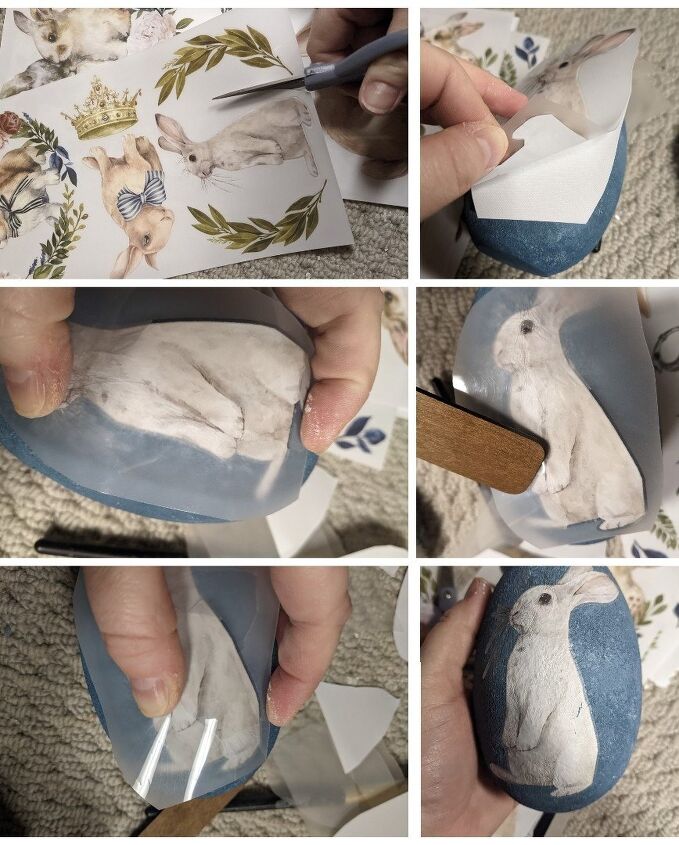
Since the eggs are curved, applying transfers is a bit tricky. So if you've never used transfers before, I would start on a flat surface first to understand just how they work.
Cut out the piece you'd like to use, then remove the white backing. Transfers are extremely sticky, so true not to touch it or allow it to touch anything but the area you'd like it to be.
You'll want to start on one side of the transfer, so only press down on one side. Then take the wooden tool included with your transfer and press down over that small area until it's adhered. Since the surface is textured, it doesn't stick as easily as it would to a smooth surface.
Once that area is completely adhered, allow the clear protective sheet to lift up and begin working on the next area. Continue this until the entire transfer is adhered.
You may have wrinkles which minimize with burnishing and topcoat. I even had a crack in the bunny so I just used a bit of ivory paint and filled in the mistake (photo below)
The smaller the transfer, the easier it is to apply to curved surfaces.
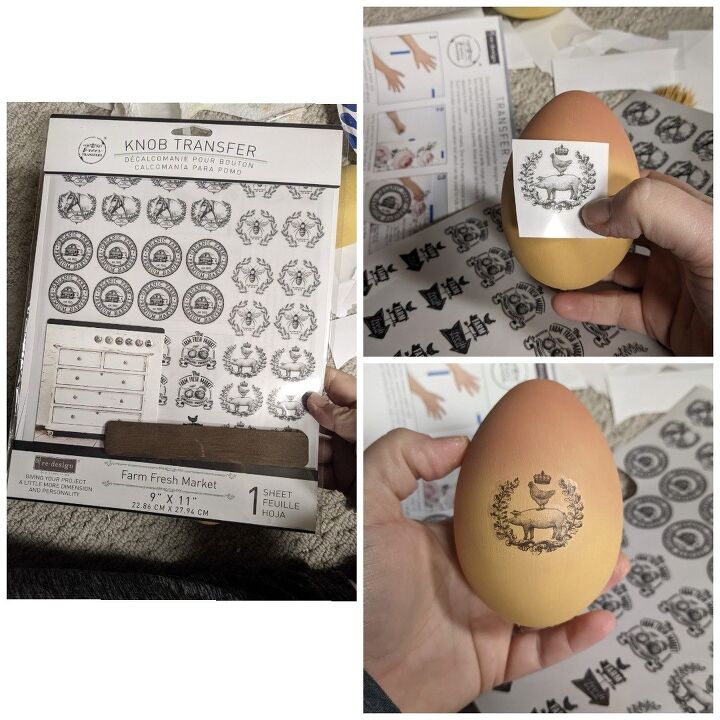
For the plastic eggs, I used Redesign With Prima's knob Decor Transfers. These are meant for furniture or cabinet knobs. They especially work great with wooden knobs. But these little guys are a great choice for any smaller project.
These were much easier to apply, but I still only worked on adhering one area at a time
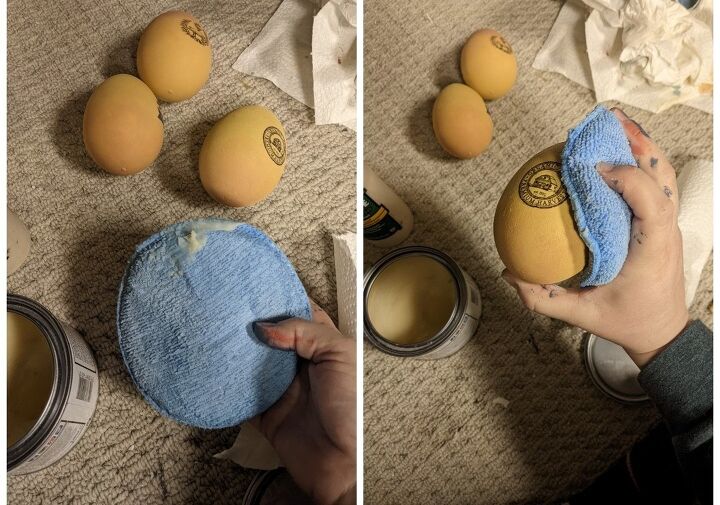
Once all of the paint has dried and transfers have been adhered, you want to seal your hard work.
You can use a waterbased topcoat or wax, which I prefer for smaller home decor projects.
Using a Terry cloth sponge meant for car wax (found on Amazon), I applied a small amount of clear wax and rubbed it onto the eggs, applying pressure when going over the transfers. Topcoats minimize the halo effect (the clear edge around the design) and wrinkles.

Then decorate with these cuties and enjoy 😍
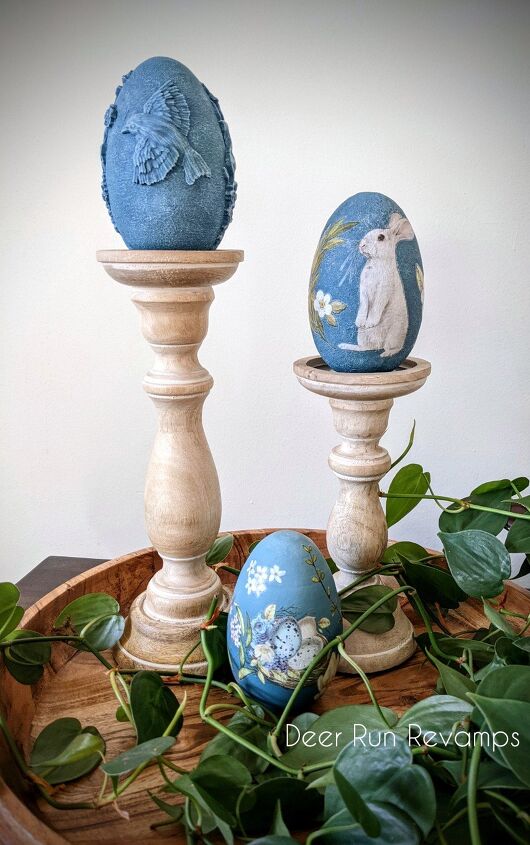
The wooden eggs have a flat bottom, so they are perfect for sitting on candlesticks!
The photos don't really capture the color gradient on this egg, but the top is much lighter than it appears here
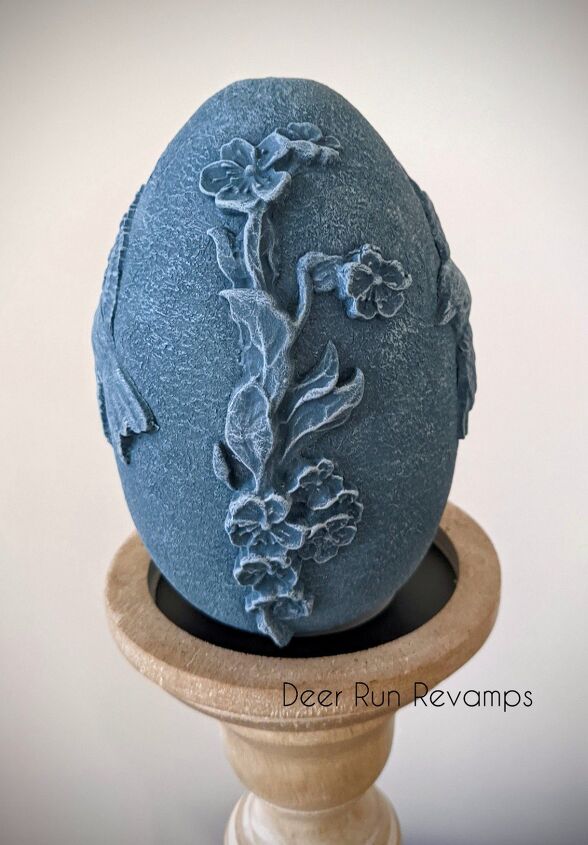
Look at how those flowers pop 🎉
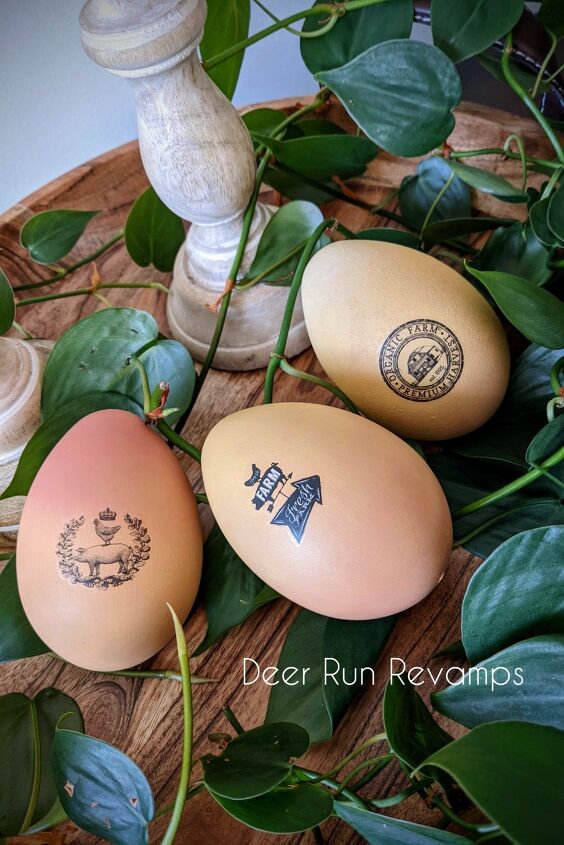
Add these to any centerpiece for a farmhouse Easter touch
For this egg, I applied the paint in dabbing motions for a just a touch of texture
This one may just be my favorite 😍 I absolutely love the coloring and the way the black looks against it!
Thank you for reading our tutorial!
If you have any questions, feel free to reach out 😊

We are a small business and take pride in helping others bring their visions to life ♥️
The products used in this tutorial are available in our Etsy shop. You'll also find over 600 different products, designs and colors in our Etsy shop along with handmade decor and refinished furniture
You can also follow us on Facebook for inspiration, how to's, and just some good ole' fun ♥️
Resources for this project:
See all materials


Comments
Join the conversation
-
So beautifully done, Love every one! TFS 💗
-
Wow, these eggs came out gorgeous!!!


Frequently asked questions
Have a question about this project?