


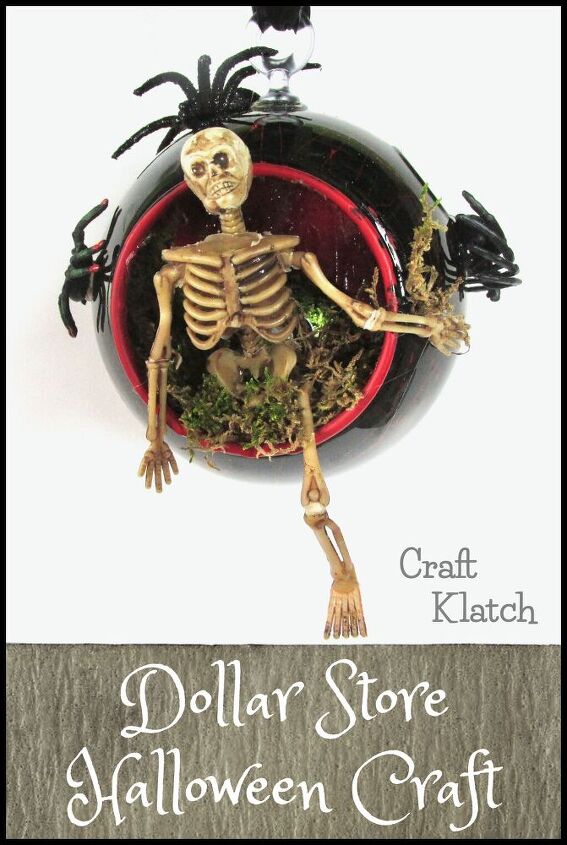
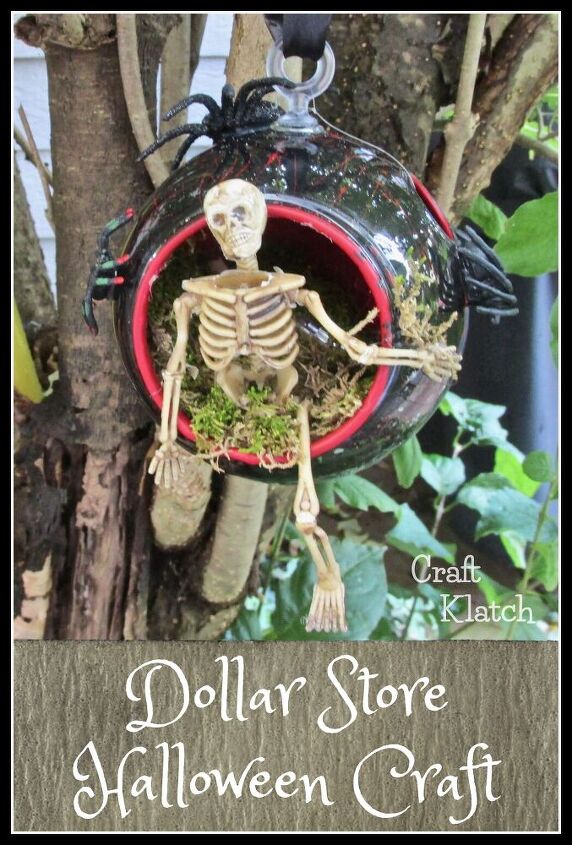
Skeleton Halloween Dollar Store Decoration for Less Then $5!
It's not too early to start planning Halloween decorations! You can decorate on a budget by using dollar store items to create spooky decorations. I used a terrarium from Dollar Tree to craft this inexpensive Halloween decoration and I was able to customize it to fit my style. Also, don't forget you can thrift store decorations are a great place to find pieces to incorporate into your Halloween decor! For more pictures and more specific directions, be sure to check out my blog post Skeleton Halloween Dollar Store Decoration!


I found this plastic terrarium at Dollar Tree and it's perfectly set up to make a hanging Halloween decoration! I also used one to make a Christmas decoration! Dollar Tree Terrarium Turned Into a Christmas Decoration
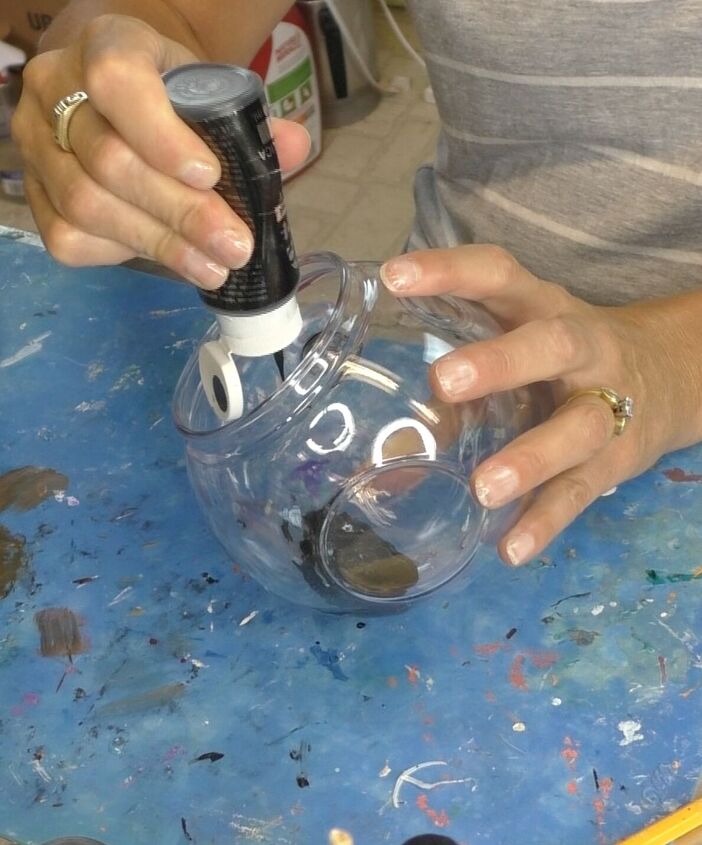
The first thing I did was squirt black acrylic paint into the terrarium and I swirled it around. I wanted to make sure it covered the entire inside of the terrarium.
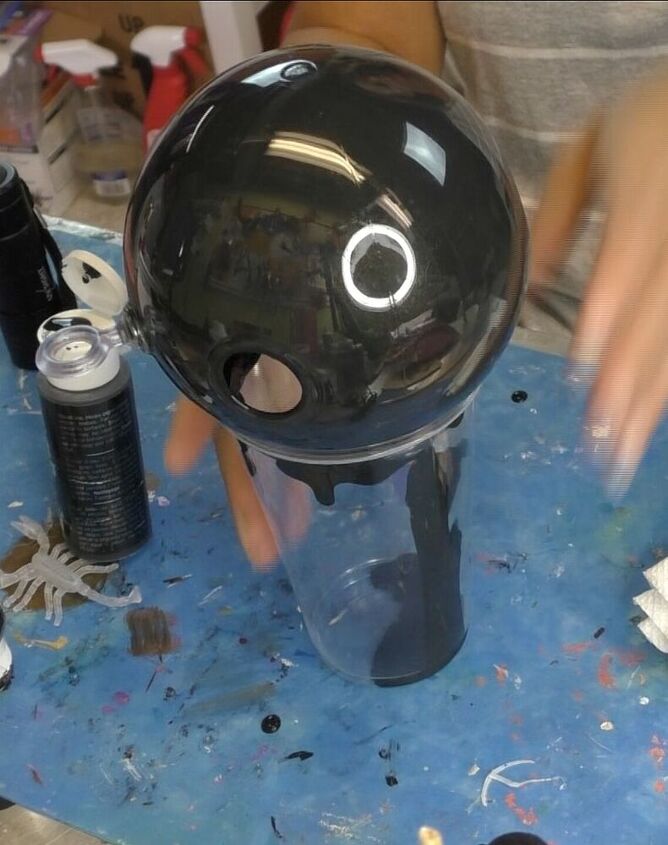
Once it was covered, I put it - opening side down - on a cup. That way, all the excess paint could run out and it would leave a thin layer of black paint on the inside of the terrarium.
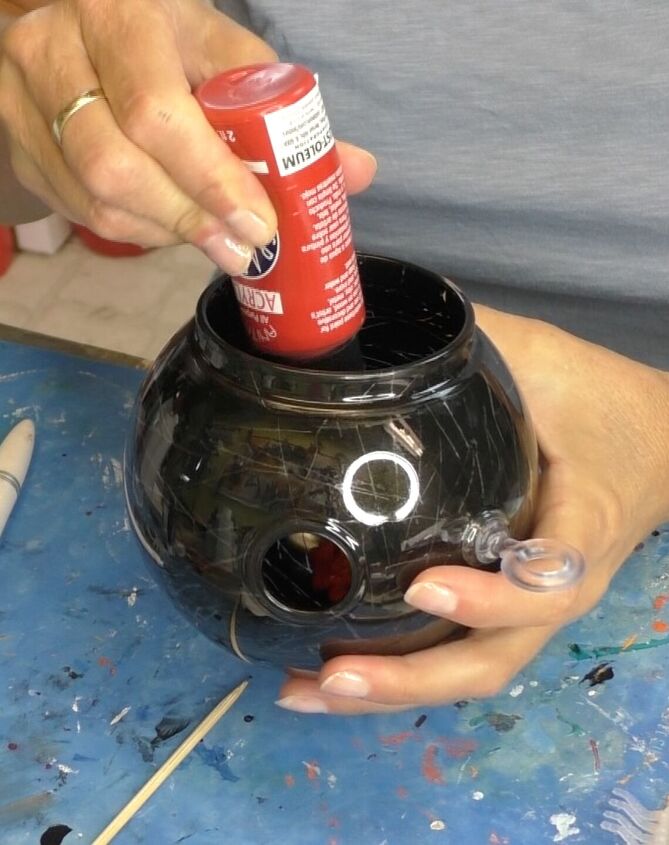
Once dry, I scraped the inside of the terrarium with a skewer stick. I wanted it to look like there were scratches in the black paint. Then, I used a blood red colored paint and poured it into the inside of the terrarium. I then let it drip out and let it dry.
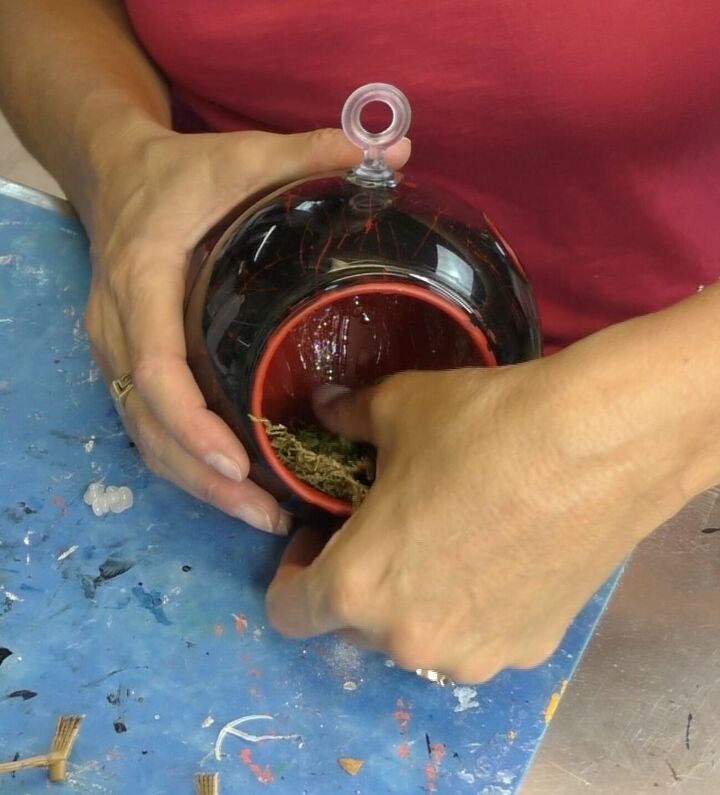
Once dry, I added some moss.
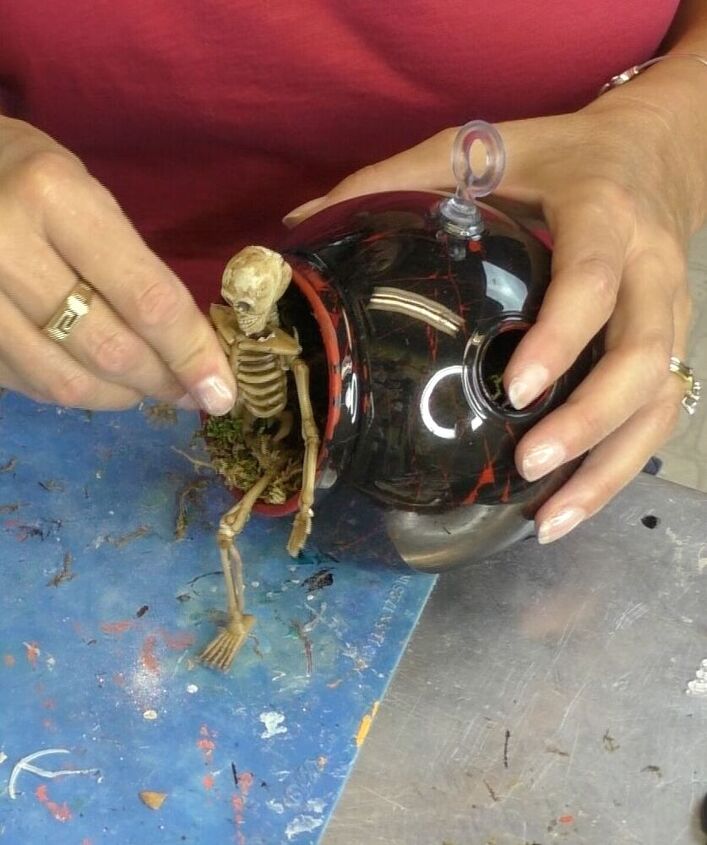
Then I added the small skeleton. You can find tips on how to position him on my blog post Skeleton Halloween Dollar Store Decoration!
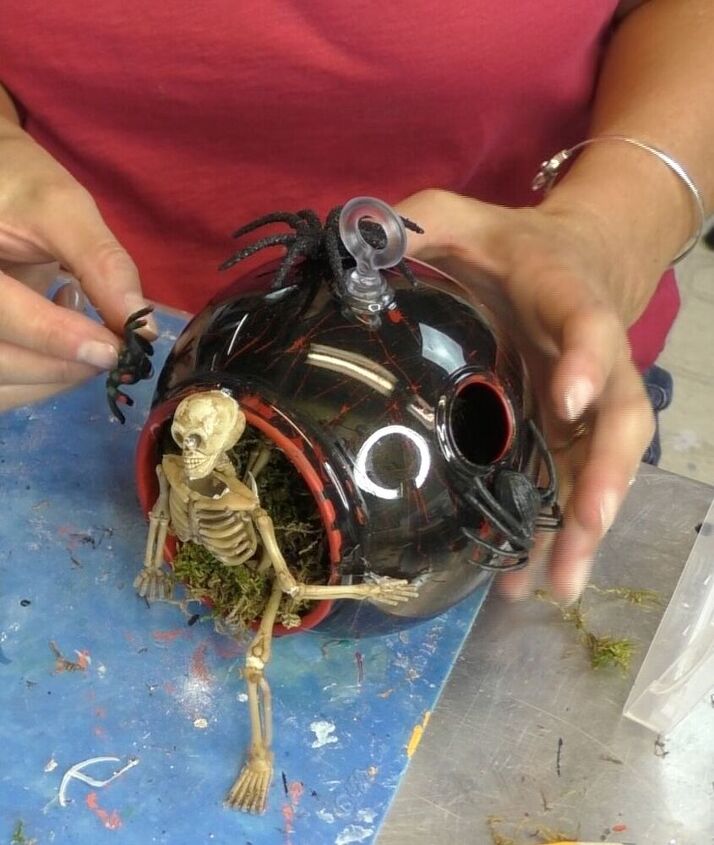
Then I added some spiders. Here is a fun tip: I used hot glue to attach everything. You know how you get those strings or wisps from hot glue? Well you don't have to remove them from this project because it just adds to it because they look like spider webs.
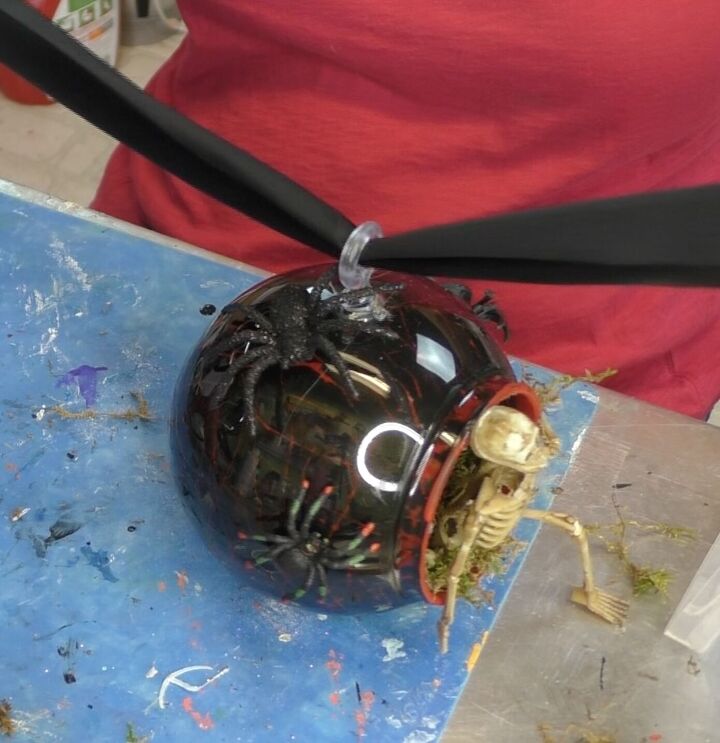
I added a thick black ribbon that was leftover from some other project.
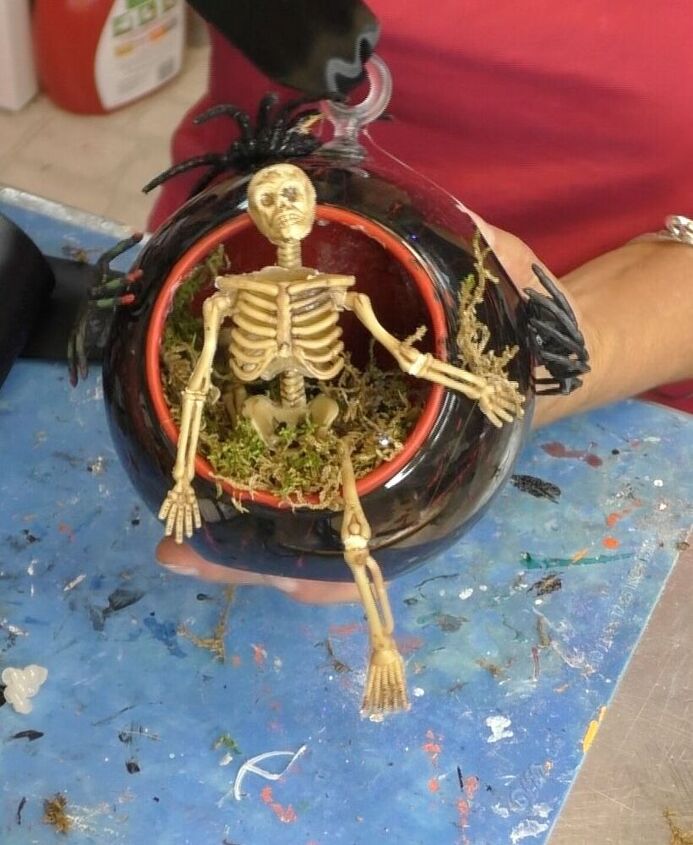
Now I have this cool looking Halloween decoration!
Be sure to Share and Pin It! You can find hundreds of great crafts on my blog at Craft Klatch!

I estimated the time for the project to be 20 minutes. That's the time you will actually be working on it. There will be lots of down time while the paint drains and dries.

Resources for this project:
See all materials


Frequently asked questions
Have a question about this project?