


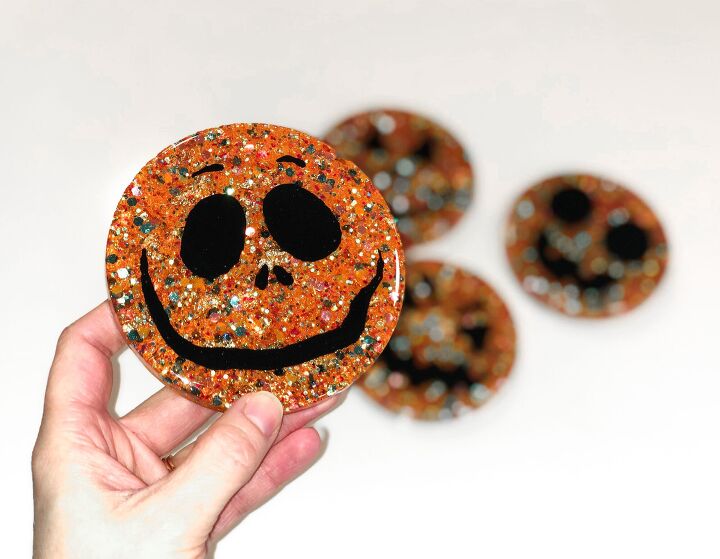
Sparkly Pumpkin Coasters

Hello all, thanks for checking out my post today.
Today's project is super cute and very easy to make, you'll wish Halloween was all year round 😉
I made my coasters using layers of resin and a nifty little relief-paste-trick. Check out my YouTube video linked below for the full video tutorial 👍🏻
WHAT YOU'LL NEED
- Resin - Use this link and my code HANNAH for 10% off resin supplies with Rockstar Resins
- Round coaster molds
- Glitter & mica pigment
- Black relief paste
- Black resin pigment or acrylic paint
- Blow torch
- Heat gun
- Sand paper
Always use protective wear and follow safety guidelines when handling resin
STEP 1 - WATCH YOUTUBE
As I mentioned before, you can watch this exact tutorial via my YouTube channel by clicking on the video link above.
Please consider subscribing to my channel and give my video a 👍🏻 if you enjoyed it. I post regular crafty content that anyone can do!
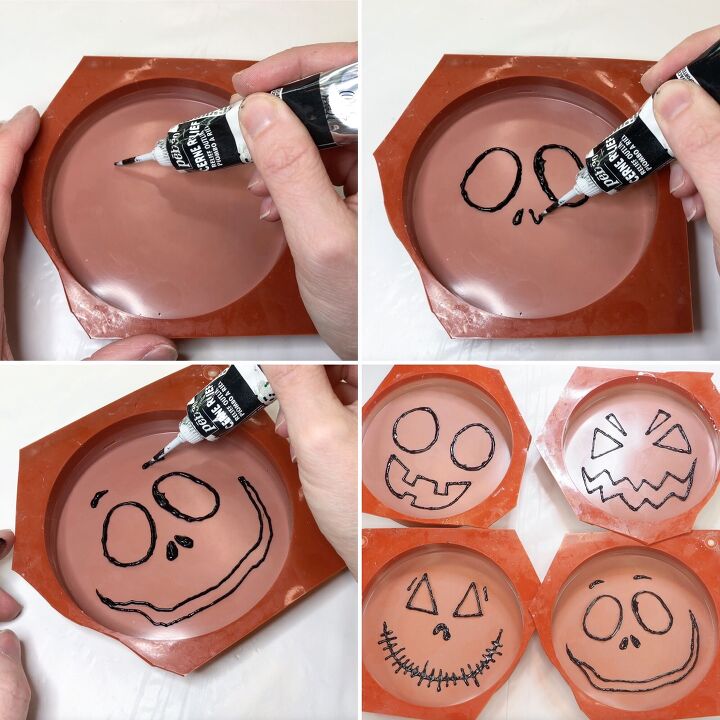
STEP 2 - FACE PAINTING
In each coaster mold base, draw a pumpkin face outline using black relief paste.
Relief paste can be a little tricky to use but if you've ever decorated a cake with that gel icing then you'll know how it goes!
Don't worry about filling in the gaps, we'll do this next with black resin. You probably could fill the gaps in with relief paste for the same effect but you'll soon run out of paste, which of course we want to avoid.
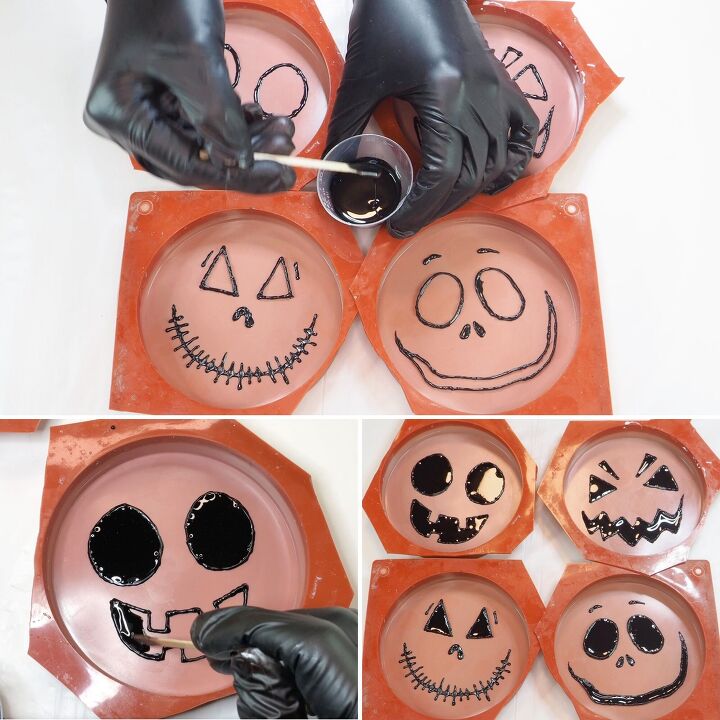
Once the paste outlines have dried to the touch, mix a very small amount of resin and colour this with black resin pigment. Black acrylic paint will also work if you don't have resin pigment.
Now carefully fill in the shapes you drew using a craft stick to coax the resin into corners. Make sure you don't add too much resin in one go or you run the risk of spilling over your paste lines, so just start with a little and add more if needed.
Once all the shapes have been filled in, allow the resin to cure.
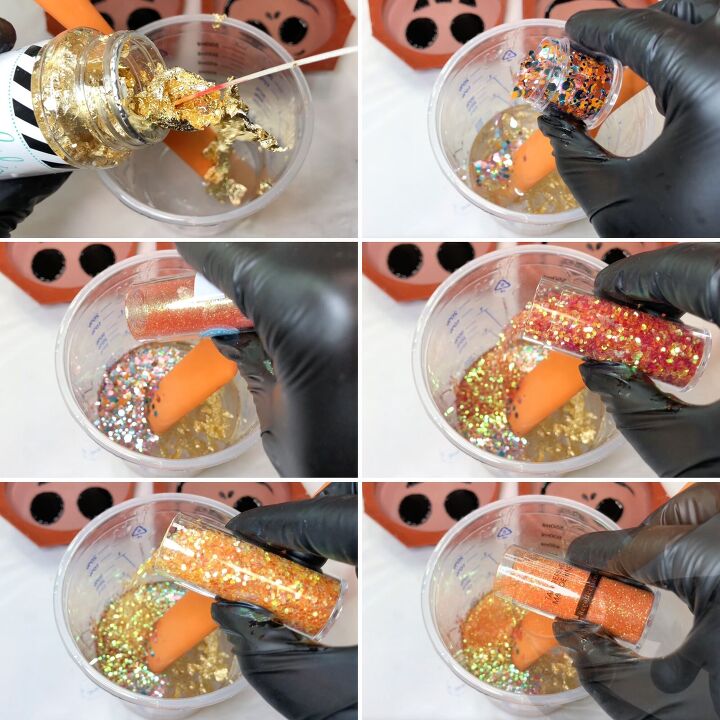
STEP 3 - THE FIRST LAYER
Mix enough resin to provide a decent first layer in all four coaster molds (for me this was approx 200mls).
Once the resin is fully mixed, add in orange and gold glitters. I used gold leaf for my gold element as I wanted different sized pieces and a less consistent texture; the gold leaf provided chunkier pieces.
I added a range of fine to chunky glitters too.
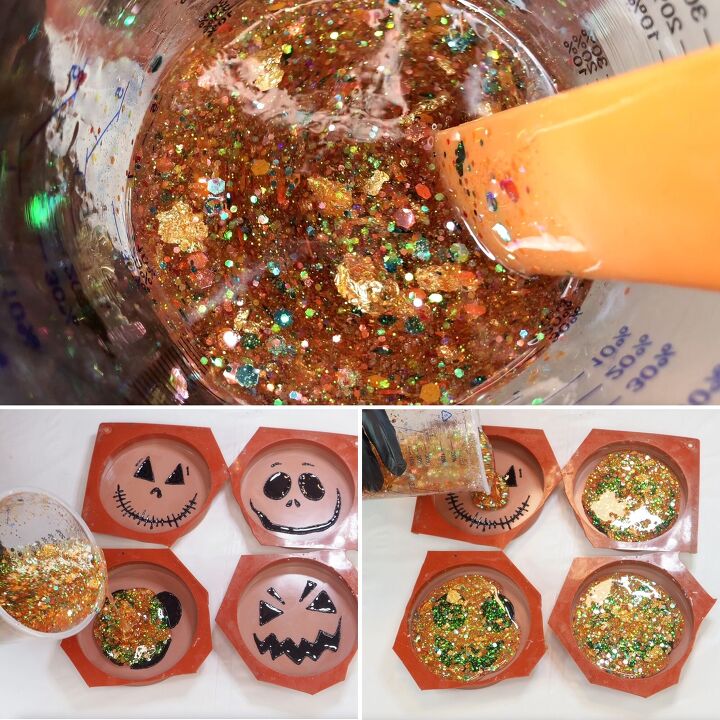
Mix all the glitters together thoroughly before dividing the resin between all 4 coaster molds.
Pop any bubbles using a heat gun and blow torch and then allow the resin to fully cure.
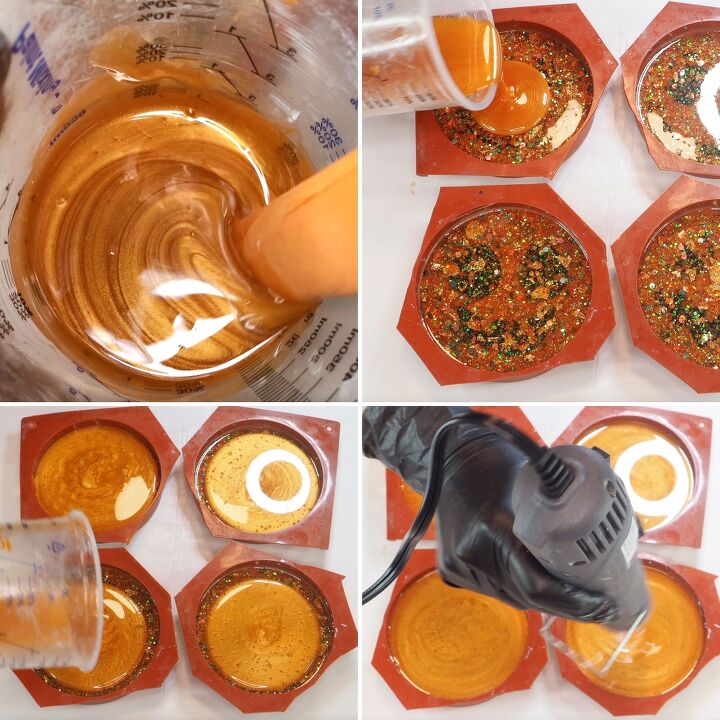
STEP 4 - THE SECOND LAYER
Next, mix another portion of resin for the more 'opaque' second layer. I mixed 100mls of resin and then coloured this with orange and bronze mica pigment.
If you don't have mica pigments then you can colour your resin with acrylic paints. The paint you use will determine wether or not you are able to get a shimmery finish. If you use a matte acrylic paint, then of course the resin colour will be a flat colour. If you use a metallic paint, you will get a metallic finish, and so on.
Once fully mixed, divide the resin between all 4 coaster molds and pop bubbles in the same way as before.
Allow to fully cure.
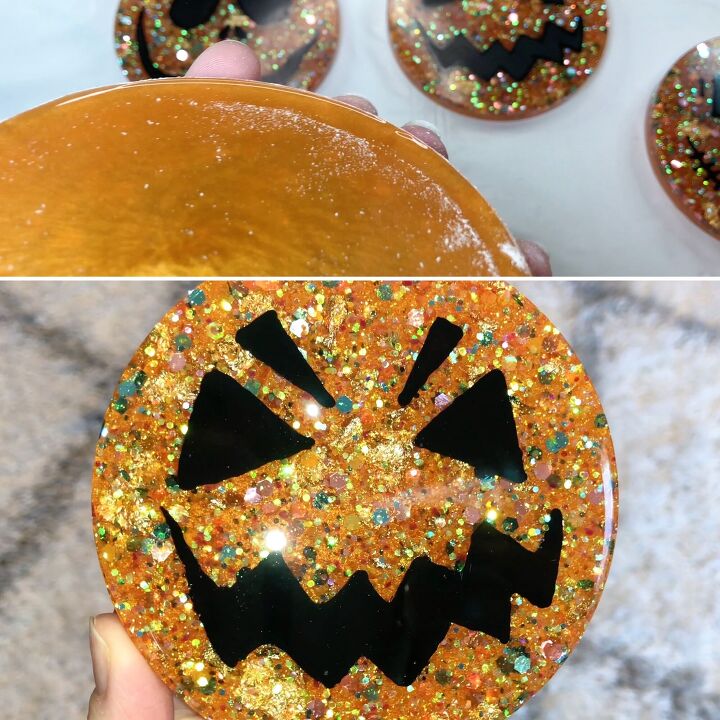
STEP 5 - FINISHING TOUCHES
Once cured, demold the coasters and sand off any rough underside edges.
You may wish to leave your coasters like this which is fine, however, I always like to add a final top coat to my coasters.
To do this I add liquid latex to the underside edges and coat the tops with resin for a lovely shine.

And that's all there is to it!
I've added these coasters to my Etsy shop if anyone is interested in buying them. Click this link to be taken to my store.
Thanks again so much for visiting this post and please remember to check out my YouTube channel for this and loads of other crafty projects.
Happy crafting! x

Resources for this project:
See all materials


Comments
Join the conversation
-
Super cute! Love the little faces on the coasters 😍 perfect for Halloween
-
These are so cute!! Great job!


Frequently asked questions
Have a question about this project?