


Chalkboard Art Christmas Coasters
4 Materials
$35
1 Day
Medium
These coasters have the look of a chalkboard, but the chalkboard art graphics are first printed and then glued to the tile. The final look is just as beautiful as if they were painted. Here is how I made them.
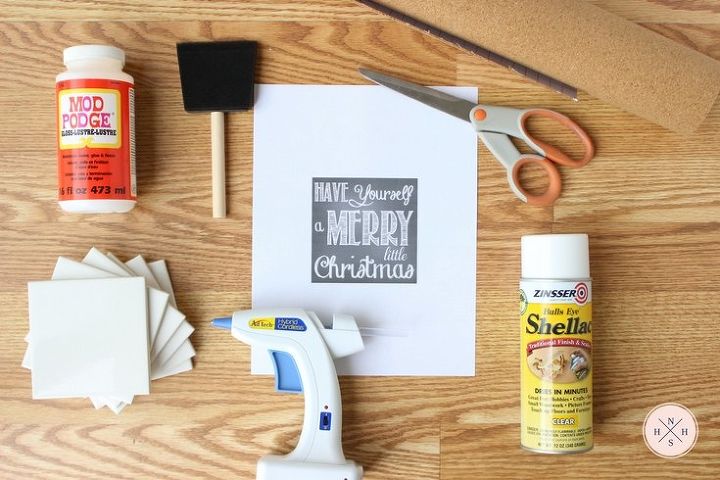
Materials:
- 6 glossy ceramic tiles (4×4 inches) – I made 6 coasters but you can make more or less, up to you.
- Christmas chalkboard art printable graphics.
- Craft scissors or paper trimmer.
- Mod Podge®
- Foam brushes
- Clear Shellac sealer in spray
- Contact Self-adhesive cork liner
- High-temp hot glue gun
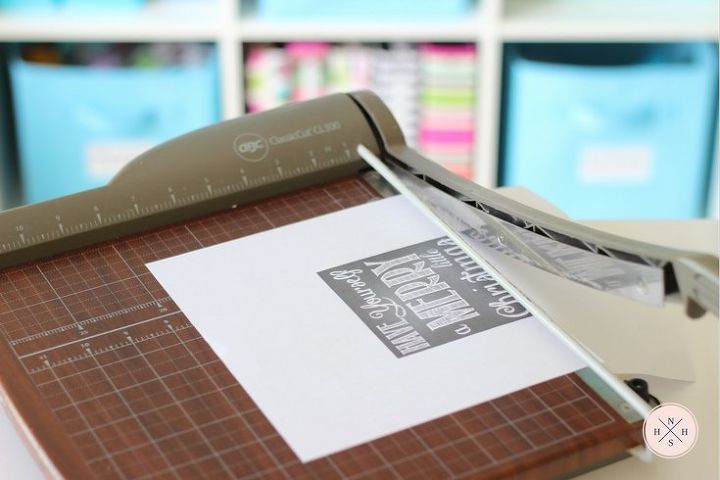
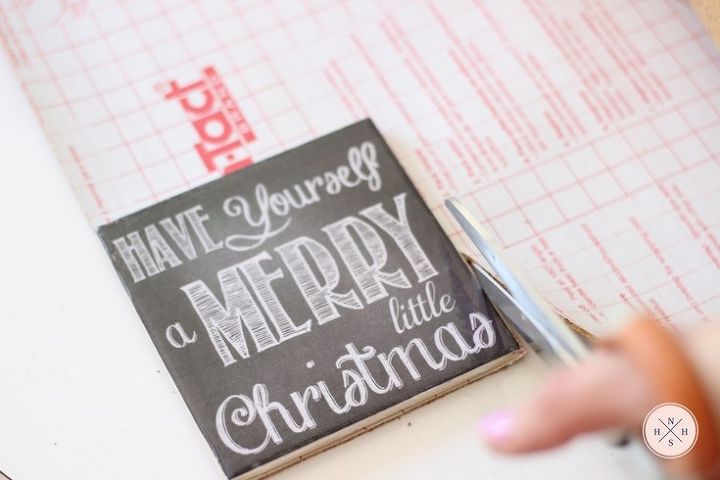
1. Print and cut the graphics. I highly recommend using a laser printer. If you don't have a laser printer at home, you can take the file to any copy and print center.
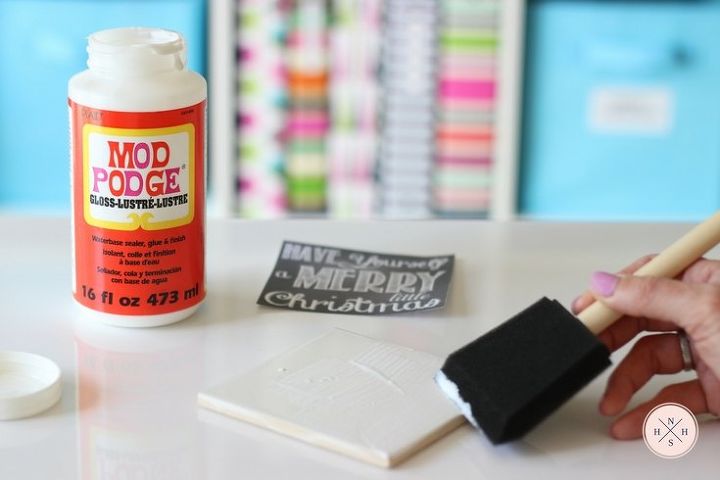
2. Apply Mod Podge over all the tile surface, including edges.
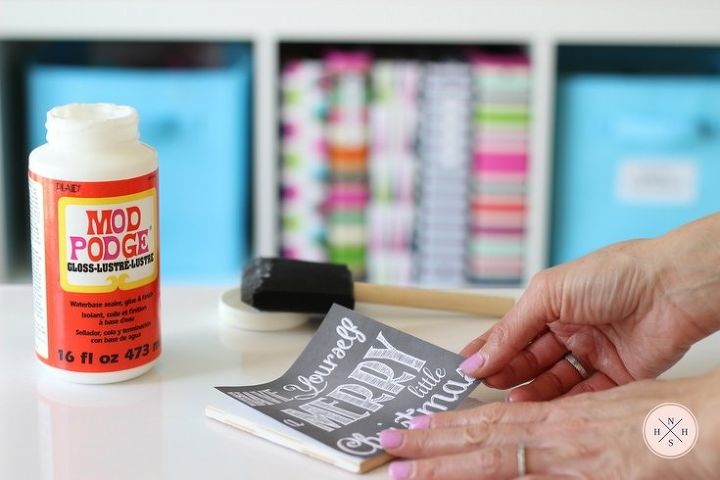
3. Place the graphic carefully over the tile, aligning edges and smoothing the surface to avoid air bubbles.
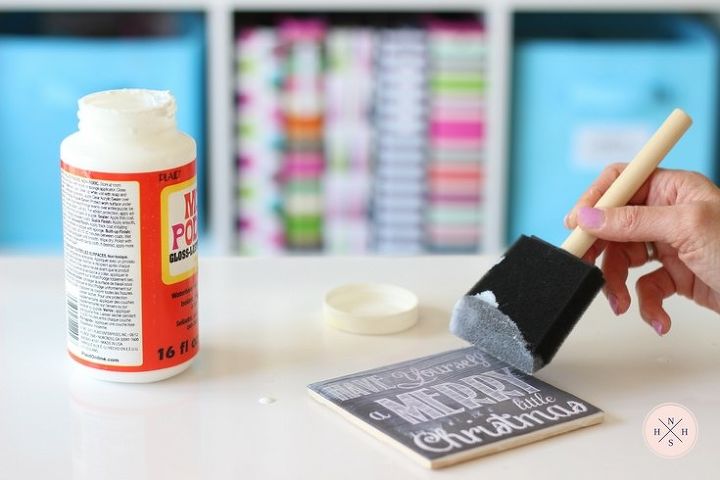
4. Apply a very thin coat of Mod Podge over the graphic, to seal the paper. Do not apply too much product to avoid smearing the black ink. A second or third layer or Mod Podge might be necessary to ensure the graphics are sealed and ready for Shellac.
Wait at least 3 hours until Mod Podge is dry and not tacky to the touch.
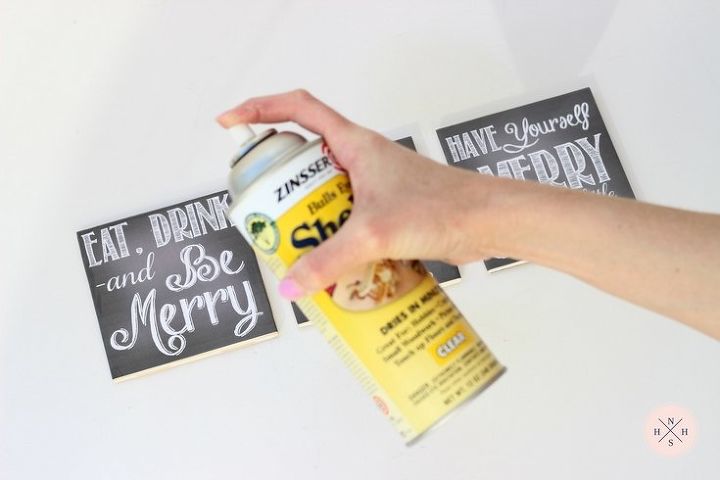
5. Go outdoors, and on a piece of cardboard, line up the tiles and spray Shellac over them according to can instructions. Use short strokes back and forth, 10 inches from the tiles.
Wait a day to proceed to step 6. Do not handle the coaster if the Shellac is still tacky to the touch.
6. Place a tile over the cork liner, and cut a piece to size. This will be the backing of your coaster.
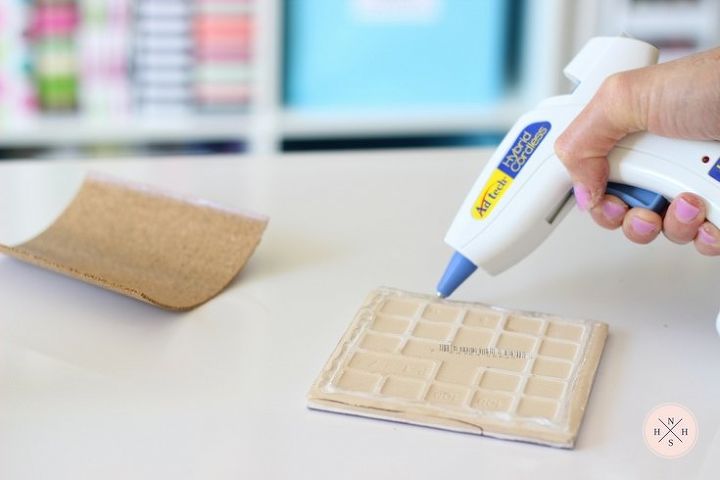
7. Peel the backing off the cork liner and set it aside (sticky side up). With the hot glue gun, add a few lines of glue to the back of the tile and quickly attach the liner. Make pressure until you squeeze out glue, and there are no air spaces between the tile and the liner.
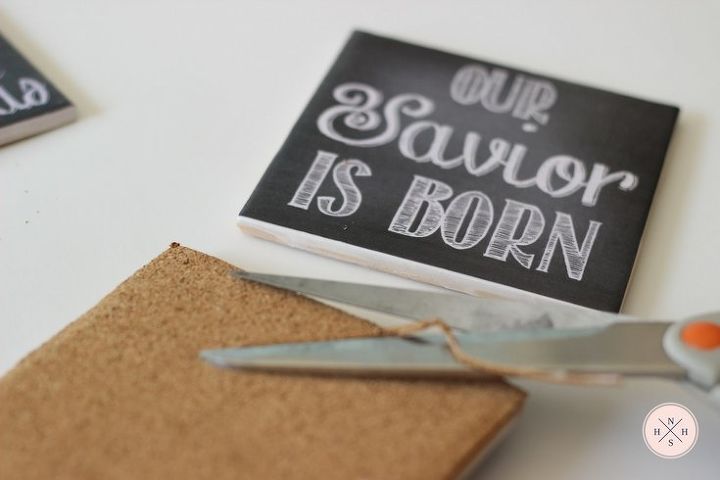
8. If necessary, cut any cork liner excess off the edge of the tile.
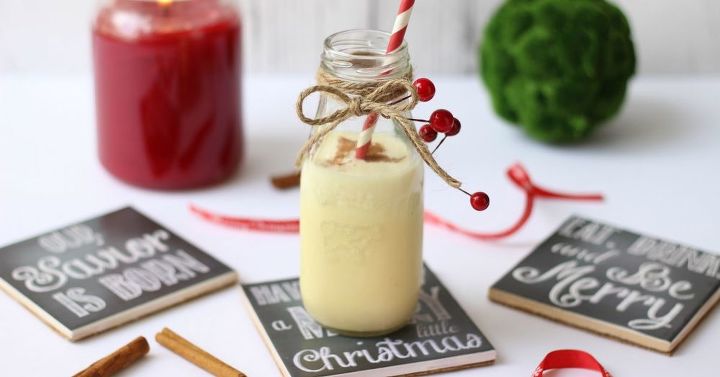
Wait a full day until the Shellac cures before you start using the coasters. You can read a full detailed tutorial and find the printable on my blog.
Head over to Christmas Chalkboard Art Coasters.
Resources for this project:
See all materials


Any price and availability information displayed on [relevant Amazon Site(s), as applicable] at the time of purchase will apply to the purchase of this product.
Hometalk may collect a small share of sales from the links on this page.More info

Want more details about this and other DIY projects? Check out my blog post!
Comments
Join the conversation
2 comments
-
Loving how customizable these are for every occasion!!


Frequently asked questions
Have a question about this project?