


Christmas Cookie Box

I know, you’re probably thinking that creating a cookie box isn’t a big deal and it’s rather easy but I thought I’d still talk about it and if you’re looking for last minute Christmas ideas, I gotcha!
I can’t believe how fast Christmas came and how this month just flew by. I planned on posting this much sooner but my entire family got sick and I was down for a while. Hence why it’s a late post but still soon enough to give you ideas for last minute Christmas gifts or hostess gifts.
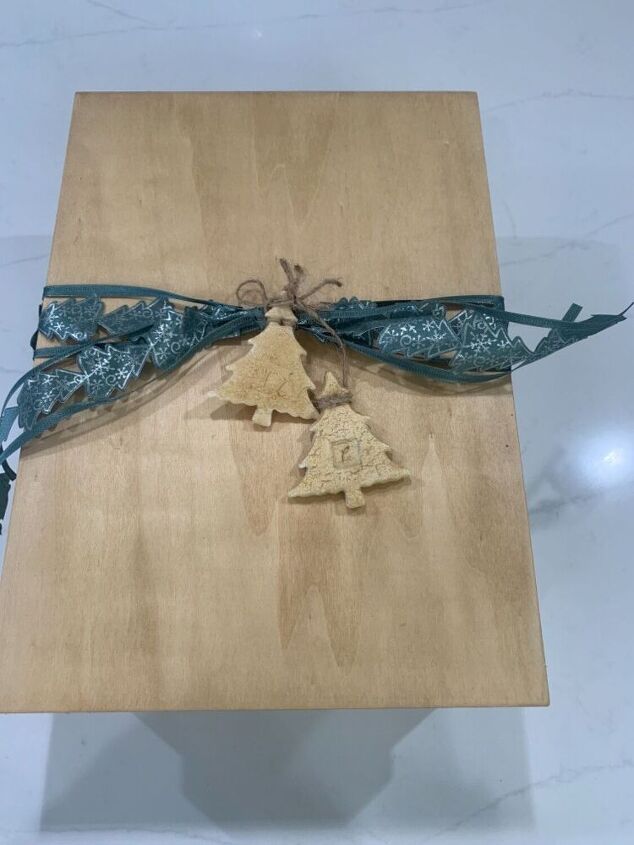
When I decided to create a cookie box I wanted it to be special enough to fill with some of my favorite cookies and some that had special meaning to me. With that being said, I wanted a box that was simple, yet looked elegant, looked aged and that the recipients of the special gift knew that it was made with love. I searched all over the internet and went to many craft stores but couldn’t find what I wanted. Sure, I could’ve just bought the typical cardboard boxes with the clear see through windows but I’m not typical, I want different! I believe I achieved that when I made these boxes and I was so happy with the end result.
I purchased the unfinished wooden boxes from Michael’s and then I stained them with coffee. I forgot to take pictures of me applying the coffee but will do my best at explaining the process. I brewed 1 cup coffee with 6 cups of water and literally used a paint brush and applied the coffee, as if I were painting a surface. I allowed each coat to dry between coats and ended up applying 3 coats of coffee before liking the color. You could use stain but I wanted to use something without chemicals and odor since the box was going to hold cookies.
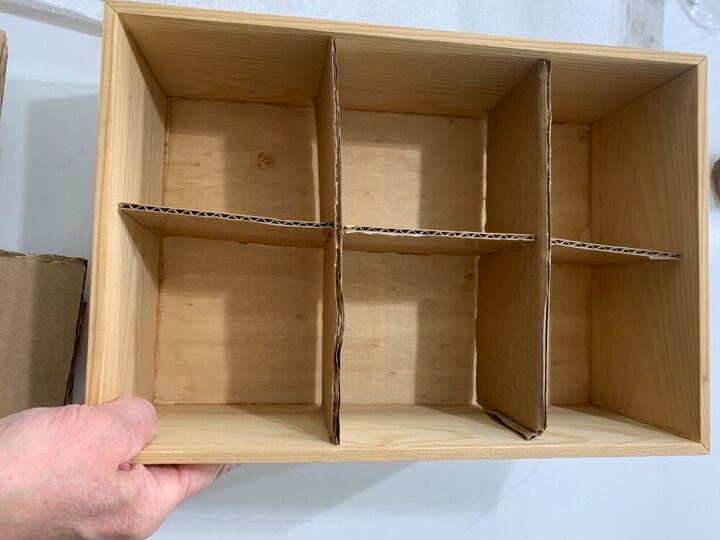
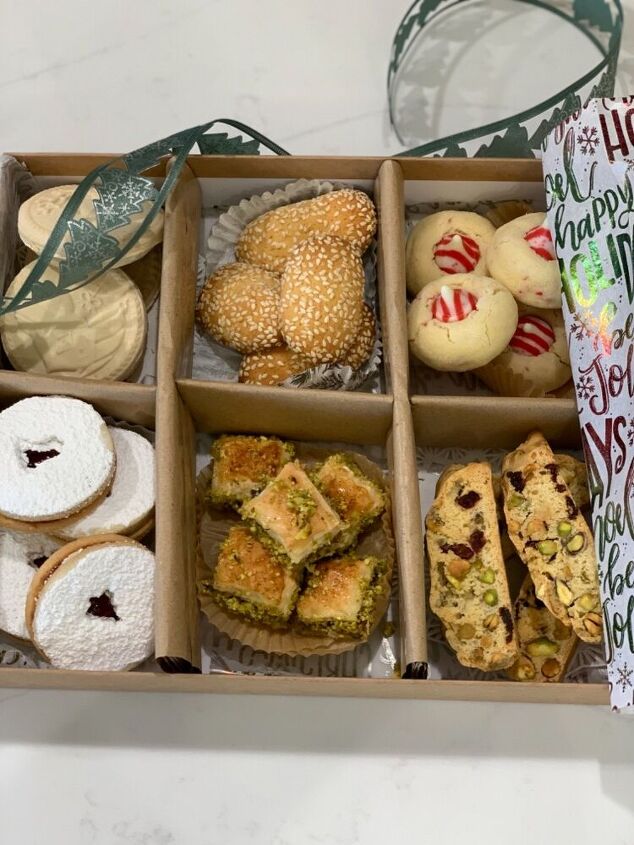
I wanted the boxes to have dividers so I decided to make the dividers using cardboard boxes that I cut to fit the inside of the box. I then wrapped the cardboard dividers with craft paper for a cleaner and finished look. It was very simple. I also made salt dough mini ornament tags, they turned out adorable! You can use anything to adorn your box.
Everyone I gifted one to loved them. It made my heart happy to know that they new it was made with love.
I think this is a great idea not only for Christmas but for any occasion. I hope you like it.
Aright, Let’s get started!
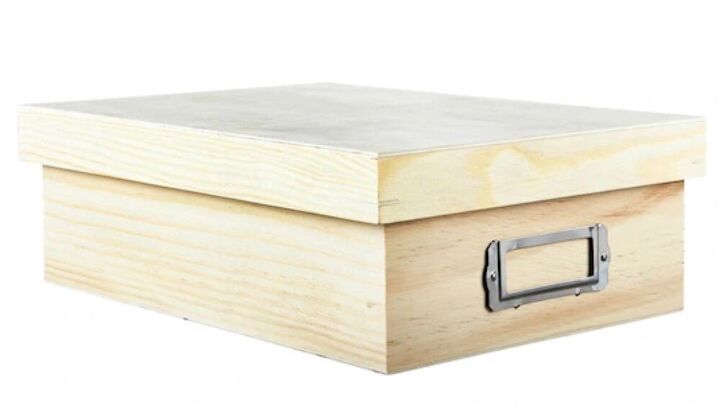
This is what the original box looked like. I purchased them on sale from Michael’s. I made 7 of them.
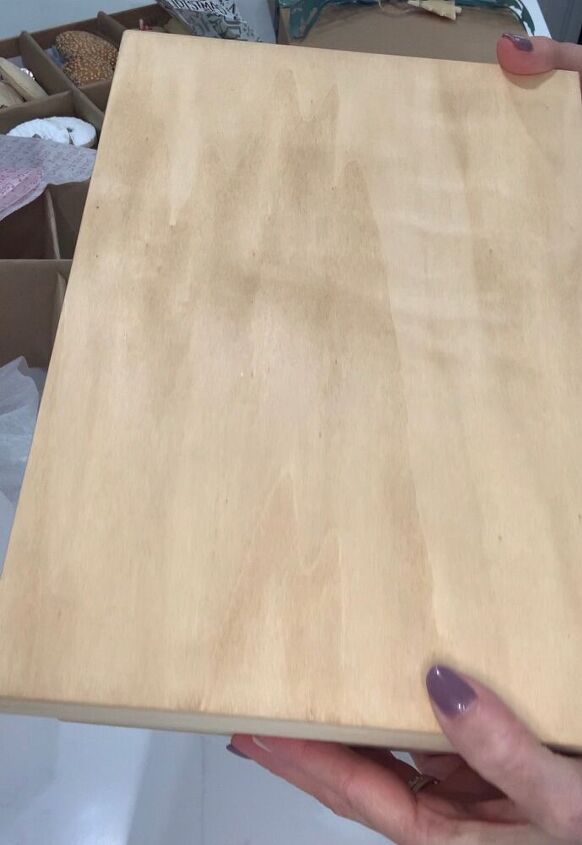
Brew 1 cup of coffee ground with 6 cups of water and use a paint brush to apply the coffee. The application is the same as if you were painting any surface. Allow each coat to dry between coats. I ended up applying 3 coats of coffee before liking the color.
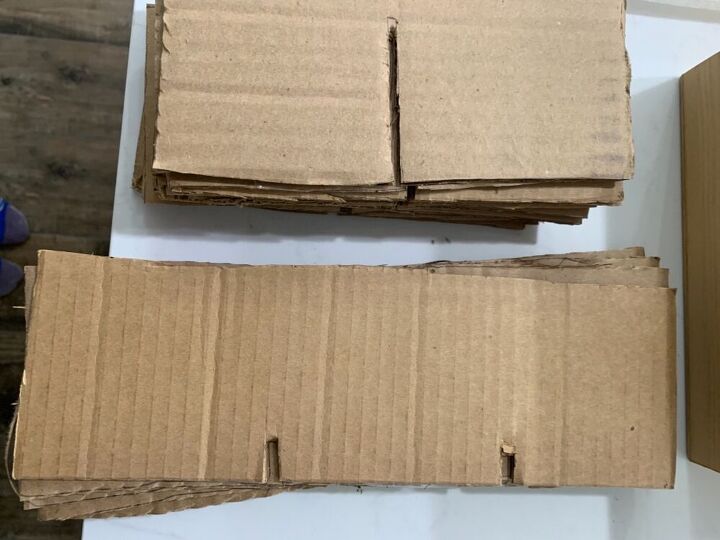
Cut the dividers to fit the inside of the box. Cut one to fit the length of the box and 2 to fit the width.
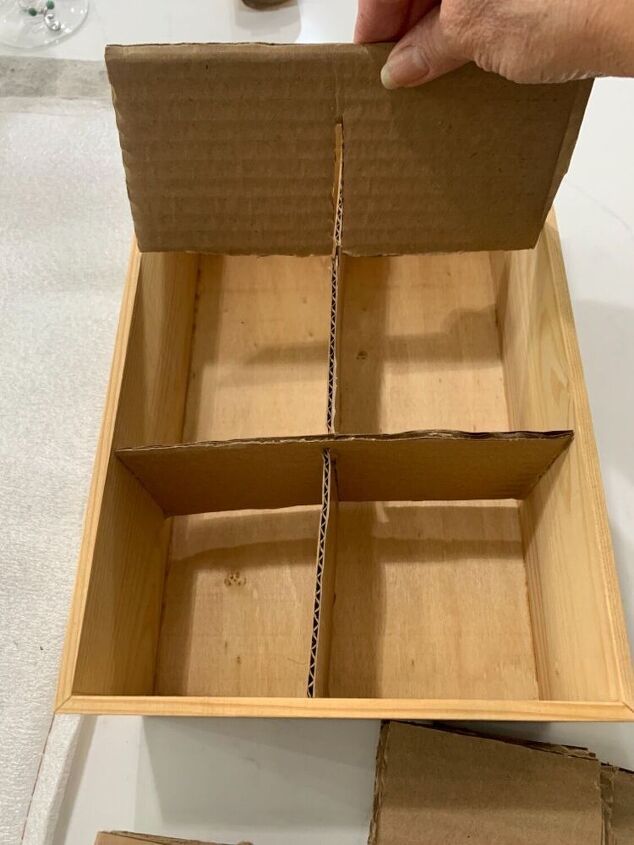
Cut slits in each piece to create the 6 compartment dividers. Place 2 smaller cardboard dividers over the slit of the longer cardboard to ensure they fit appropriately.
This is a picture showing the cut pieces with the slits and also showing how each piece fits over the other. I hope that made sense.
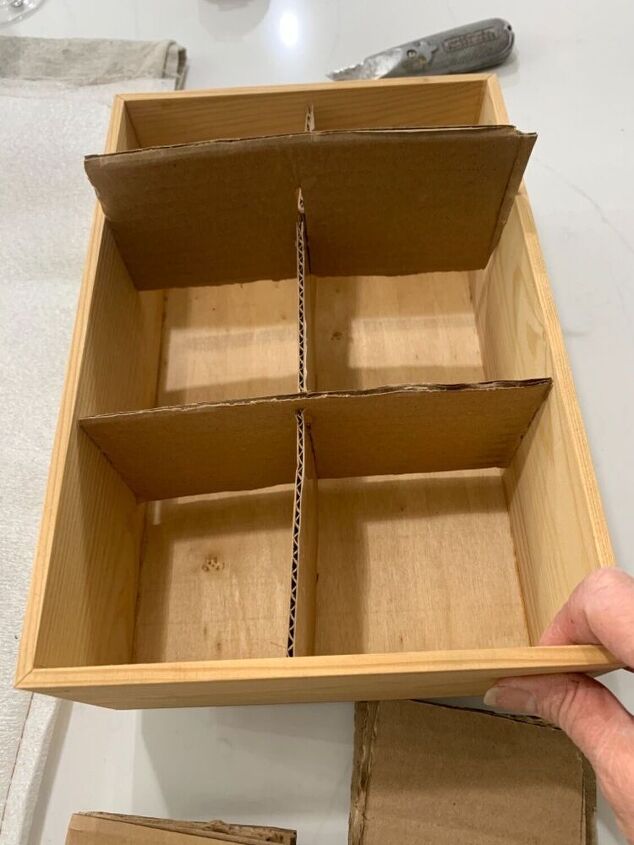
A closer look.
Wrap each piece of cardboard with craft paper and make a slit over the existing previously cut slit of each cardboard piece/divider.
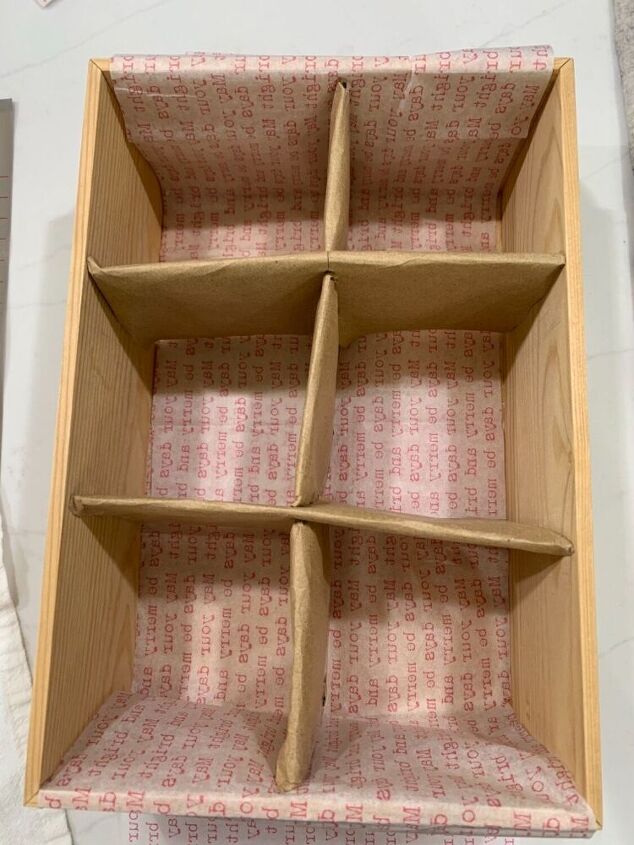
Before inserting the dividers, lay Christmas tissue paper on the inside bottom of the box. Make it long enough so it covers the cookies with the tissue paper. I will show you that later.
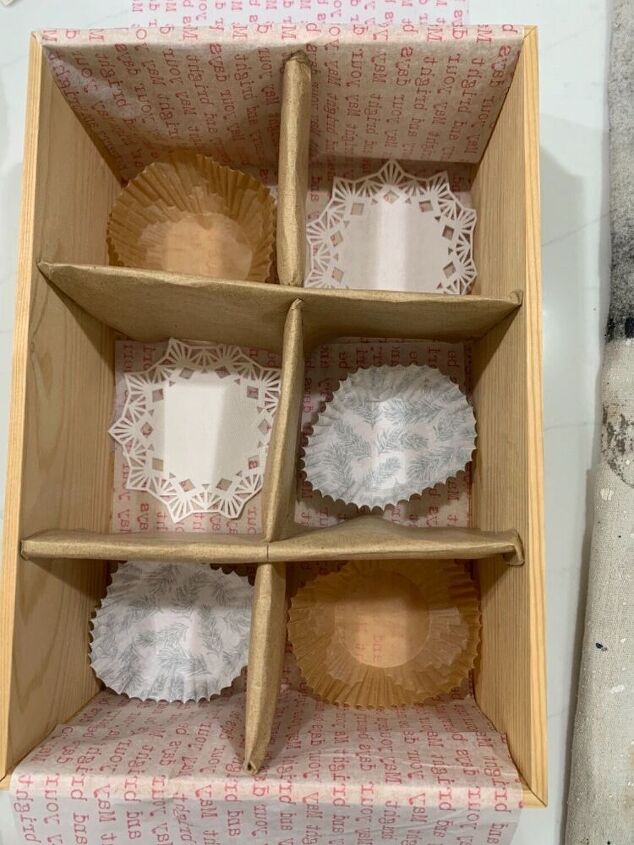
After applying the tissue and inserting the dividers, apply paper doilies and paper cupcake liners on the bottom of the box and on top of the tissue paper. These serve as holders for the cookies so you don’t have to apply them on the tissue paper. I wanted a variety of cupcake liners so I chose 2 different liners and white doilies
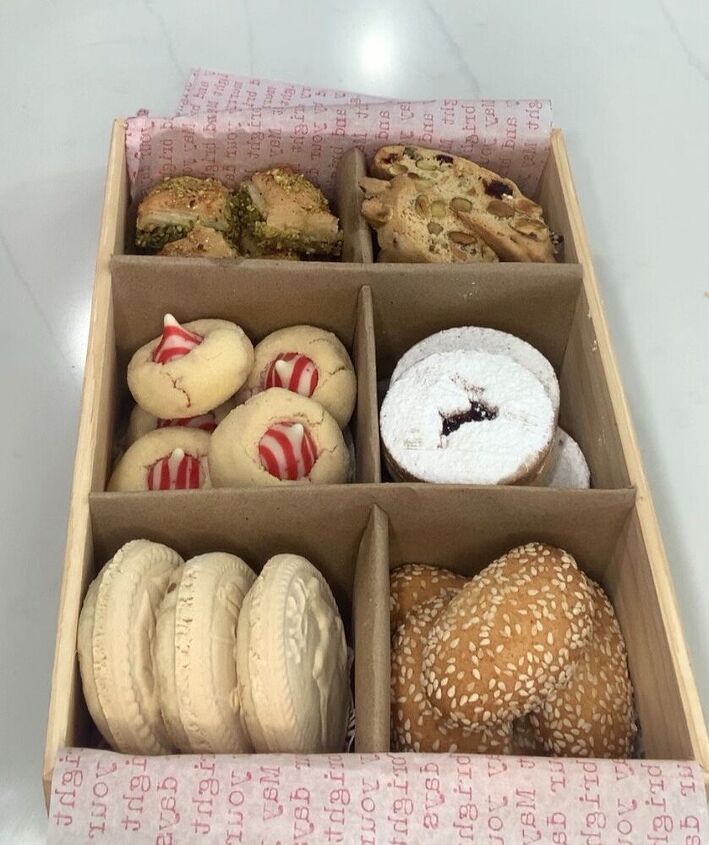
Fill each compartment with the cookies on top of the cupcake liners and the doilies.
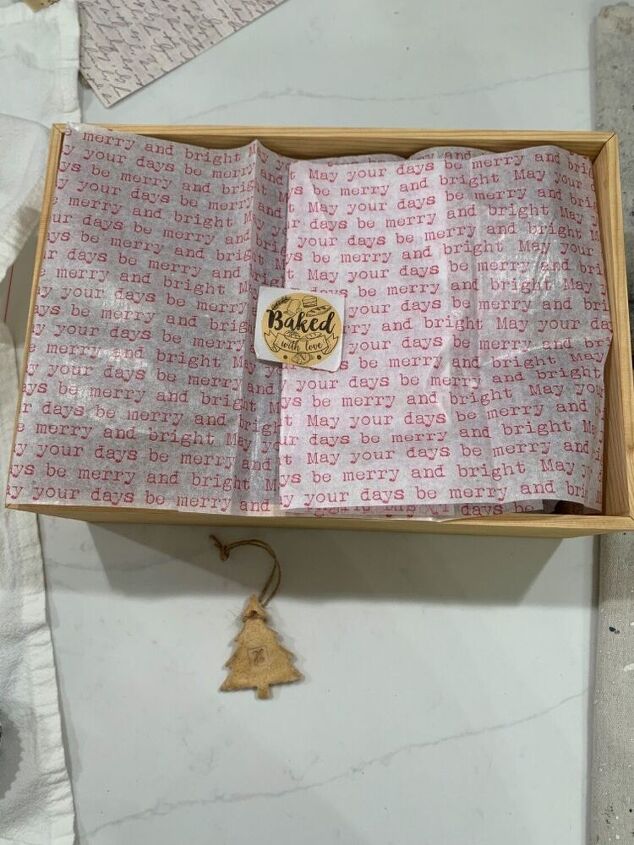
Ensure that the tissue is long enough to cover the bottom of the box and so it extends over the cookies. I used 2 pieces of tissue paper by cutting one in half. Apply each piece at each and of the box then cover the cookies and seal with a decorative sticker/label. I used a “baked with love” label to close off the tissue paper.
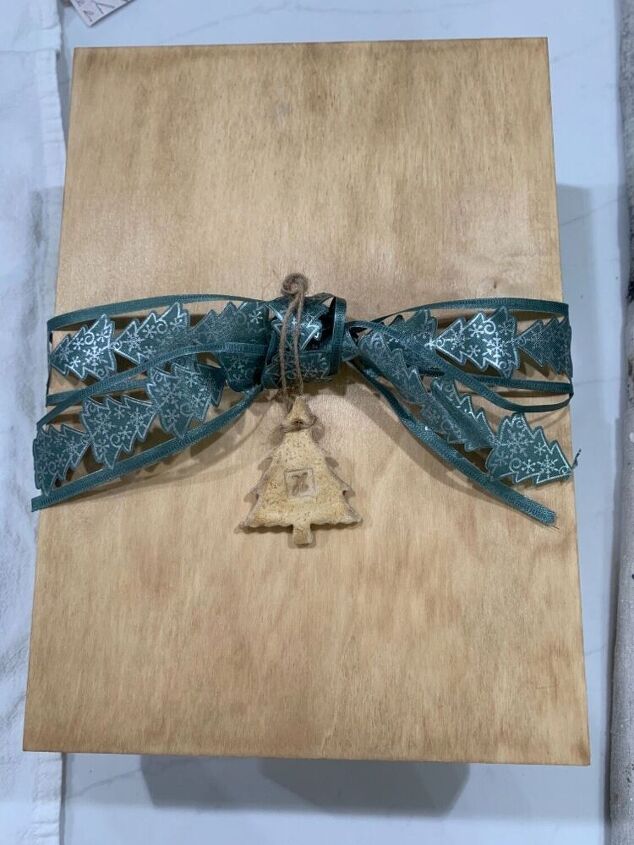
Close off the box by wrapping a decorative Christmas ribbon around the box. You can add an ornament, flower or anything else to adorn the boxes and ribbon. I made mini homemade salt dough ornament and voila, the cookie box was complete.
I hope you liked this DIY project and thank you for stopping by.
If you’d like to see more of what I do, please come visit me at https://www.instagram.com/mycreativekneads/
Happy DIYing and Happy Holidays to you and your loved ones.
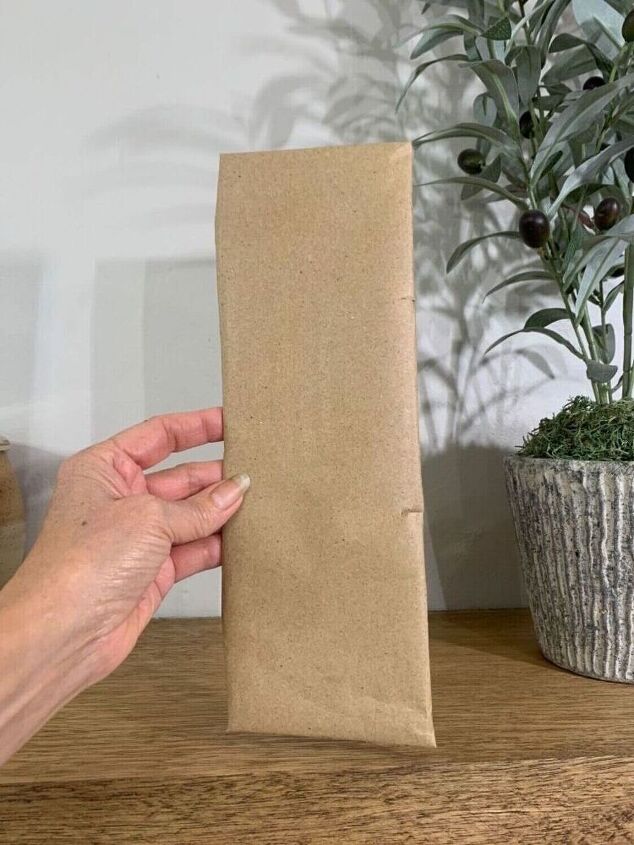
This is a photo of another one I made using a pastry cardboard box that I purchased from Michael’s. It’s by Celebrate and it’s called Kraft Frame box. It wasn’t as deep as the wooden one and it was a little bit longer but it also worked perfectly and as much love went into creating this one. I was unable to find more wooden boxes but these were a brown paper craft color and so I thought they were perfect.
Resources for this project:
See all materials


Comments
Join the conversation
-
They are beautiful. I would be happy to receive a box of cookies like this. Great job.


Frequently asked questions
Have a question about this project?