


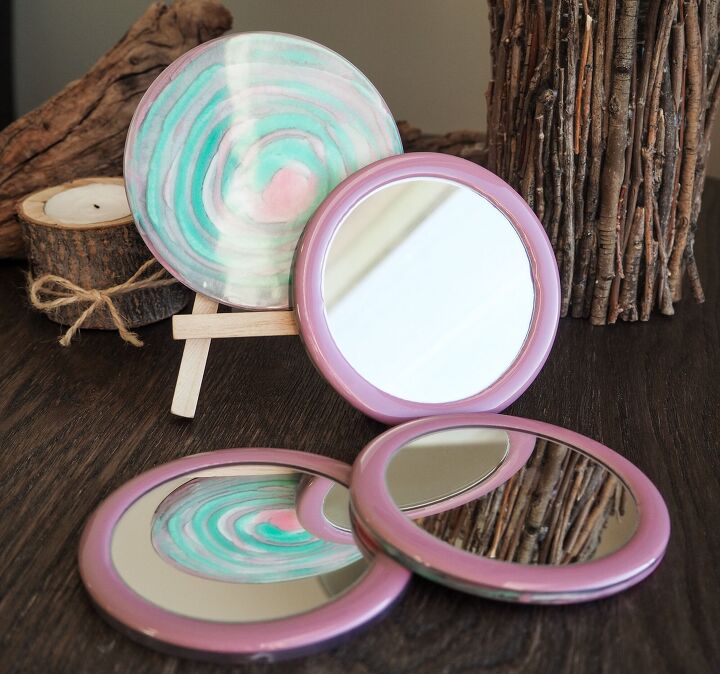
Compact Mirror Stocking Stuffers

Are you looking for an easy DIY Christmas gift idea that can be made in bulk? Well this might be the perfect project for you!
The sort of gifts that I find really hard to buy are the ones where you have to get several all for the same group of people. People who are obviously close enough to be receiving a gift from you, but not THAT close! E.g. your co-workers, book club members or more 'distant' relatives. You don't really want to buy them all the exact same gift, so what then?
Then there's the type of gift you wish you had for an extra little stocking stuffer. A little added extra.
My solution: make gifts that are technically the same (easy) but that can be personalised or changed up enough using different colours or patterns so that it's no longer the same as someone else's in that group.
An easy and convenient group gift or stocking stuffer for the people in your life 🎁
WHAT YOU'LL NEED
I made my mirrors using resin. Feel free to use my discount code HANNAH with the resin company I use, Rockstar Resins, and the web link below*
- Resin - For 10% off, use code HANNAH and this link*
- Round coaster molds (4 Inch diameter)
- Small mirrors (3 Inch diameter)
- Mixing containers and sticks
- Pigments
- Heat gun/blow torch/heat source
Always follow the appropriate safety measures when handling resin 👍🏻
STEP ONE - YOUTUBE TUTORIAL
You can watch this tutorial via my YouTube channel as I personally think it's much easier to watch instructions than just read them (hence why I got into making videos ☺️)
Just click the video link above to watch this exact tutorial and remember to give it a 'thumbs up' if you thought it was helpful and consider subscribing to my channel for more crafty content 👍🏻
I've also linked all the products I've used in this project in the description of my YouTube video. I'm aware that Hometalk sometimes doesn't quite have the necessary links at the bottom of these projects, so that's where you can find them if needed.
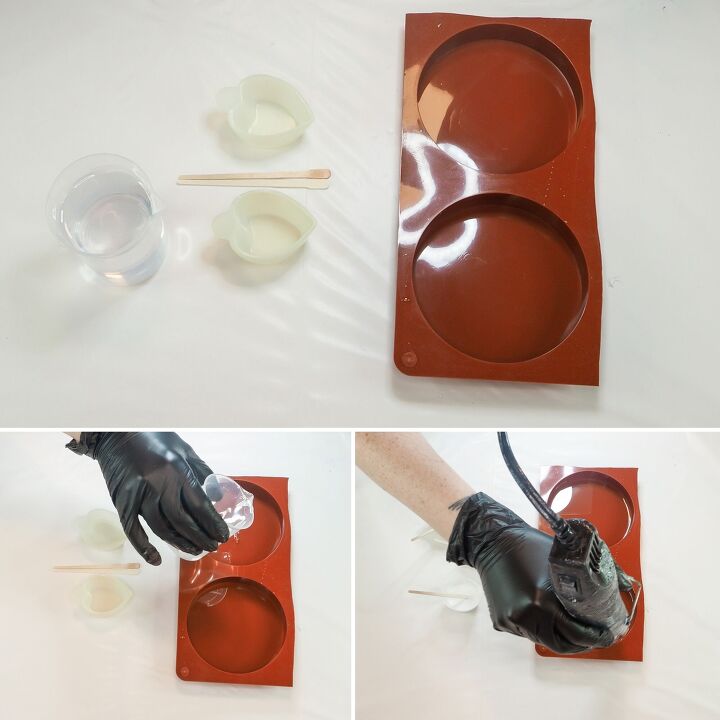
STEP TWO - PREPARATION
Mix a small amount of resin, approx 80mls. This will easily make 4 mirrors. If you want to make more than 4 then scale up your measurements.
Split this between 4 coaster molds and 3 small mixing containers for colouring - you will only need very small amounts of resin for your colours (the 3 small containers).
For this tutorial, I only show the process of making 2 of my 4 mirrors because it's more about how to incorporate the mirror rather than the pattern making techniques.
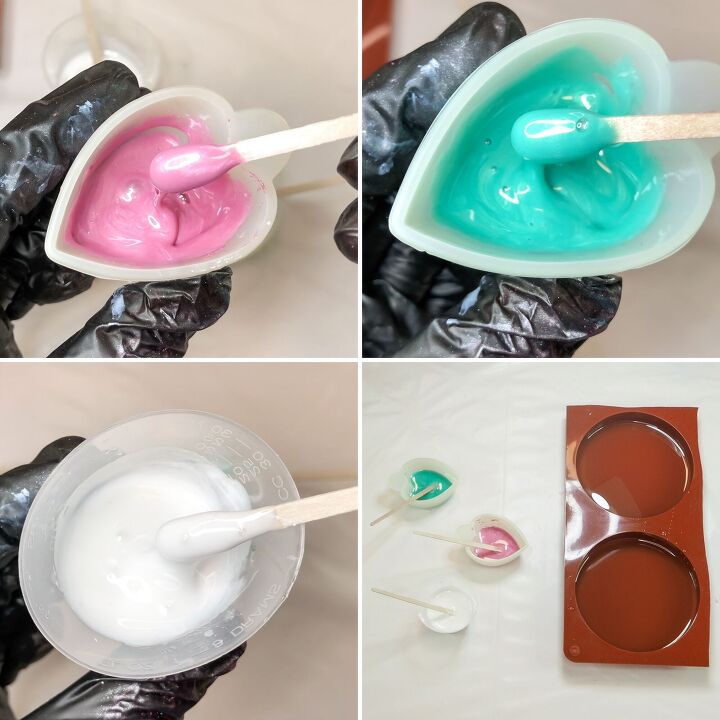
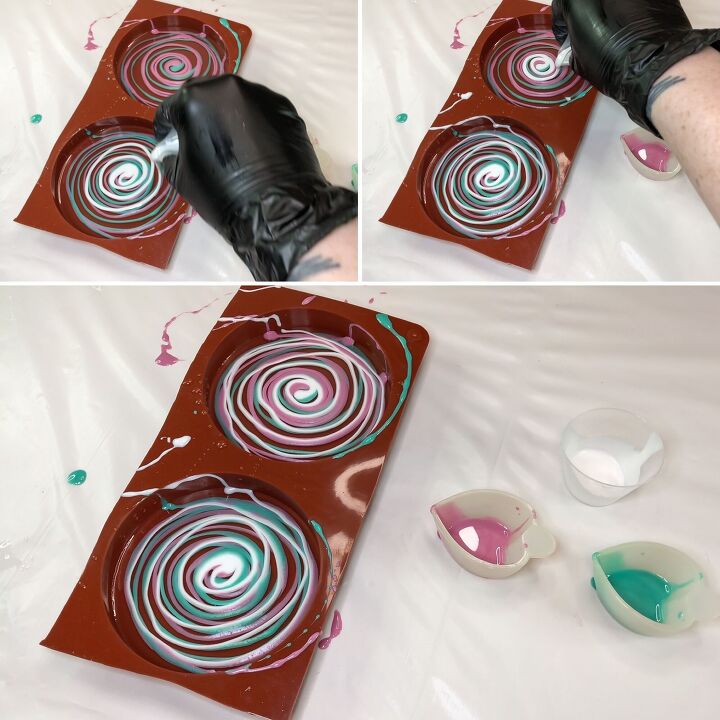
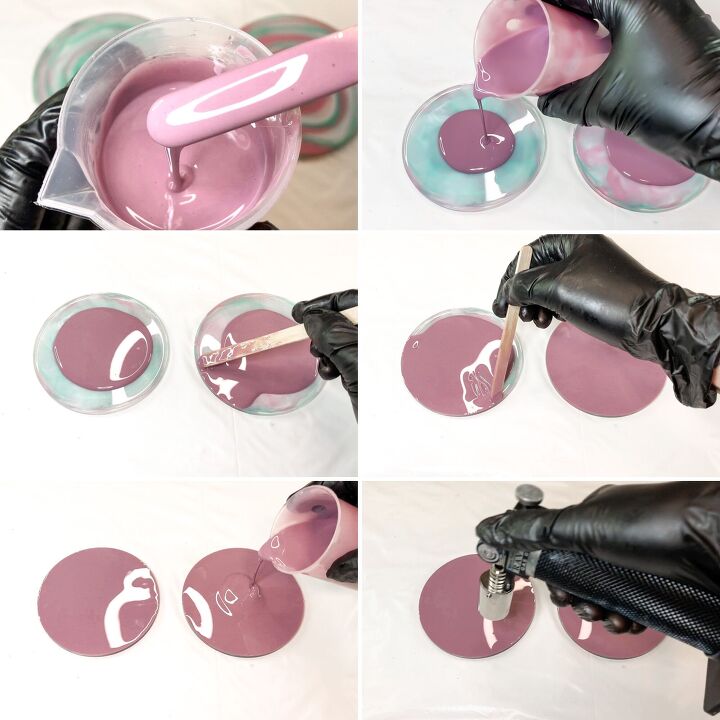
I colour my small portions as shown above. I did this by first adding pink, green and pearl mica powders into the separate containers and then added in a small amount of white liquid pigment into each. I added more white into the pearl colour than I did in the other 2 colours. For those, I just dabbed the tip of the mixing stick into the white.
White is heavier than other colours so by adding a tiny amount to the pink and green, this will help those colours sink better. Do the same to your colours if this is your intention for your patterns.
If you don't have traditional pigments for resin then read on....
If you don't have mica powders or resin liquid pigments, then why not try using household items to colour your resin?
I tested around 30 different everyday items to see if they would colour resin for people who either don't have proper powders and pigments or for those who were just plain curious (like myself!).
The YouTube video for this experiment is linked above. Simply click the video link.
Who knows, maybe this can help with other projects you have been putting off because you didn't have the right colours yet? 🤷🏼♀️👍🏻
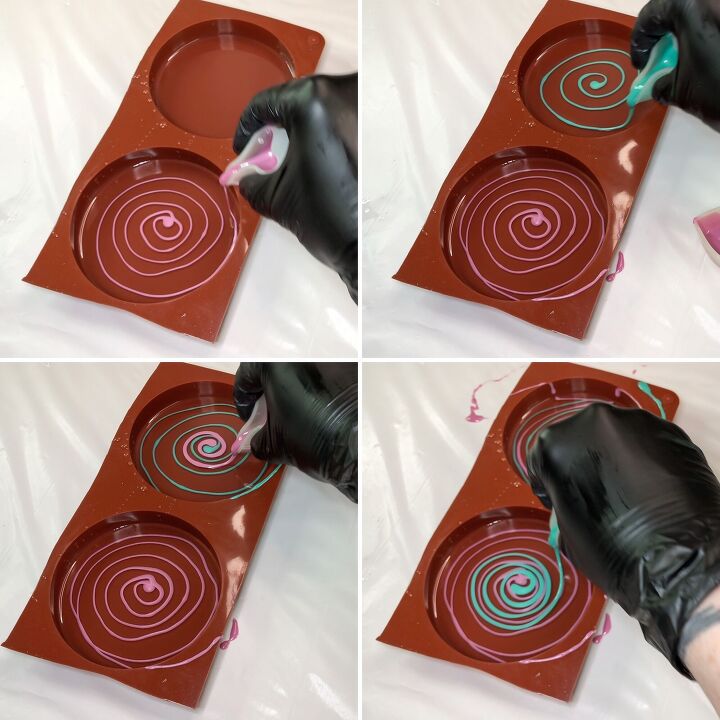
STEP THREE - MAKING THE PATTERNS
This is the part where you get to have lots of fun and be creative making all your different designs for the backs of the mirrors, maybe even with different people in mind.
You could use different colours based on each persons' favourite colour or personality.
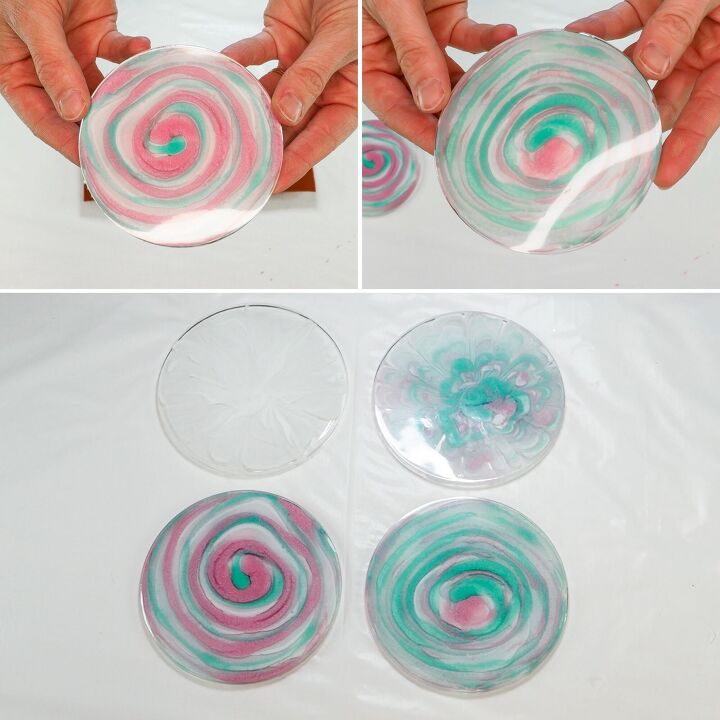
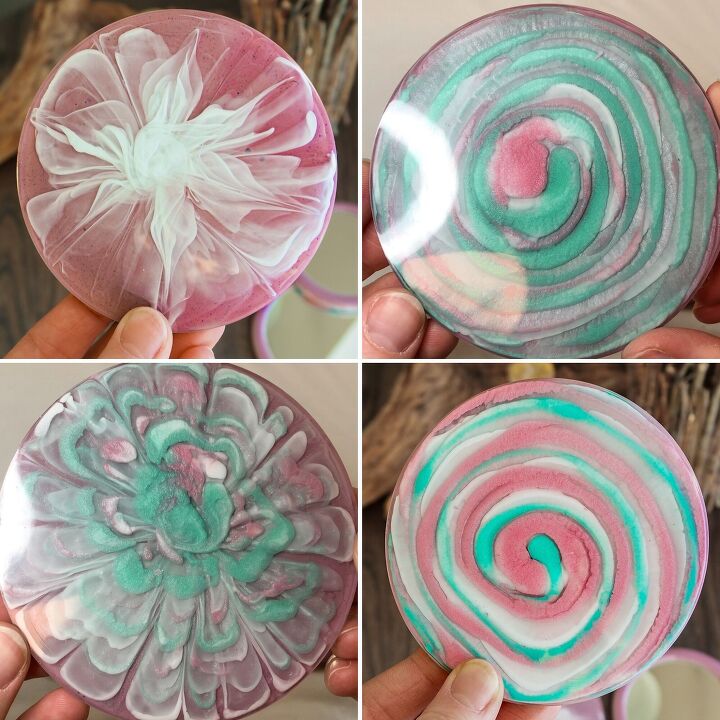
I made 2 spiral patterns (shown) and 2 floral patterns for my mirrors.
If you want to make a spiral pattern too, then this is how.
Pick a colour to start with, pinch the mixing container to create a narrow spout and make a spiral pattern in your coaster mold starting in the middle. Keep spiraling until you reach the edge.
In the same mold, spiral in another colour trying not to overlap the first colour. This spiral will be applied in exactly the same way as the first.
I usually finish with white and spiral this in over the other colours. I'm not as bothered about missing the other colours now so I don't mind if my white overlaps because the white will simply help the other colours sink even more.
There are a few thick blobs around the outside of my spiral so I drag a thin stick through these to feather them out. I should have done the same in the centre of my spirals really, this would have given them a slightly daintier, neater look.
Use a heat source to pop any bubbles. If you use a heat gun, just be careful not to distort your patterns. That's why I use a blow torch at this stage.
Once you're satisfied with how the mirror backs are looking, leave them to fully cure.
STEP FOUR - PREPARING THE MIRRORS
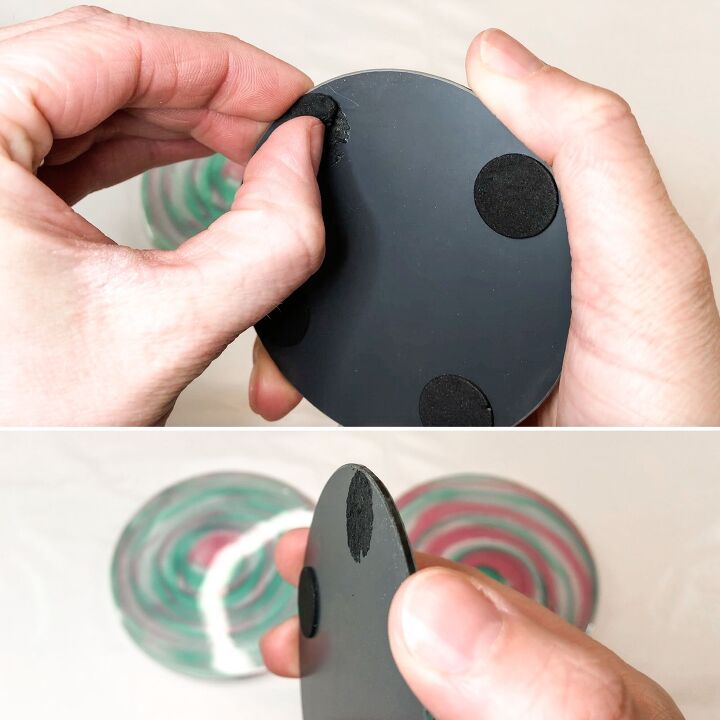
This might be a completely irrelevant step for you depending on what your mirrors come like. Mine came with these little felt feet on the bottom which I didn't realise at the time.
It wasn't a problem at all, I just peeled the feet off so that the mirrors had a flat surface.
I got my mirrors from Michaels but there are plenty online that don't have felt feet and that come in large quantities. I bought these because I was in Michaels at the time 🤷🏼♀️
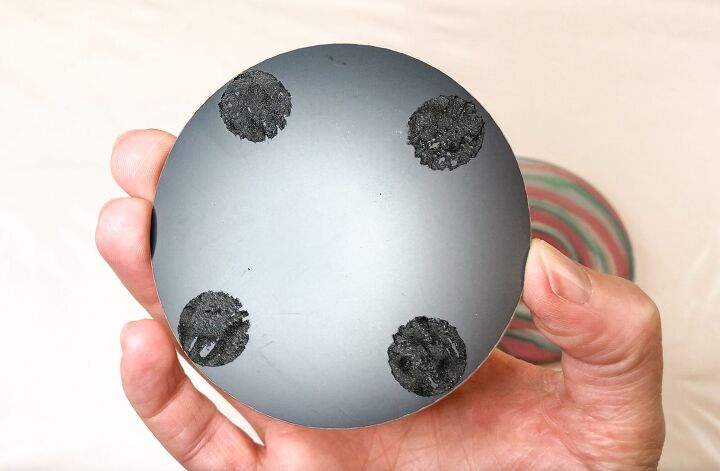
They don't look super neat like this but it really doesn't matter as you won't see this side at all.
As long as they are flush with the back of the mirror, you're good to go!
STEP FIVE - PLACING THE MIRRORS
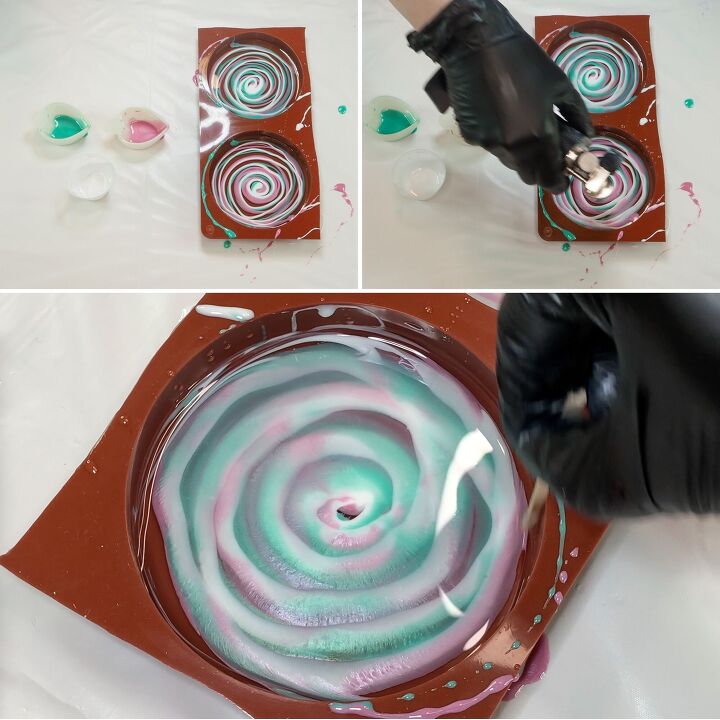
With your other resin (the mirror backs) fully cured, mix up another very small batch, smaller than before. I'd say no more than 60mls.
Lay your patterned resin mirror backs down on your work surface so that the side with the small lip is the side facing up (the non-patterned side).
You might be able to tell from one of my earlier pictures that some of the patterns I made don't really stand out at this stage. Don't worry if yours are the same, this may be because there are clear patches of resin in the design. We are about to remedy this.
Colour the new batch of resin in a complimentary colour to the colours you used first time around or simply pick a block colour that will help enhance your patterns. Not only do we want to help the patterns stand out by having this new colour show through the clear resin patches, we also don't want to be able to see the back side of the mirror when it's in place so make sure your colour is opaque.
Split the resin between all 4 mirror backs and carefully push the resin all the way up to the edges with a stick. Do not let the resin spill over the edges. You don't want a domed effect at this stage either, you want the resin to be flat and level with the lipped edges so only add resin up to this point.
Carefully pop bubbles and then leave the resin to part cure. I would say about a 1/4 of the cure time for the resin you're using.

A 1/4 way through the cure, it's time to put the mirrors in place.
Carefully lay a mirror in the centre of each partly-cured resin circle and gently direct it with your finger if necessary.
This mirror will slowly sink and this will create a domed border between the edge of the mirror and the edge of the outer circle. Because the resin is highly viscous at this point (firmer) it won't spill out over the outer edge or over the mirror sides like it would have done earlier.
Little bubbles may escape from under the newly laid mirror so monitor the resin for about a quarter of an hour or so to pop any that may surface.
Then leave the mirrors to fully cure.
STEP SIX - FINISHING TOUCHES
I LOVE how these turned out after applying my pink backing colour, the designs really popped.
I polished up both sides of my mirrors and then I was done.
If you want to further personalise your mirrors then you could add vinyl stickers of people's names to the them or drill a little hole at the top of each to attach a charm, one that might mean something to the recipient.
I'm sure there are so many ways to personalise these further!

So what do you think? Do you reckon you'll give them a go?
I'd love to hear from you down below in the comments and feel free to ask any questions at all and I'll get back to your asap.
Remember to check out my YouTube channel not only for this tutorial but loads of other videos that don't all wander across to Hometalk. Please consider subscribing too and join me in the comments over there.
If you want to follow me over on instagram then it's @hscraftytutorials
Thanks so much for visiting this post today!
Until next time, happy crafting! x

Resources for this project:
See all materials


Comments
Join the conversation
-
These are so cute and perfect for stocking stuffers!
-
Love these! Especially the white "flower". How does that happen?


Frequently asked questions
Have a question about this project?