


DIY Peppa Pig Family Felt Magnets

by
Troom Troom
7 Materials
How to make DIY felt magnets. Our tutorial is about how to make magnets shaped as famous animated television series characters - "Peppa Pig family". This beautiful toys can become a great gift for kids and also will cheer you up every day if you attach them to your fridge!
{
"id": "3861514",
"alt": "",
"title": "",
"video_link": "https://www.youtube.com/embed/Oyrs5noxels",
"youtube_video_id": "Oyrs5noxels"
}
{
"width": 634,
"height": 357,
"showRelated": true
}
Check out the video above to learn how to make your own!
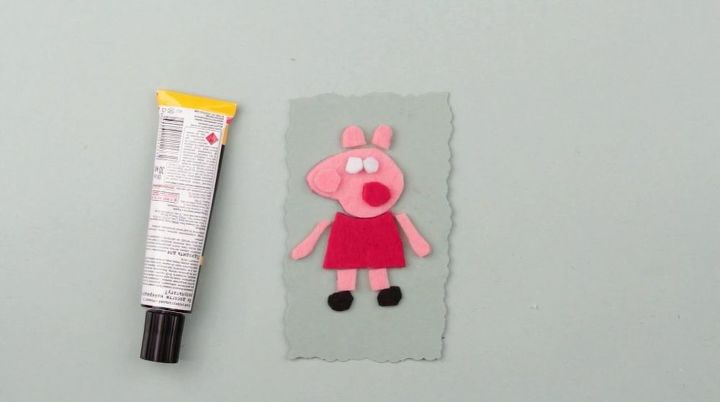
Take the pattern and cut out the main character, Peppa Pig.
Cut out the pattern into the basic elements. A dress. A head.
Cut out one ear and make one more the same.
Take the red felt and trace the dress with the marker. Cut out.
Trace the head on the pink felt. Cut it out. Cut out a leg pattern.
Make two same details from the pink felt. Cut out small circle for a pig nose.
Add a rosy cheek. Make it from the red felt of the dress shade. Cut out a small circle of the same size as the nose.
Make two same ears from the pink felt.
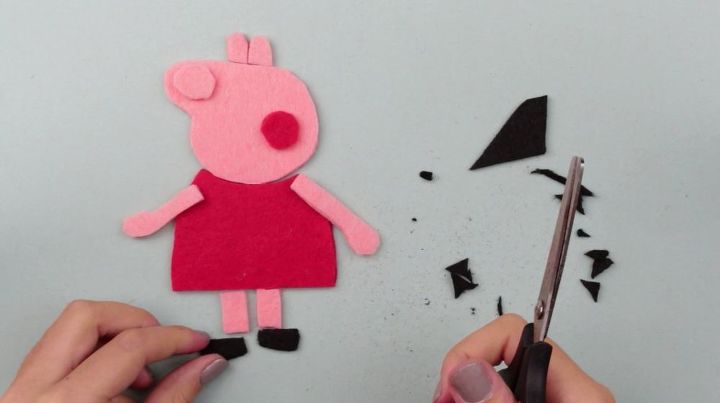
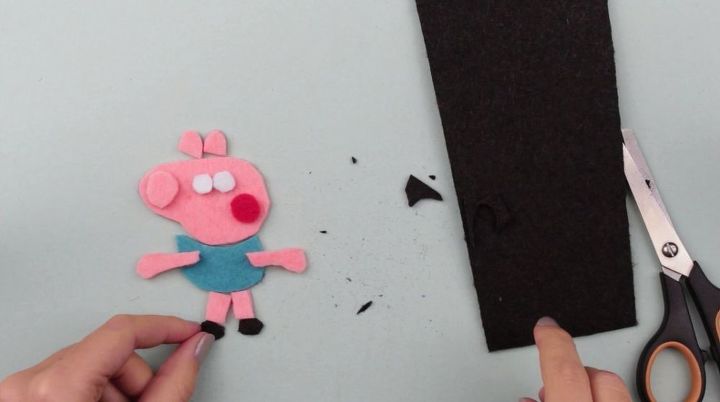
Now we’ll need black felt to make shoes. You can make them without measuring to fit the other details.
The basic details are ready. Let’s make eyes. Cut out two circles from the white felt smaller in size than the cheek or nose.
Take the pink felt for a hand. Cut out a bulb shape ended strip resembling a hand. Put it to the figure and see if it fits the body.
Cut out the excess. Make the other same detail.
Let’s glue the details together on a mat to protect the surface.
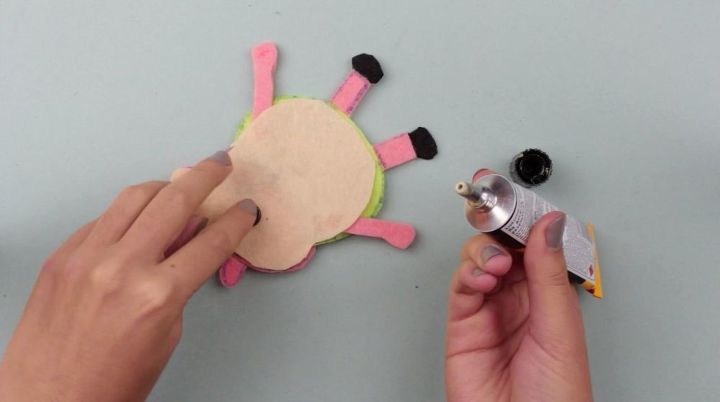
Start with the big elements. Add some glue to the bottom back side of the head.
Attach the front side of the dress. Glue the other basic details on the back side.
Add some glue to the top of the legs and stick them to the bottom of the dress.
Glue the shoes in the same way.
Add some glue to the dress and attach the hands. Press over. Stick the ears.
Turn the Pig over to the front side.
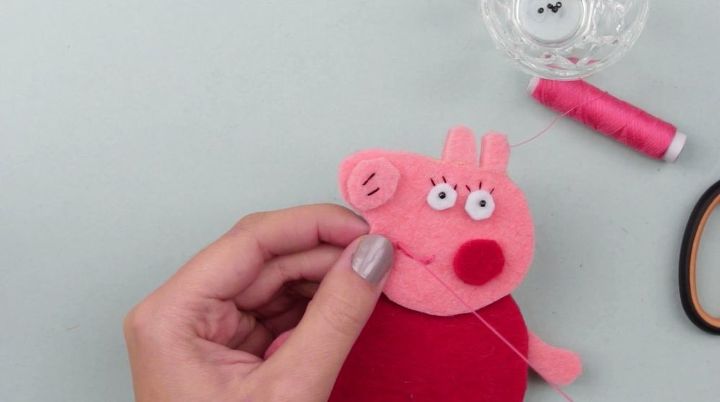
Now we can make the face. Glue the pig nose and press down. Then the eyes.
Attach the cheek. Add Peppa a charming smile. Seam with a double bright pink thread several times to make it distinct.
Two parallel stitches on the nose – and Peppa has got nostrils.
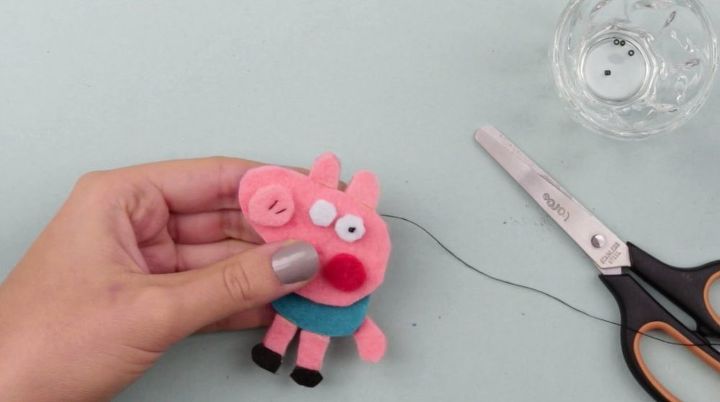
Make the eyes more expressive. Add pupils. Pass the needle through the center of the eye, remove the needle.
Thread a black seed bead and pull along the thread to set in the center of the eye. Thread a needle again.
Pierce the center fixing the bead on the thread. Fasten off on the back side. Cut out the thread.
Make the second eye in the same way.
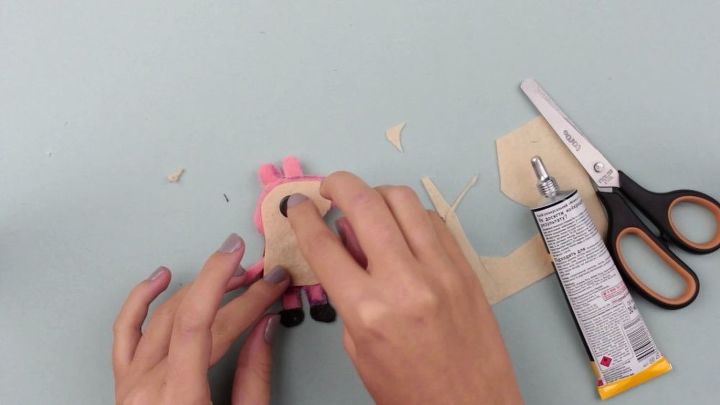
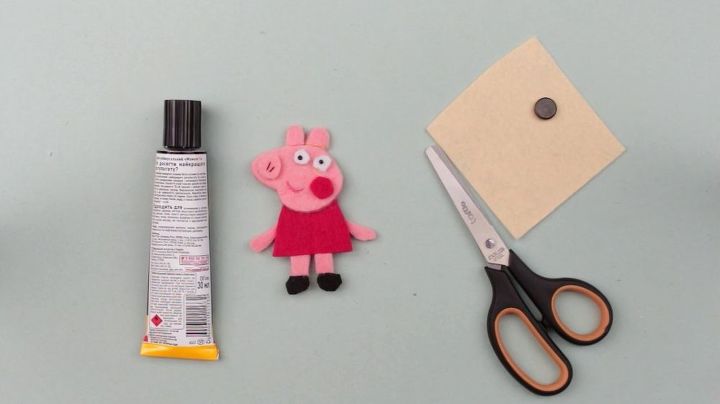
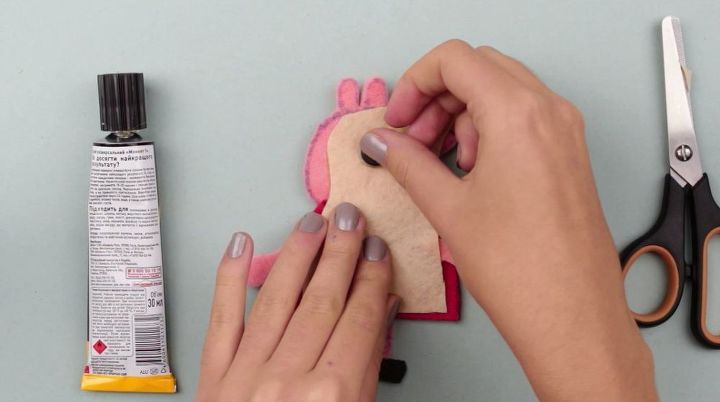
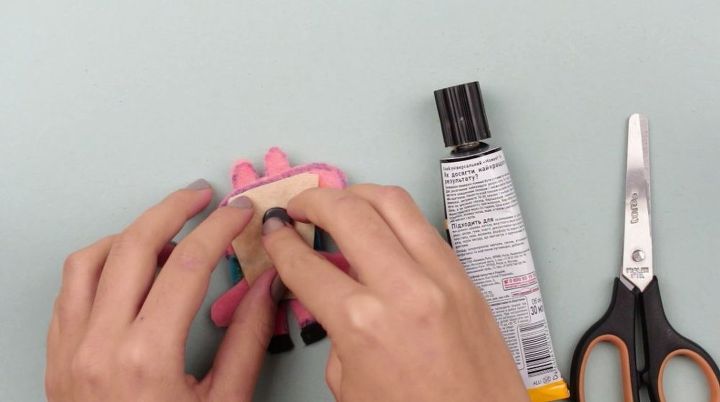
We’ll need thin felt of a neutral shade and a small magnet to attach to the back side.
Cut out a piece of felt to cover the head and body back side.
Glue and press over. Attach the magnet. Peppa Pig is ready.

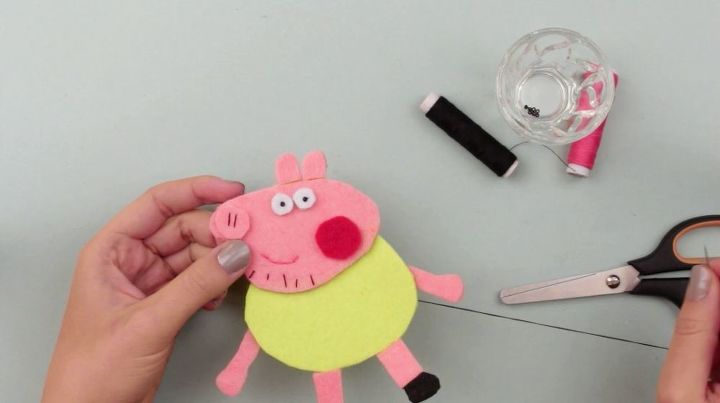
Now take Daddy Pig pattern and cut out the basic elements in the same way you did for Peppa.
Take the lemon lime felt, trace the body pattern and cut out.
Make the head from the pink felt.
Cut out an ear and make two identical details. Repeat for legs.
Make hands without a pattern as we did for Peppa.
Cut out the same pig nose as Peppa has.
Keep in mind the shoes. Make them without measuring from the black felt.
Add a red cheek a bit bigger in size than the nose. Use the white felt for eyes.
Attach the details on the mat. Stick in the same order you glued Peppa.
When the basic details are attached, make the face. Glue the nose, eyes and cheek.
First detail the face in the same way you did for Peppa. Stitch the nostrils, seam the smile and add seed beads as pupils.
Now let’s make the particular character detail. Make a beard with double black thread using stitches of different length. Add mustache.

And one more detail the other family members don’t have. It’s glasses. Use the black thread. Make a temple.
Then seam rims around the eyes to shape recognizable round glasses.
Stitch a bridge between the eyes.
Cover the back side in the same way you did for Peppa and attach a magnet. Daddy Pig is ready.
Begin to make Mummy Pig by preparing patterns. Cut out a red felt dress.
The pink felt details are the same you did for the previous figures.
Add a red cheek. Keep in mind the hands.
Put on black shoes to Mummy Pig. Cut out the eyes.
Glue Mummy Pig in the same order you did Peppa.
Make the same nostrils and eye pupils.
A particular character detail is eyelashes. Make three stitches above each eye.
Embroider the mouth in the same way as for Peppa and Daddy Pig.
And a finishing touch. Cover the back side you did for the previous figures. Mummy Pig is ready.
The last character is little George. Start with the patterns as usual.
Make a pink felt head. Trace and cut out a body from the turquoise felt.
Cut out other pink felt details. Add white eye base.
Make a distinctive family mark, rosy cheek.
Put on black shoes to George like the other family members wear.
Glue in the same order you did the other figures.
Attach the details to the face.
Stitch the same elements you did for Peppa.
Cover the back side. George is ready.
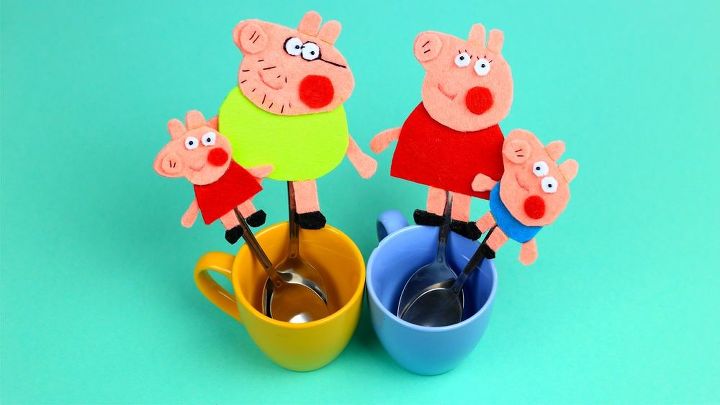
Now all the family members are together. Mummy Pig, Daddy Pig, Little George and the main character, Peppa Pig. Attach this joyful friendly family to your fridge and they will cheer you up every day. The kids will be excited to see the favorite animated characters in the kitchen.
If you're like this project, check out our youtube channel OR our super cool website
Thanks so much for reading/watching!


Frequently asked questions
Have a question about this project?