


DIYS FROM A FLANNEL SHIRT
I know I'm not alone when I say fall is my favorite. Fall is apple cider, flannel shirts, piles of leaves, football, evenings by the fire pit, mums for days, an excuse to make donuts and buy more throw blankets. It's when you keep your favorite hoodie on the hook by the door.
The only thing I don't like about fall is what comes after. Why can't spring come after fall? I digress.
Back to fire pits. I like to be warm, I like my guests to be cozy and snuggly and I think these could be as fun as handing out flannel jammie pants when friends come over.
I'm talking about flannel. I love the softness and the plaids. I decided I wanted to make pillows from flannel shirts and what better place to go
than the thrift store?
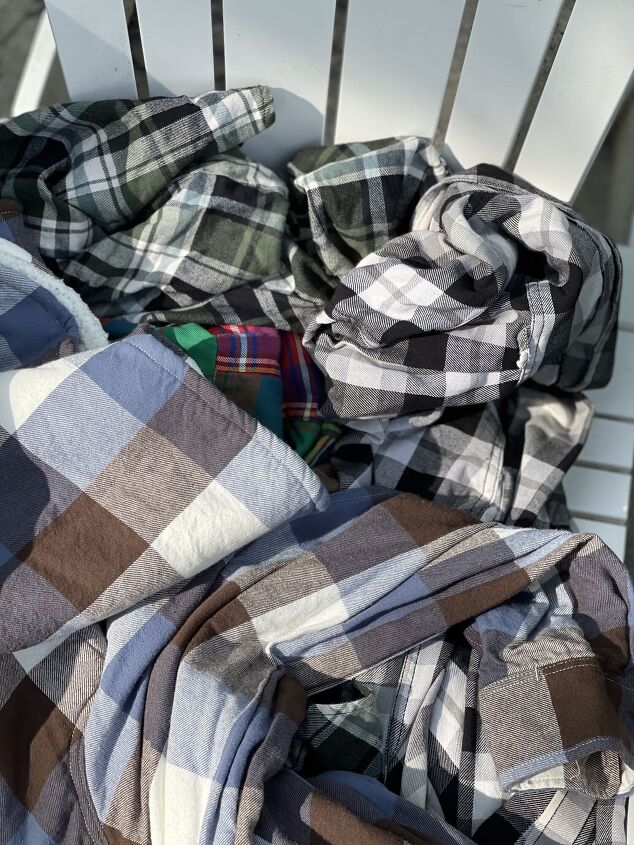
I hit two thrift stores and bought all the flannel shirts they had. What a great way to add color, texture and increase the snuggly factor by the fire pit.
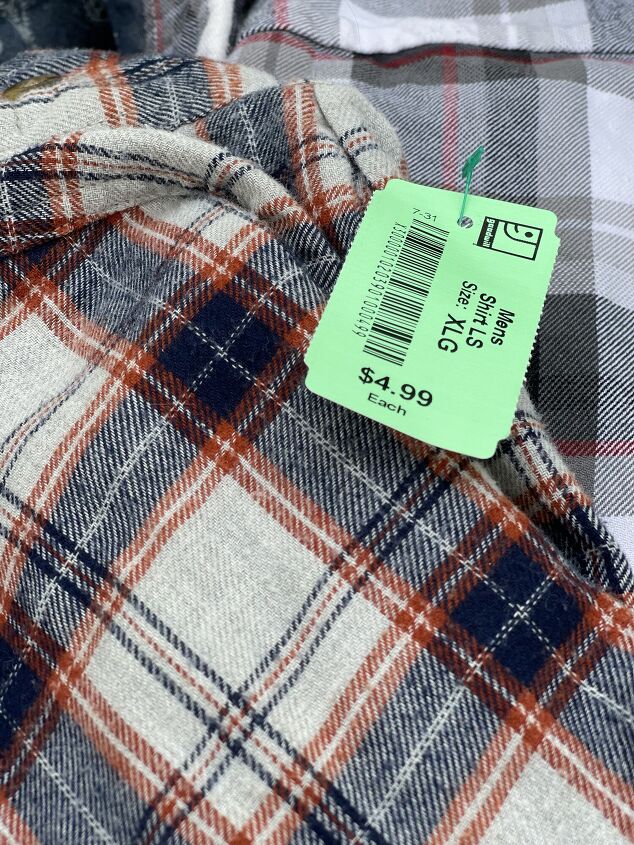
I paid $4.99 a shirt, and I decided to try and use every bit of the shirt and really get my monies worth.
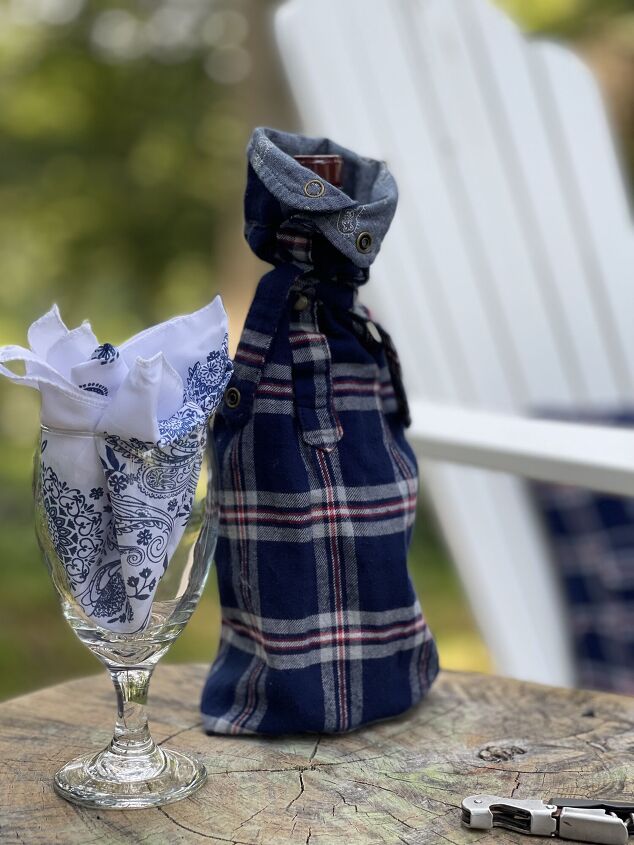
From one shirt I was able to create 2 wine sacks, 1 bottle sleeve and a throw pillow for my Adirondack chairs.
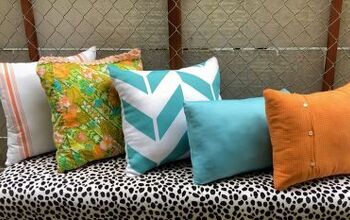
Again if you follow me at all, you know I love pillows and I certainly don't need any new ones (well the inserts I mean).
This was such a fun and easy project. Certainly something you could whip up in an afternoon.
I've done a few projects on my blog where I have hand sewn pillows or buttons, not on a sewing machine. I received a sewing machine as a gift in December of 2016. I remember heading out to purchase fabric and a pattern to make (of all things) jammie pants.
Learn how to wash throw pillows without removable covers.
Before I began sewing, life had another plan and here I am over four years later. My sewing machine, never out of the box has been stashed in my office closet since then.
Well this project required me to pull it out, unbox it and use it.
The only thing different from the last time I dabbled with a sewing machine is that everything is plastic instead of metal, the hooja ma jiggy to thread the needle was new, the instructions hurt my head and I couldn't see to sew without readers.
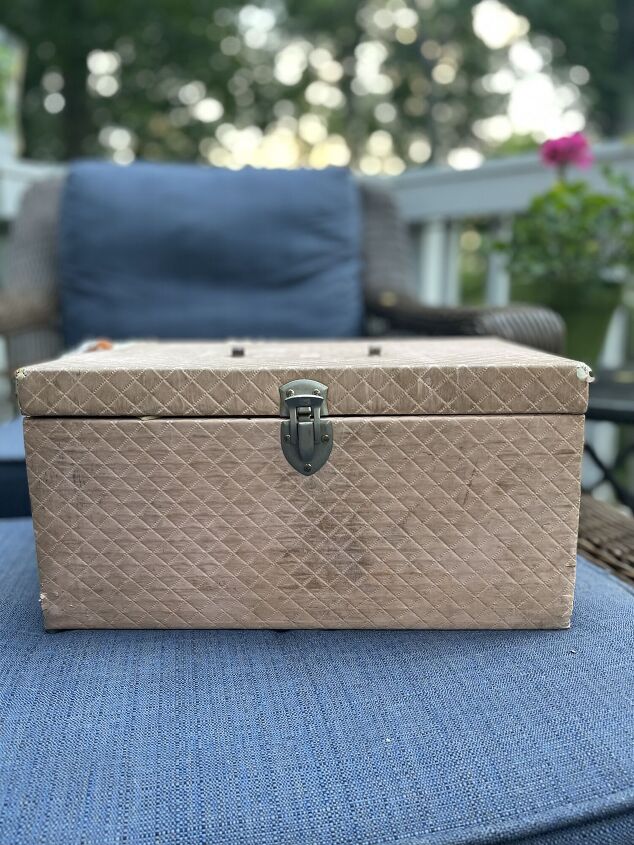
For starters I needed thread. The only thread I had was what I've used to hand sew but I remembered that there was a chance I had my mom's sewing box from when I was a child. I asked Carmine if he remembered and he said yes I had it.
Up to the the attic I went and spotted the pink quilted vinyl broken handled sewing box. I opened it up and it was like time had stood still.
Yellowed patterns, vintage spools of thread, paper packages of needles and electric scissors. It was like opening a treasure chest. I pulled out each item, remembering as I did. The seam ripper, the chalk, the button making attachment, memories poured over me and I smiled. It might sound silly but the smell was even familiar.
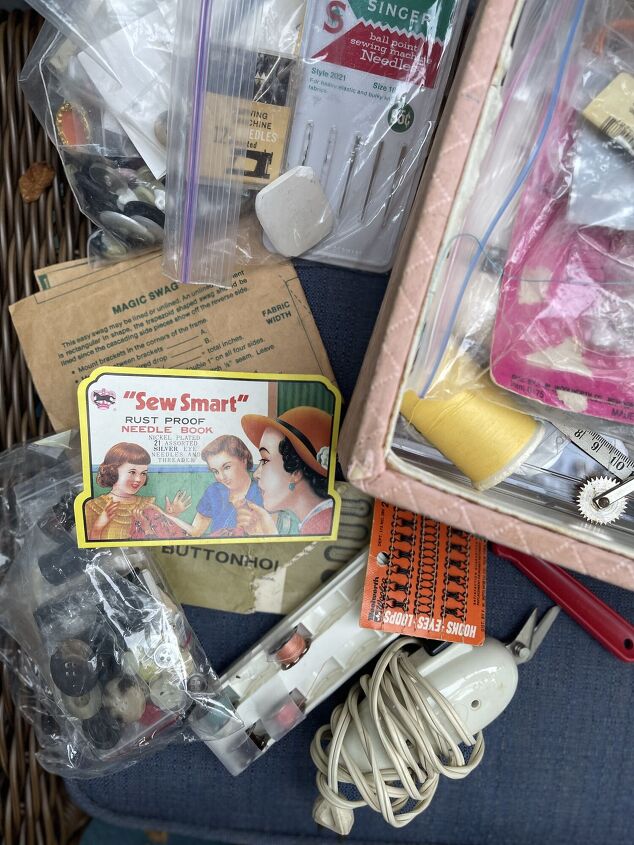
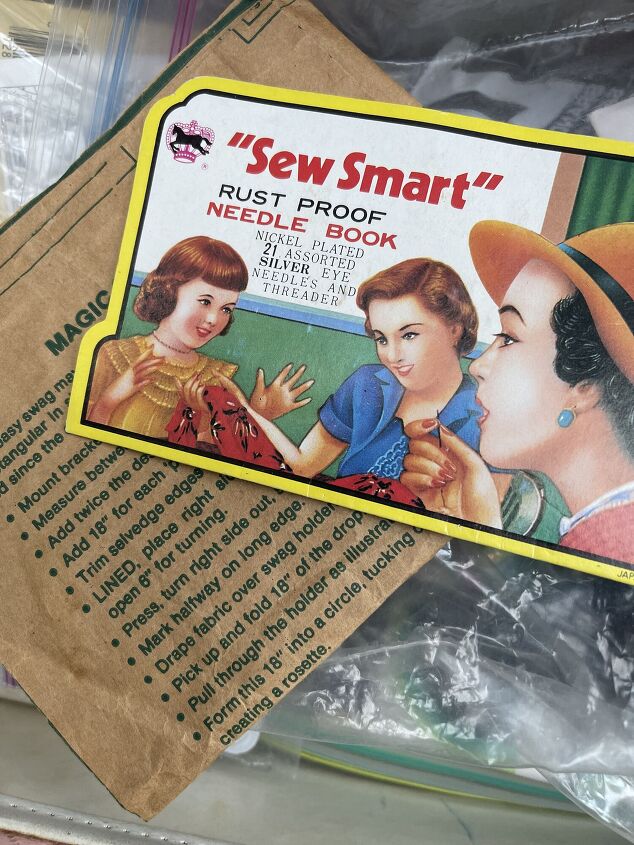
I was so happy to be able to use thread that was my moms and I felt her presence and was no longer intimidated. I'm not a great reader of instructions but I fumbled through, got my bobbins set and was off to the races. I have to say I was pretty excited to be pushing the pedal on a sewing machine again.
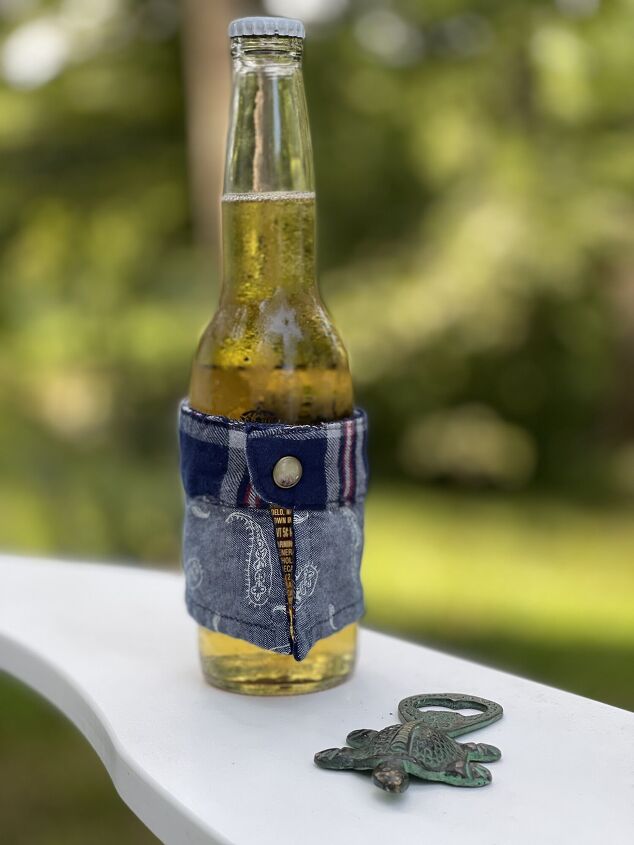
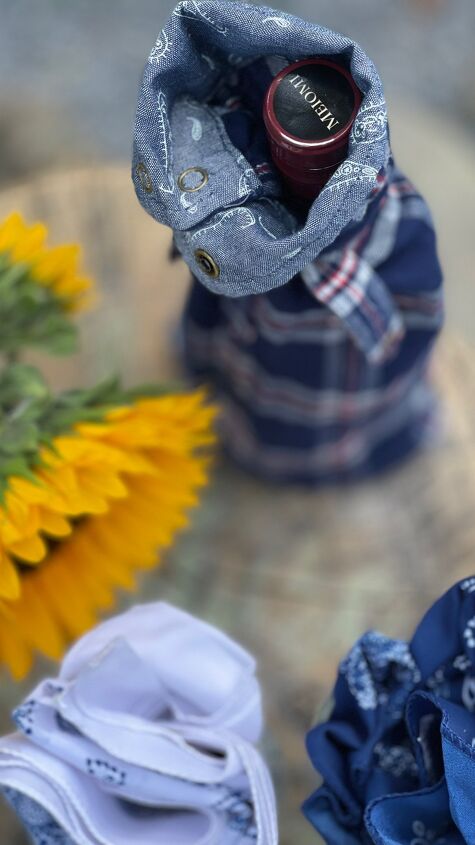
I'm sharing directions for the wine bags, pillow and the bottle sleeve. In the winter, it's not so much about keeping your drinks cold but keeping your hand warm. The sleeve does just that.
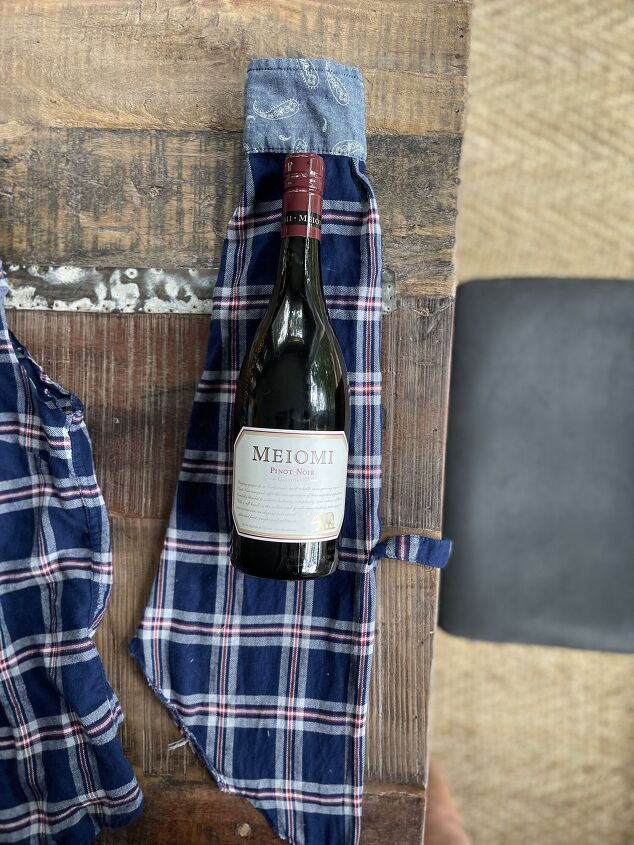
The Wine Bag
Step one:
Wash the shirt.
Step two:
Lay out the shirt flat on the table.
Step three:
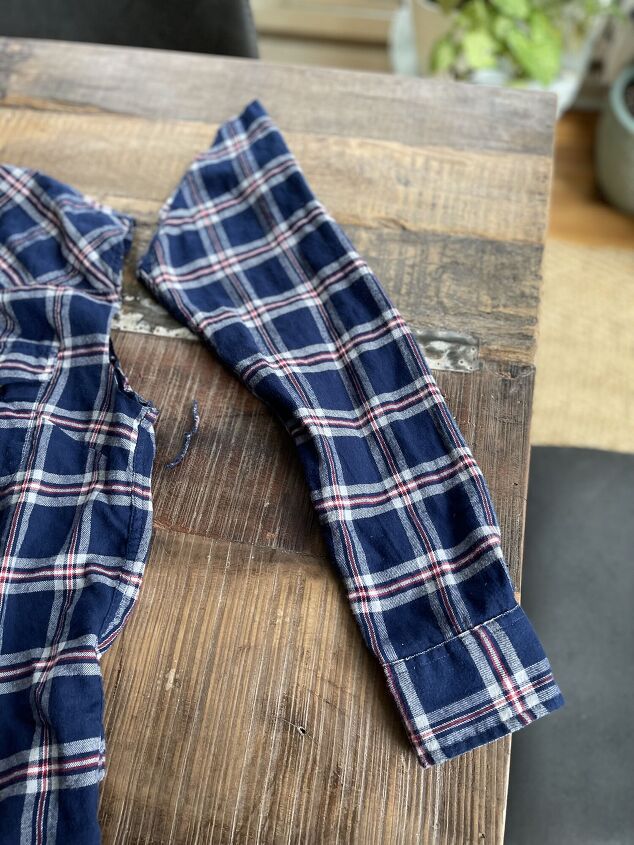
Cut the sleeves off at the arm. Turn the sleeve inside out and measure against a bottle of wine or whatever bottle you'll be using.
Step four:
Turn the sleeve inside out. Decide how wide you want the bottom to be and mark it with chalk or pins. Cut if needed and sew a seam along the bottom.Turn it back inside right and you are done.
Step five:
I decided to use the tabs that hold a sleeve up as a tie for the top of the bottle. I trimmed them from both sleeves, sewed them together and attached them to the back of the bag, just under the cuff.
The Pillow
Step one:
Get your pillow form or insert so you can see the size. It's best if you can get a pillow that is as wide as the shirt. This way you only have two seams to sew. If it's too narrow, you will have to take in the shirt equal amounts on each side which is ok, but just takes a bit longer.
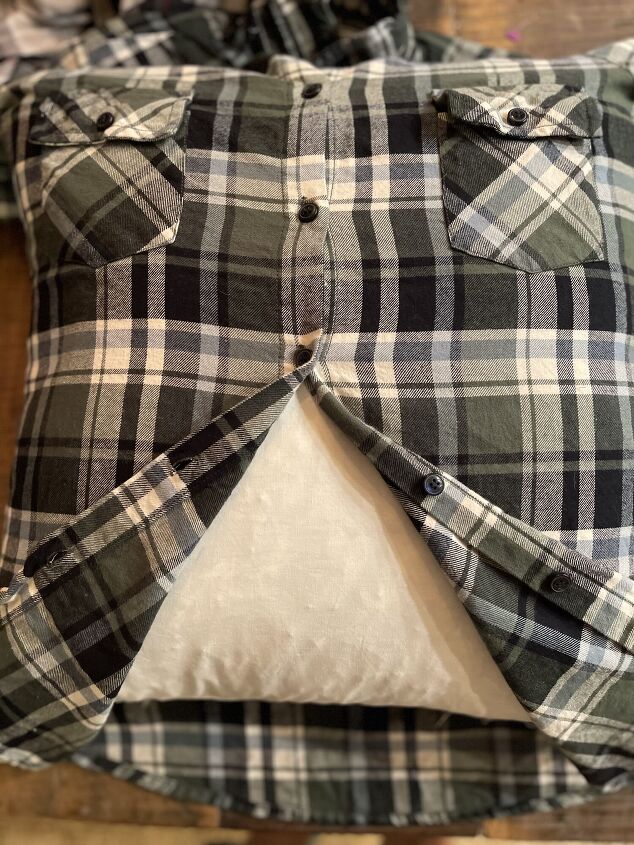
Step two:
If you want the pockets on the pillow (I did) then make sure they fit on the pillow insert. Next with the shirt buttoned, turn it inside out and sew a seam along the bottom of the shirt where the pillow insert ended. If you have more than an inch of material below the seam, cut that off.
Step three:
Unbutton the shirt and put the pillow form inside. Measure again how much of the top of the shirt above the pockets you need for the pillow. Then trim the excess about two inches above where the seam will be. Take out the insert, turn the shirt inside out again and sew the top seam. Trim any excess and turn the shirt back inside right.
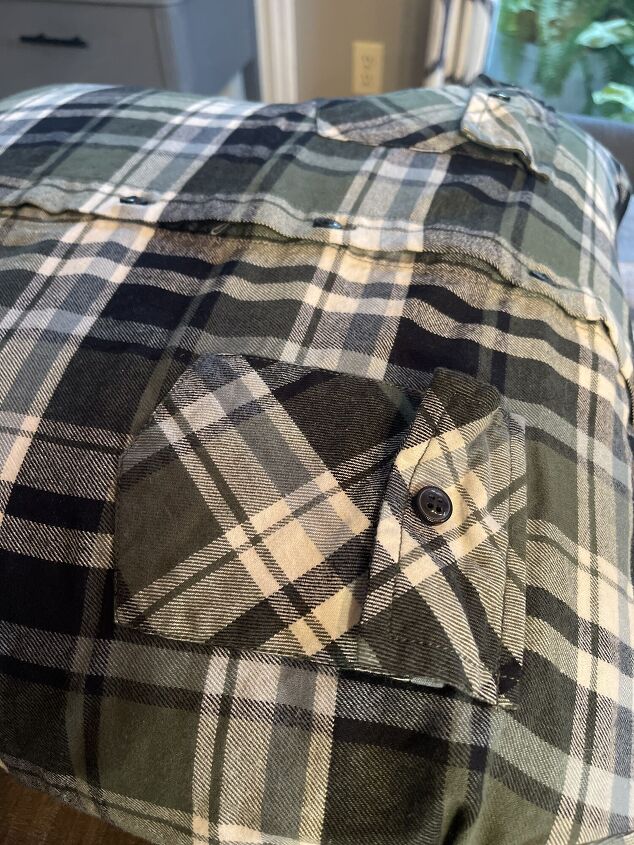
Step four:
Unbutton the pillow and put the insert inside. You will have to push to make sure it fits into the corners at the top and bottom of the shirt then button it back up and you have an adorable pillow. See how easy was that?
I tucked hand warmers into each pocket in case it gets really chilly one night.
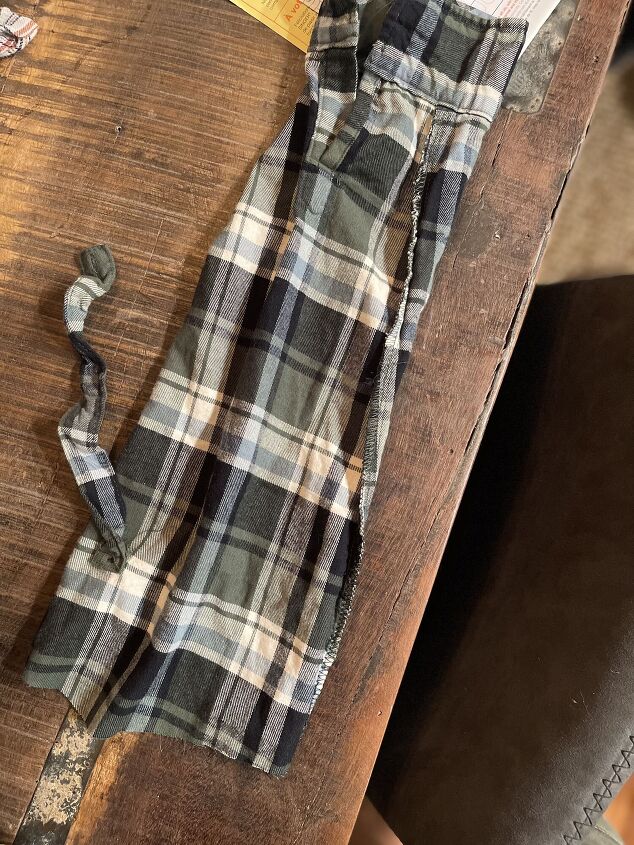
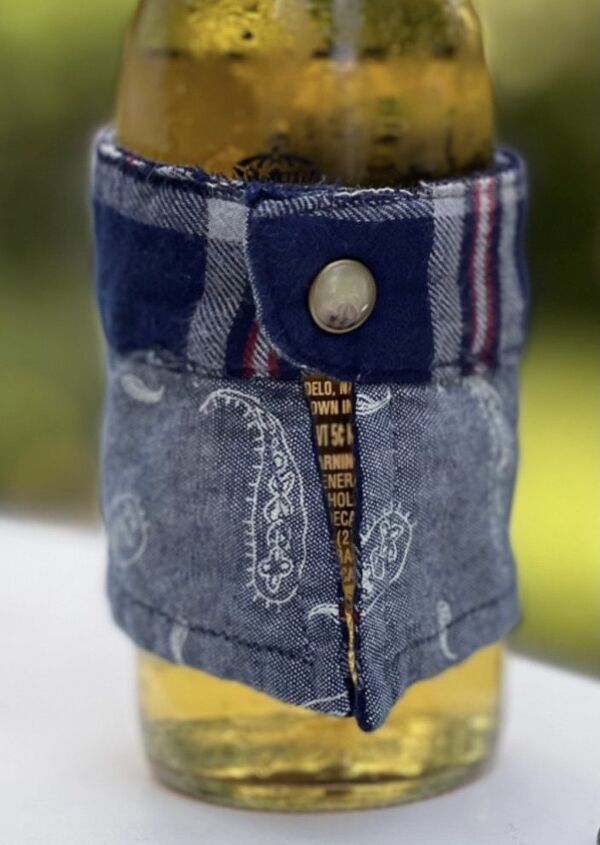
The Bottle Sleeve
Step one:
I cut the collar off of the shirt. Wrapped it around a bottle and measured. I then cut the collar in two.
Step two:
I wanted to secure it on the bottle with the snaps so I measured each half so the snaps could reach and close.
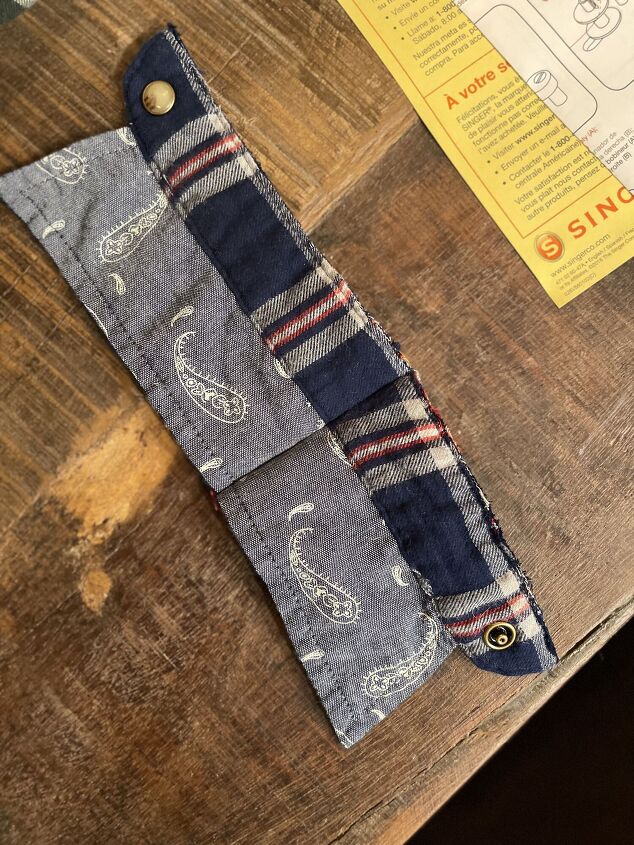
I sewed them together on the inside using only the amount I needed to make it around the bottle. Then I snapped it around the bottle.
Head to a thrift store, or maybe your closet or your son's and grab a few shirts. You can have the most unique pillows around. Don't forget to tuck a few hand warmers in the pockets just in case.
Here is the rest of my stash ready to go.

Here's to chilly nights by the fire!
If you enjoy what you read please comment and/or share my blog with a friend. It's the easiest way to support my business. You don't have to spend a penny - just comment or share.
I really appreciate you taking time to follow Saved From Salvage.
XO, Regina

Comments
Join the conversation
-
I have some old flannel shirts that I'll play around with now that you've sparked my interest. I too have been collecting sewing supplies and odds and ends for years.....lace, rick rack, small pieces of fabric, etc. I started to use a sewing machine in my mother's kitchen when I was about seven or eight. My mother taught me to make doll clothes. I'm now 78! Yipes! I love your post! 💕💕
-
I've made the flannel and dress shirt pillows out of deceased loved ones shirts as memory pillows


Frequently asked questions
Have a question about this project?