


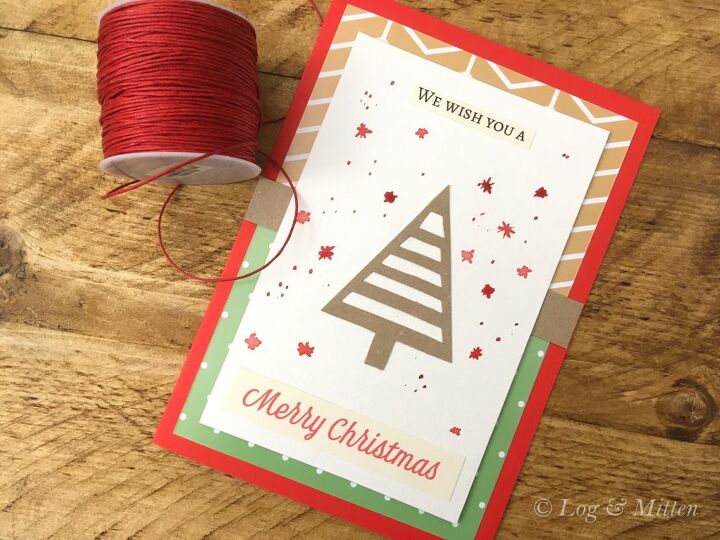
Easy Christmas Card to Make This Holiday Season

Are you considering making your own Christmas cards this year and need something fairly simple and cheap to make? Well, if you’ve already got a quality home printer and basic paper craft tools at home, then I’ve got just the thing for you: my Christmas card series.
The series is called Christmas Cards to Make this Year and it goes through various Christmas card projects that are simple and cheap to make. These are projects I myself took for the sheer joy of paper crafting with the digital paper I design.
This post covers card No.1.
Without further ado, let’s see how to make it!
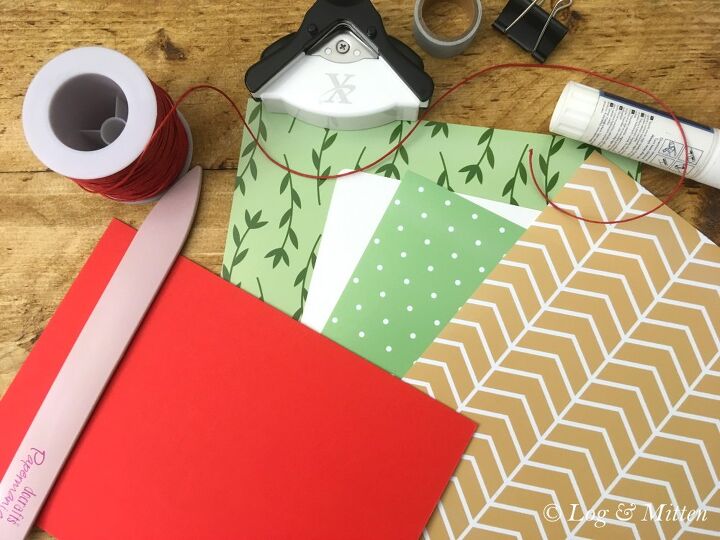
THE TOOLS YOU’LL NEED
For this project, I used the below tools and materials:
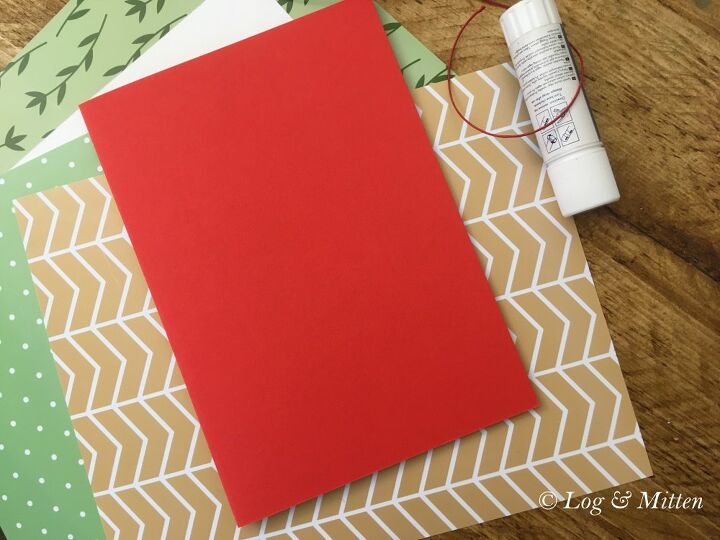
PAPER
- A4 Red card stock paper
- A4 Watercolor paper (textured as opposed to smooth)
- Digital paper from my store (feel free to use other digital papers if you wish)
- A4 Kraft card paper
- A4 premium paper 120 gsm (beige)
- 8″ x 10″ Photo paper (to print my digital paper on)
CUTTING TOOLS
- Craft knife
- Paper cutter
- Scissors
PAPER CRAFT ESSENTIALS
- Craft glue
- Craft mat
- Bone folder
PRINTING
- Word processor software
- Home printer
SKETCHING & PAINTING
- Watercolor
- Pencil
- Pen (any pen would do, as long as it’s visible on paper)
- Eraser
DECORATIVE
- Washi tape
STEP 1 – CREATE A CARD BASE
Use the bone folder to fold the red card paper into 2.
And that’s your base done.
STEP 2 – PRINT YOUR PATTERNED DIGITAL PAPERS
For this project I used the the rustic chevron and green polka dot paper from this set from my Design Bundles store. Feel free to use other digital papers.
I printed this on 8″ x 10″ photo paper because that’s all I had at the time. Feel free to print on whatever paper you have. Warning: 1. Do ensure that you print on card paper or another paper of similar paper weight though as regular A4 printing paper won’t do here because it is too light in weight 2. Do make sure you configure your printer correctly to avoid ink leaking inside the printer (for me for instance I had to select paper size 8″ x 10″ and photo paper; you will need to find out what your printer configuration is and select the relevant options).
TIP
I was new to printing digital paper, so I took what I could and ended up with my chevron pattern printed slightly too big to my taste. Since then, I have resolved this and found how to preserve the original pattern. To find out more about it, check out my other post.
STEP 3 – MEASURE YOUR PRINTED PATTERNED PAPERS FOR CUTTING
Place both papers on top of the card and use a pen at the back to take measurements for cutting. Ensure they meet more or less in the middle of the card.
STEP 4 – CUT YOUR PATTERNED PAPERS FOR PLACING AT THE FRONT OF THE CARD
Use the paper cutter to cut both sheets so they meet in the middle of the card more or less like this:

Now glue the sheets to the front of the card.
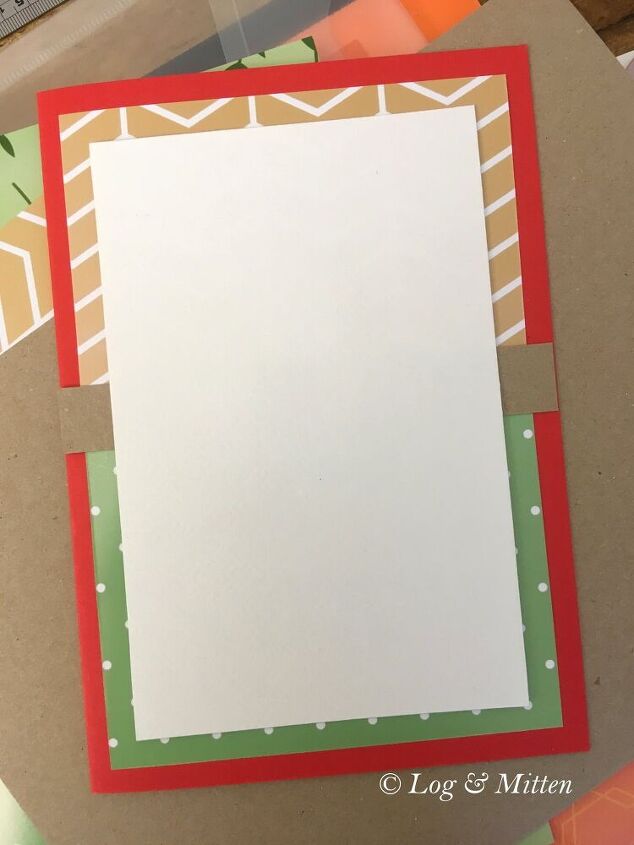
STEP 5 – CUT & GLUE A STRIPE OF KRAFT PAPER ON TOP OF THE PATTERNED PAPERS WHERE THEY MEET
Use the paper cutter to cut a stripe of kraft paper.
Glue the above stripe in the middle so it covers both sheets like this:
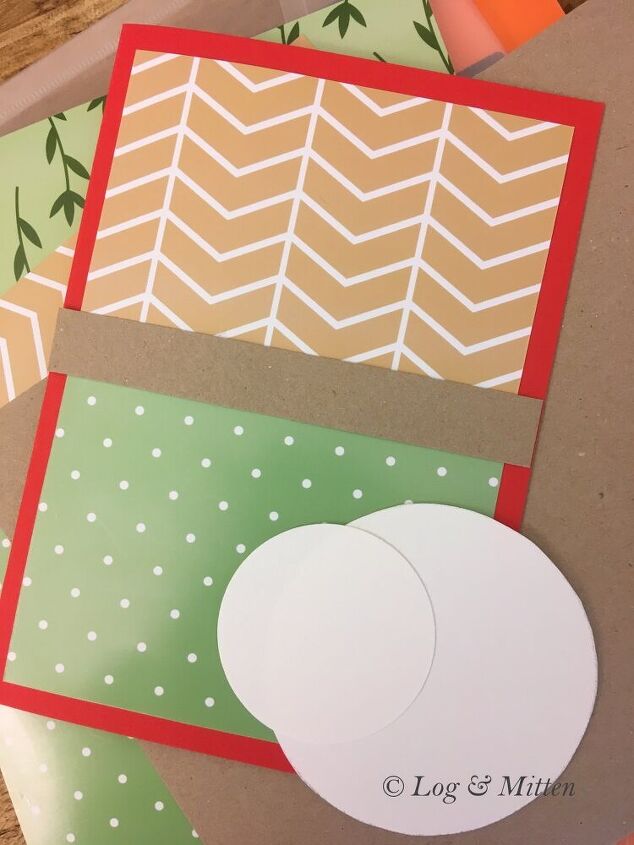
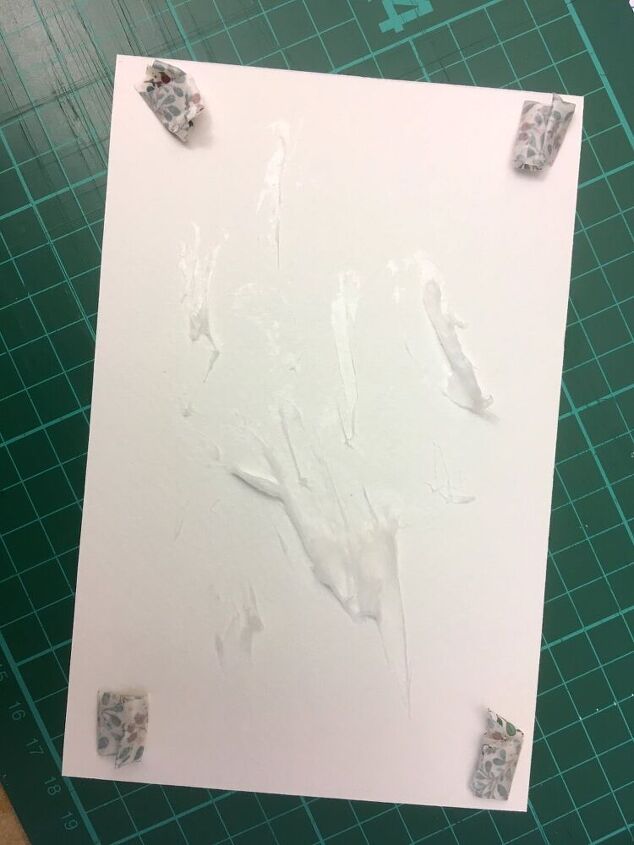
STEP 6 – CUT A RECTANGLE OUT OF TEXTURED WATERCOLOR PAPER FOR PLACING ON THE FRONT OF YOUR CARD
Take measurements for cutting the watercolour paper and use the paper cutter to cut it.
Apply glue to it and, if you wish, add some rolled washi tape in all 4 corners to secure it (I like doing this sometimes instead of using glue).
Place and glue this paper to the front of the card:
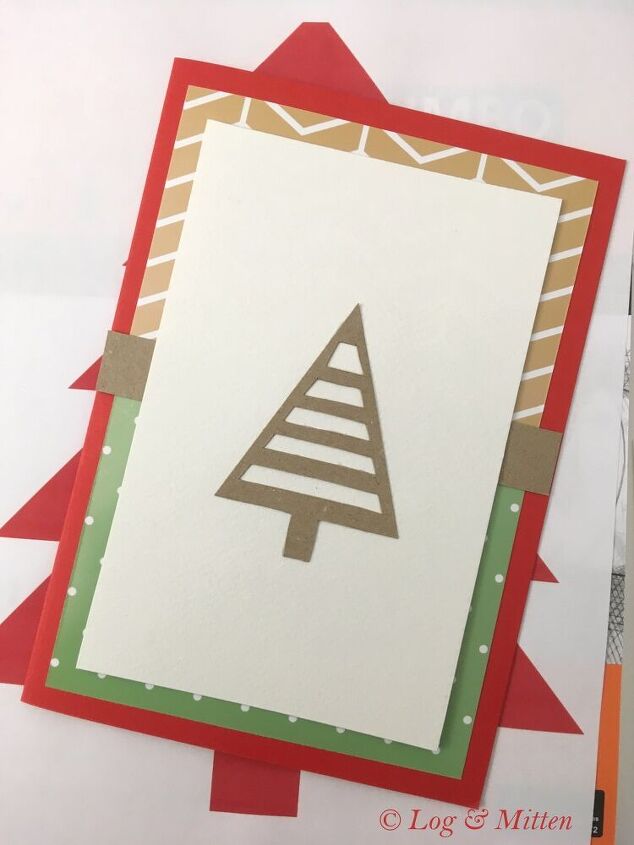
STEP 7 – CUT A CHRISTMAS TREE OUT OF KRAFT PAPER
Use a pencil to draw a triangular Christmas tree on the kraft paper sheet. Add stripes inside the tree.
Now, use the paper cutter to cut both sides of the tree.
Finally, switch to the craft knife and continue cutting (be careful not to hurt yourself and proceed safely; research how to cut paper with art on…on Youtube first if need be):
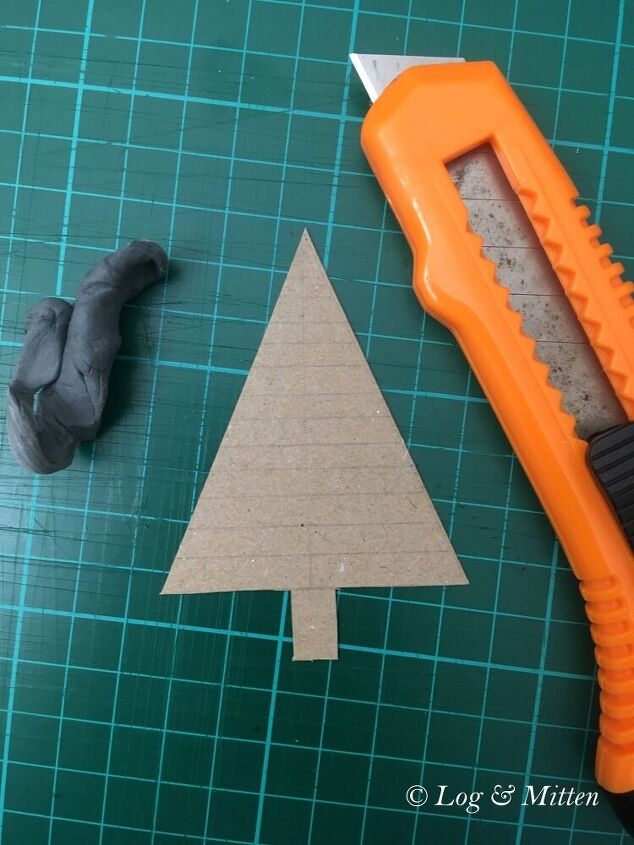
Now cut every other stripes inside (plan ahead by marking the stripes to cut with a pencil and leave 2 stripes free at the top if need be, should you have an odd number of stripes inside your tree).
When you’re done, use the eraser to erase any pencil marks still visible on your tree. Proceed carefully and use your other hand to keep the paper secured to ensure you don’t inadvertently tear it apart.
You should have something like this at this stage:
In my case, I messed up a little towards the top but that’s ok. It does not need to be perfect. I messed up because this craft knife is not my usual one, so though I felt safe all the time I was using it, I don’t feel too comfortable using it for crafting. I’ll be ordering myself some new craft knives soon.
STEP 8 – ADD YOUR GREETINGS TO THE FRONT OF THE CARD
Open your word processor and type the text that needs to go on the card (feel free to pick 2 fonts of your choice and configure them as you see fit).
Next, print them on your beige premium paper. You could use regular printing paper if you wish. The reason I used premium is to add elegance because my premium paper is beige, slightly textured therefore slightly more stylish.
Now, use the paper cutter to trim them so they fit very nicely on the card at the top and the bottom.
Finally, glue them to the card.
STEP 9 – PAINT THE STARS
Randomly add red festive stars with watercolour.
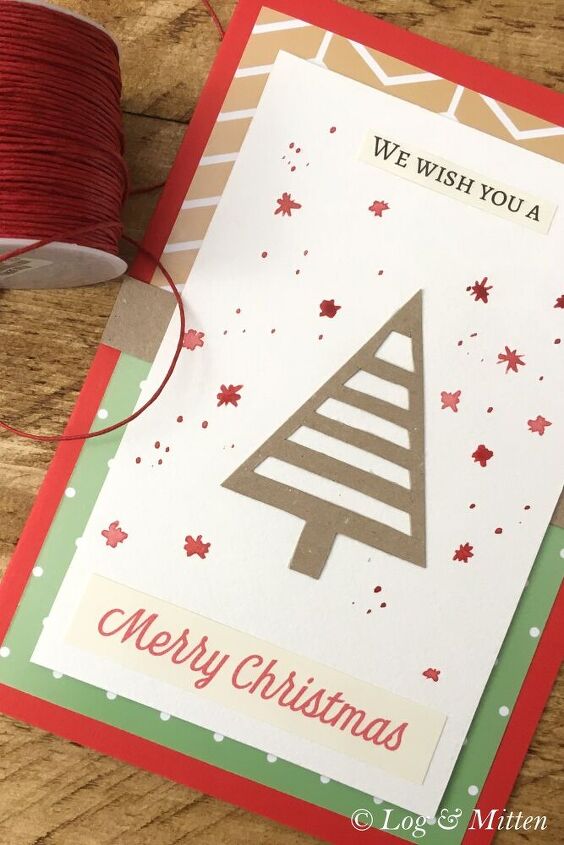
And that’s job done! 
Happy Card Making!
Alex of Log & Mitten


Frequently asked questions
Have a question about this project?