


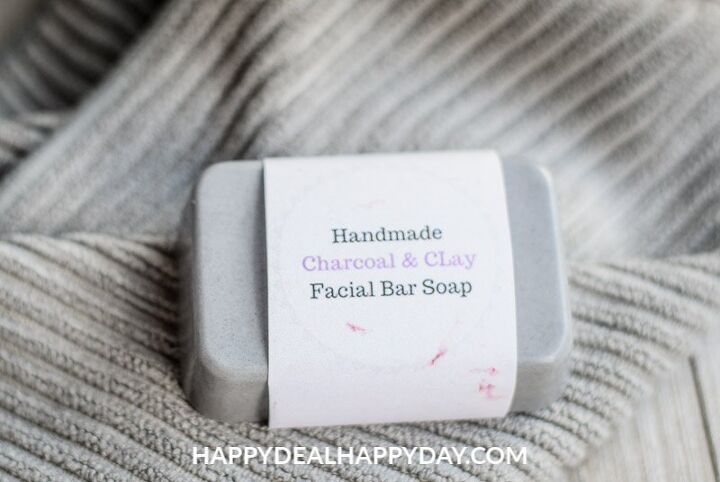
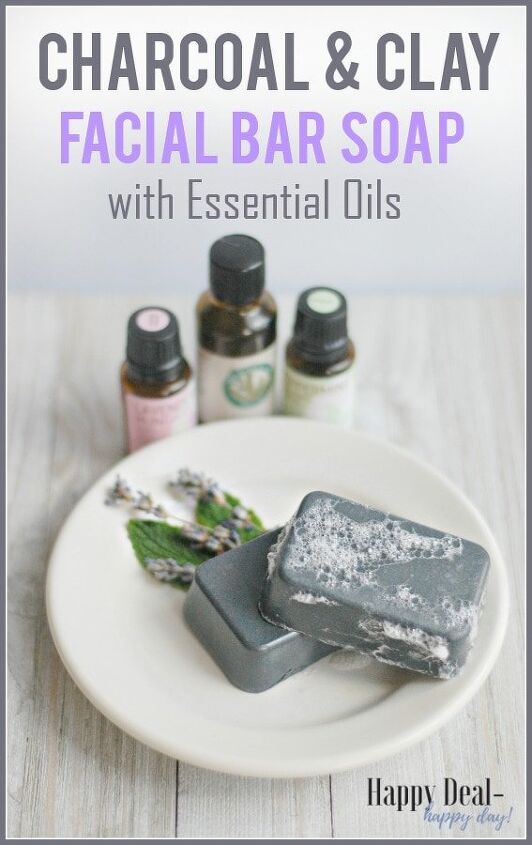
Easy DIY Charcoal in Soap Recipe

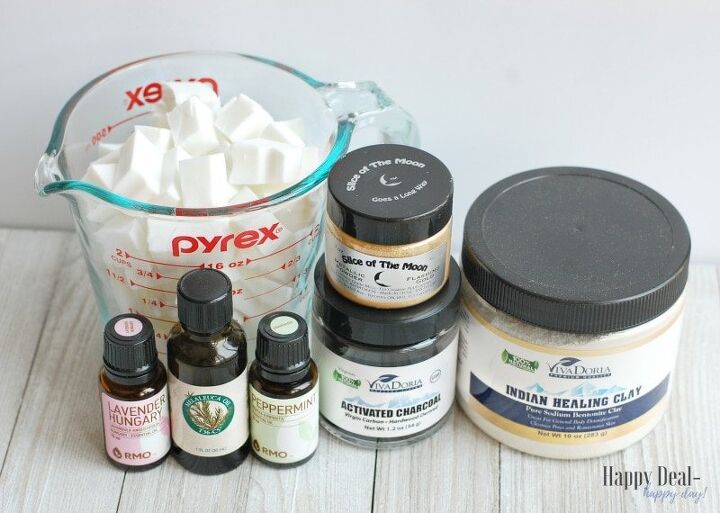
- 2 lb block of Goats Milk Glycerin Melt & Pour Soap Base – this is enough for 12 bars
- Silicone Mold
- Peppermint Essential Oil
- Tea Tree Essential Oil
- Lavender Essential Oil
- 1 Tbsp activated charcoal
- 1 tbsp of Indian Healing Clay
- Royalty Golden Mica Powder
- 2 cup glass measuring cup
- Glass spray bottle with 50/50 isopropyl alcohol and water
One note about the goat’s milk glycerin melt: you can find cheaper blocks of goat’s milk soap online, but let me caution you. Since I always try to save money, I’ve tried them and they do NOT work as well.
The cheaper blocks of goat’s milk soap don’t melt as smoothly and they are not as natural. Take my word for it; pay the extra couple of dollars and get Dr. Adorables Goat’s milk soap base! (Not a sponsored opinion either!)
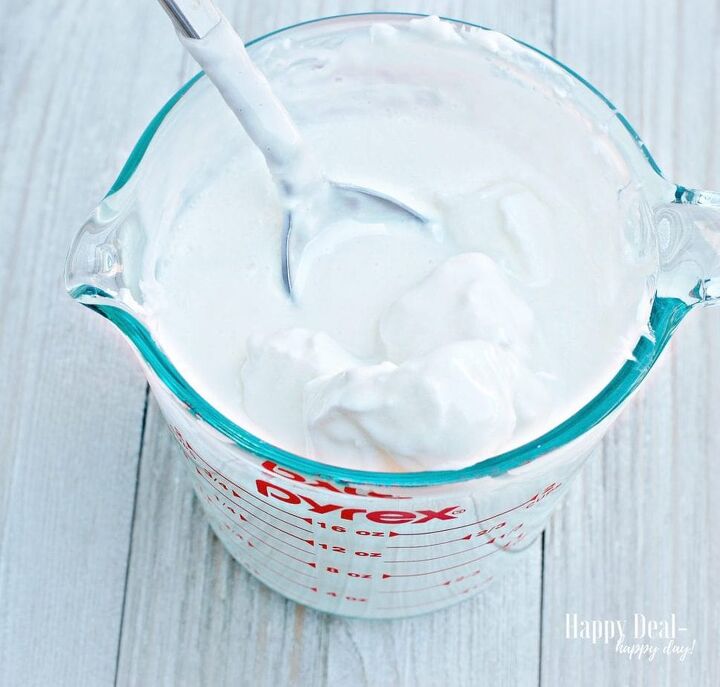
The large block of the goat’s milk soap base is smooth and silky, and it cuts easily with a kitchen knife. Slice the soap base into strips, then cubes, and place them inside the microwave-safe measuring cup.
My Pyrex glass measuring cup holds about half of the soap – so I made these charcoal and clay soap bars in 2 different batches.
Microwave your first batch of soap cubes for 1 minute. Take it out and stir; you’ll see that it’s starting to melt. Put it back in the microwave for another 30 seconds and stir again.
Repeat until all the solid soap is melted. It will be about 3 minutes total of cooking time.
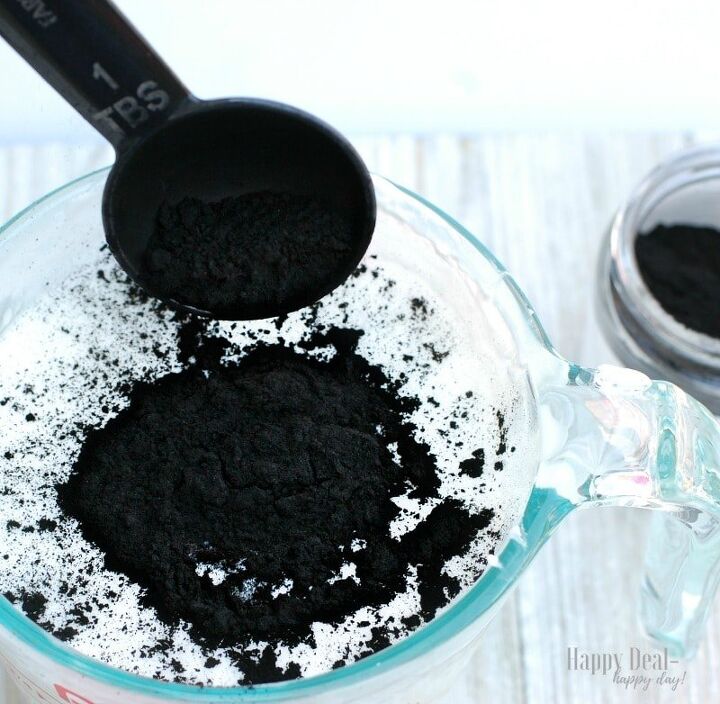
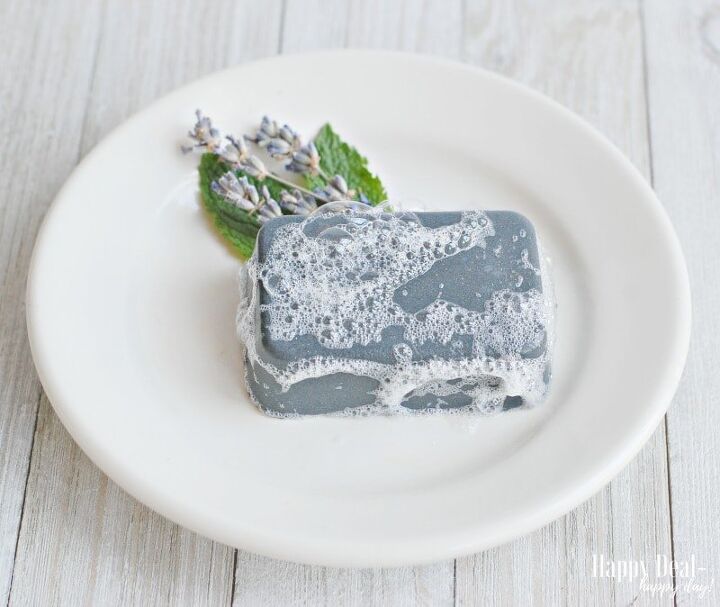
Then add 1 tbsp of activated charcoal powder.
Have you noticed that charcoal is creeping its way into so many of our personal skin care products? Especially face masks?
Both excess oil or environmental toxins will bind to the charcoal and will be washed down the drain. This will help you if you suffer from mild acne or even clogged pores. The dirt and oil combo that is in clogged pores can be bound to the charcoal first before it builds up in your pores.

Then add 1 tablespoon of Indian Healing Clay. It’s made up of natural sodium bentonite clay. This clay is known for deep pore cleansing, and for detoxifying & rejuvenating skin, which is why I wanted to add it to this soap!
After you add your powdered clay and charcoal, it will take a few minutes of stirring to get a smooth consistency without any charcoal or clay lumps.
Let the soap rest in between stirrings and you’ll see more small clumps of charcoal float to the top. Then stir those back in.
Continue stirring until you don’t see any more small clumps of charcoal or clay powder.
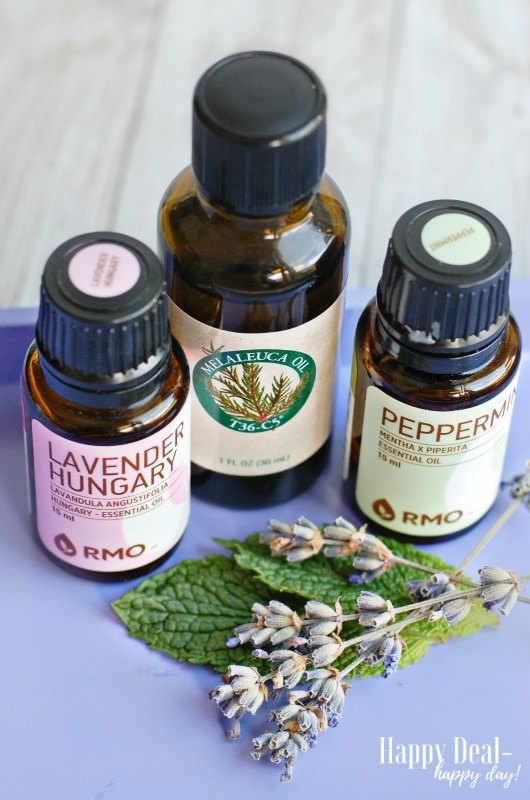
The three essential oils I chose for this are lavender, tea tree and peppermint.
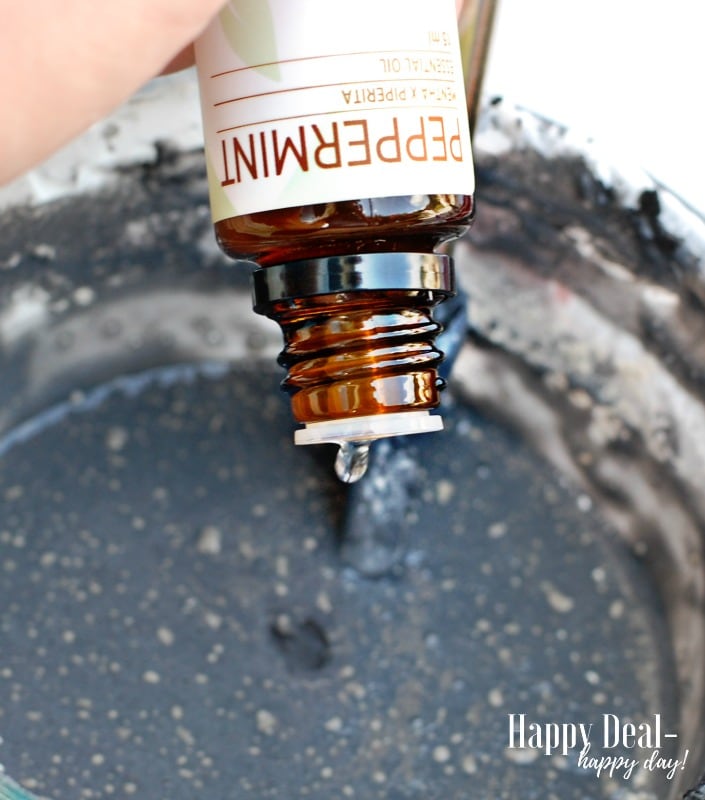
You will want to add 15-20 drops of each essential oil to your melted soap base. If you like a stronger smell, especially of just one of them, then add up to 30 drops.

I chose lavender to add to this soap because it is so healthy and healing for your skin. It helps promote healing of any blemishes on your face.

Tea tree oil is anti-bacterial, anti-inflammatory, and a tissue regenerator, also making it phenomenal for skin healing. Peppermint is cooling on your face and brings a nice cool tone the scent of the bar.
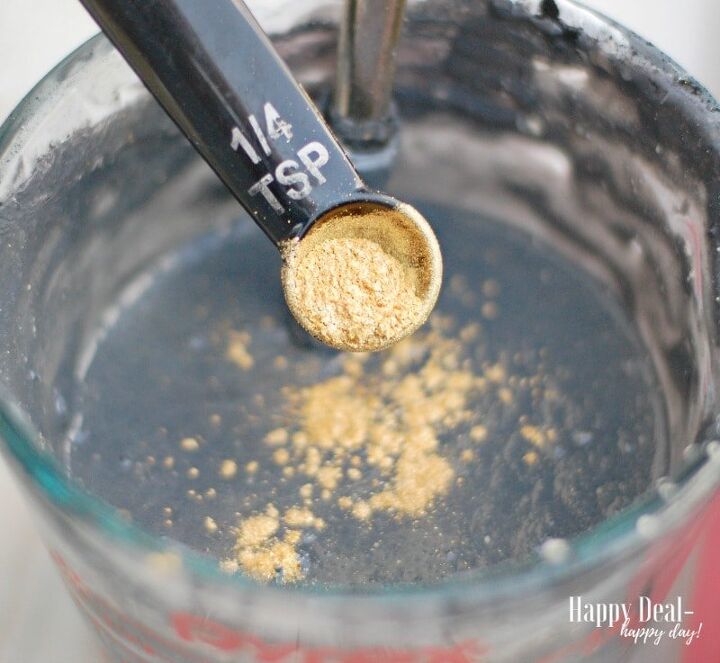
This next stage is completely optional, but I like the shiny and shimmery addition of mica powder to this soap. I started by just adding 1/4 of a teaspoon, but ended up doubling that to 1/2 a teaspoon to get the shimmery effect I was looking for.
Make sure your soap is well mixed with no clumps of charcoal, clay or mica powder. If your soap starts to cool and harden around the edges while stirring, go ahead and stick it back in the microwave for 30 seconds to re-melt all of it before you pour it into the mold.
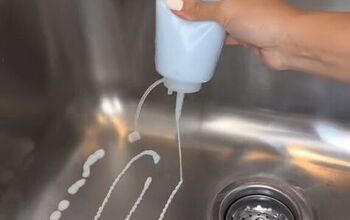
You’ll probably notice some bubbles as you pour your soap into your molds. If you want a smooth bar of soap on the bottom with no bubbles, spritz it with a mixture of 50/50 isopropyl alcohol and water. That will make the bubbles pop and you’ll get a nice smooth finish to your soap as it cools and hardens.

Wait a good couple of hours for your charcoal soap to fully cool before you pop it out of the molds.

You’ll end up with 12 charcoal in soap bars after you use the full 2 pounds of soap base. So you can keep a few, or add some decorative ribbon and give them as gifts! (especially with Mother’s Day right around the corner!)
Easy Melt & Pour Lavender & Rose Soap with Gold Mica Powder – includes FREE printable soap labels
Easy Melt & Pour Rose Scented Soap with Glycerin & Goats Milk – includes FREE printable soap labels
Easy Melt & Pour Orange Creamsicle Scented Soap – includes FREE printable soap labels
Lemon Poppy Seed Homemade Soap Recipe – includes FREE printable soap labels
Easy Melt & Pour Ginger and Lime Soap – includes FREE printable soap labels


Frequently asked questions
Have a question about this project?