


How To Make Watercolor Gift Tags For Christmas

by
Gabi Ralea
2 Materials
1 Hour
Medium
How would your grandpa look if wearing the false eyelashes that you intended to give to your sister as a Christmas gift? And how happy would your sister be with the new hearing device that was not meant for her??
That’s why you need gift tags. And not any gift tag, but this kind of lovely colored handmade gift tags!
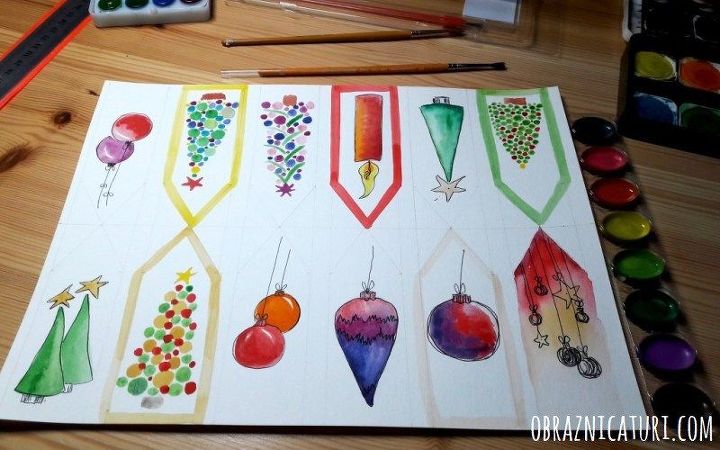
Start with a piece of thick paper 8.5-in x 11-in, a small brush, watercolors, a ruler, a pencil and scissors. Use the pencil and the ruler to draw 12 equal areas on the paper, with 0.4-in between them.
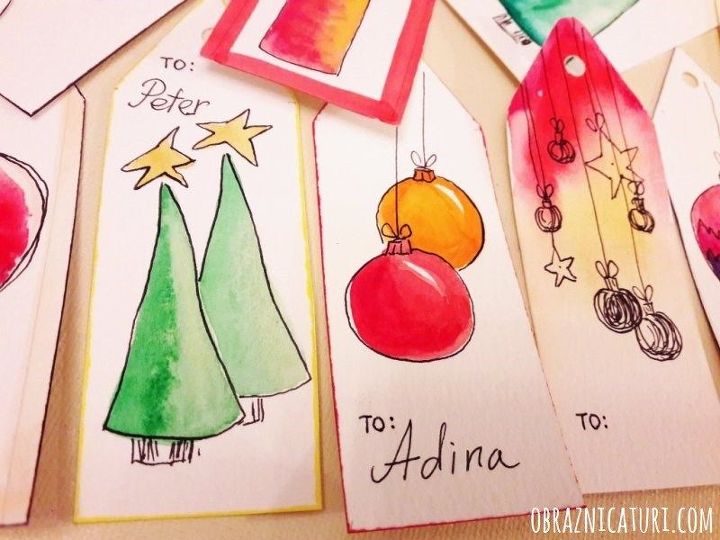
For each tag, draw an angle pointing to the center of the paper. Those 12 areas would later turn into tags, so you have to draw something on each of them. Choose naive art like Christmas trees, stars or simple decorations.
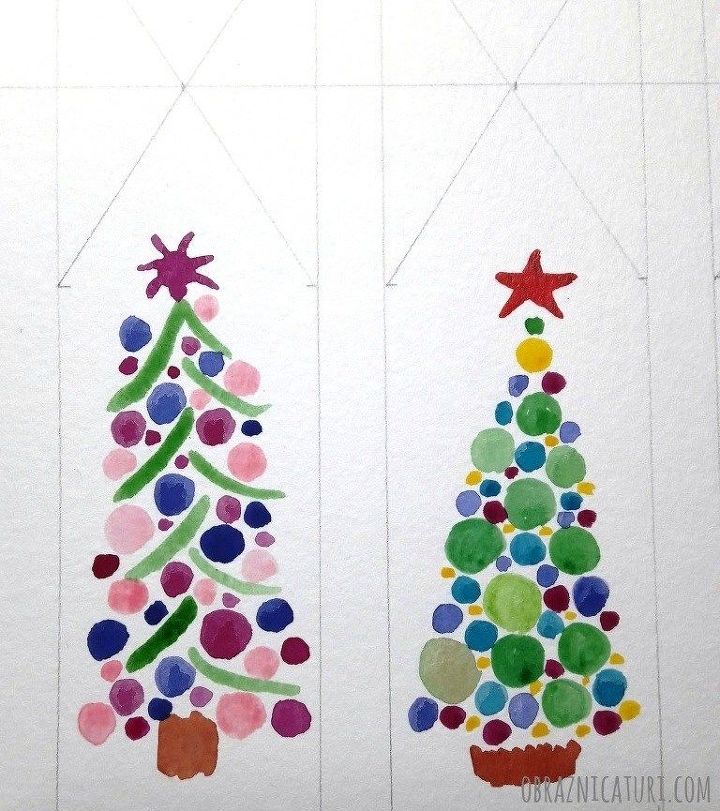
Fill all the areas with designs at your will. Play with colors and shapes, add small details with an ink pen, or you could even add a pinch of sparkle or fluff with beads, pompoms or anything else you like.
Let the tags dry, then cut them one by one. You’ll get 12 personalized gift tags to play with a little more.
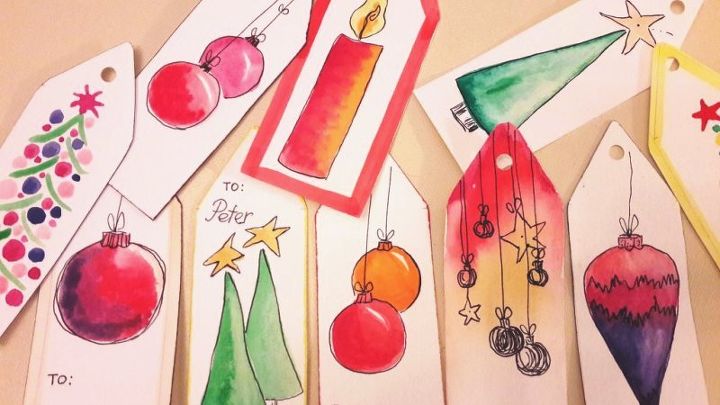
What you need next is to make them easy to fix on the ribbon, so you need to perforate them close to the top. You can use an usual desk paper decorator for this task.
Check my blog OBRAZNICATURI for more pictures of these handmade gift tags, but also for a bunch of DIY projects and ideas that you can easily craft with what you have on hand!


Any price and availability information displayed on [relevant Amazon Site(s), as applicable] at the time of purchase will apply to the purchase of this product.
Hometalk may collect a small share of sales from the links on this page.More info
Want more details about this and other DIY projects? Check out my blog post!
Comments
Join the conversation
2 comments
-
you are very talented and creative!


Frequently asked questions
Have a question about this project?