


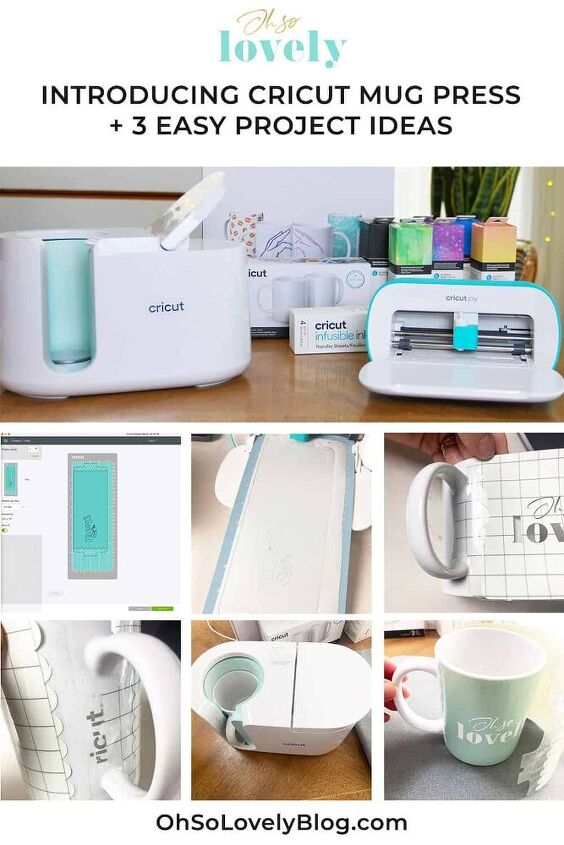
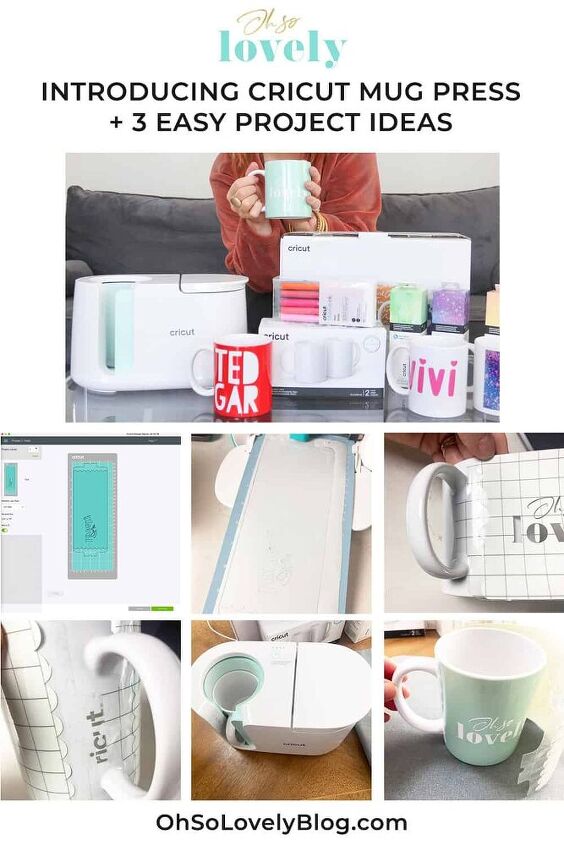
Introducing Cricut Mug Press + 3 Easy Personalized Mug Tutorials
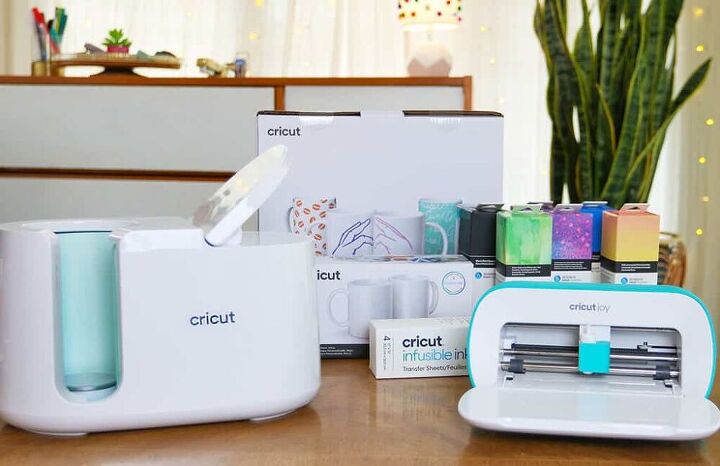
I’m so excited to share that Cricut has just launched a new product – Cricut Mug Press! I was lucky enough to be a part of the product launch group, and have been playing with my Mug Press for a month now. I love how easy it is to use and that the mugs are completely dishwasher safe!
Another thing I adore is the clean and sleek design of the Mug Press – it looks amazing on my office shelf.
I’ve made so many cute mugs so far. I promise, you’re going to LOVE it as much as we do!


Before I show you how to use the Cricut Mug Press I want to list some ideas how you can use it as well as my favorite features.
- Perfect for anyone and any occasion – personalize a mug for birthdays, anniversaries, holidays, or just because!
- Making mugs with the Cricut Mug Press is incredibly easy! Just cut your design, apply it to your mug, and the press does the rest! Not to mention, every holiday and gift-giving occasion just got easier, too.
- Dishwasher-safe designs permanently transfer to your mug.
- One-touch setting applies the optimal amount of heat and pressure.
- No time, temperature, or pressure adjustments to make – secure your mug in the press, and the machine does the rest.
- Fits straight-walled Infusible Ink compatible mugs ranging from 11 oz – 16 oz without need for manual adjustment.
- Safety-conscious design and auto-off offer peace of mind.
I’ve blogged about my love for Cricut many times, so by now it’s probably pretty obvious that I’m a huge fan and truly love their products.
Ok, let’s get the tutorial going, shall we?!
Gather your supplies (all supplies are linked in my original blog post link at the beginning of this post)!
– Cricut Mug Press
– Cricut ceramic mug blanks ( large or small size)
– Infusible Ink in your favorite colors and patterns
– Cricut Joy (or any Cricut cutting machine)
– Basic Tool Set
– Design Space
– Cricut Access
– Infusible Inks
– Infusible ink pens and markers (not required)
– Heat resistant tape
Making your mug with Cricut Mug Press
To get started turn on your Mug Press following the provided directions. I needs some time to warm up and might smell extra “hot” the first time you use it. This smell wears off after a couple uses.
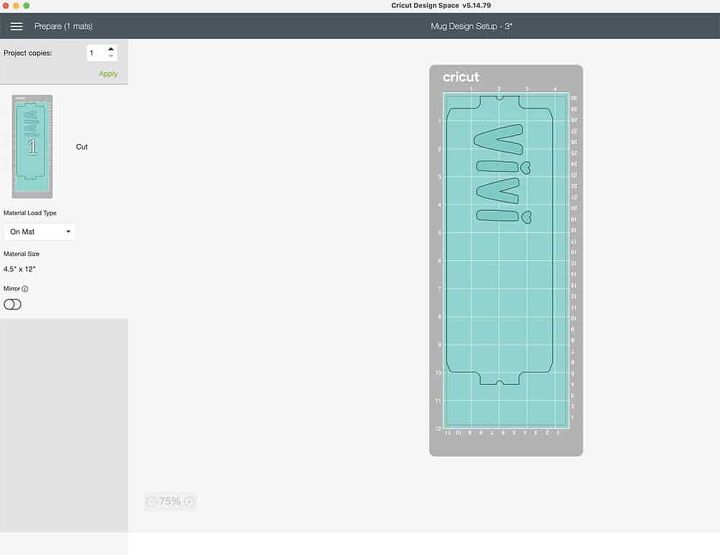
Next, open your Design Space to plan out and design your mug design.
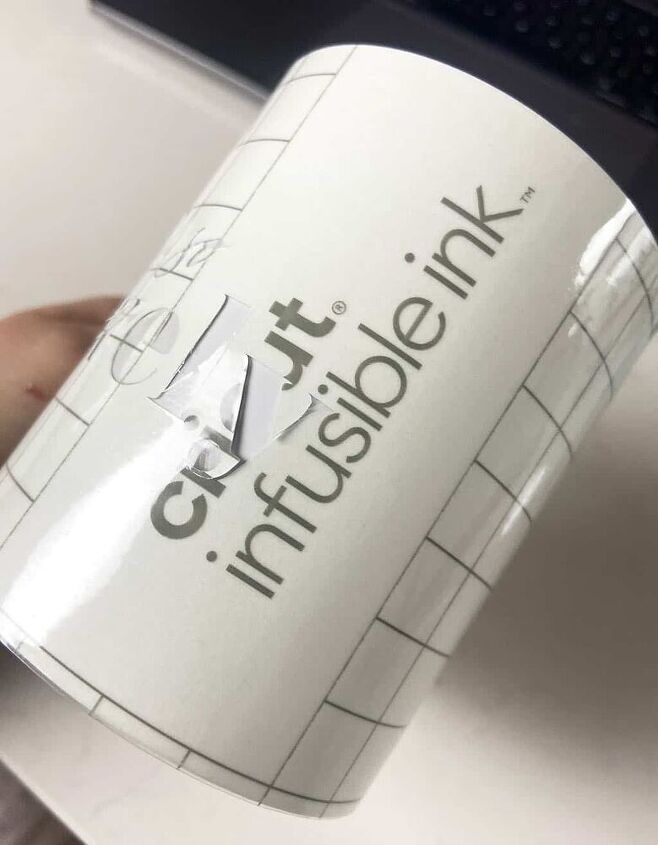
I brought in an .svg of my blog logo and used the mug template to place the logo where I preferred.
After “welding” the whole logo together, I elected both the backer template and my welded logo and “attached” them together.
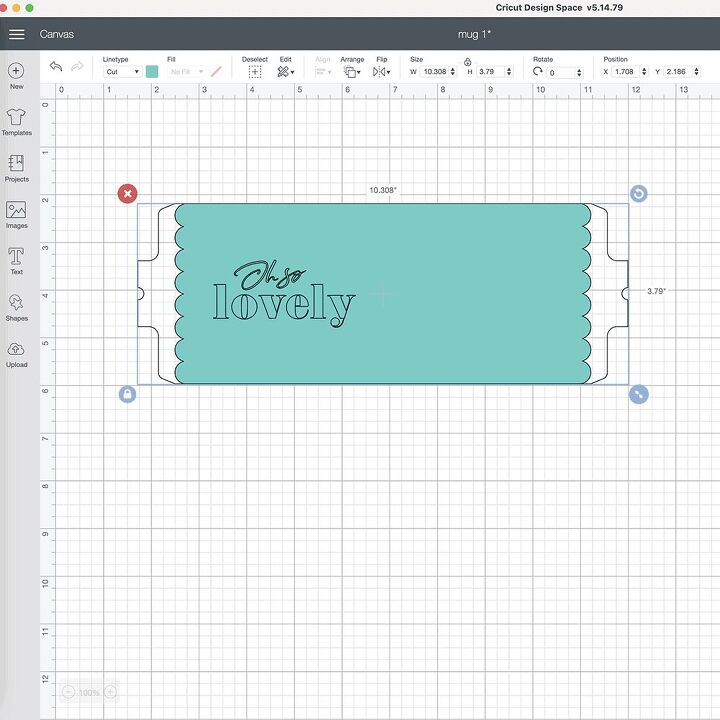
I love how easy Cricut makes it with the mug templates. They fit the mug perfectly and show you exactly where to place your art and your size limitations.
You can choose form many different edge designs – straight, scalloped, wavy, and many more. I chose scallop for this mug.
Once you’re happy with your art, go ahead and mirror your design – this is always a necessary step on any design that isn’t a symmetrical heart, star, etc.
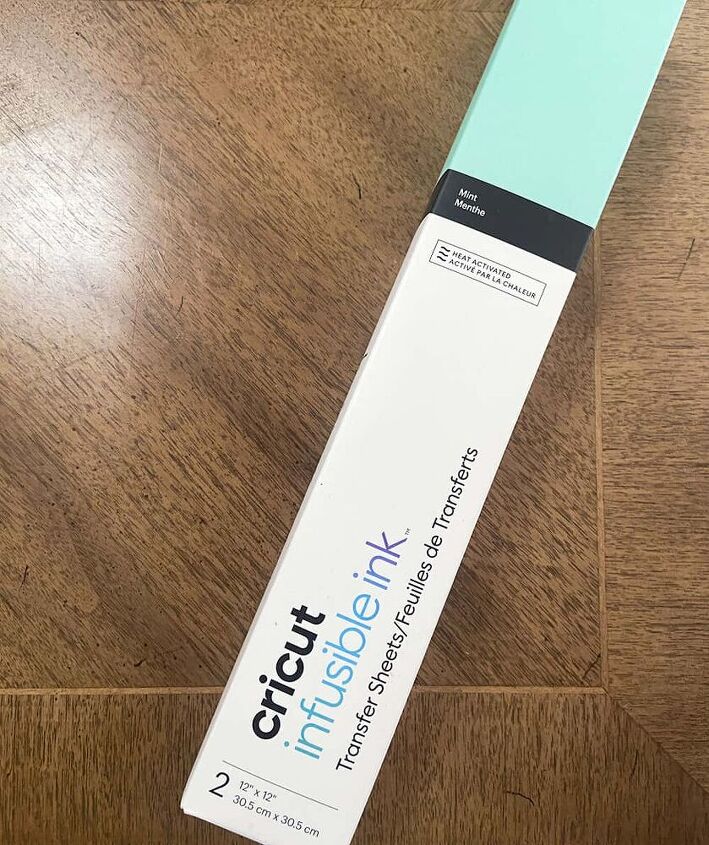
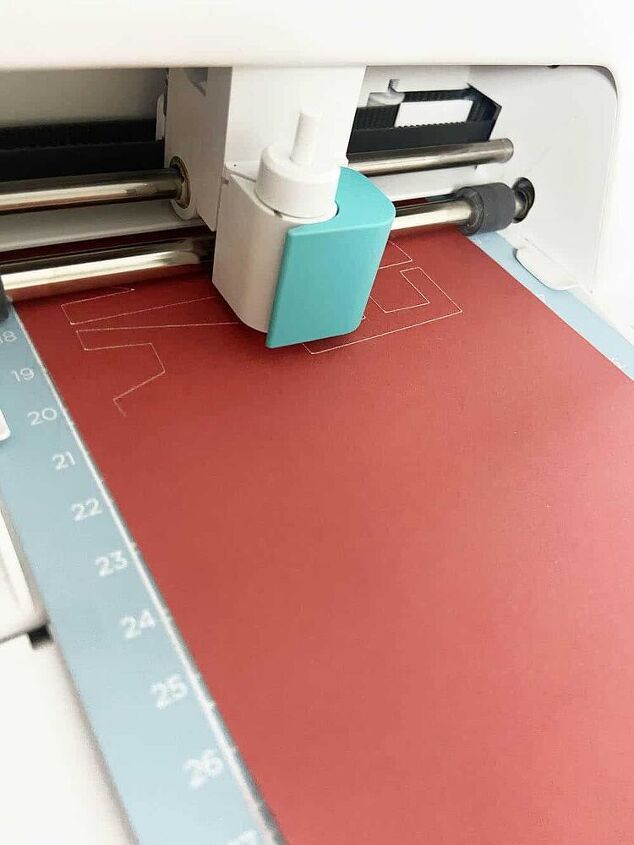
Choose your Infusible Ink color – I went with mint.
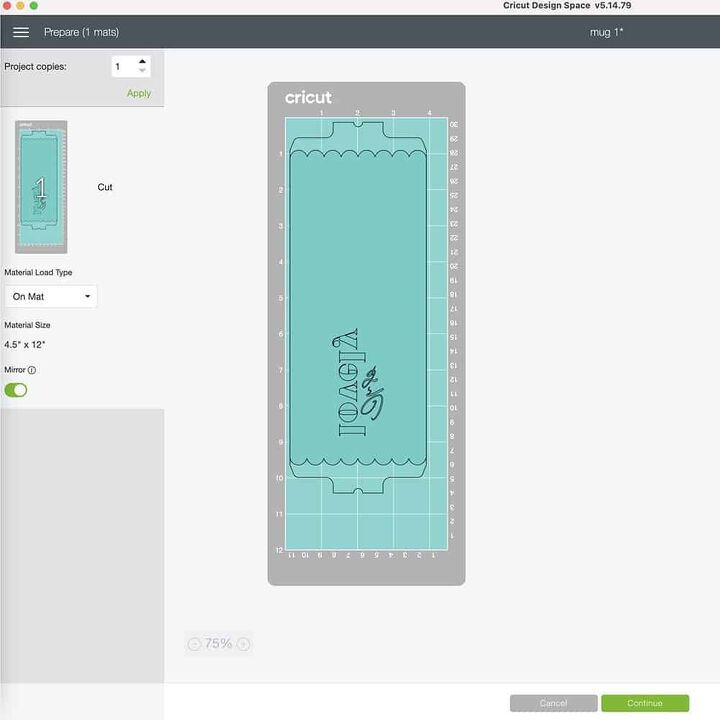
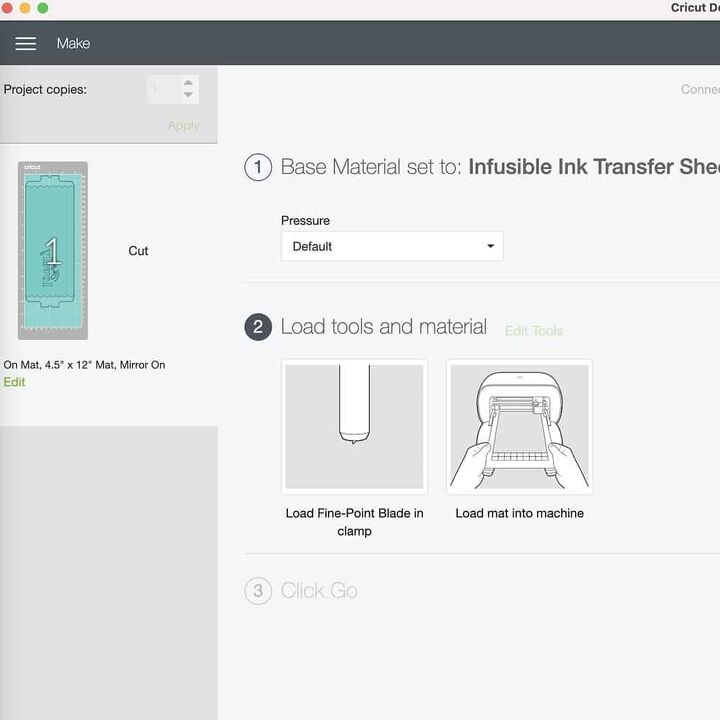
Trim your sheet if needed, add your infusible ink sheet color side down on a mat, and start the cutting process.
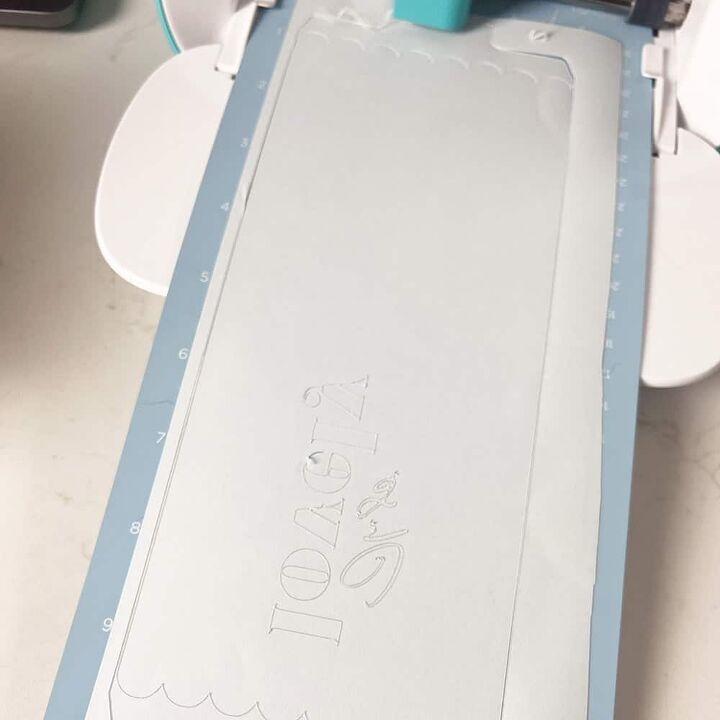
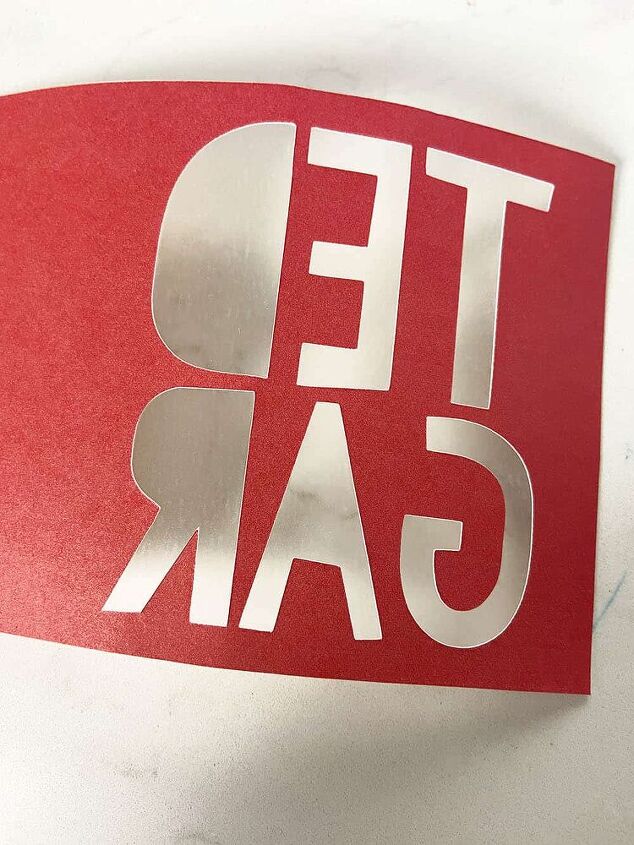
Once your design is fully cut, start the weeding process by gently pulling the mat away from the design. I used my weeder tool to gently pull away my design since it is so thin and delicate.
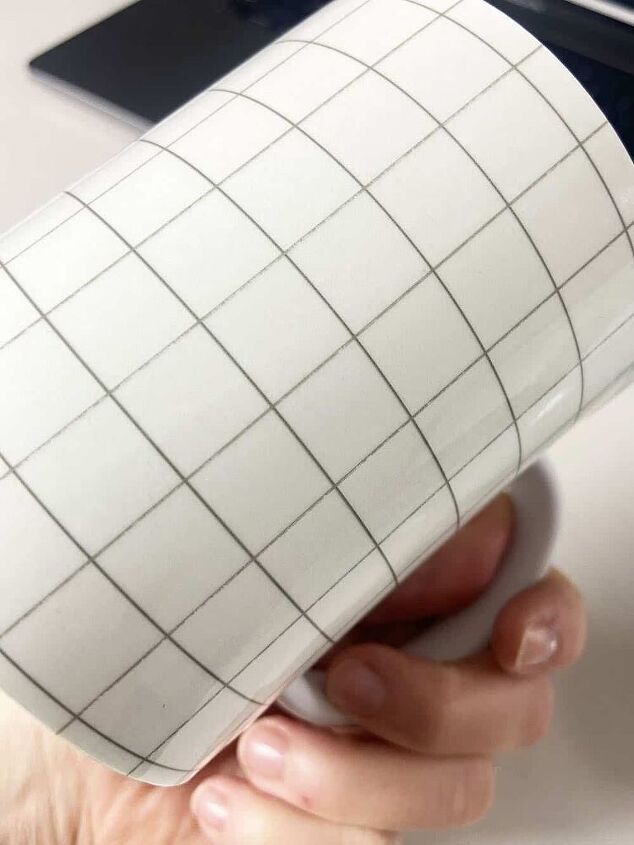
This is how the infusible ink design looks after weeding.
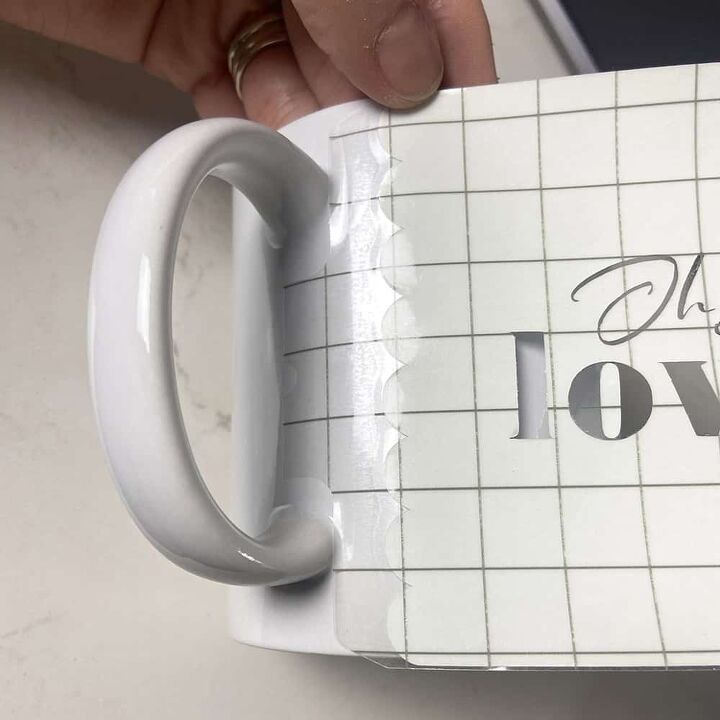
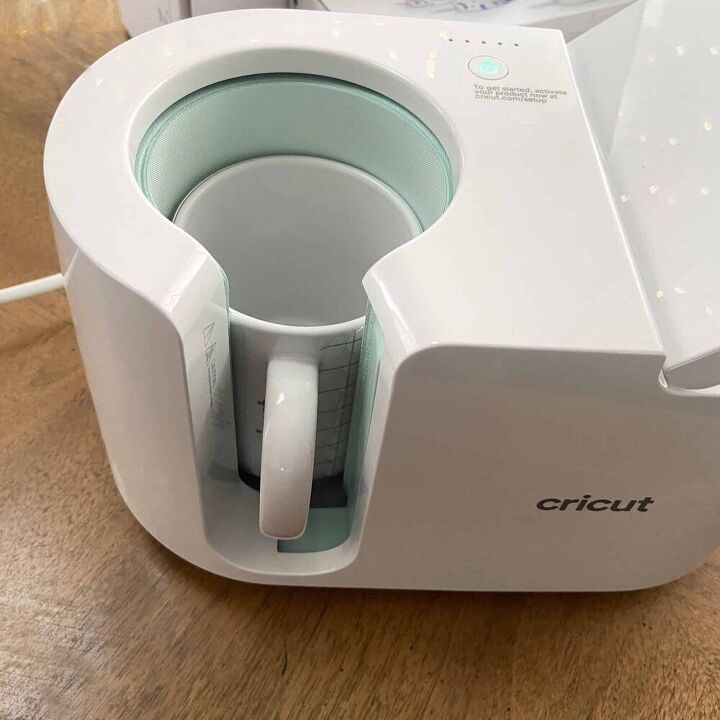
Carefully line up the design starting under your mug handle. I love that this template has a sticky section on each end to adhere to the mug so no shifting takes place.
Firmly push the sheet around your mug ensuring there are no bubbles.
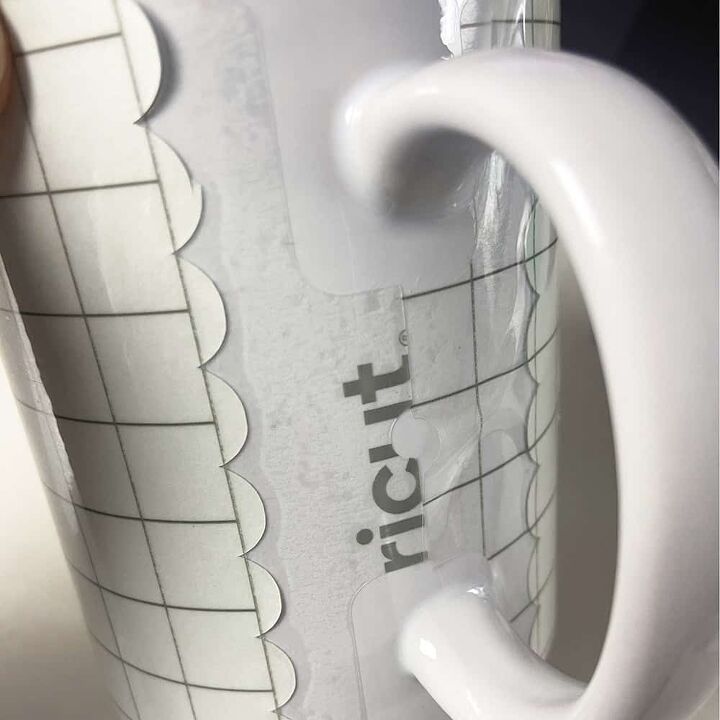
The circles should align under the mug handle. Mine were a bit misaligned here, and to fix that I simply pulled up some of the adhesive section on the right hand side and made sure it was flat.
Here’s the other side of the mug. You can use your Heat resistant tape to tape down any sections that might extra security.
Time to make your mug!
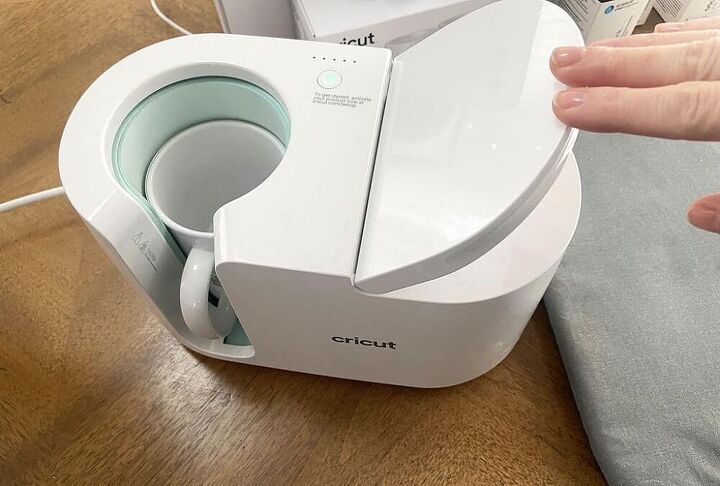
By this time the Mug Press should be hot and ready to use.
It is sooo easy to use, I promise. It is made with only one power button to remove any guesswork. I love the safety-conscious design and auto-off feature.
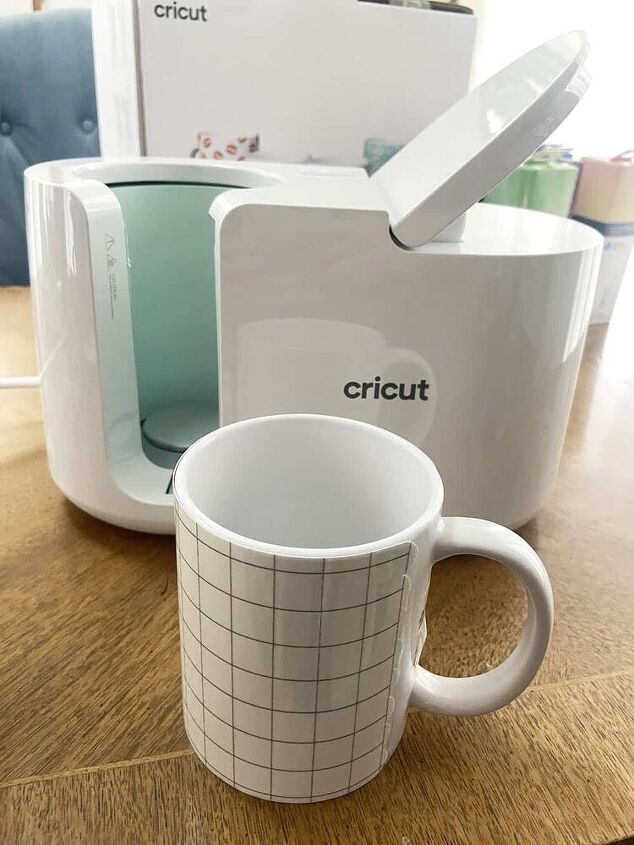
All you have to do is place the mug in handle facing outward, and push down the lever. The Mug Press literally does all the work. So simple!
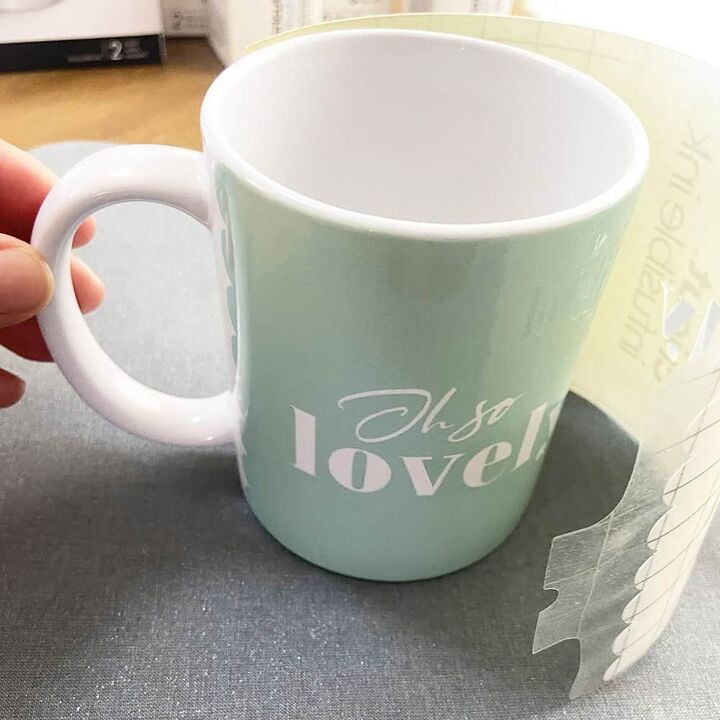
A few minutes later my mug was ready! I pulled up on the lever and pulled out the mug by the handle and placed it onto my Easy Press 2 mat to cool for 15 minutes.
Important note: Every part of the mug will be extremely hot for 15 minutes except for the handle. Please only touch the handle when removing the mug from the Cricut Mug Press.
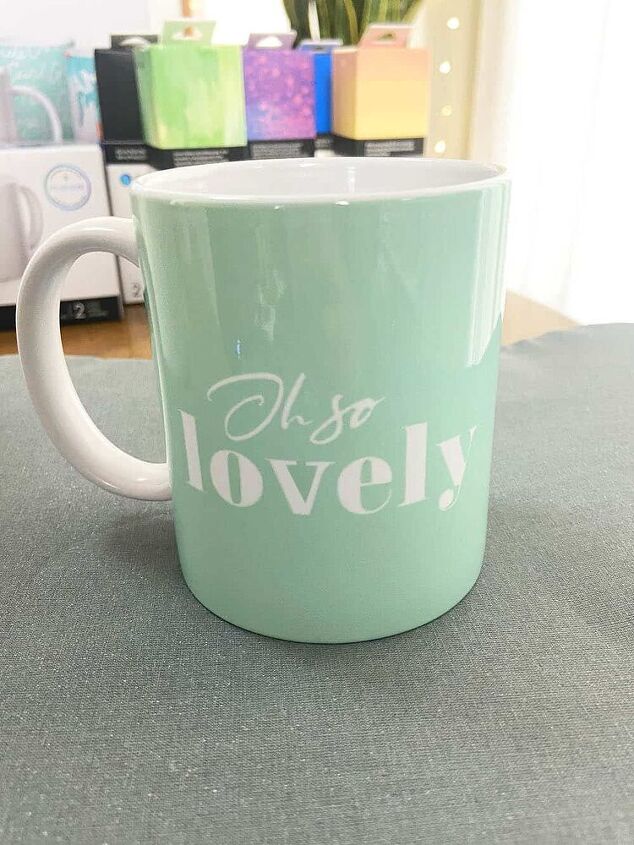
Once cool, I removed the wrap to reveal my mug! It turned out great!
A more simple mug option using Cricut Mug Press
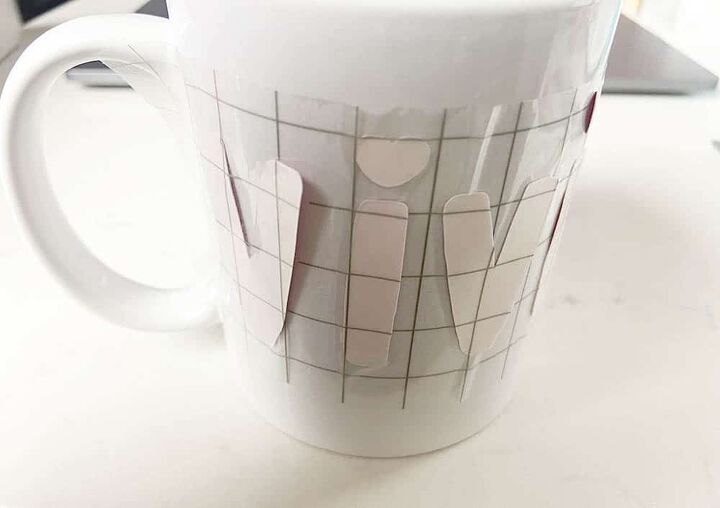
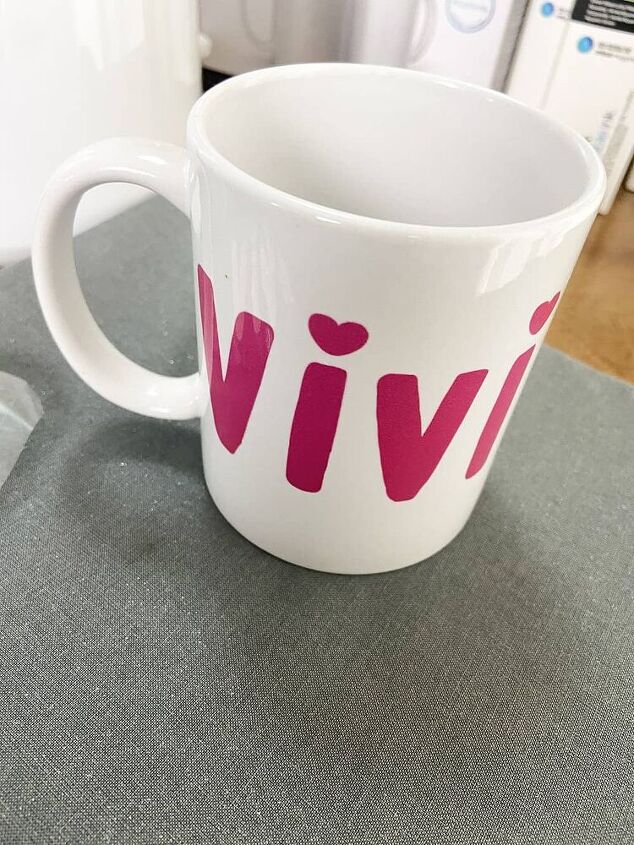
My daughter, Vivienne wanted me to make her a personalized mug for her hot chocolates. She picked out party pink Infusible Ink and I got started.

She wanted her name in pink with hearts on the “i”s, which was so easy – I simply chose a kid-like font in Design Space and typed out her name. Then I replaced the dots with hearts from the image library.
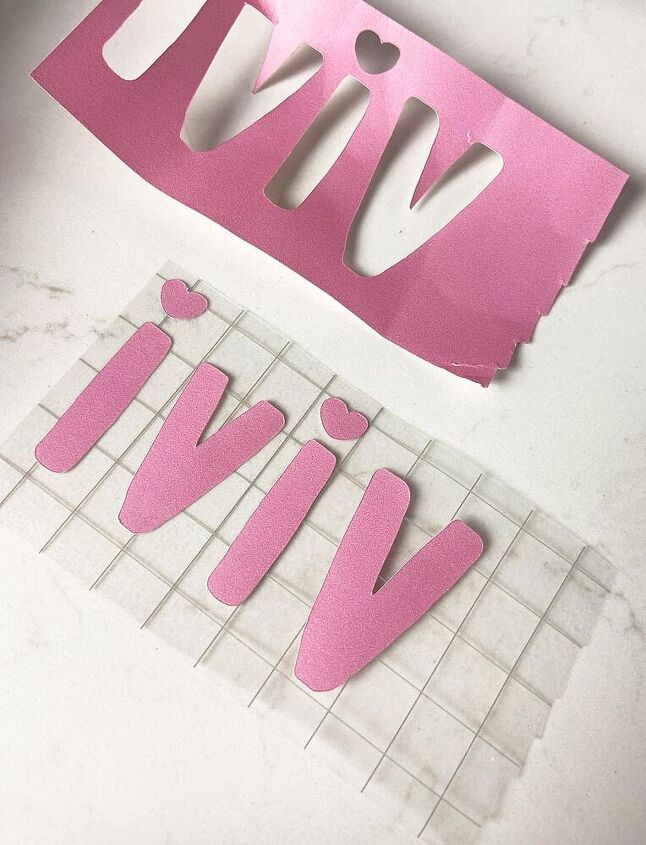
I mirrored my design and cut it out. Since this design isn’t supposed to have a colored background I didn’t print the whole template like I did on my logo mug. Cutting only what I need saves a lot of material.
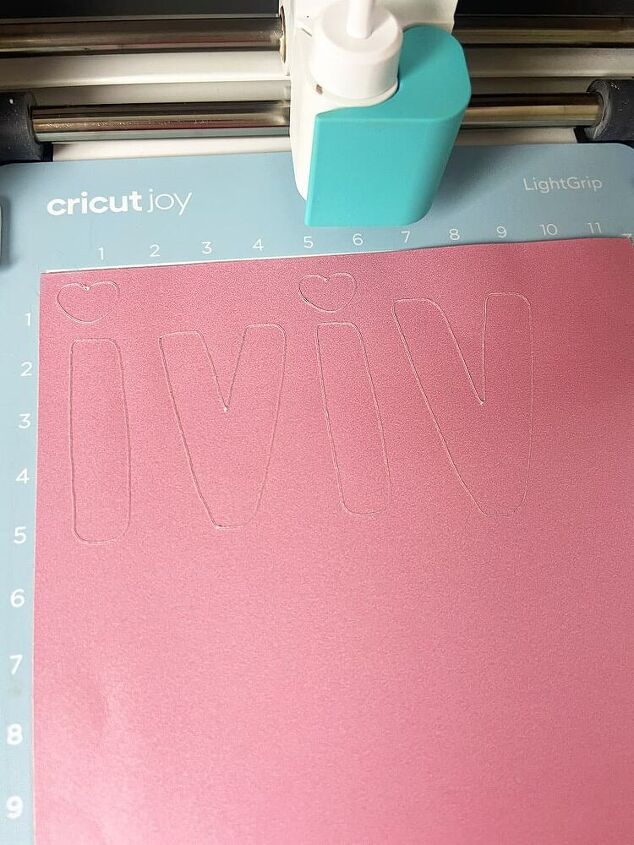
I weeded away the background.
And applied the design to my mug in my desired location.
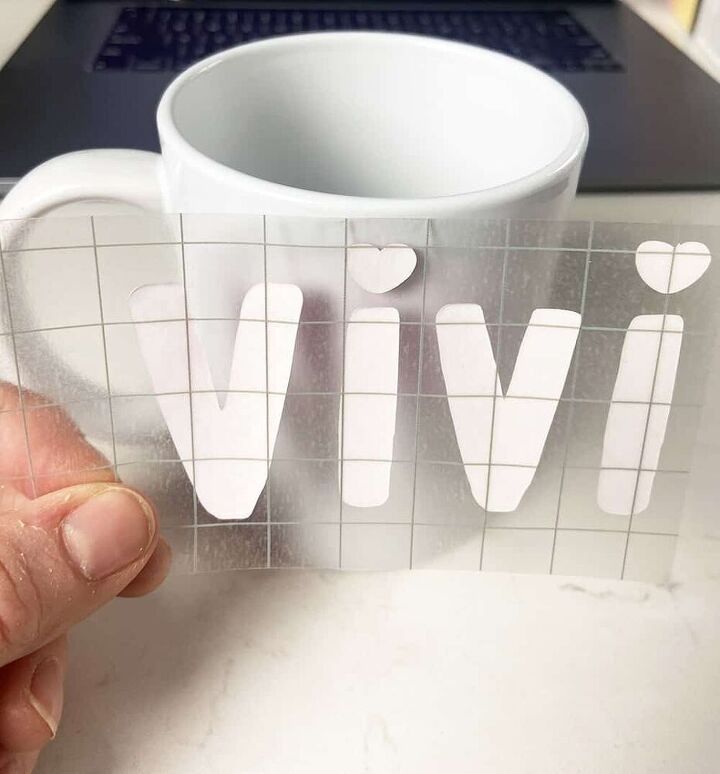
Firmly pressing all around the mug, I ensured everything was in place before I put it into the mug press.
Five minutes later, I had another mug – Vivi loves it so much!
One more mug design idea
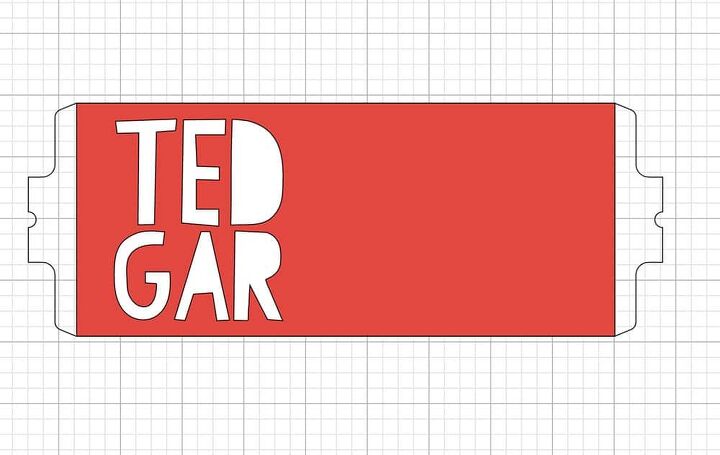
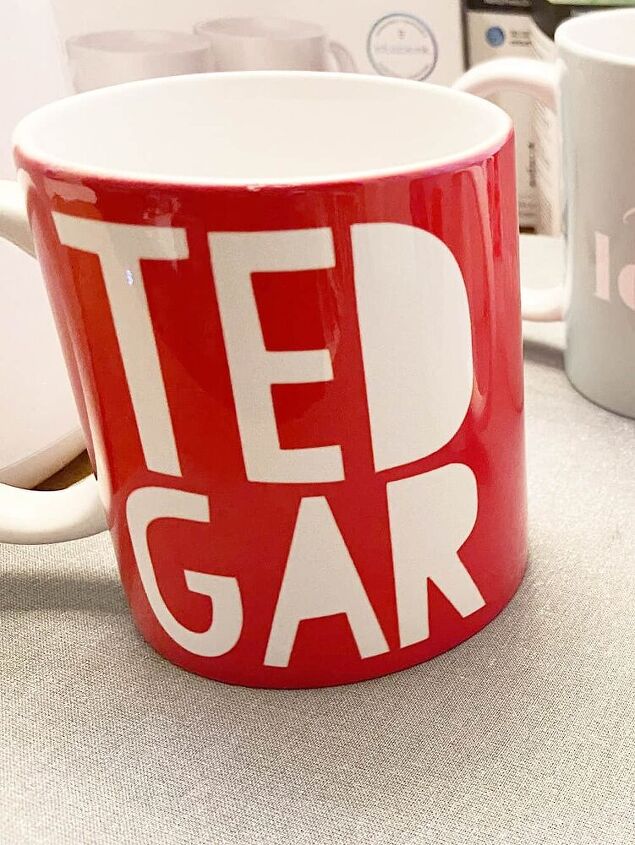
I didn’t want to leave my husband out, so I decided to make him a mug with his nickname in red.
I followed the same steps as my logo mug with a colored background.
Time to mirror and cut!
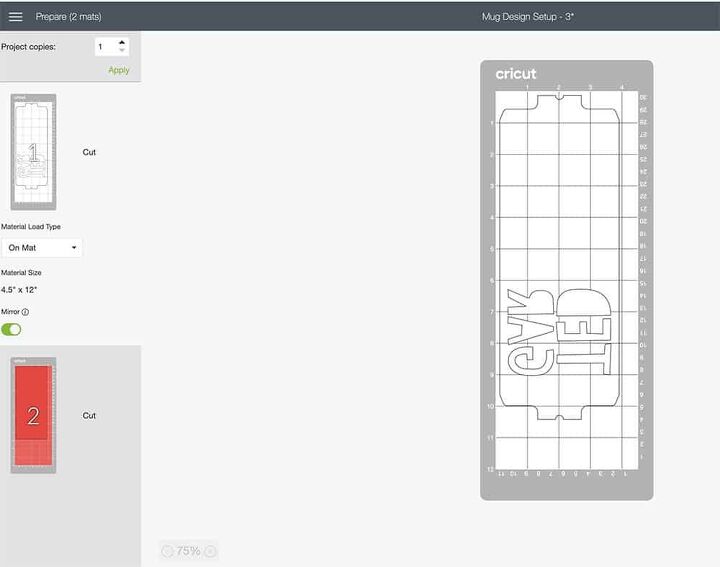
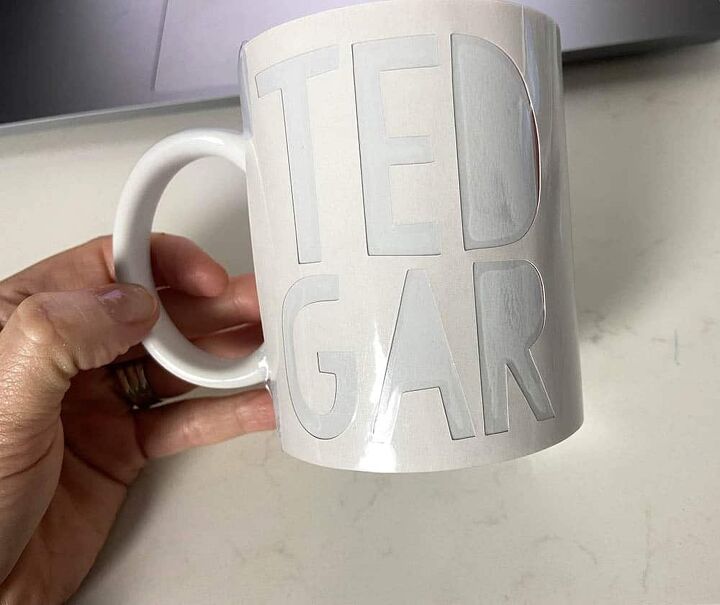
After weeding the letters away, I firmly applied the design to the mug.
Once you do one mug, the others go much more quickly.
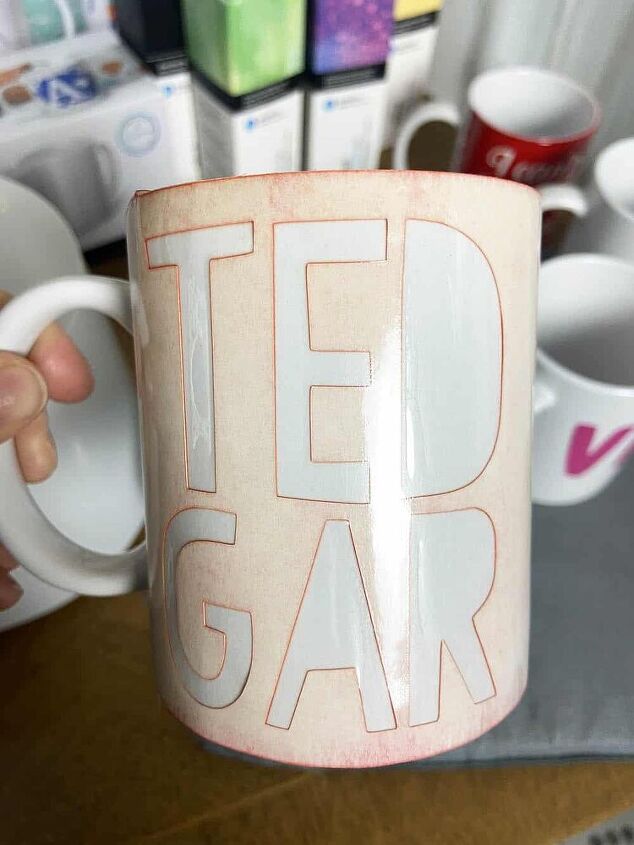
It’s already time to add it to the Cricut Mug Press following the same steps as my first mug.
After the mug cooled, I peeled the outsides away and revealed Ted’s fun new mug!
Everyone loves their personalized mugs and I can’t wait to make lots more with my trusty Cricut Mug Press!
For my next round of mugs I plan on using my Infusible ink pens and markers!
What do you think? Interested in getting your own Mug Press? I highly recommend it!
xoxo
Audrey
This post is sponsored by Cricut, but all opinions are 100% my own. I truly love my Cricut Mug Press, and I think you will too. I make a small commission off of sales at no added cost to you. Thank you for your support!
Pin this Mug Press review and tutorial for later!


Resources for this project:
See all materials


Frequently asked questions
Have a question about this project?