


Secret Wood Ring Making

7 Materials
$35
2 Days
Medium
There has been a great deal of popularity with wood and resin rings. I wanted to make my own. It's incredibly satisfying to make. The neat thing is, the project is functional and sort of easy. Check out the video for inspiration and check out how I made it!
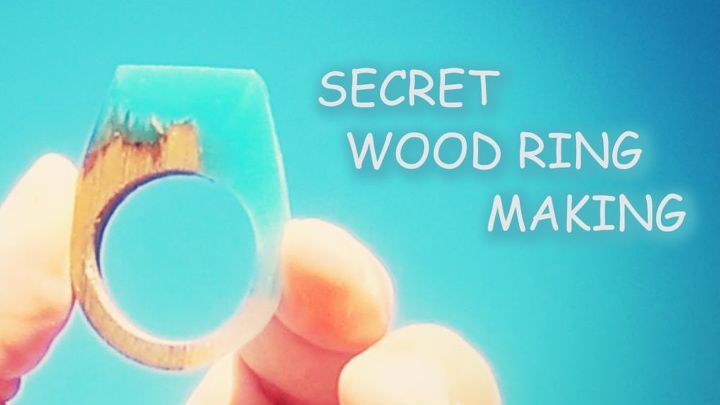
turquoise resin and walnut ring
turquoise resin and walnut ring! You can buy the resin at craft stores everywhere. It's a 2 part resin. You can even use bartop epoxy like I did. It will take around 72 hours to cure...but it's a lot of fun to make.
{
"id": "4794124",
"alt": "Video for inspiration",
"title": "Video for inspiration",
"video_link": "https://www.youtube.com/embed/2sidMLCxGZc",
"youtube_video_id": "2sidMLCxGZc"
}
{
"width": 634,
"height": 357,
"showRelated": true
}
Check out the video for inspiration!

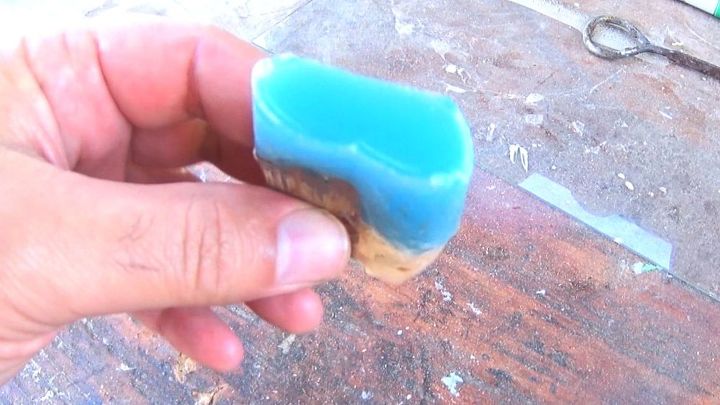
wood and resin blank
I took a piece of walnut wood and wrapped it in packing tape. I also built up packing tape above the wood. This way I had space to pour resin in. You can use a silicon mold too. The idea is to have a wood blank and the other half filled with resin.
bartop resin
The resin you buy at the store will have instructions. Read them and follow the process. These resins usually are a 2 part mix. You can add a drop of alcohol ink or use acrylic paint, just a drop or so. Once you mix it well as per the instructions, you can pour it into your mold. Then just let the resin cure and bond to the wood.
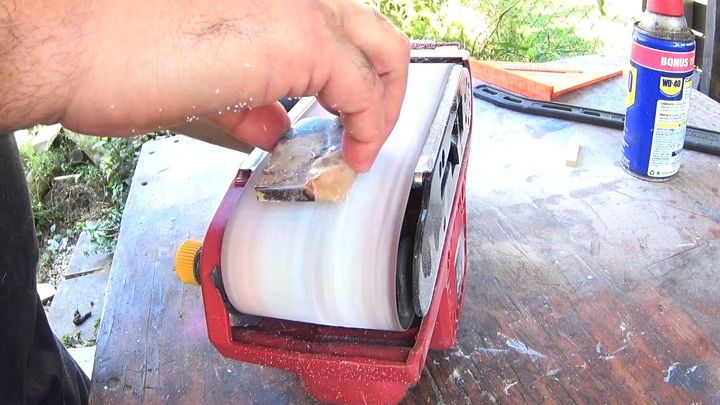
Belt sander
I used a belt sander to remove the excess around the blank. With this project, we are removing material to reach the shape we intend for the final look.
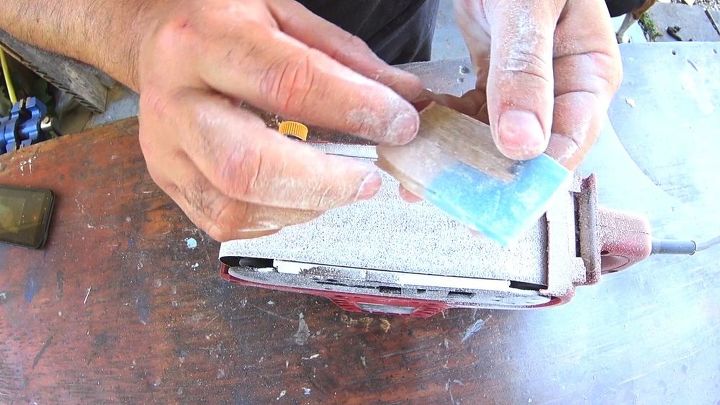
more sanding
Once you have the basic thickness, you can start to shape the ring along the edges using the belt sander.
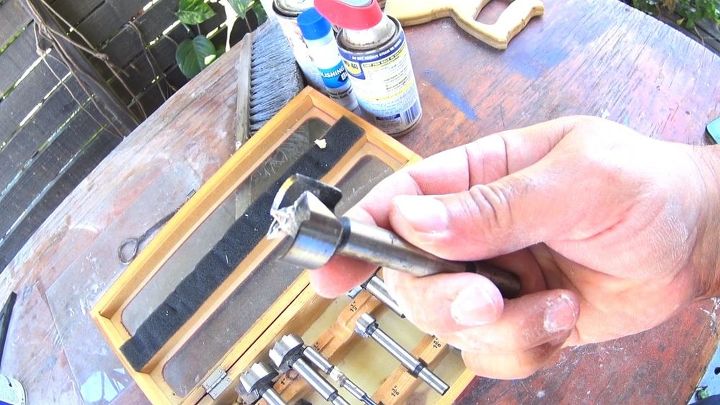
forstner bit
You will need a drill and forstner bit to open the ring hole.
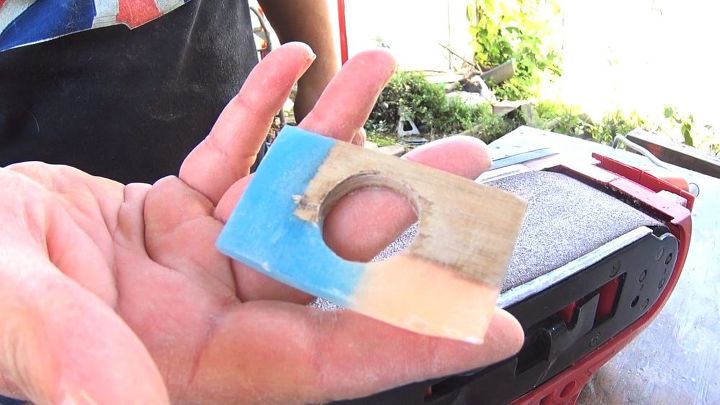
Taking shape
Take your time and use a clamp to hold down your work. This will help to protect your fingers while drilling. The black is taking shape...but let's sand the sides and form the shape we want.
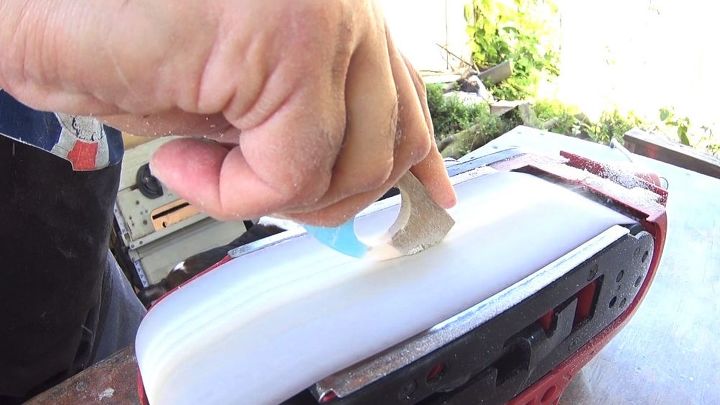
Final shaping
I use the belt sander again and shape the sides to my liking.
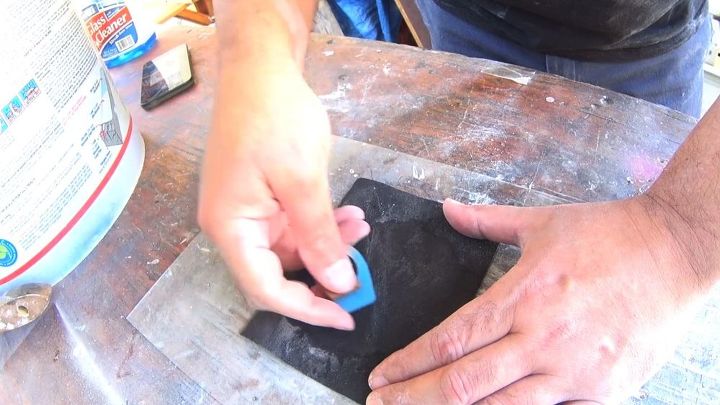
wet sanding
Once you have the desired shape, it's time to use wet sandpaper. You want to polish it up with fine grit paper. So take your time and work with it.

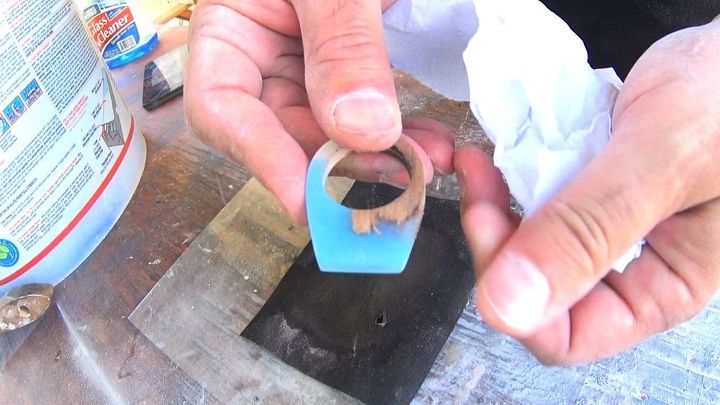
paper towel
Here I'm using a paper towel to remove excess after every sanding.
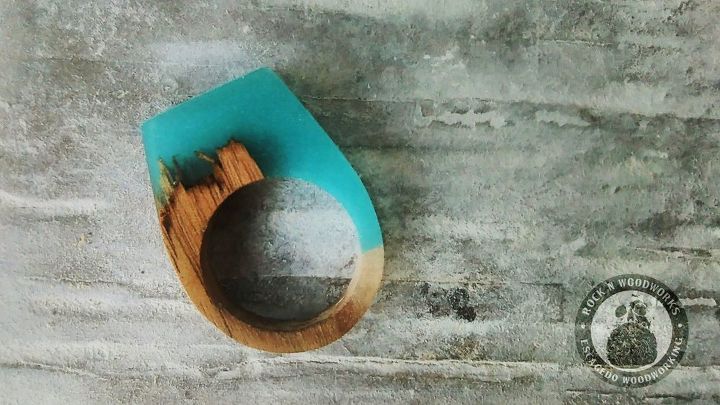
turquoise and wood
The colors of turquoise and wood look stunning don't you think? So let's wrap up the project!
This was a really fun project. It's not too difficult. Yes there are a few things you will need. If you're interested in trying it out for yourself, give it a shot! Yes you will need a few tools and supplies...but if you are into crafts and making things, You will be using these tools for a long while on other projects too. All you need is a belt sander, sandpaper, Resin, A drill, forstner bit and some inspiration. Thank you for reading.
If you missed the video, I recommend you check it out for inspiration. Catch you next time!
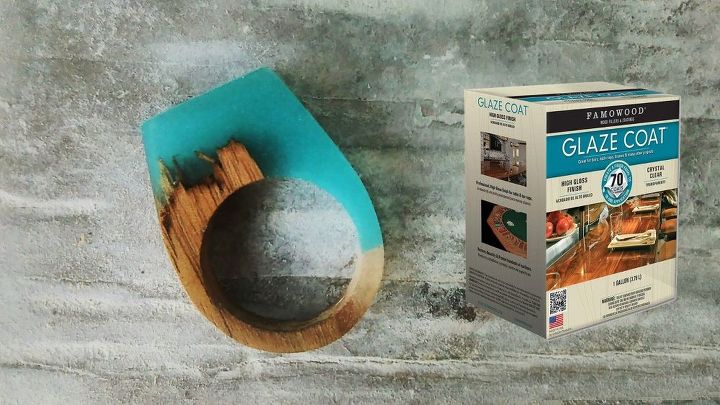
Here's a picture of the Bartop epoxy resin I used. As mentioned before, you can find similar 2 part resins at craft stores as well. By the way, you will only use a small amount of epoxy for one ring. So the 2 bottles that come in the pack will serve you well for many projects.
Let me know if you want to try this project out.
Comments
Join the conversation
1 comment
-
I watched the video and learned that there is a lot of tedious work involved and an artists eye for detail. I liked what you did with this "foreign" object and made it your own. Thanks for showing what you do and how you do it - IT'S ALL GOOD.


Frequently asked questions
Have a question about this project?