


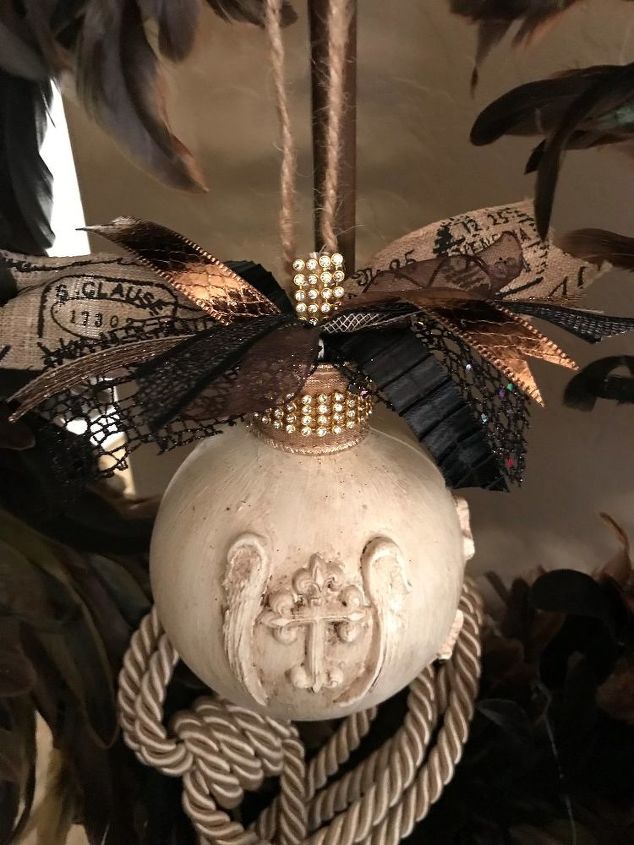
Angel Wing & Cross Ornament

My daughter and I wanted to try these dimensional ornaments, I keep seeing them so, I went to the craft store and looked at all the clays. I decided on the paper clay because when it dries it becomes firm. I thought this would be perfect. I found a mold they didn't have many choices. I like angel wings & crosses, so I grabbed that and headed to the checkout. When I returned home we open the clay and mold and below I will give you step by step instruction on how we did this!
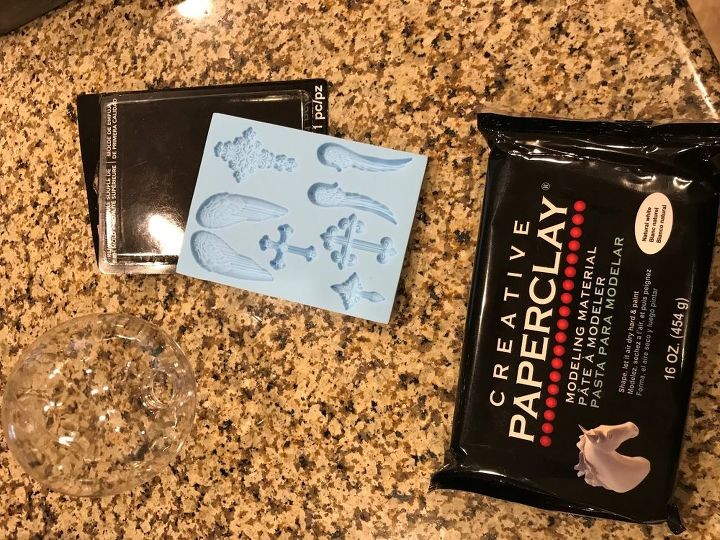
Gather all your materials:
- Mold
- Paper clay
- Plastic bulb (ornament)
- Ribbon
- Glue gun
- Spray paint
- Scrapper
- E6000
- Chalk paint
- Wax
- Painter tape
- Ribbon wire
- Paint brush
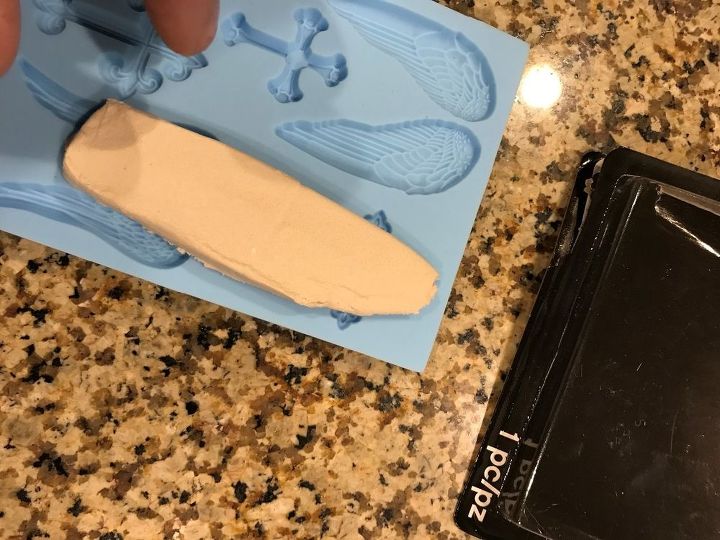
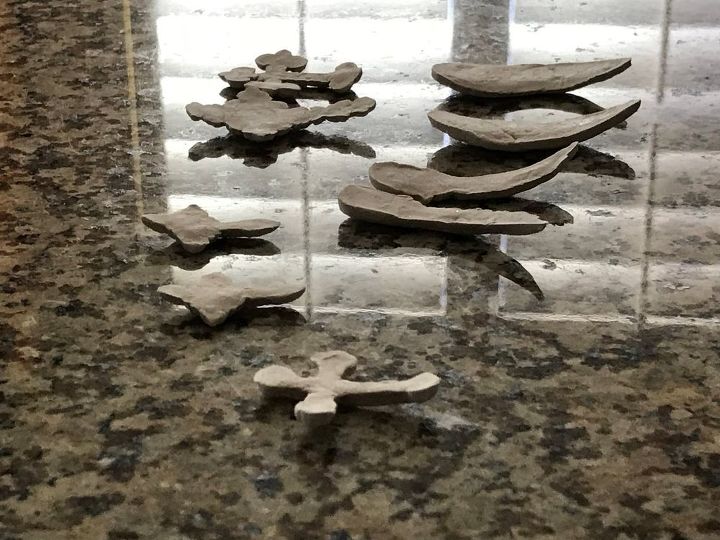
Grab your paper clay and mold. When filling your mold with clay I noticed over filling it all the way was not very successful. This led me to only fill my mold with a thinner layer of clay then, using my scrapper I pushed the clay down. It is important to push your clay down this way your clay reaches all the details in your mold. However, it was easiest for me to push down and scrap off the excess clay at the same time because this left smoother edges along the clay once dried.
This is the scrapper I used. This is a Pamper Chef scrapper. it's a free one from a party I went to. Worked great to clean edges perfectly.
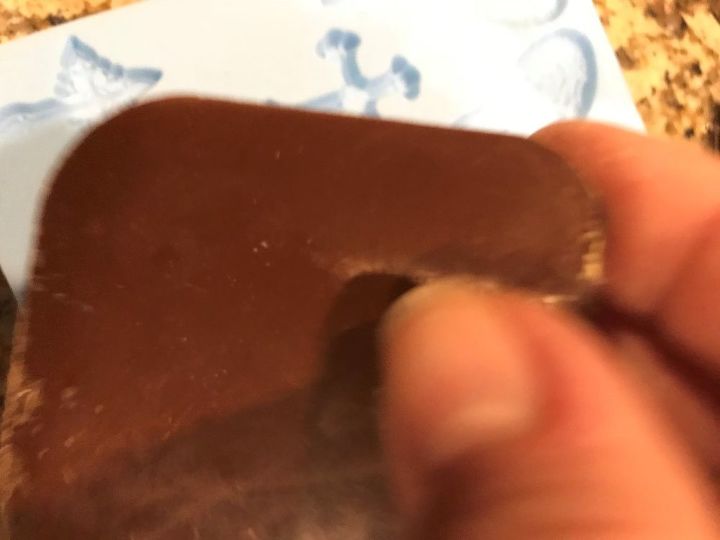
See how its perfectly clean on edges. I found this works best and next you can see I just bent the mold and popped them out. I did one design at a time.
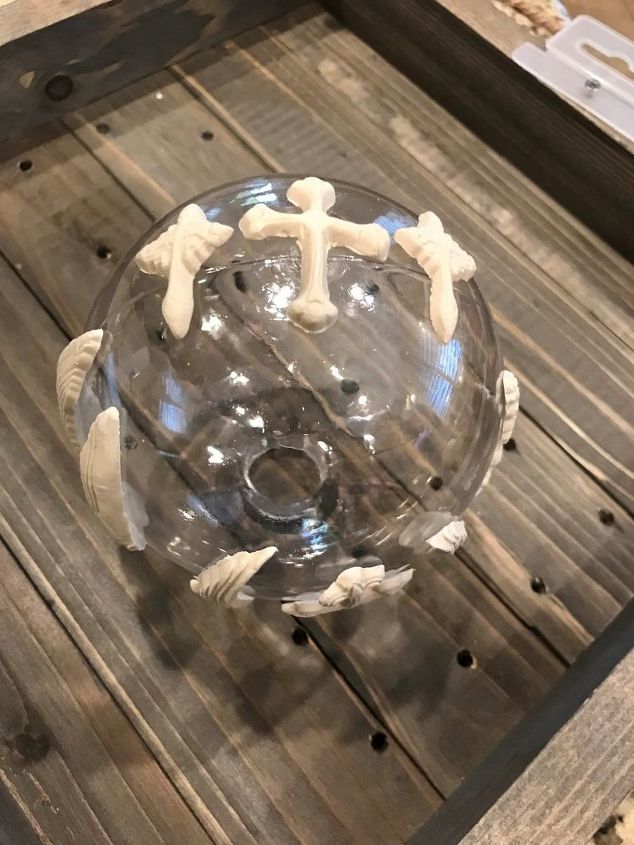
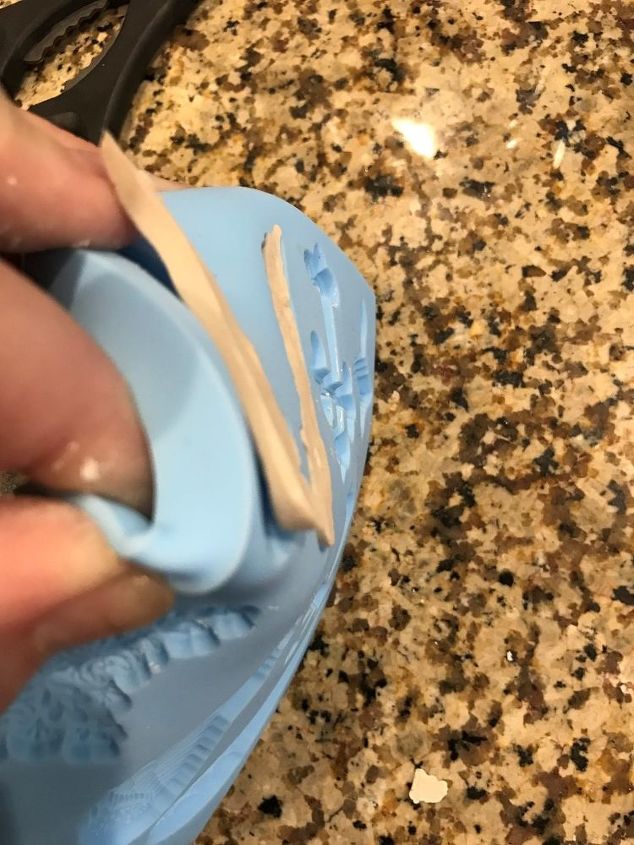
I did not let the clay dry entirely through because once I removed my clay pieces I laid them over my ornament. By doing this it allows the clay to take the shape of the round ornament so there are no edges that are raised or lay oddly.
Once I found that my clay pieces were in the shape I liked best. I let them completely dry. This allows the clay to harden and hold the shape of the ornament. while that dried I
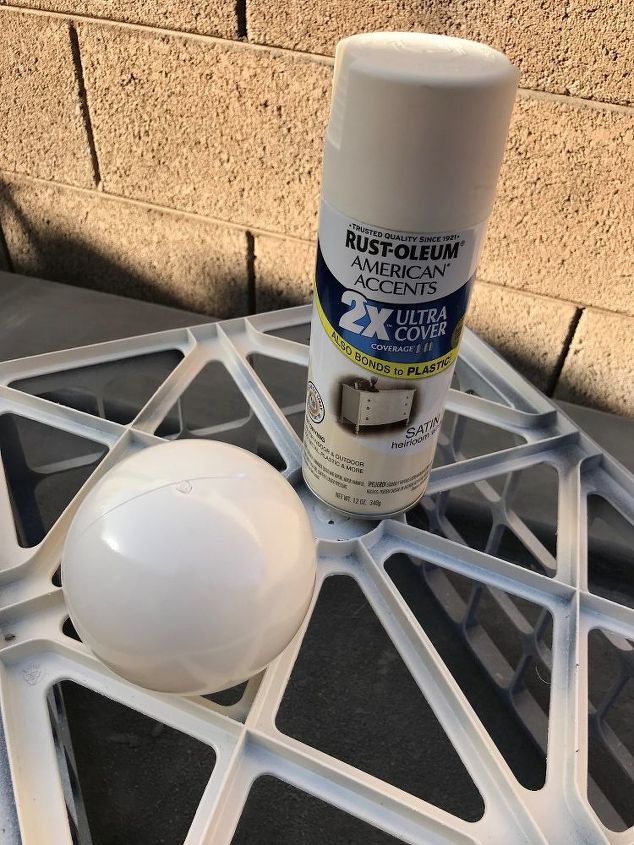
Sprayed my ornament with the spray paint. You can use whatever color you prefer although I suggest sticking with a satin. On mine I used the satin heirloom white.
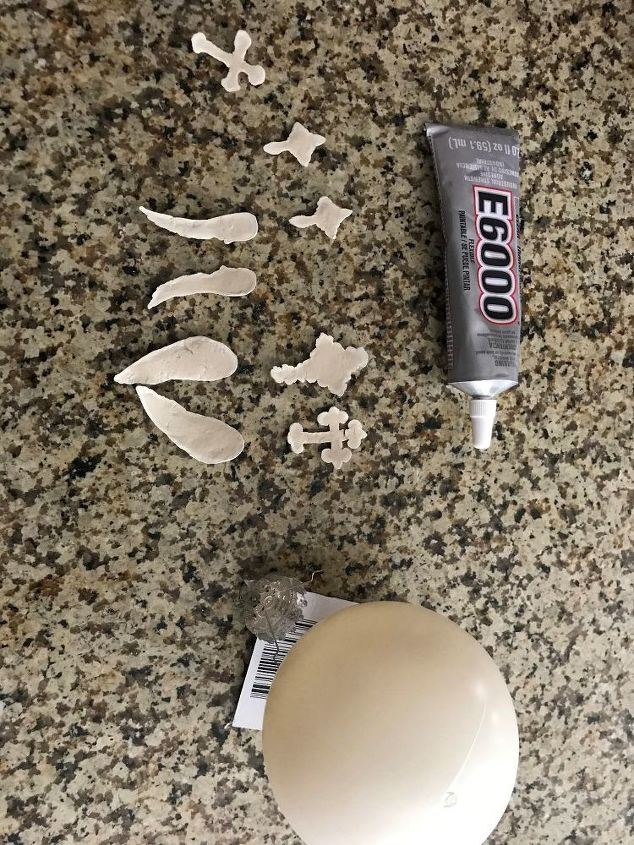
I then took the E6000 and secured the clay pieces. I choose to do this so that it just ensured the clay pieces would not fall off over time. E6000 is really strong.
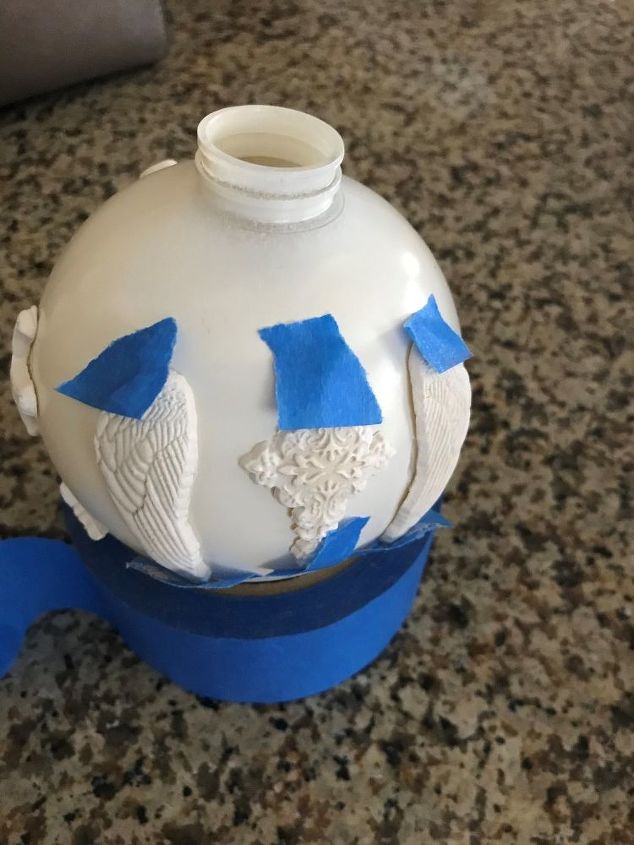
I then used painters tape to secure the pieces in the mean time when the glue was drying. This helped the clay pieces not slide or shift from where I wanted them on my ornament
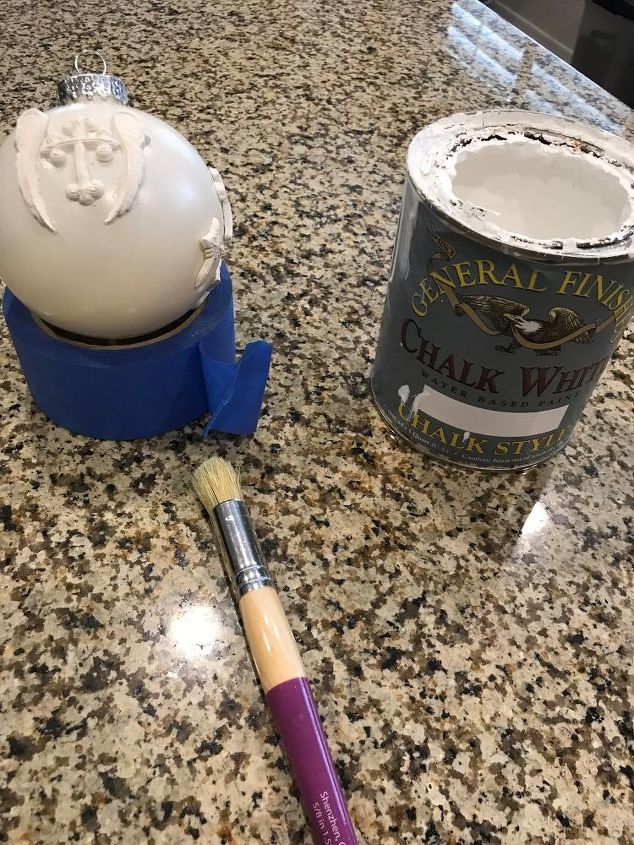
Finally, with everything dry I used chalk paint and painted the entire ornament and clay pieces. I used General Finishes chalk white.
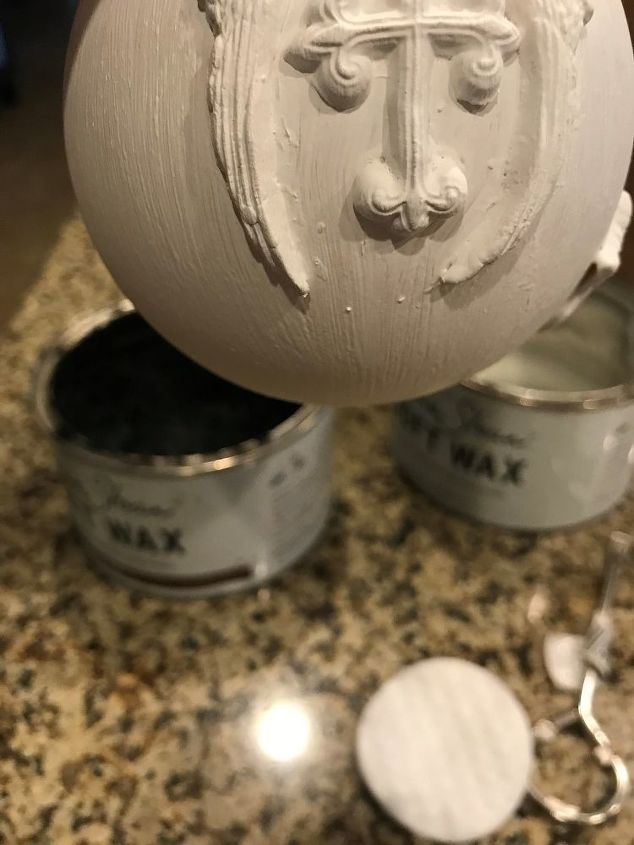
Once I let that fully dry I used Annie Salon clear wax and waxed the ornament. I followed with the dark brown Annie Salon wax after and let it sit.
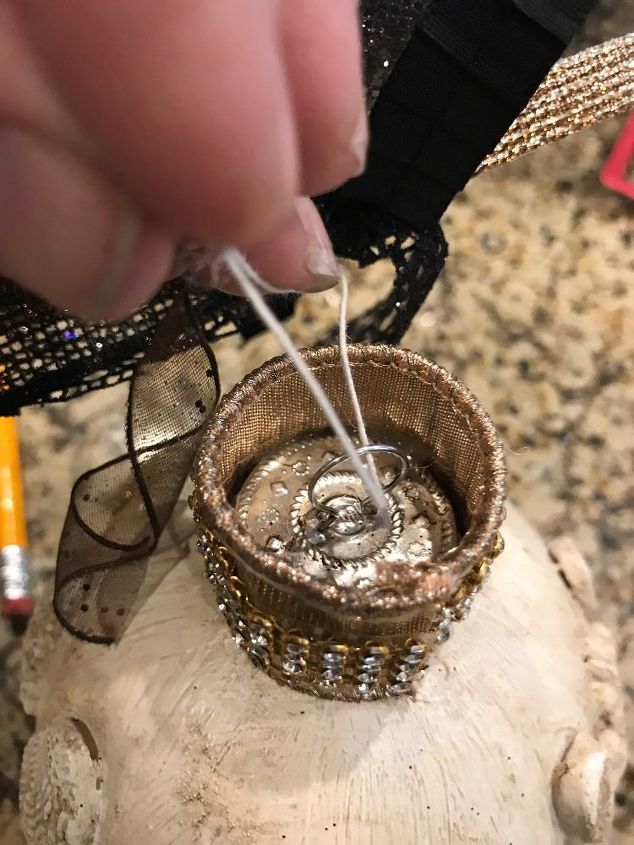
While the ornament was sitting, I took the cap and glued a diamond ribbon around to hide the ugly mental. To secure the ribbon I just used the hot glue.
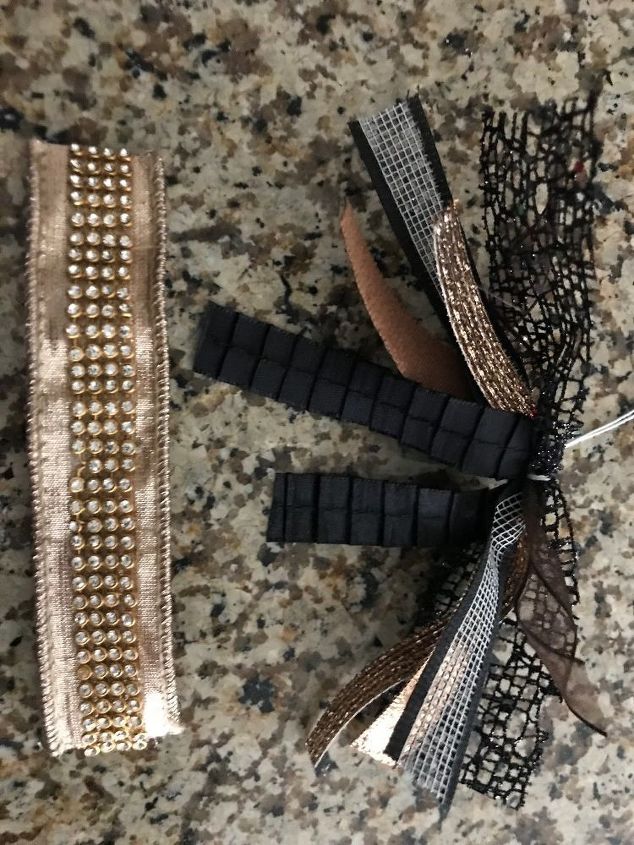
Then, I gathered about 6 different ribbons. I choose ribbons that were different shades, colors, and textures to give that fun look. I purchased all my ribbon from a local store, The Ribbon Store, they have tons of options and they even have an online store I believe. I laid my 6 ribbons and then pinched in the middle like an accordion. I then used my ribbon wire to wire the middle of all the ribbon tightly. I pulled my wire threw the ornament caps loop and twisted this to secure my ribbon to the cap. I then took the hot glue and glued additional diamonds on the wire.
Finally, I added some burlap twine through the caps loop to be able to hang from my tree.
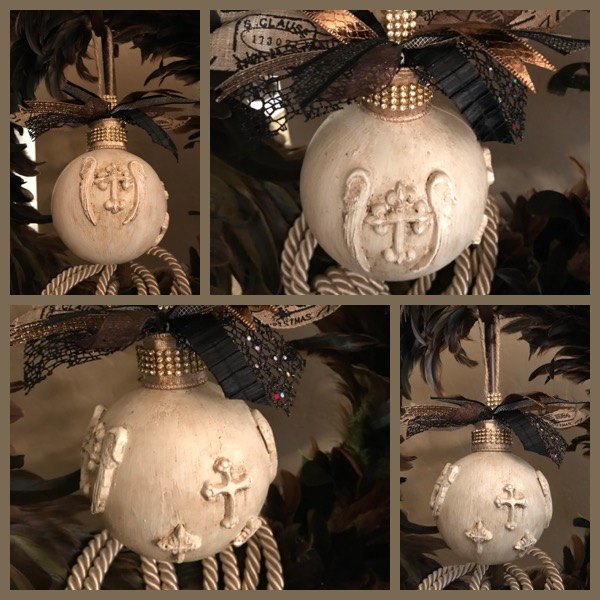
This is the ornament on all the sides
This project is time consuming because nearly every part needs dry time. However, the results were fantastic, and we were extremely please with my new addition to our ornament family. Happy Holidays! See more at Gilbert Marketplace on Facebook and YouTube
Resources for this project:


Comments
Join the conversation
-
Thank you
-
Still a great one for Christmas


Frequently asked questions
Have a question about this project?
What are the ivory rope loops that are behind the ornament?
Love what you did also how large is the bauble?
Fantastic is right. Where do you find all these products? I really mean, how do you keep finding ways to use so many different products? You are so artistic and creative. Fabulosity! ☺️