


Antique Inspired Ornament Makeover

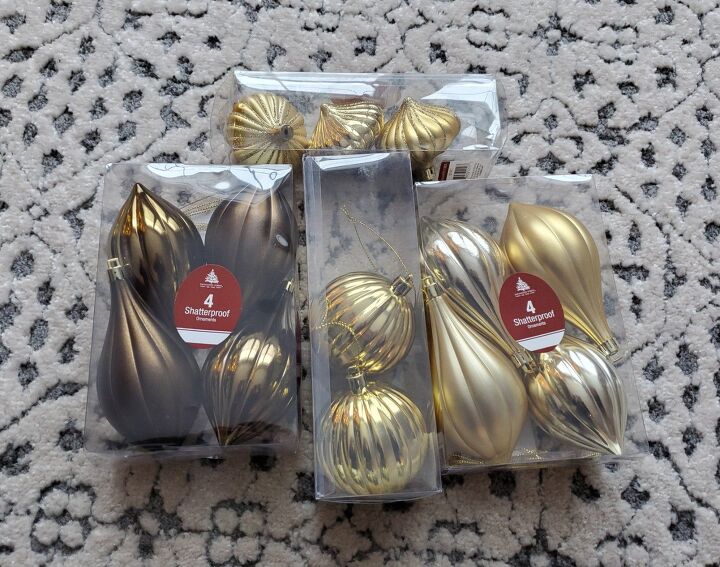
I love old ornaments but most of my antique ornaments are glass & very fragile. I love using them in my holiday decor, but this year I decided I wanted a neutral color palette.
I also decided to buy shatterproof ornaments, so I can use them for years without fear of them breaking.
The following tutorial is how I took a few packs of $1.99 shatterproof ornaments and created "antique" ornaments I can use for years.
Start by looking for ornaments you like the shape of. I love the shape of these and the colors are nice too. If you can find ornaments you like the base color of means that the base color can show through the paint and you'll still like them.
If the only ornaments available are colors you don't love, you can still use this method of antiquing them. I would even suggest spray painting them with a white primer coat before adding your paint mixture to them.
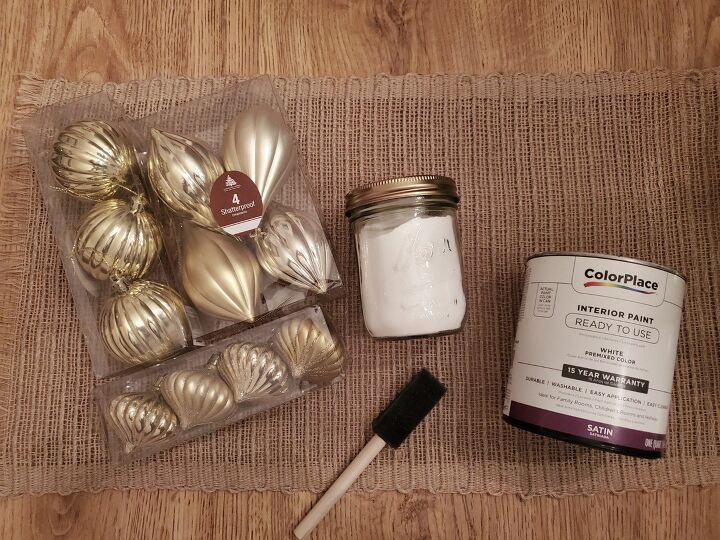
Material List:
- Paint in a color of your choosing
- Baking Soda
- Foam Brush
- Ornaments
- Antiquing wax
- Paper Towel
- Gloves (optional)
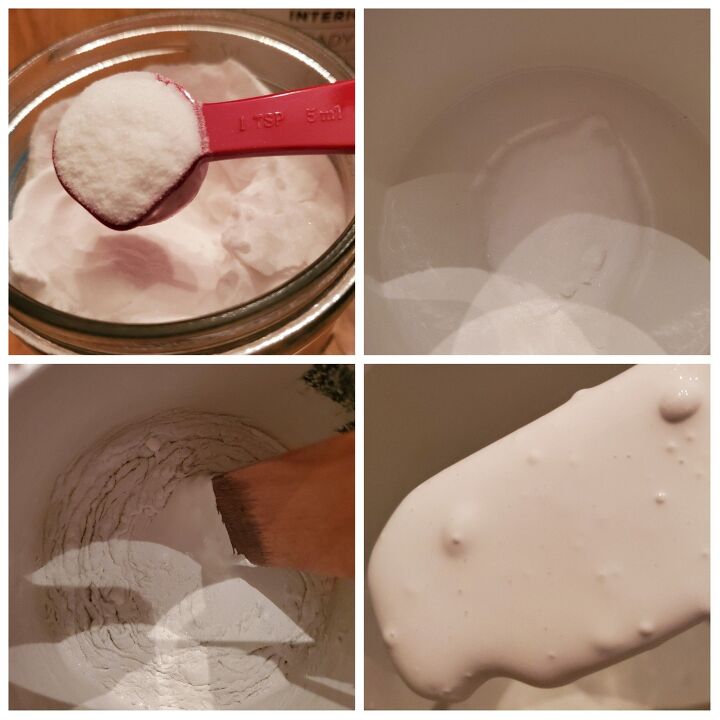
This is not a new technique, but it is for me. All the recipes I found showed a paint to baking soda ratio of 5:1. I had about a 1/4 of paint left in a quart size can and I kept adding teaspoons of baking soda to the paint until I liked the consistency. It will get thicker the more you add. Stir it well.
I ended up using 10 tsp.
My ornaments are shiny so I painted a first coat as a primer.
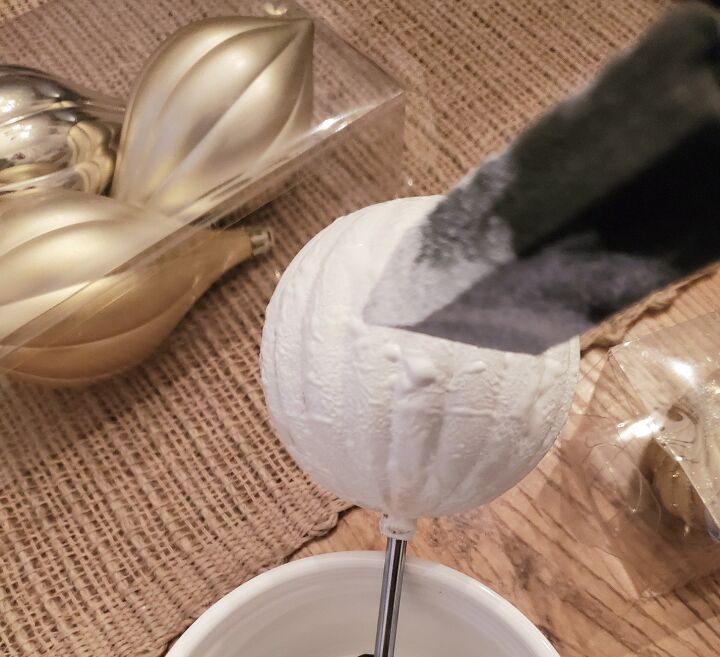
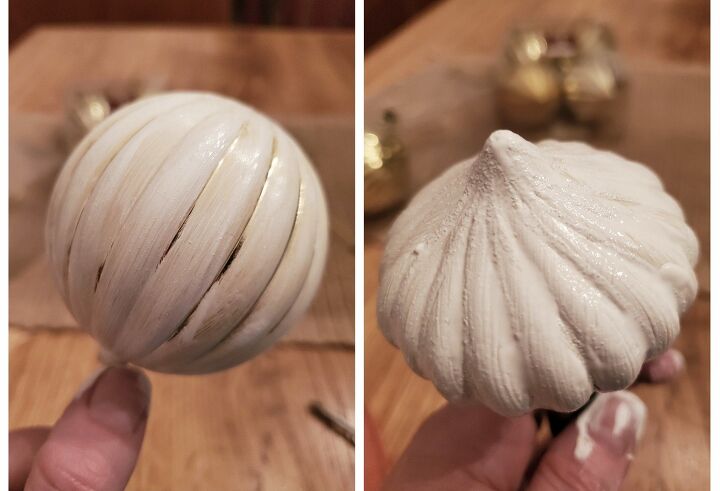
Once the base coat of paint dries you can start to add more paint. I used a foam brush and a pouncing motion to add more paint to areas creating a little more texture.
Don't be afraid to experiment with your projects. Paint is so forgiving and can always be repainted if you end up not liking the outcome.
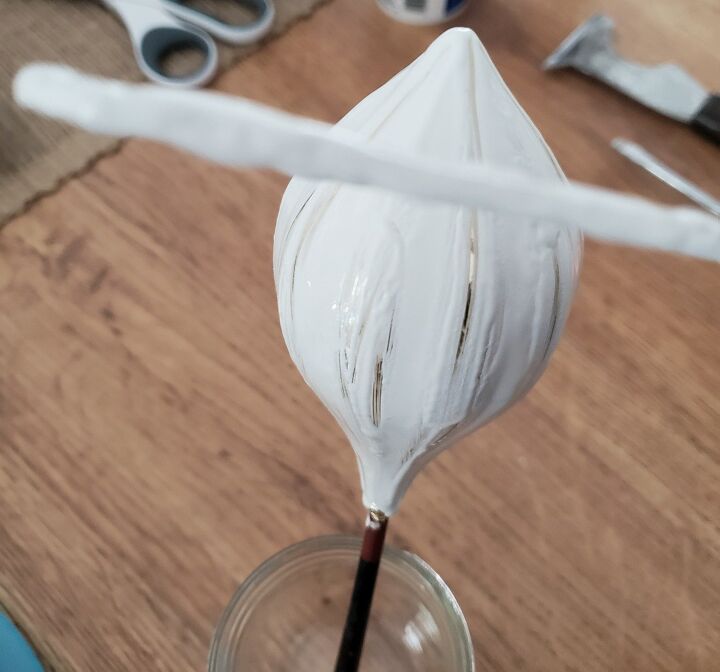
I decided to try using my paint stirrer to coat one of the ornaments and then scraped the edges to reveal the gold color underneath.
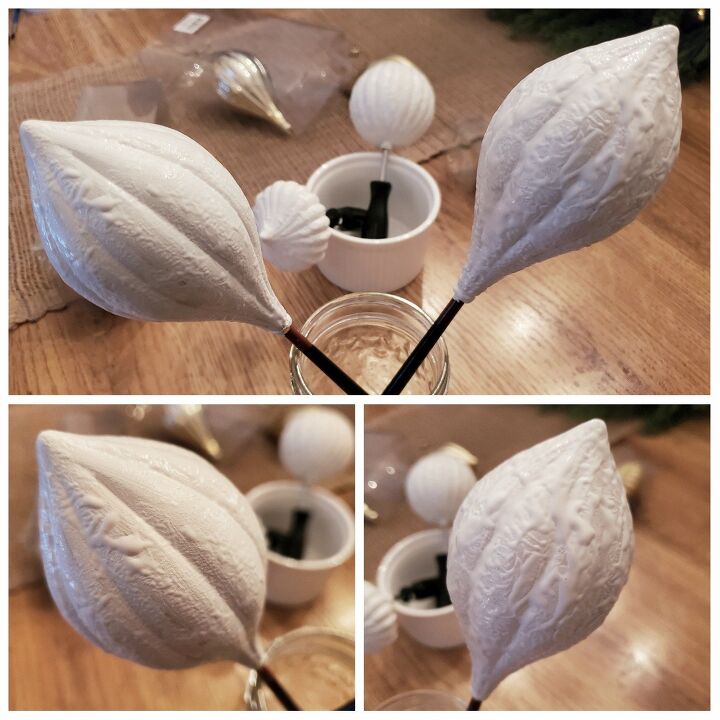
Here you can see my set up for drying. I could have done better, but using paint brushes was the quickest way for me to get my project done and it works.
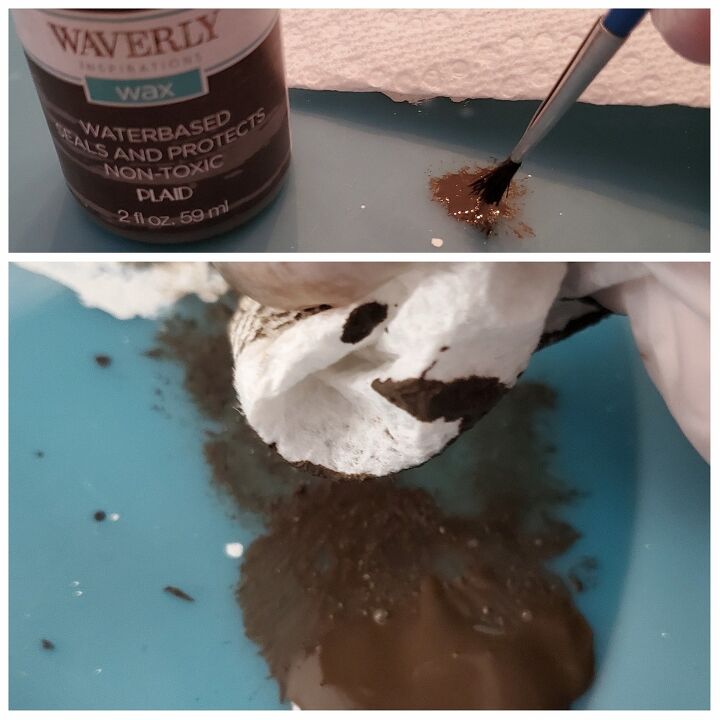
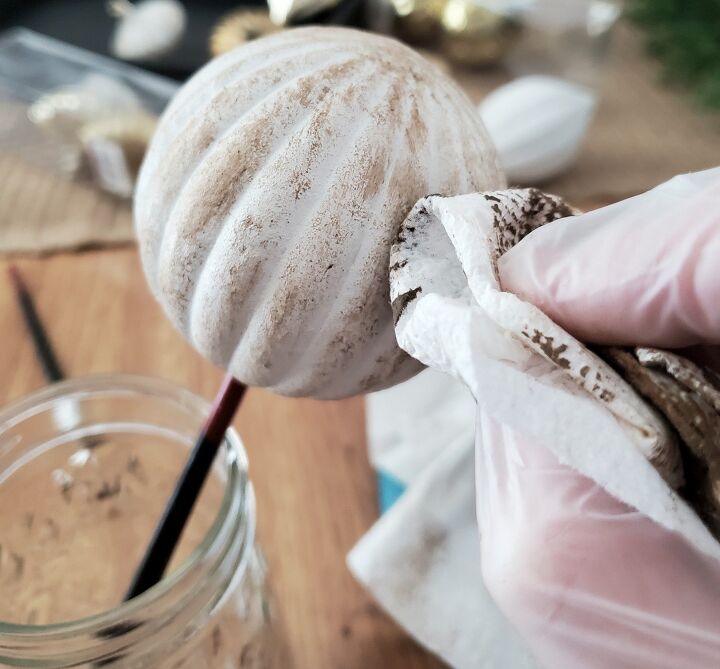
Once dry, I used an antiquing brown wax to go over the baking soda paint to "age" the ornaments.
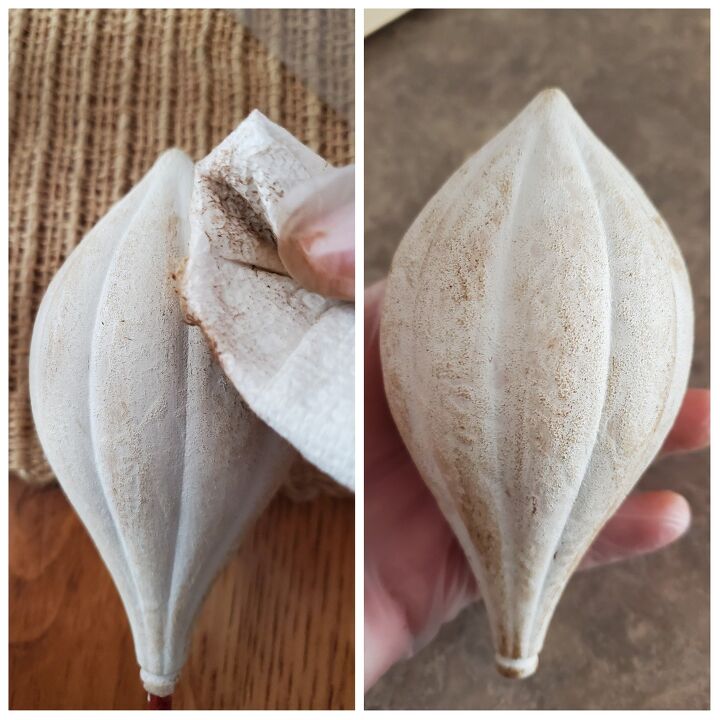
You can go as heavy or light as you want. This is a light handed waxing.
On this ornament I used a bit more antique wax.
I use a paper towel to rub the wax onto the ornaments. I also went back and forth between wiping and pouncing the antiquing wax.
The best part...if you don't like the look or you get too much in a spot, you can try to wipe it off with a clean paper towel. For me, that worked best if the wax was just applied. I used a little water on some spots and that helped some areas that were drier. If those 2 methods to remove some of the wax doesn't work...repaint it!
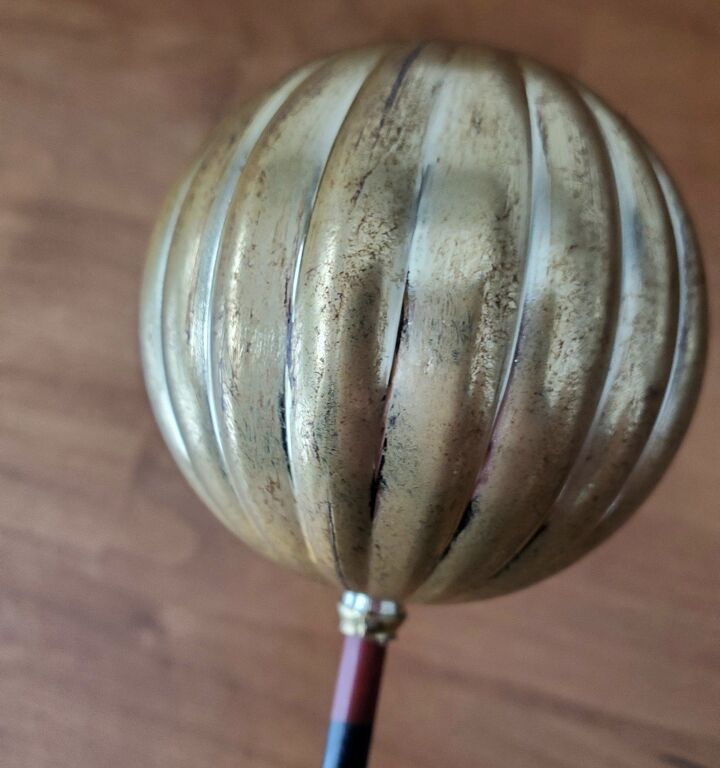
Then I decided to try adding the antiquing wax to my gold ornaments without the baking soda paint. Since these ornaments were shiny gold I pounced a lot of wax onto it. I love it!
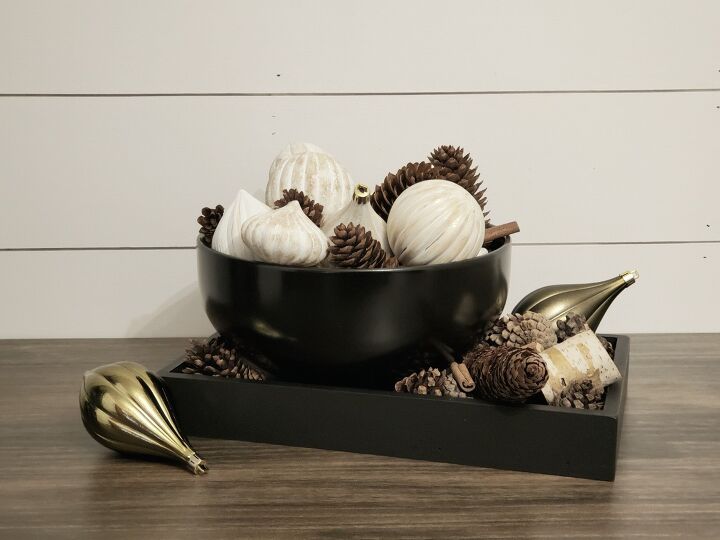
Now is the fun part. Styling my new "antique" ornaments! I put all the ornaments together in a bowl with pine cones, cinnamon sticks and then added them to a small tray with more of the same.
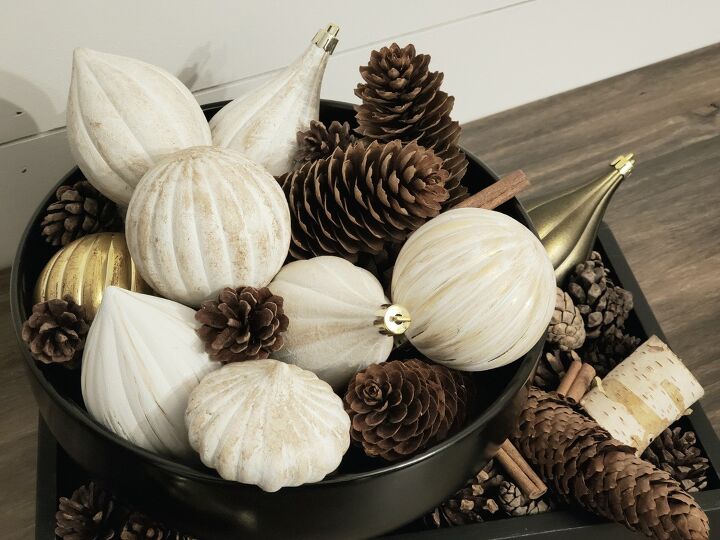
I love how it turned out and think I am going to make more ornaments and find a bigger bowl or tray to use as a display for next year.
Resources for this project:
See all materials


Comments
Join the conversation
-
Pretty nice! Looks antique for sure.
-
Oh my gosh…I’ve been looking for just the right items to put in my basket. So I kinda settled on different size pinecones. This was to make my hubby happy. I swear I think he thought I was going OCD on this basket issue lol. Now that I saw Your basket after your remake on plastic ornaments addition I have found and will make my final touches to my basket…A great big thank you for such beautiful ideas.
Gail and her basket


Frequently asked questions
Have a question about this project?
What was the reason for the baking soda addition to the paint? Could you just have painted- distressed-waxed and achieved the same thing? My fav was the dark wax over the original ornament