


DIY Christmas Sweater Ornaments
Last year, I made some faux mercury glass ornaments and thought they were some of my favorite homemade ornaments. Until today. These DIY Christmas sweater ornaments are so easy to make and can be customized to your style and favorite colors for the Christmas season!
Whenever I am browsing the internet – mostly Pinterest, I always fall in love with the look of the Scandinavian designs. I especially fall in love with it around the holidays. There is a minimal, simple vibe that comes with the Scandinavian design that is just beautiful to me. Our holiday decor doesn’t look like that, but there are elements of it in smaller doses and vignettes around our home. When I was planning to make these DIY Christmas Sweater Ornaments, they reminded me of some Scandinavian decor I saw online and I knew I would love them if they turned out.
{Affiliate links are used in this post. Click on any of the underlined links to find the products I am talking about. You can read my disclosure HERE.}
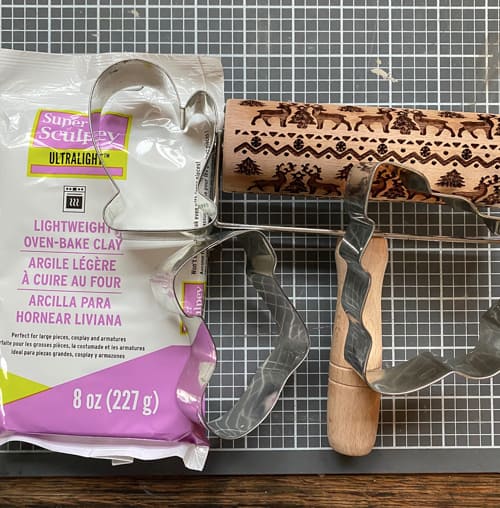
Supplies To Make DIY Christmas Sweater Ornaments
Regular Rolling Pin
Cookie Sheet Pan
Wood Skewer/Pencil/Paintbrush (something to poke a hole in the top of the ornaments)
This process is so easy, but there are some things I learned throughout the process that I will share as I walk through the steps.
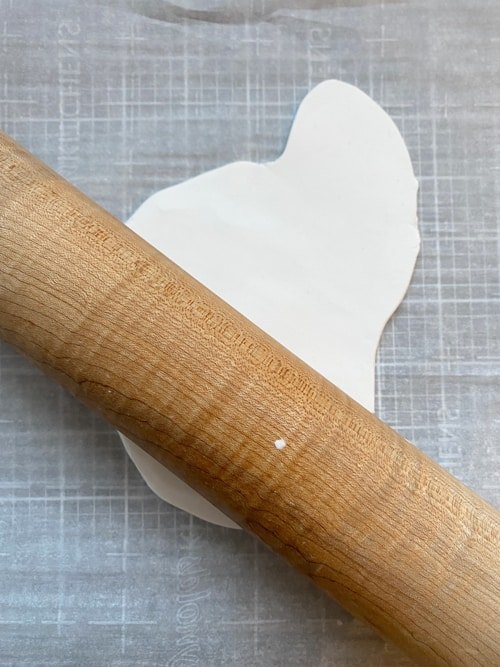
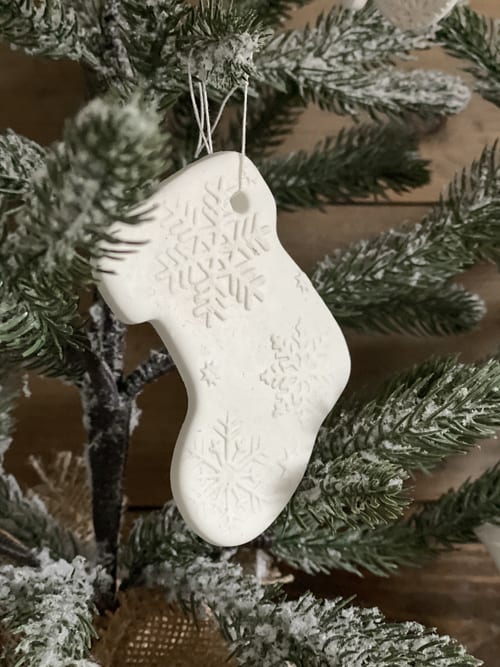
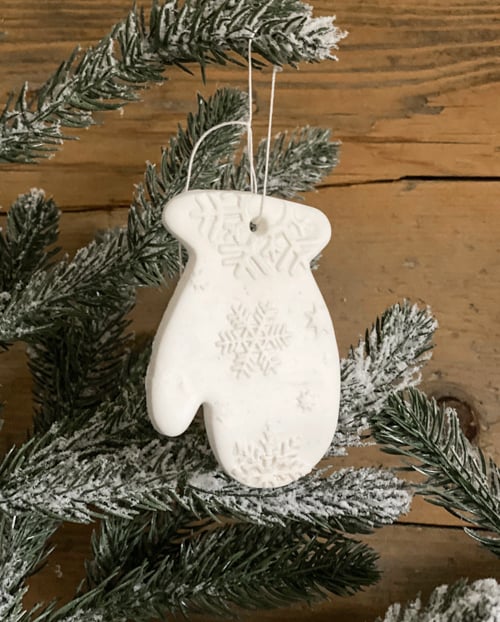
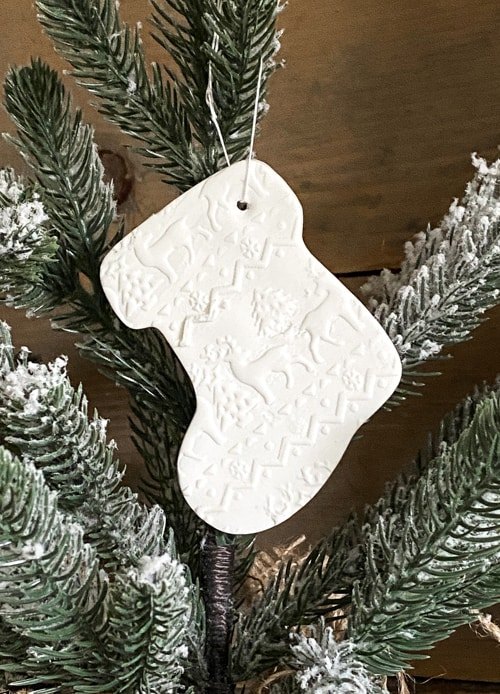
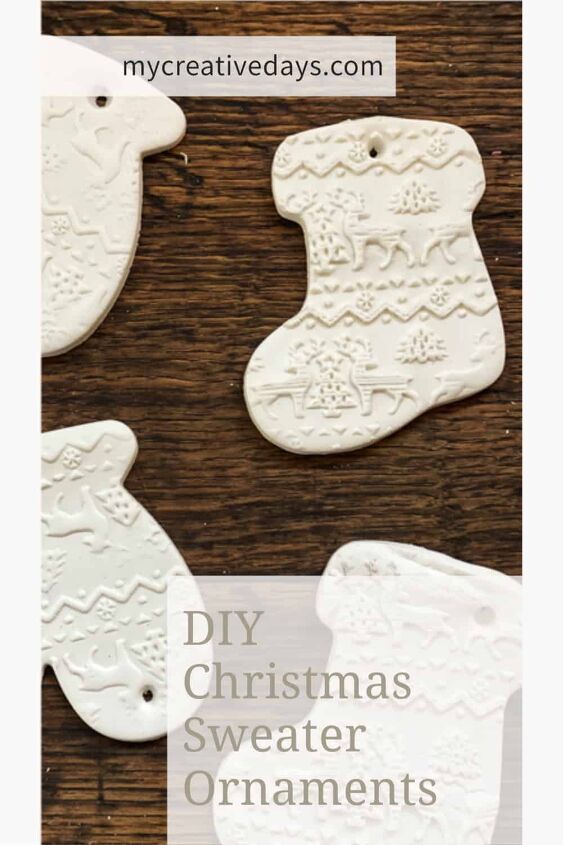
First, roll out the dough to about 1/4″ thickness with a regular rolling pin. I worked with about a golf ball size chunk of clay each time. The embossing rolling pins are only so wide so I found that the golf ball size was a good amount so I could fit the entire width of the embossing pin on the rolled-out clay. It is hard to match up the patterns exactly with anything bigger than that.
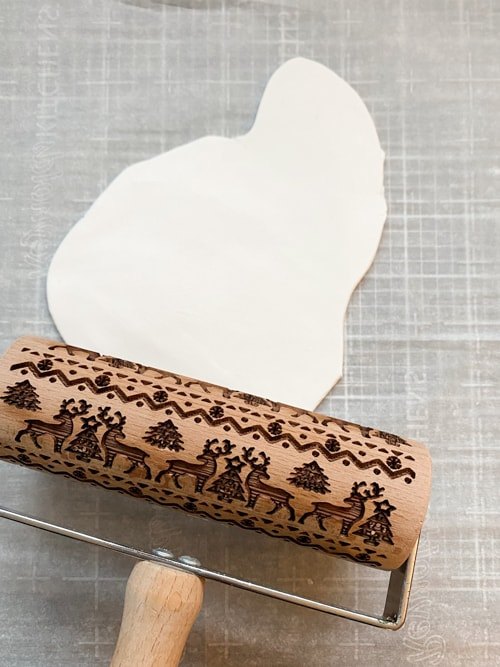
After the clay is rolled out, use the embossing rolling pin and roll it over the clay. This took some time to figure out how much pressure I needed. You will figure this out as you go. If you mess it up or don’t like it, just flip the clay over and roll the regular rolling pin over it and it will “erase” what you did so you can start over. The look you want will determine the amount of pressure you need with the embossing rolling pin. If you want the pattern to really be raised, you need more pressure. If you just want the outline of the pattern, you don’t need as much pressure.

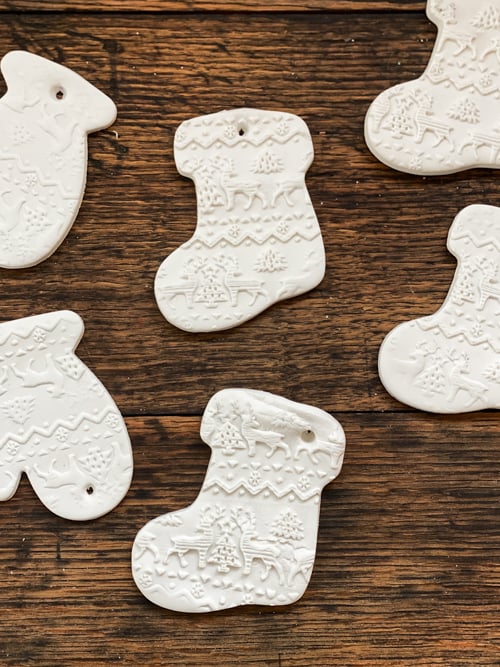
Once the pattern is on the rolled-out clay like you want it, it is time to grab your cookie cutters and start cutting out the shapes.
Once the shapes are cut out, use a wood skewer/pencil/etc. to poke a hole through the ornament where you want it.
Place the ornament on a cookie sheet and bake at 275° for 10-15 minutes. When I pulled mine out (after 10 minutes), they weren’t rock hard.
I let them cool on the baking sheet and they got hard as they cooled on the baking sheet.
That’s it!
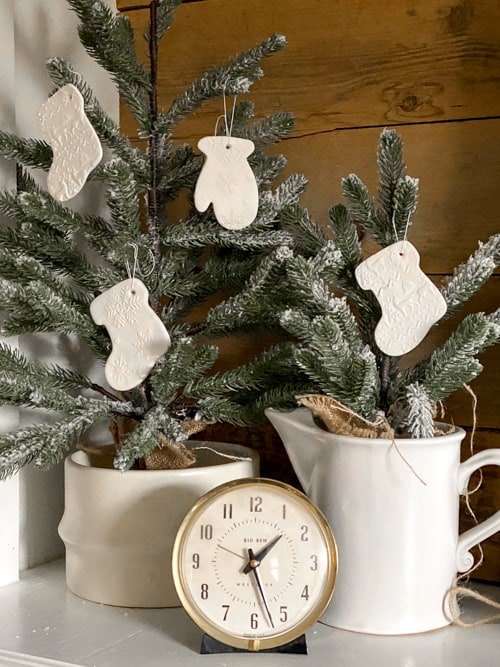
You can be like me and hang them as they are, or you could paint them, stain them, age them using brown paint or cinnamon mixed in craft glue.
You could brush metallic colors over the raised areas…… there are so many options.
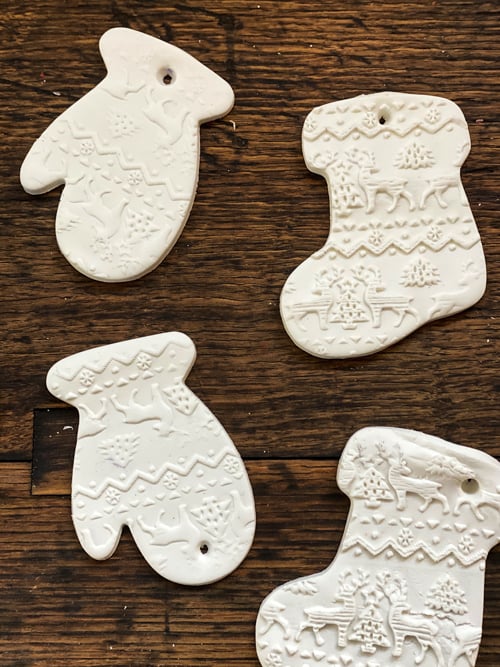
I loved the simple white with the designs so much that I just left them as-is. I used some string to hang them on some of our small trees.
As soon as Gabrielle got home from school, I told her how easy they were and we sat down and made more. Any project that can get the family members involved is a win in my book.
I will be turning the other ones we made into garlands and gift tags.
Is this a project you would try?
If you do, I would love to see yours! Share a photo and tag me on Instagram @mycreativedays.
Here is the live video I did showing the process of making the sweater ornaments:
PIN THIS POST!
If you liked this easy project, you will love these Christmas projects:
DIY Wood Burned Christmas Tree Garland
Resources for this project:
See all materials


Comments
Join the conversation
-
I have all the supply list and links on my blog post: https://www.mycreativedays.com/diy-christmas-sweater-ornaments/
-
Love this idea. Very cute. Thank you


Frequently asked questions
Have a question about this project?
I also see this method of the two cookie cutters working for some awesome Christmas "cookies"!
Where does the word "sweater" fit into this project, please?
Am I right that once you use the rollers and cookie cutters for this they shouldn’t be used for food? Btw I love the way they look unpainted!