


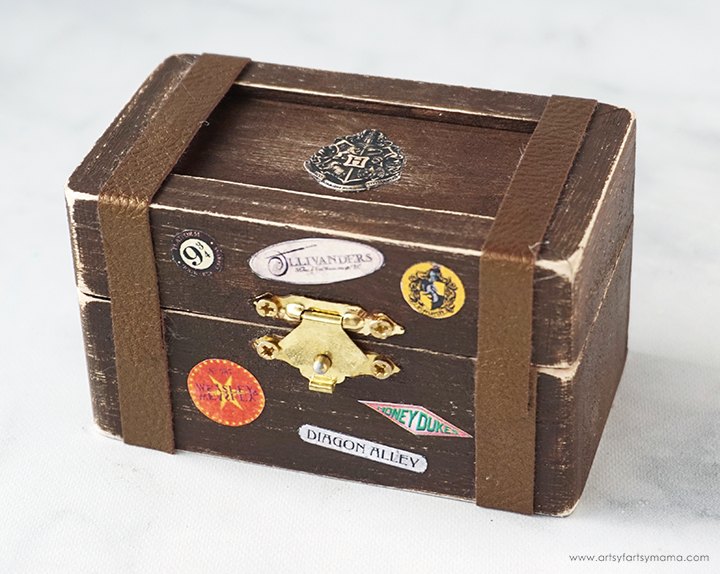
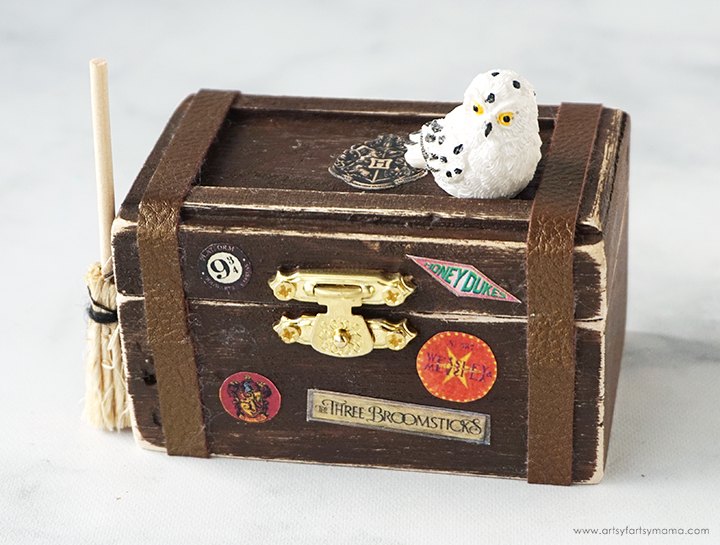
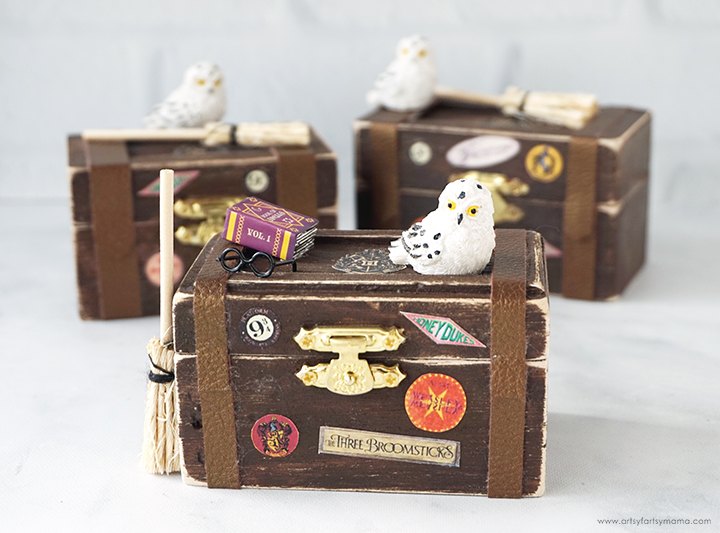
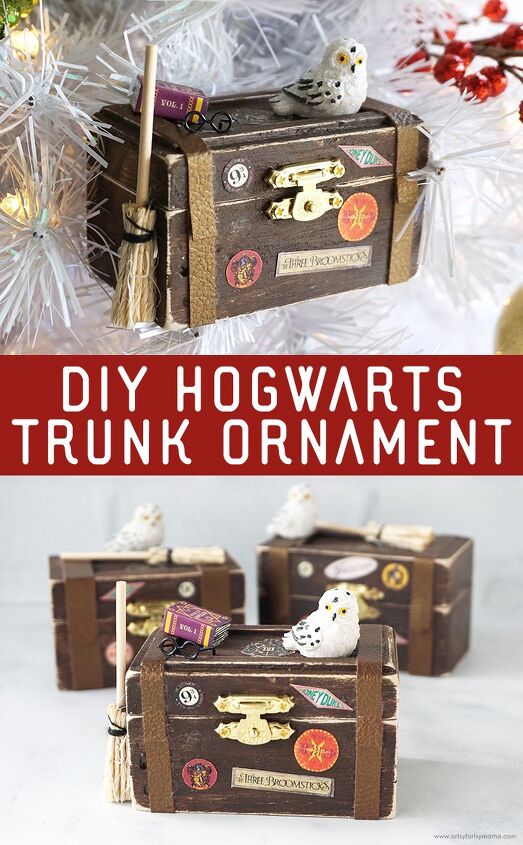
DIY Hogwarts Trunk Ornaments
$10
1 Hour
Easy
Get ready for a Hogwarts holiday with DIY Hogwarts Trunk Ornaments!
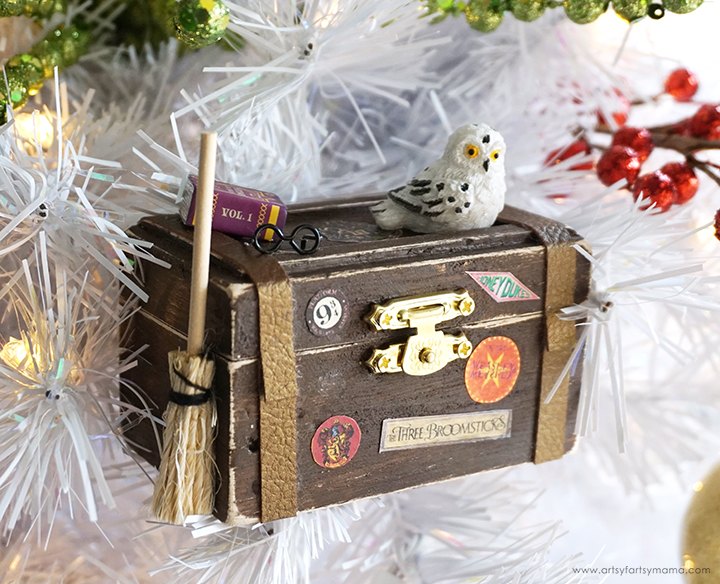
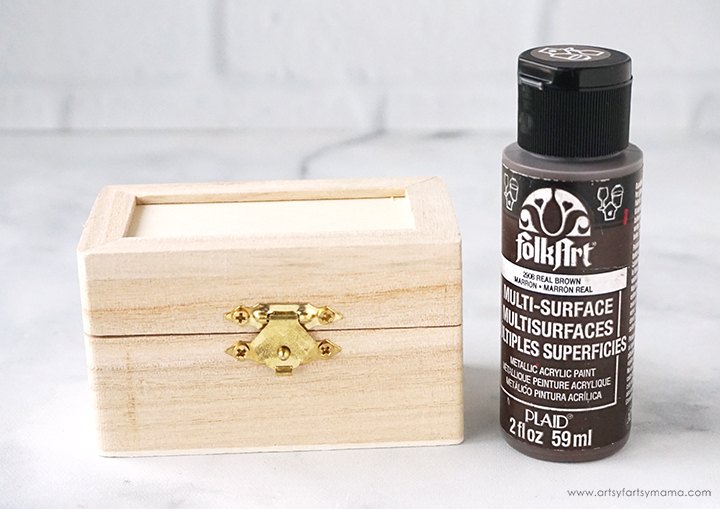
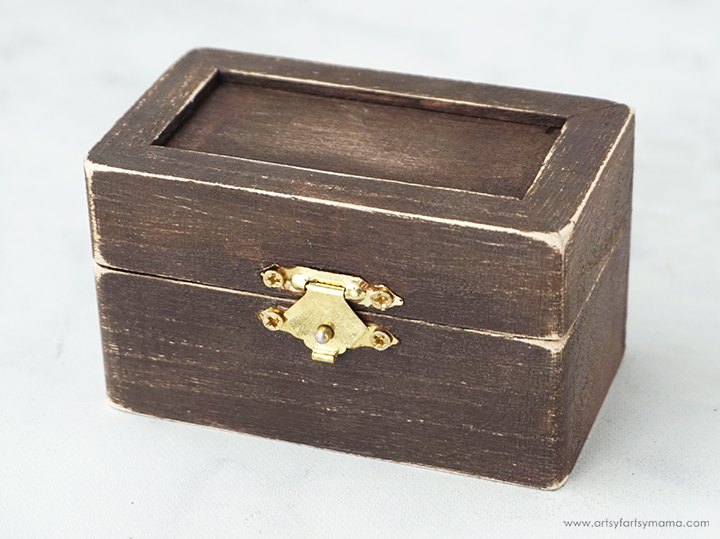
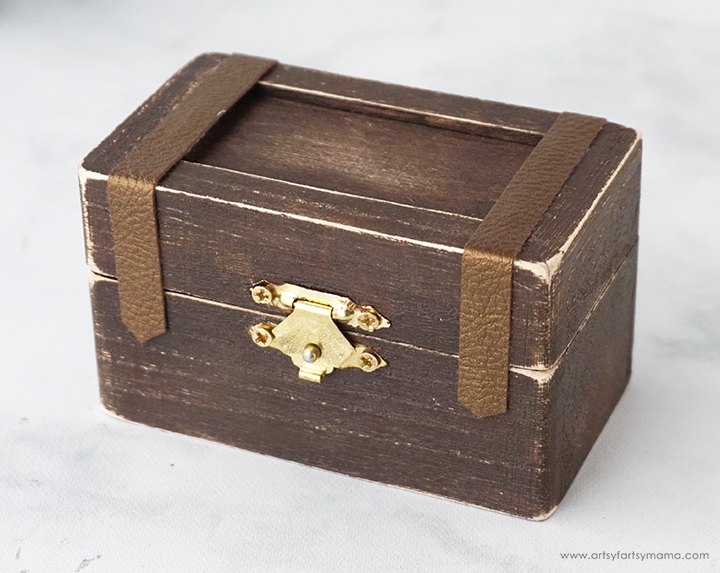
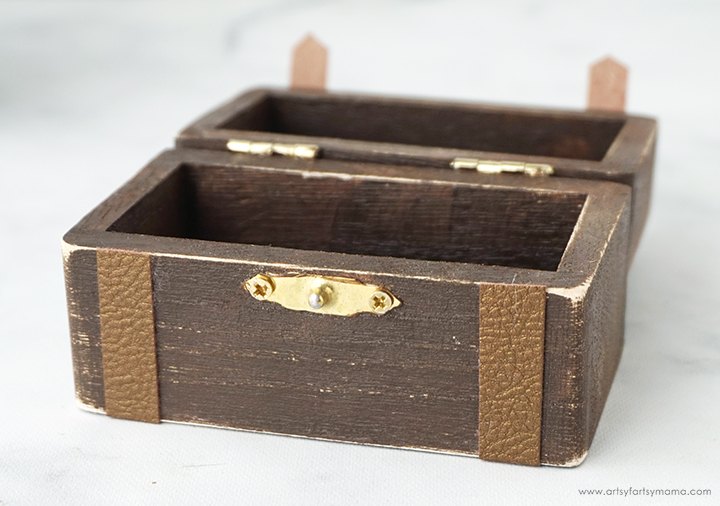
- Miniature Unfinished Wood Trunk
- Brown Acrylic Paint
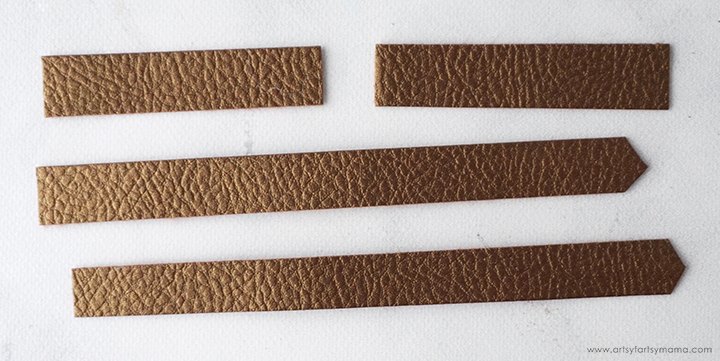
- Faux Pebbled Leather
- Strong Adhesive
- Sandpaper
- Scissors
- Miniature Owl (or other animals)
- Miniature Broom, and other Miniature Accessories

Want more details about this and other DIY projects? Check out my blog post!
Comments
Join the conversation
2 of 12 comments
-
This is an AWESOME project!!
-
Oh, I love this project and the term "Potterhead." My SO's granddaughter is a Potterhead; I want to make one for next Christmas! Thank you!


Frequently asked questions
Have a question about this project?
Where can I find the trunk stickers printable?