


Age New Christmas Ornaments
Y'ALL I HAVE BEEN FORTUNATE TO FIND A GOOD SUPPLY OF VINTAGE SHINY BRITE ORNAMENTS AND I LOVE USING THEM AT CHRISTMAS. HOWEVER, I GET SO MANY QUESTIONS ABOUT WHERE I GET MY FADED, RUSTIC ORNAMENTS. TO BE QUITE HONEST THEY CAN BE HARD TO FIND AND ARE QUITE PRICEY. SOOOOO.........
Here is the absolute easiest way to age new Christmas Ornaments to make them look like vintage shiny brites.
These are my inspiration ornaments. I've been collecting these for several years and they are the real deal. I have tried several methods that I've seen online and nothing really worked well for me until my shiny light bulb in my brain finally went off. So here's my ah ha moment and how to do it!.
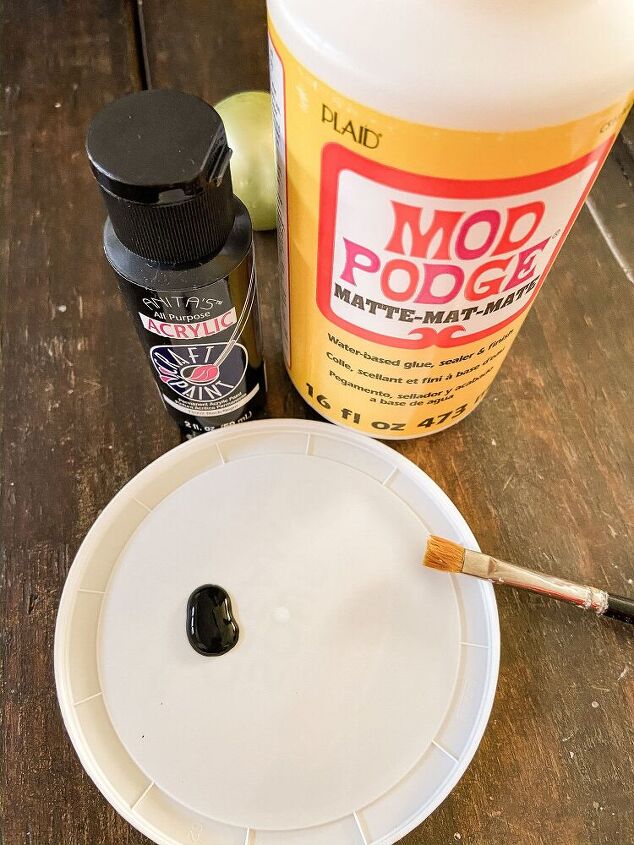
SUPPLIES NEEDED TO AGE ORNAMENTS Click Here

First, protect your table or work area. Then remove the hangers from the ornaments and set them aside to add back once your ornaments are aged and dried.Here is a small supply of new ornaments that are going to be aged.
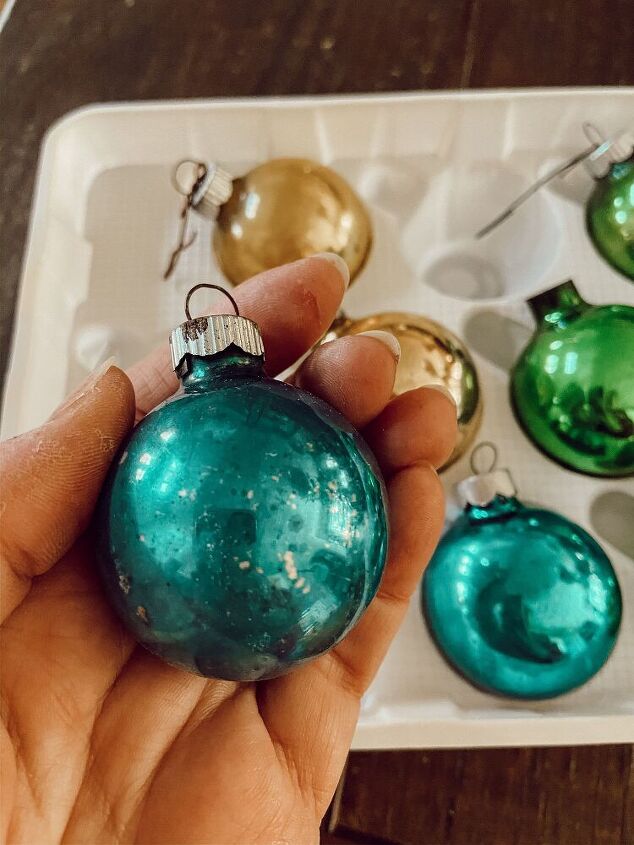
You can see the aging on this vintage ornament up close. This is the look we want to achieve by using this technique.Most of my vintage ornaments no longer have a smooth surface and are no longer as shiny as the new ornaments due to the natural aging process.
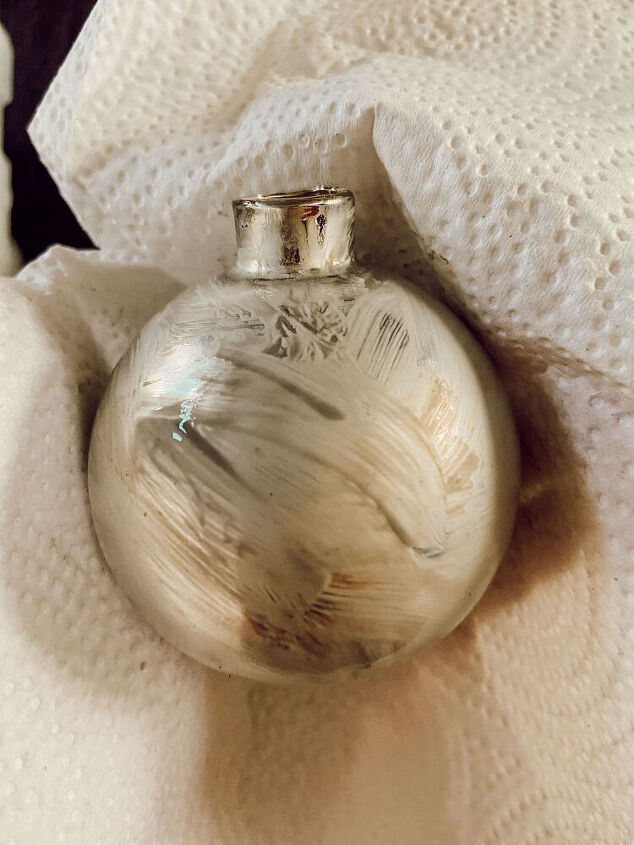
Rub off any excess mod podge gently with a paper towel. See more tips here.
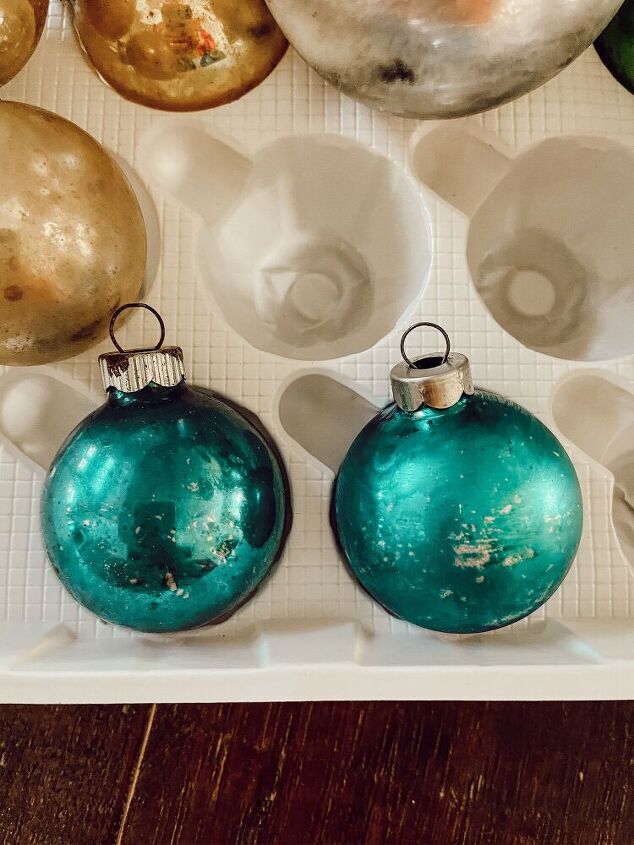
The ornament on the left is the original shiny brite vintage ornament and the one on the right is the faux aged ornament. Hard to tell the difference.
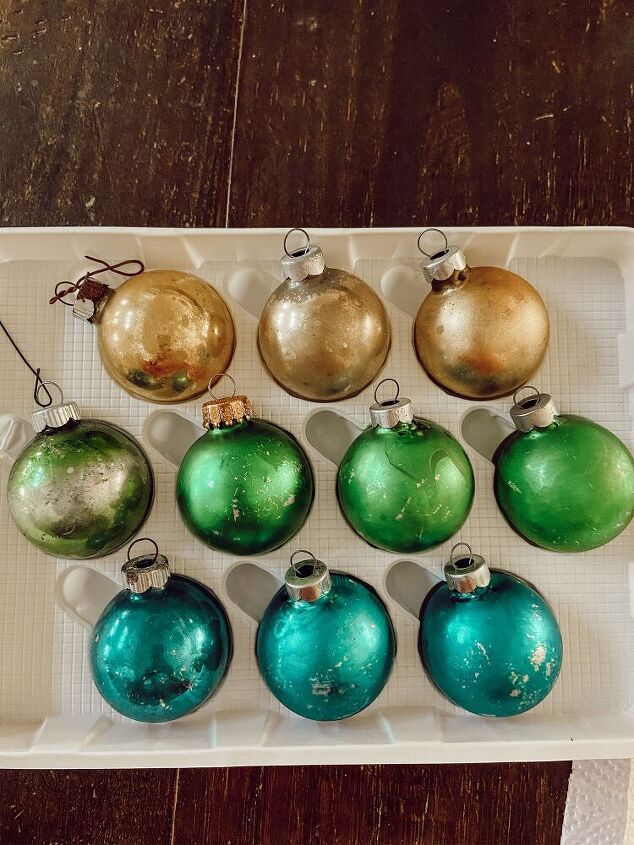
Here are the vintage ornaments and the new ornaments that have been aged to look vintage. See more details here.
Here is a mix of actual vintage ornaments with the aged ones and it is hard to tell the difference. Another project is to repurpose several old Christmas decorations and you can see some of the results here.


Comments
Join the conversation
-
I have some vintage but going to make some of these. Thanks for the inspiration!
-
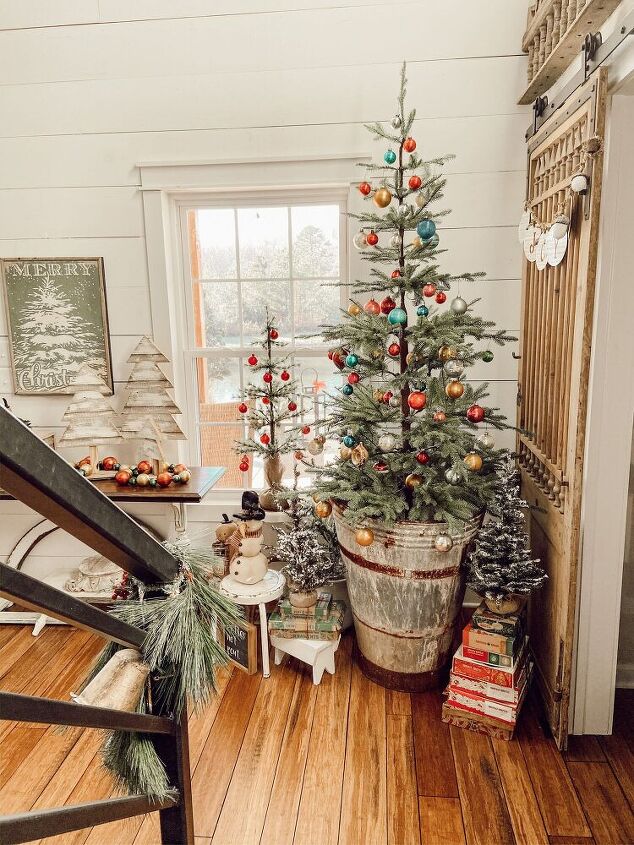
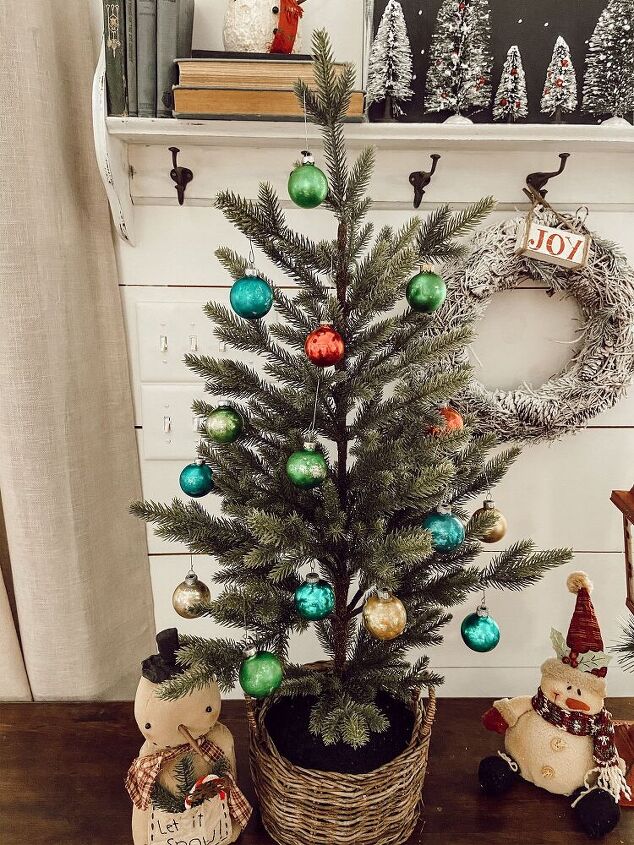
Thanks for the tips. LOVE your corner vignette in first picture! Merry Christmas


Frequently asked questions
Have a question about this project?
Sorry, I'm a little confused. Are you saying mix some mod podge with black paint and apply it, and then put a layer of mod podge over that and wipe off? One picture I notice the grayish black color and then the next picture is white. I love what you did, but I want to be sure and do it right. Thanks!
Does wiping off the Mod Podge remove the original color so it looks like it's chipped off?
Are. You using only glass balls or plastic ones work too??