


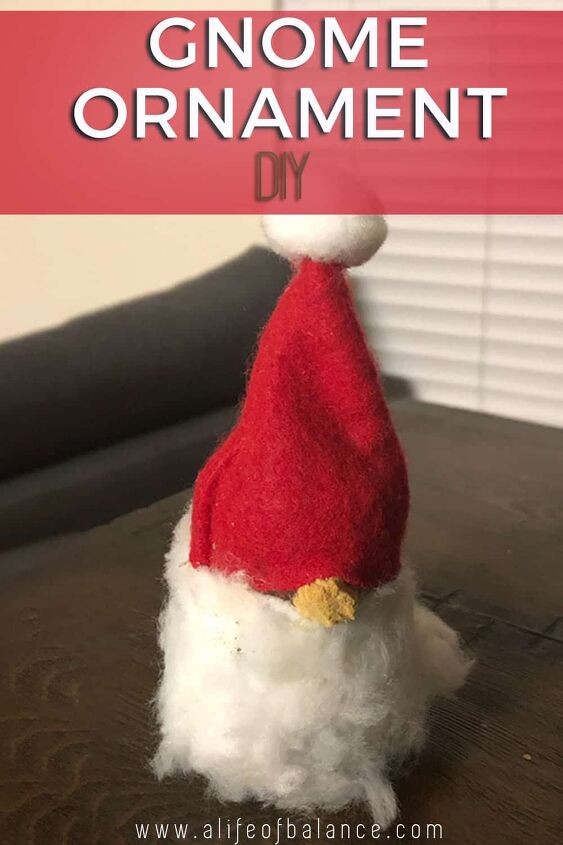
Gnome Ornament From a Recycled Furniture Leg
Welcome to an interesting challenge hosted by Kippi from Kippi at Home. While I love crafting for the fall season and holidays, I’m in the mode to start thinking about and crafting for Christmas. If you’re like me, this is your lucky day! I’m sharing my gnome ornament today, and several other talented bloggers have also linked up their own Christmas crafts for this challenge. Be sure to check out their projects on the blog.
Here’s how this challenge worked. Kippi sent each of the bloggers participating a few of the leftover chair legs she had laying around from her upholstery days. She challenged us to come up with a way to use these as a part of our Christmas décor! Here’s what the legs looked like when I received them.

I’m always up for a good crafting challenge so I jumped on this quickly. I decided to make a gnome ornament out of the smallest furniture leg. Watch the blog for what I did with the other 2 coming soon.
This cute project can be used as either a shelf sitter or an ornament, whatever works best for your needs.
Supplies List
Old chair leg
Red & white felt
Floral wire
Cotton balls
Hot glue gun
Large sewing or needlecraft needle
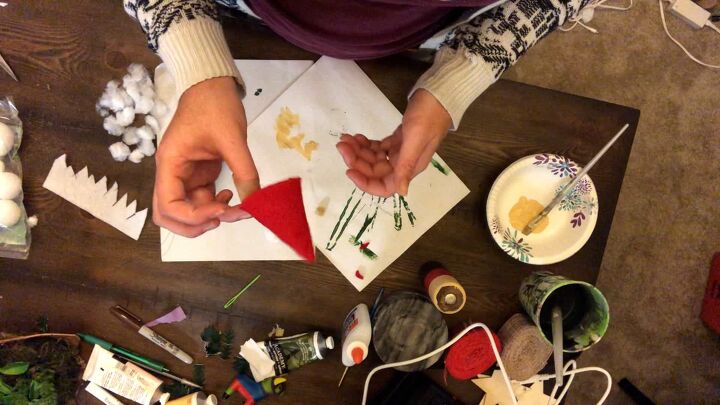
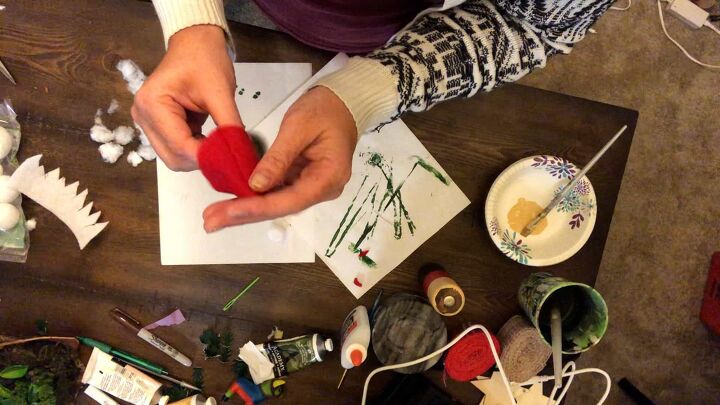
Cut the red felt into 2 tall triangles. Glue the long sides together, leaving the short side open, and leaving a small, unglued hole at the peak of the hat. Set aside and let dry. Once dry, turn the triangles inside-out. Pull off some of a cotton ball until you have a smaller ball of an appropriate size for the top of the hat.
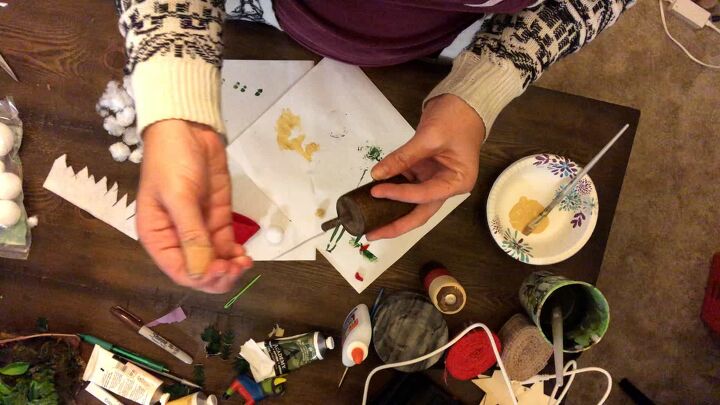
Step 2 – Prepare the Chair Leg
Wrap several inches of floral wire around the bolt coming out of the chair leg. This will be the hanger for your ornament, so be sure to leave a tail sticking up that is long enough to extend through the gnome leaving enough wire for hanging.
Step 3 – Prepare the Beard
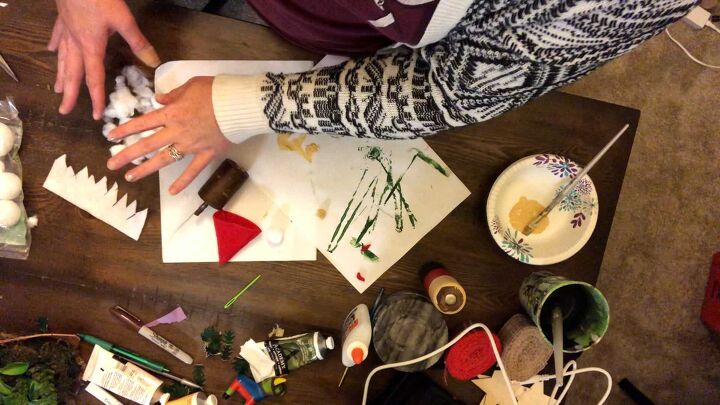
Cut out the template for the beard from the white felt. Shred some cotton balls for the beard hair. Also, paint a small cotton ball in a flesh color for the nose of your gnome.
Step 4 – Assemble your Gnome
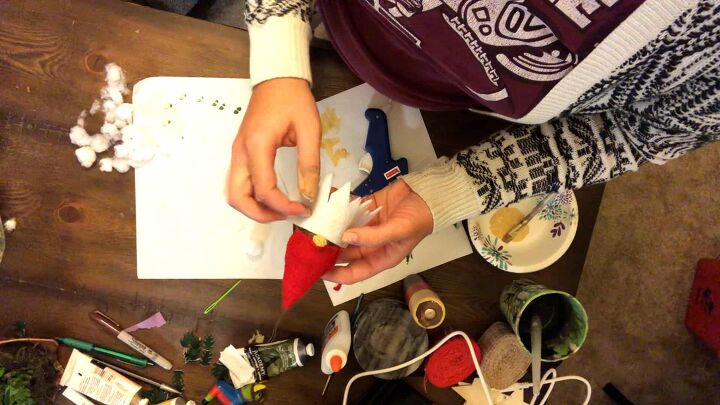
- Thread the wire on the chair leg through the hole in the top of the hat. Push the hat down the wire until it overlaps an inch onto the chair leg. Once your hat is positioned on the chair leg, glue the hat to the chair leg. Be sure to leave a small part unglued for the gnome’s nose.
- Glue the nose to the chair leg, positioning the nose slightly under the hat.
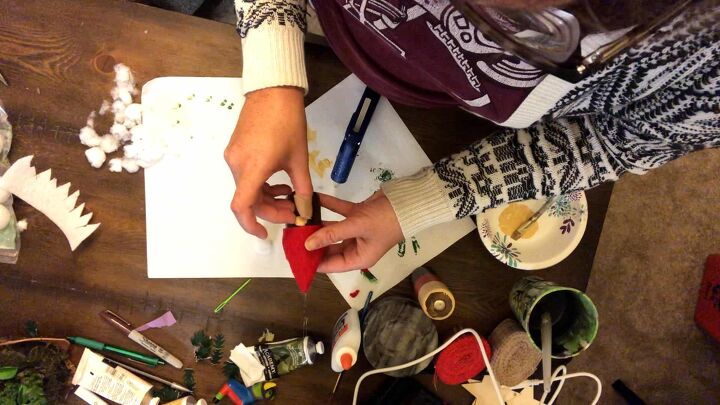
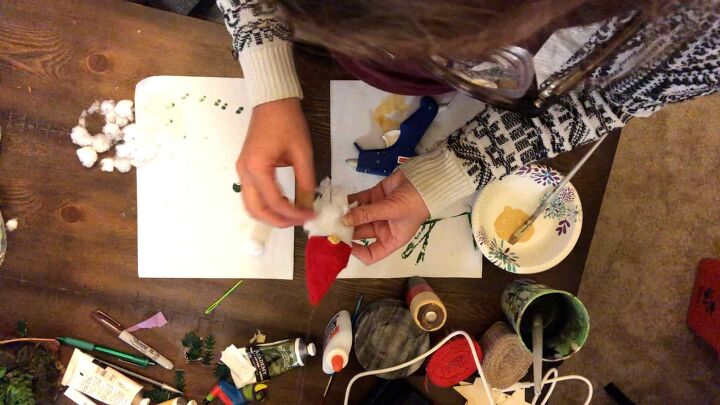
- Glue the beard template to the chair leg, positioning it tightly against the bottom of the hat. Be sure to leave the nose exposed.
- Glue the shredded cotton balls to the template, arranging the cotton to fit the template. You can leave some cotton hanging down below the template.
- Thread the hanging wire through the eye of the needle. Then push the needle through the small cotton ball you made for the hat. Push the ball all the way down and remove the needle from the hanging wire. You can secure the ball to the top of the hat with a small drop of glue.

Now you can sit your gnome on a shelf or hang him on your tree.
If you still need some more inspiration, here are some other Christmas crafts to check out!

Comments
Join the conversation
-
I love the idea of making a gnome. I would suggest using poly fill for the beard and painting a wooden bead /ball for a nose to give the gnome a more polished look. The other would be great to do with kids! 😊
-
Thanks for the suggestions Amy. We were going for more of a homemade farmhouse look rather than a professional one.


Frequently asked questions
Have a question about this project?