


Holiday Crafts: DIY Macrame Christmas Ornament

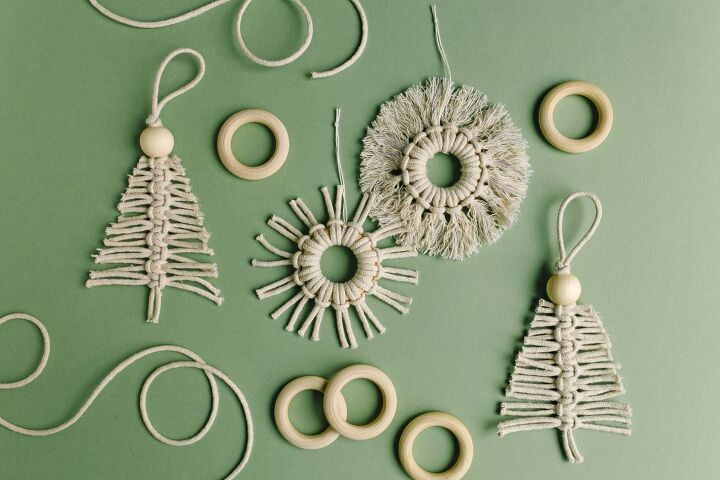
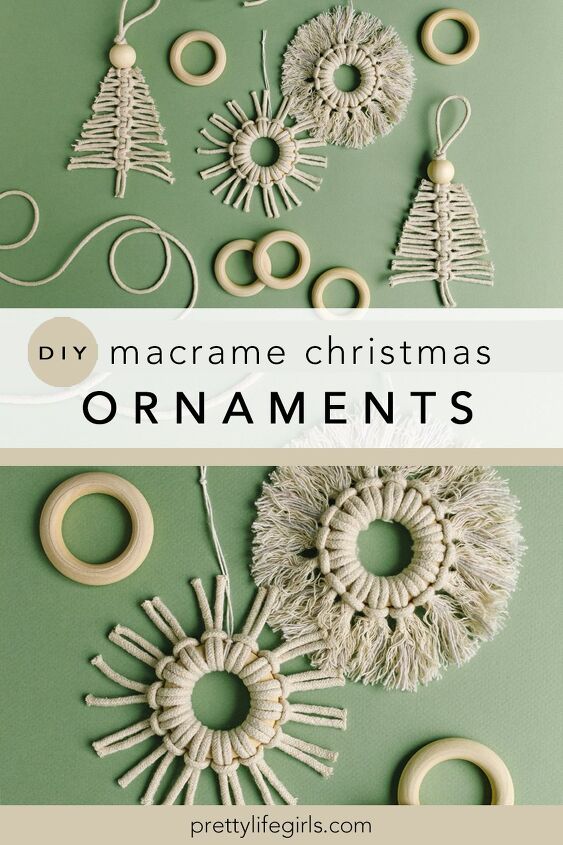
These DIY Macrame Christmas Ornaments are the perfect handmade touch for any Christmas decor!
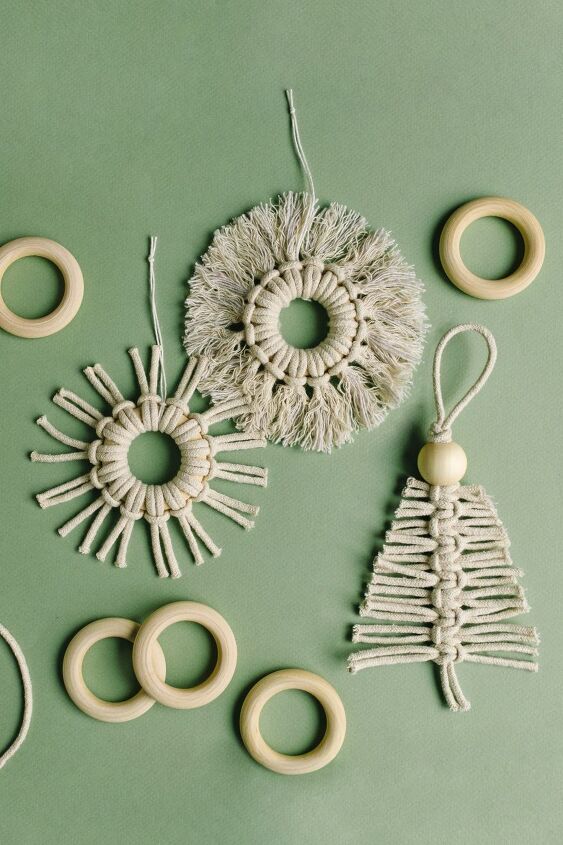
Although we aren't particularly talented with it, we love making macrame projects (see our Dyed Macrame Keychains and Mini Macrame Wind Chimes). It takes us back to the days of making friendship bracelets and putting Chinese Staircase hair wraps in our hair! These DIY Macrame Christmas Ornaments use similar skills and only a few supplies, but they are the perfect handmade touch for any Christmas decor. Keep reading for the full tutorial!
Supplies needed to make a DIY Macrame Christmas Ornament
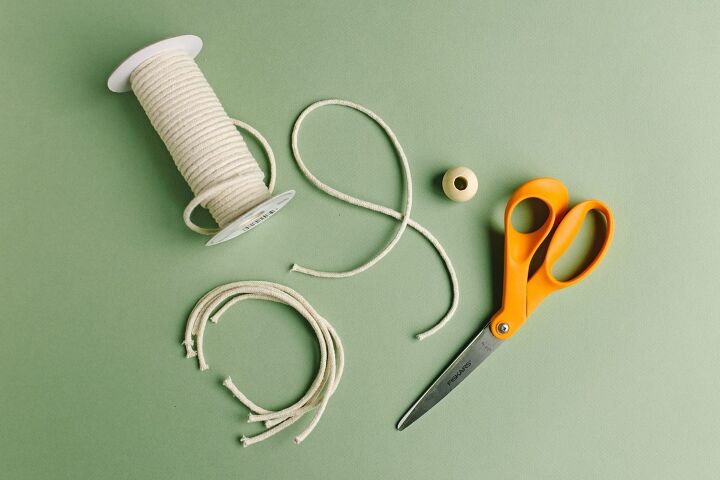
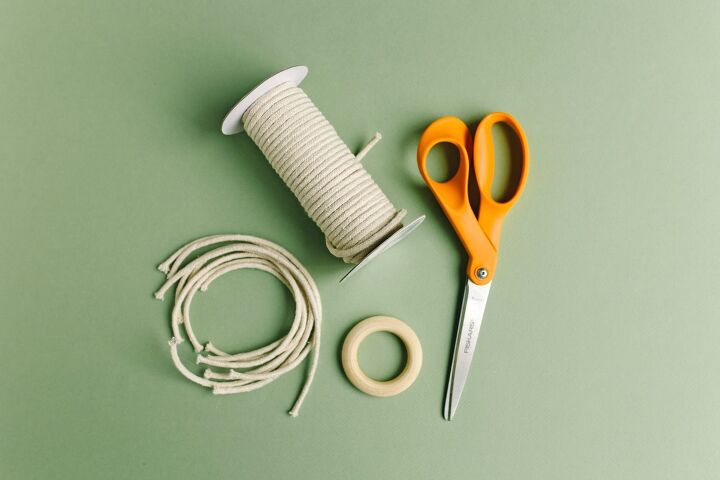
Macrame cord
Scissors
Wood beads (Tree)
Wood ring (Snowflake)
White twine (Snowflake)
How to make DIY Macrame Christmas Ornaments
How to make a DIY Macrame Christmas Ornament – Tree
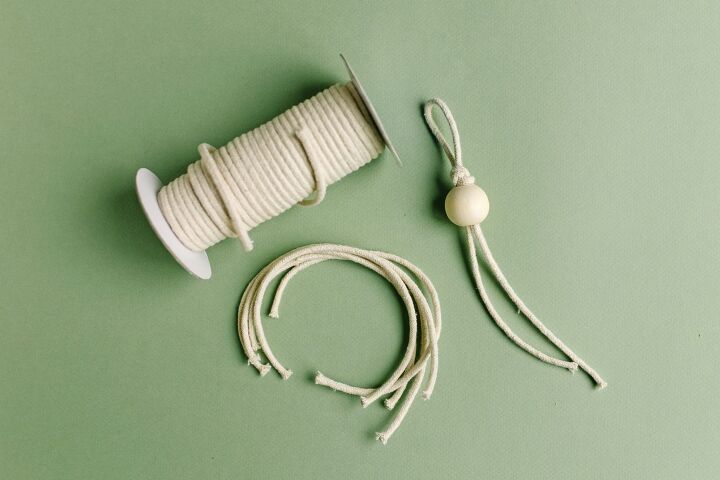
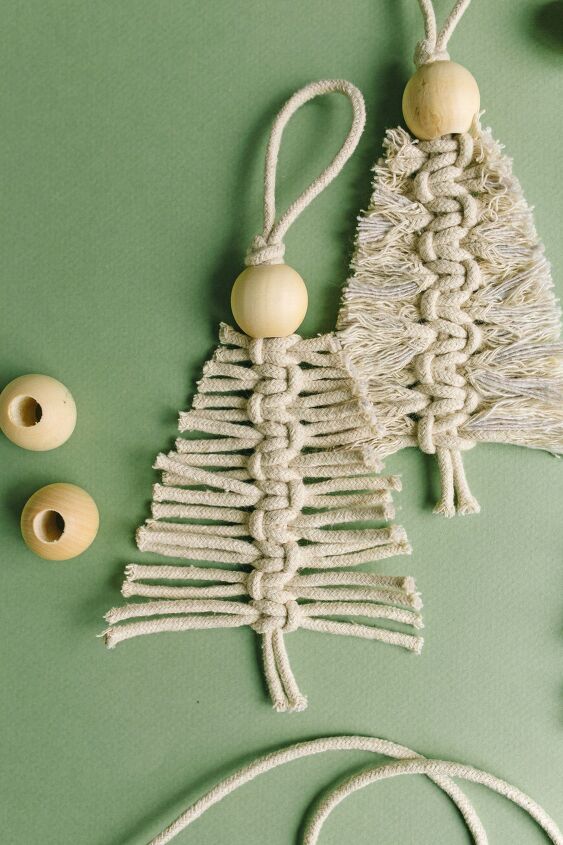
Step 1: Cut 20 pieces of cord eight inches in length, and set aside. Cut one piece of cord about 20 inches in length. Fold the long piece in half and tie a knot below the fold, leaving a two inch loop at the top. String the cord ends through the bead, and pull the bead up to the knot. This will be the center piece of your tree.
Step 2: Start creating your branch pieces by folding one piece of eight inch cord in half and lay it under the center piece with the loop on the left. Fold another piece of cord in half and lay it over the center piece with the loop on the right. Pull the ends of each piece through the loop from the opposite piece and pull tight to create your first knot.
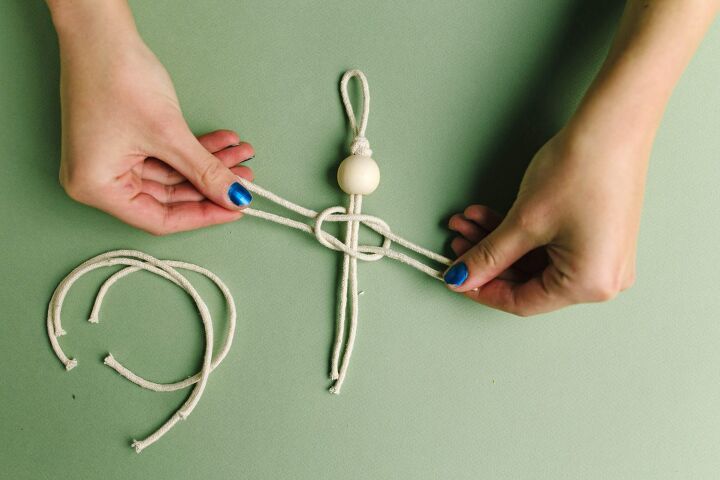
Step 3: Make your second branch by tying the same knot, but this time putting the bottom loop to the right and top loop to the left.
Step 4: Repeat the knots with the remaining pieces of cord, alternating the sides of the loops with each branch.
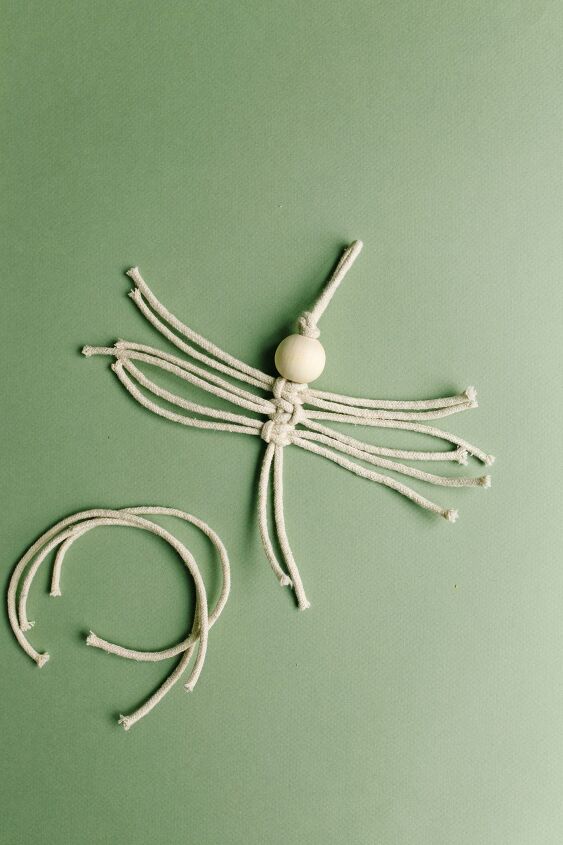
Step 5: Use scissors to cut the branches at an angle to make a tree shape. Cut the center piece so about one inch sticks out on the bottom.
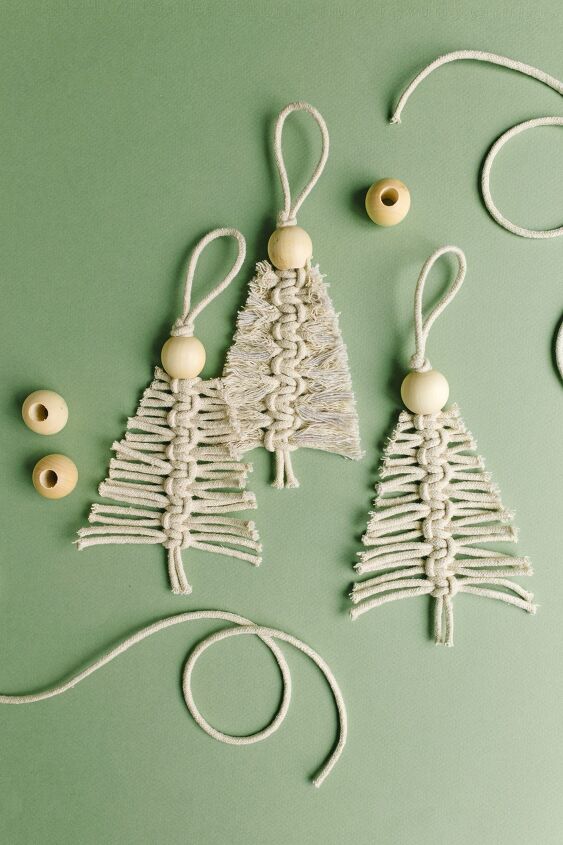
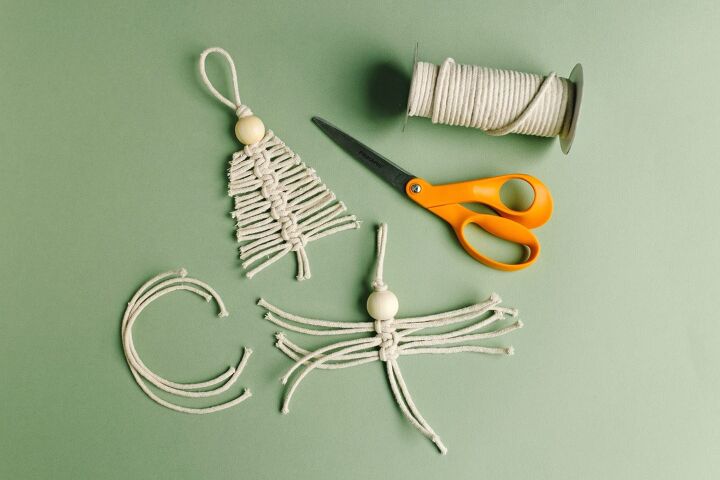
Step 6 (optional): Use a comb or brush to fray the branch pieces (this part can take a little time, but just keep combing). Trim the tree shape, if needed.
That's it! And now on to the snowflake version…
How to make a DIY Macrame Christmas Ornament – Snowflake
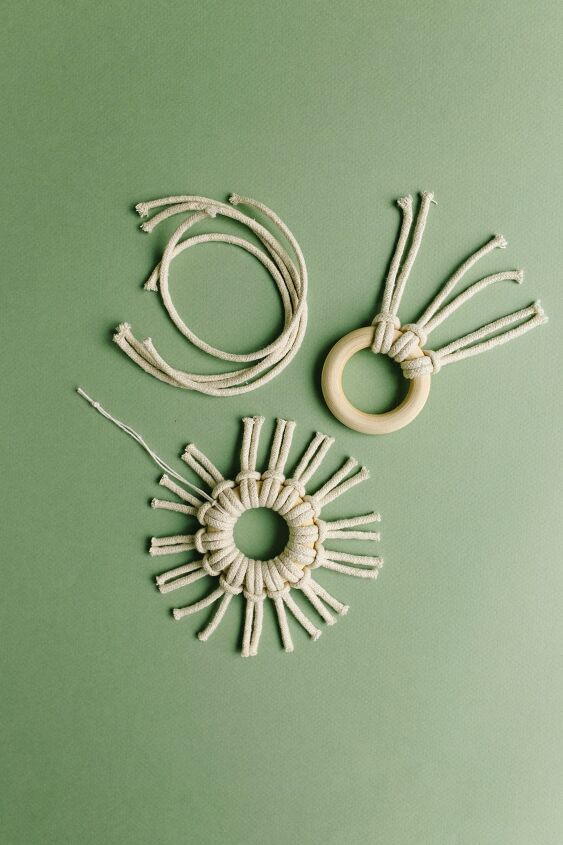
Step 1: Cut 16 pieces of cord eight inches in length. Take one piece of cord and create a larks head knot around the wood ring by folding the piece in half, putting the loop through the center of the ring, and pulling the ends of the cord through the loop.
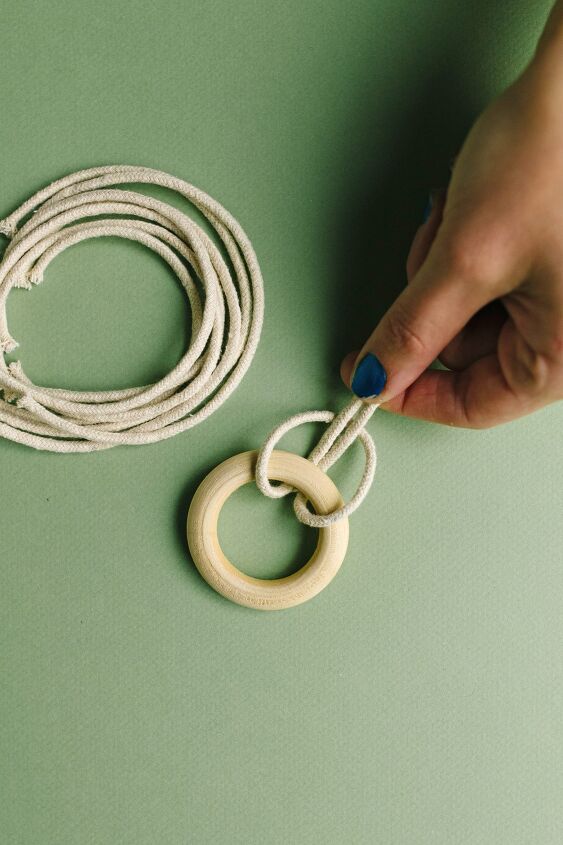
Step 2: Tie larks head knots with the remaining pieces of cord.
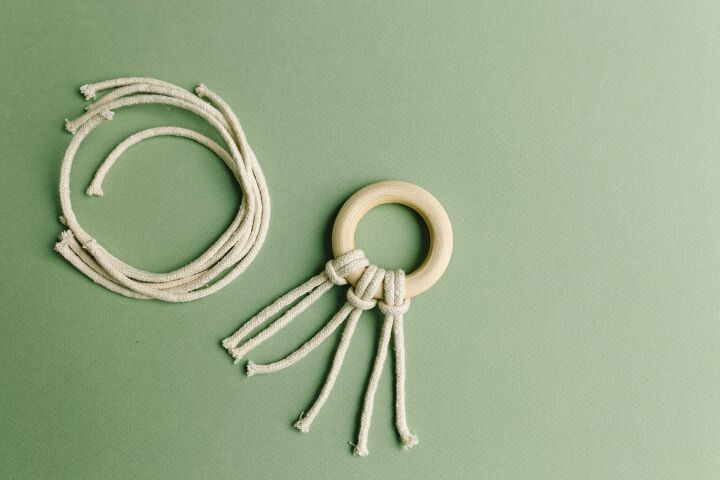
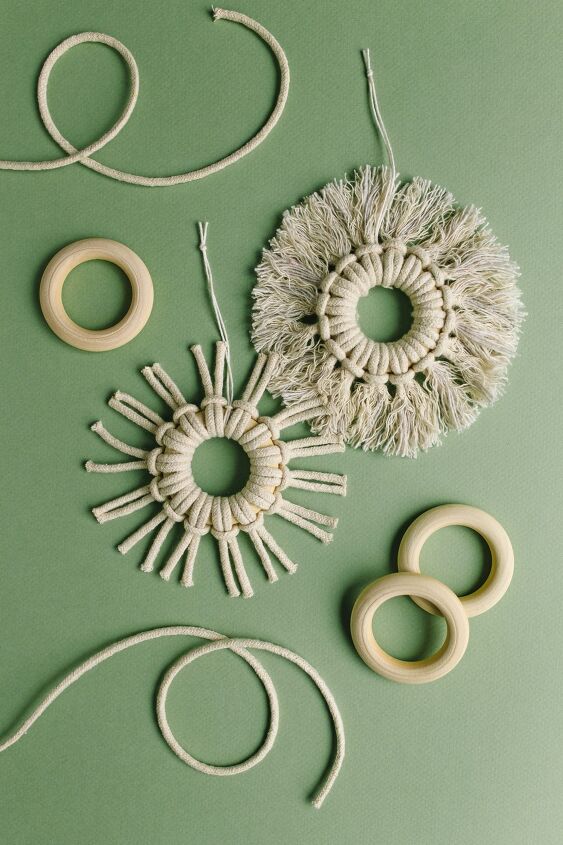
Step 3: Trim the cord pieces to about one and a half inches.
Step 4: Cut a piece of twine to about ten inches. Fold the piece in half and tie a knot half an inch from the top. Attach the twine to the ring with another larks head knot.
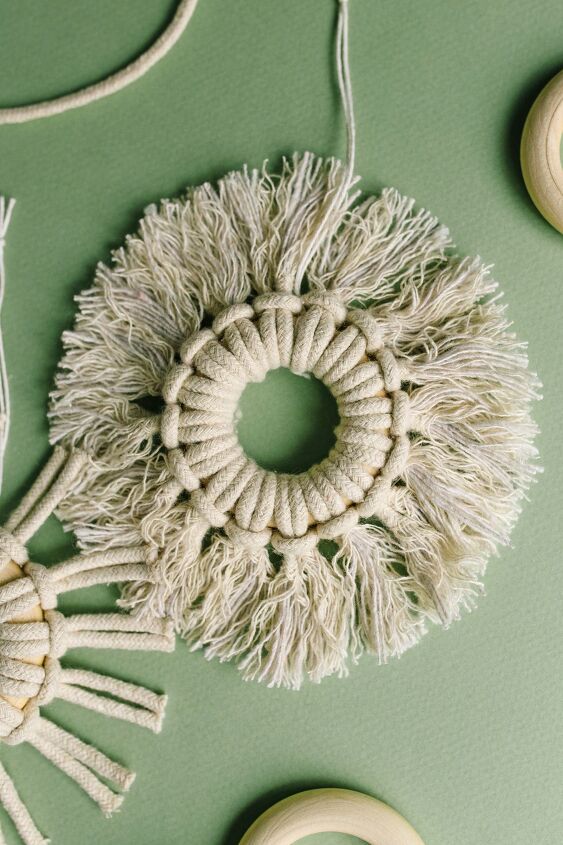
Step 5 (optional): Use a comb or brush to fray the pieces. Trim the snowflake shape, if needed.
Aren't they so cute? They would be so cute for gifting, and I can just imagine a Christmas tree covered in them!
Happy making!
-Sam
Resources for this project:
See all materials


Comments
Join the conversation
-
Textured natural look ornaments are trendy this year.
If you did want to add a little sparkle to yours, I would suggest that you add cut pieces of metallic embroidery floss, knotting them alongside the rope.
-
Nifty idea!


Frequently asked questions
Have a question about this project?
What size cord did you use?