


How to Make Easy Christmas Tree Ornament Cones Using Scrapbook Paper
I’m sharing a Christmas in July craft project!
These ornament cones are affordable and easy craft project using scrapbook paper, available in single sheets at or in paper pads at the craft store.
Best of all they can be customized to your theme and color of your Christmas tree now, before the hustle and bustle of the busy month of December and Christmas season.
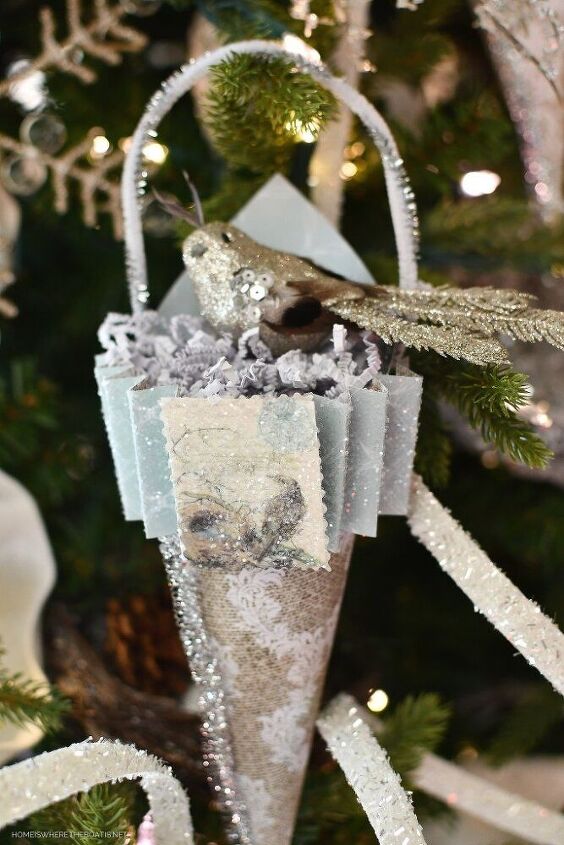
These ornament cones are an addition our Winter Nesting Tree which is a wintry mix of icy branches, snowflakes, birds and glittery nests and pine cones. It became a tradition several years ago to extend the twinkle season after the Christmas ornaments and decorations were packed away.
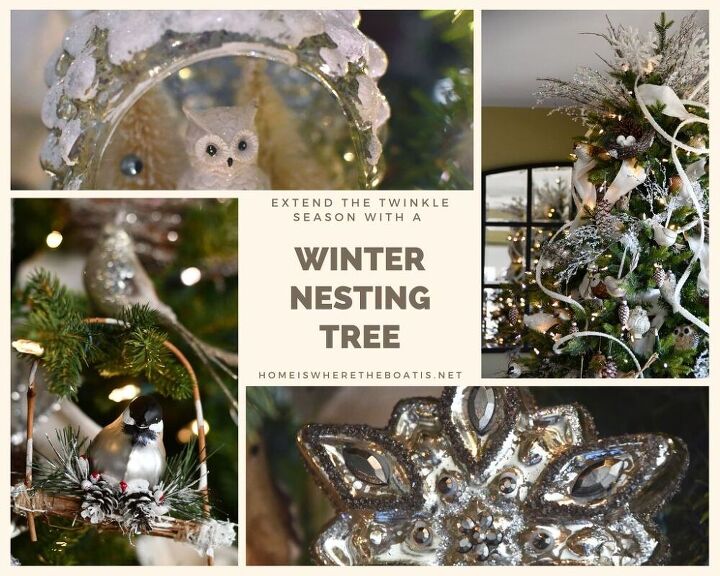
The twinkling lights of the tree help make the transition from Christmas to winter easier and the house a little cozier and brighter and it’s good for my mental health when it’s dark and gray outside!
You can see more of the tree, HERE.
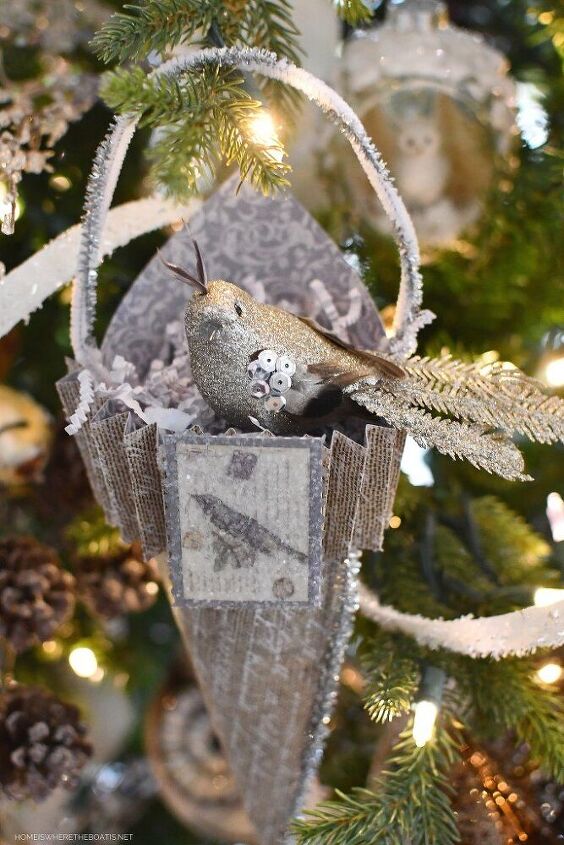
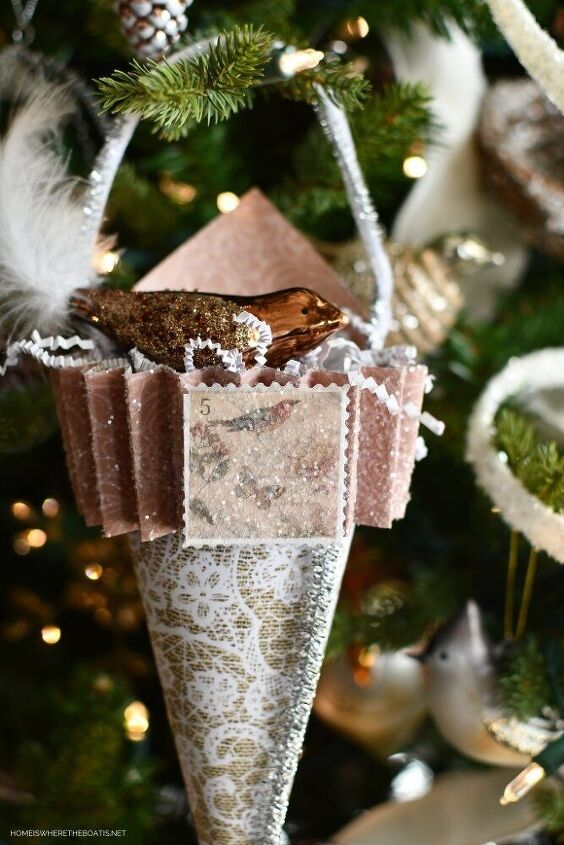
I filled these ornament cones with some paper shred for the bird ornaments to ‘nest’ and to hang on the tree. These cones come together quickly once you have your supplies gathered using the same method as with Halloween Treat Cones.
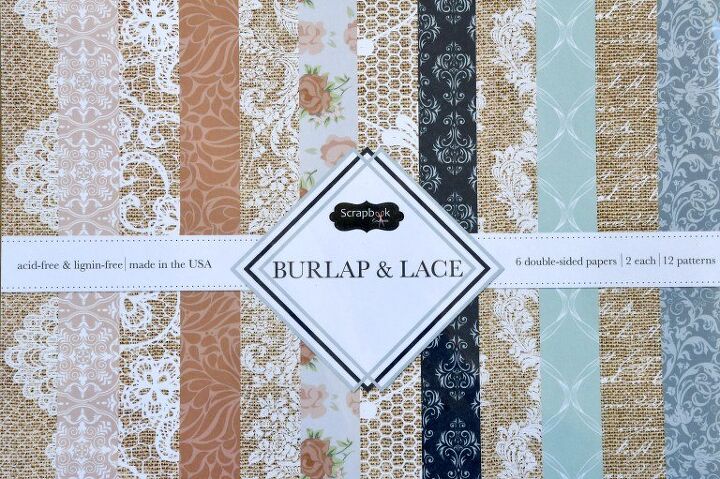
I used this double-sided scrapbook paper for my cones so there would be a pattern on the inside of the top of the cone once they were rolled. Most scrapbook paper comes in 12 x 12 sheets which I cut down to 8 x 8 squares to form my cones.
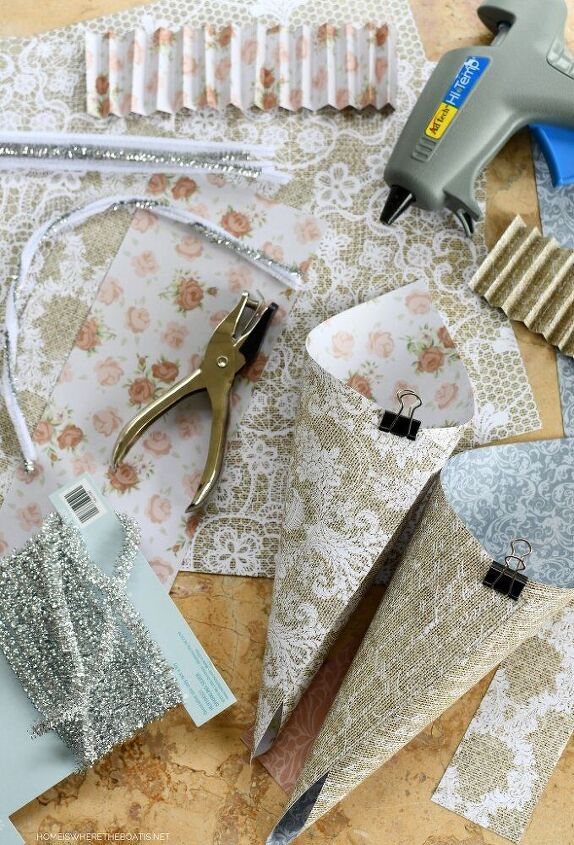
After I rolled the cones, I used a binder clip to help them hold their shape then used a hot glue gun to glue the edges together.
I used white and silver chenille stems to make a handle to hang the cones. Use a hole punch on the sides of your cone and thread your stem through the holes, twisting the ends to secure it. I used two chenille stems twisted together per cone.
Tip: When using a hot glue gun, have an emergency glass of ice water available in case you get hot glue on your fingers. . . *ouch*.
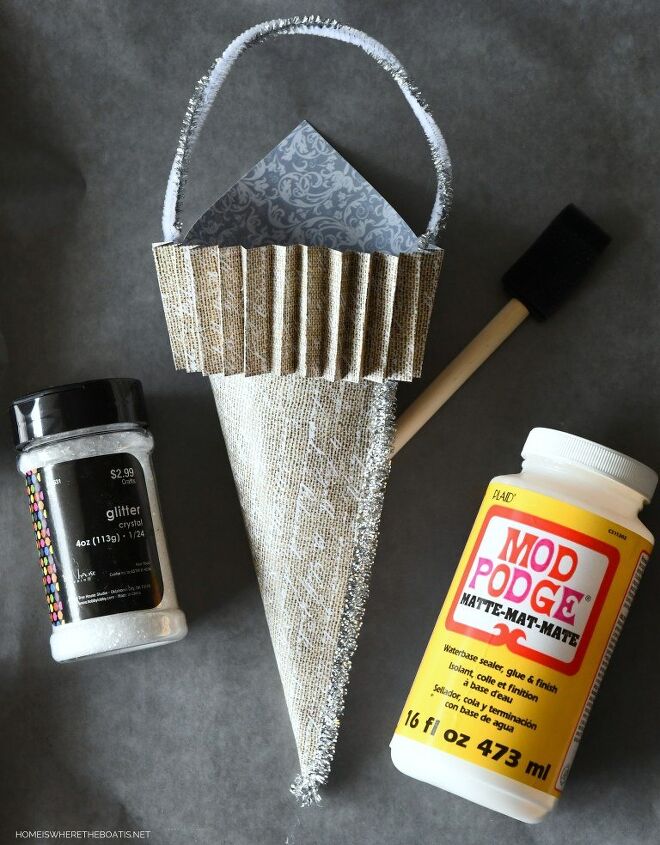
After the cones were glued together, I ran a bead of glue down the front seam to attach some silver tinsel trim which also helps conceal any extra glue that might show on the seam of the glued cone. You can use ribbon, decorative braid, rick rack or the trim of your choice.
I cut some 2 x 12 inch strips of paper from my trimmed scrapbook sheets and accordion pleated them, then glued a pleated paper ‘cuff’ along the top of the cones.
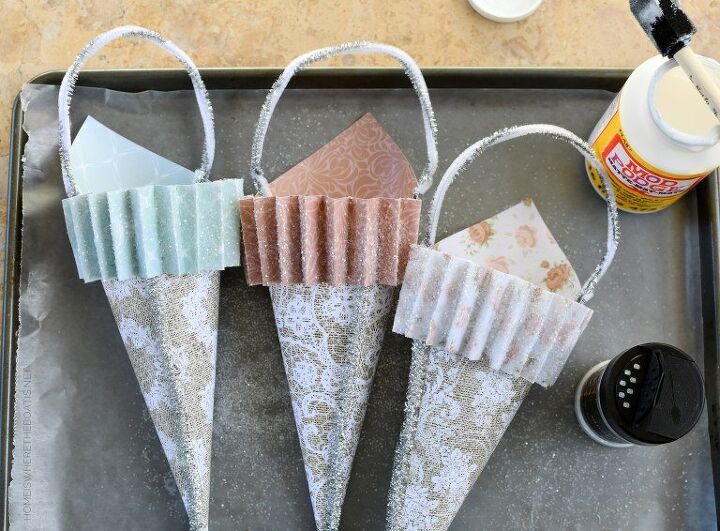
To give the cones the appearance of sparkling snow, I applied a coat of Mod Podge on the paper cuffs, then sprinkled some clear glitter on the Mod Podge. Allow the Mod Podge to dry and then shake off the excess glitter.
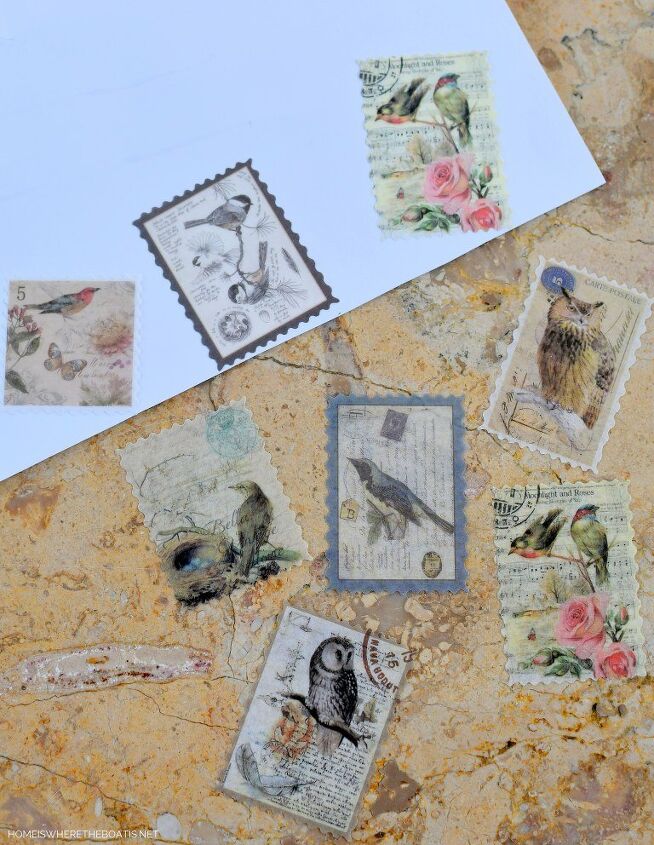
I found Vintage Washi Paper Stickers with an assortment of birds that I applied to white card stock to give them some stability and then glued them to the pleated cuffs. The stickers got a coat of Mod Podge and sparkling glitter too.
Click over via the blue "go" button below to visit the original blog post to find:
- Sources and supply links
- More photos
- Additional creative craft projects


Frequently asked questions
Have a question about this project?