


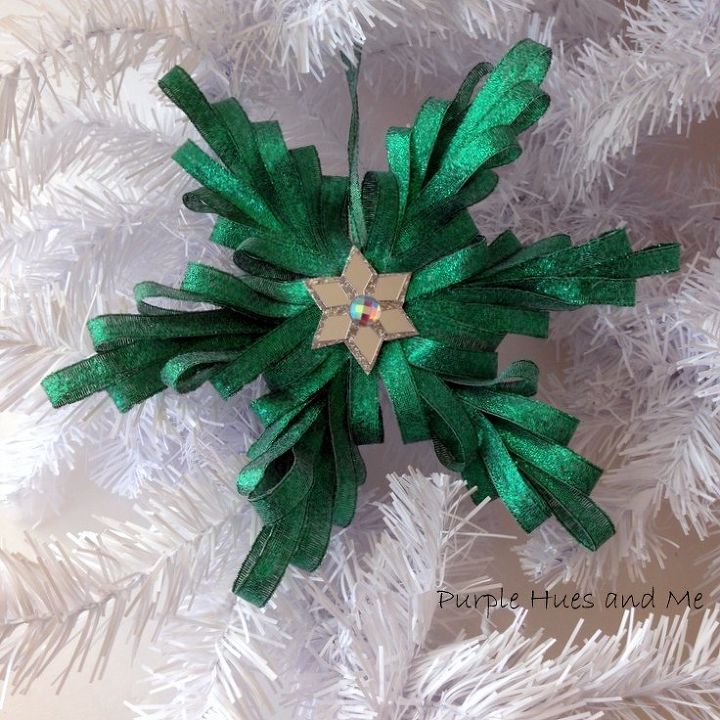
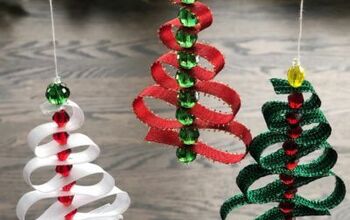
Ribbon Quilling Comb Ornament
5 Materials
Easy
You might know that quilling - the coiling and shaping of narrow paper strips to create a design - has been around for many, many years and that beautiful paper quilling patterns and designs can be created with a quilling comb technique. But instead of using paper, I'm using ribbon to make a Christmas ornament. And I'm also creating a "comb" out of cardboard and skewer sticks so that I can use a larger width ribbon and a simple quilling technique to make a lovely ribbon snowflake. A regular quilling comb just wouldn't work for this size.
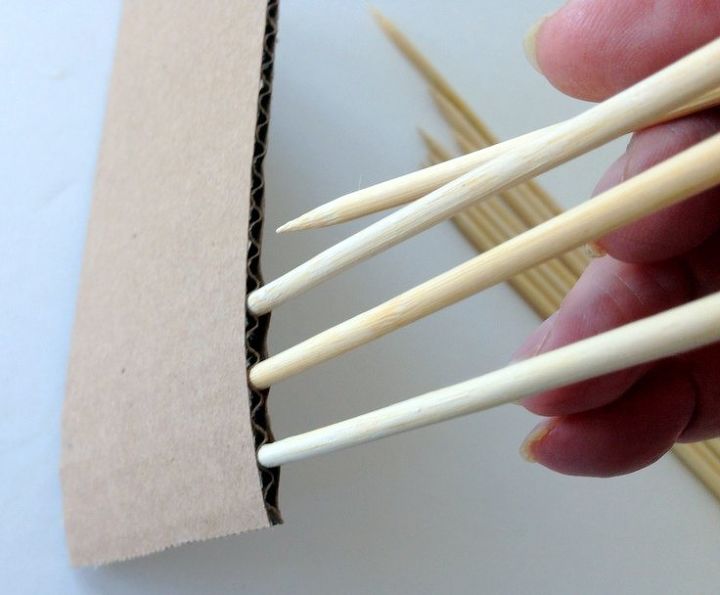
Let's begin by making the quilling comb. First, cut the closing flap off of a cardboard box making sure the corrugated openings are large enough for skewer sticks.

Insert pointed ends of skewer sticks into every other corrugated hole and channel. Press the flap with the pointed stick ends down on a flat surface so none will be protruding.
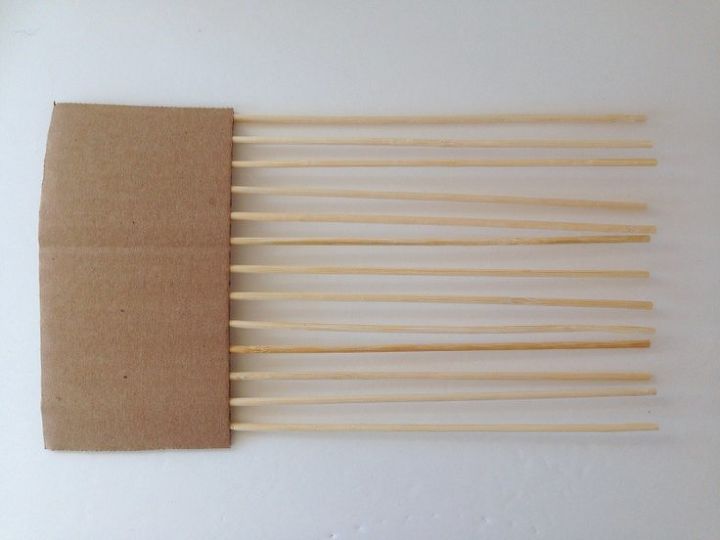
Continue inserting sticks until flap is filled and your handmade quilling comb is ready.
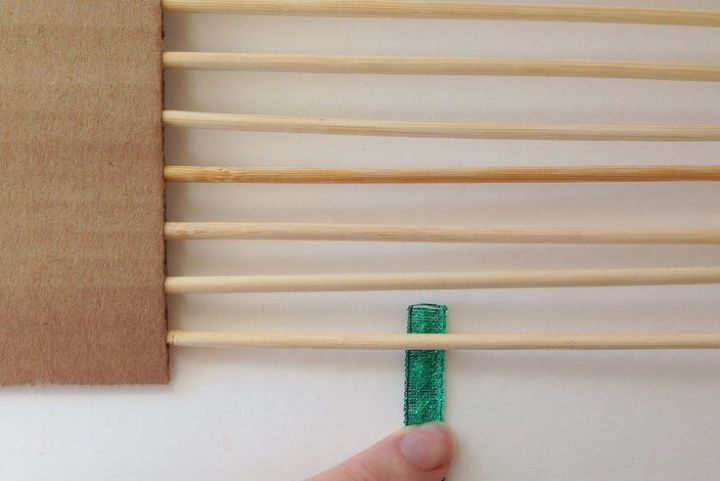
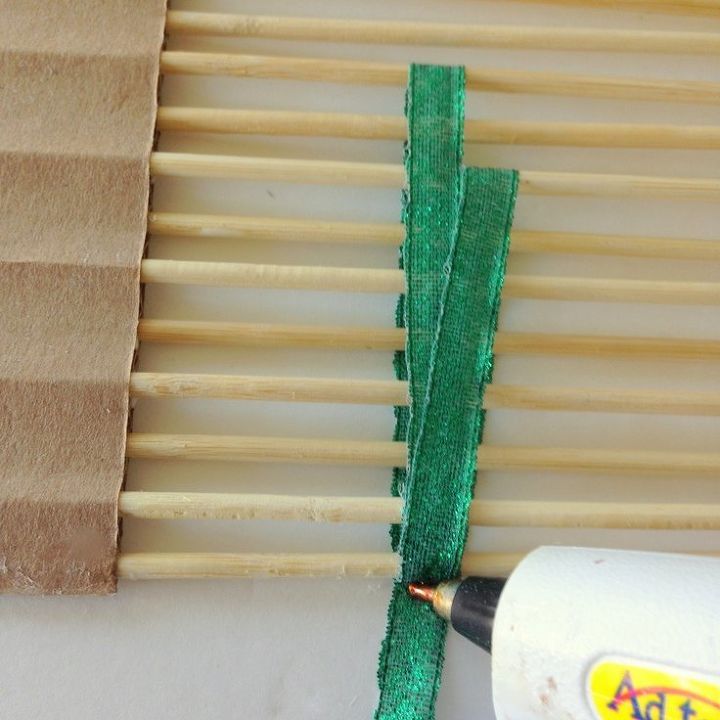
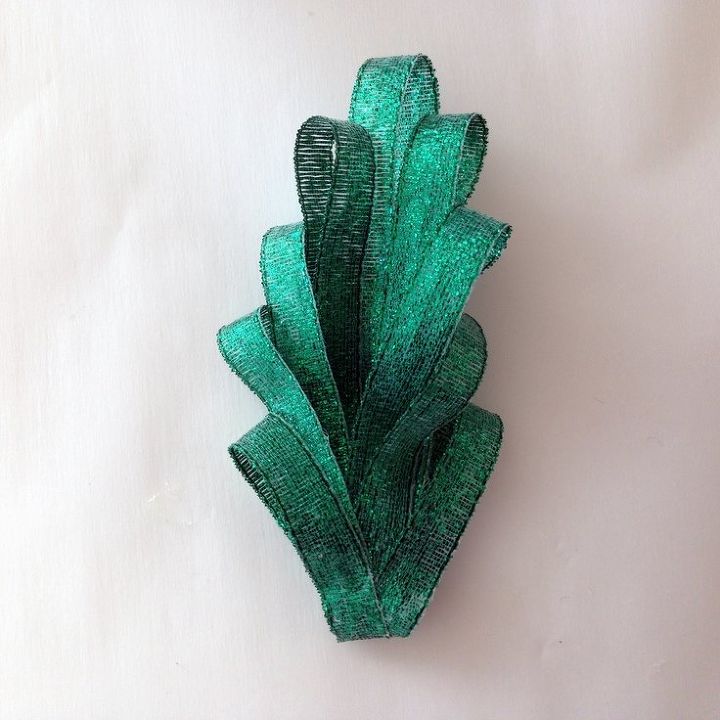
Next cut approximately 60 inches of ribbon for each snowflake "ray" (depending on size of flap and skewers). Insert ribbon in between the first and second stick or prong and place a dab of glue on the ribbon end to secure around the first prong. Gently move ribbon sideways and back to make sure it is not stuck to the wood.
Wrap a long loop around the tenth prong, back down and around the first prong and apply a little bit of glue on the ribbon.

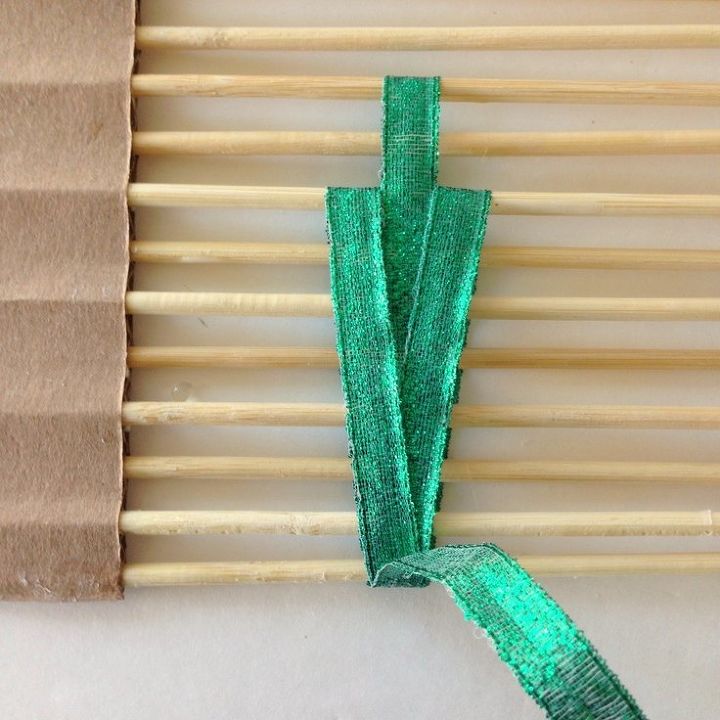
Then, wrap a second loop around to the right on the eight prong, down and back around the first prong, applying a bit of glue to the back and front of the ribbon base.
Next, wrap a loop on the eighth prong to the left of the first loop and back down to the first prong, securing the ribbon with a bit of glue on the front and back.
Continue decreasing the loop sizes on the prongs, adding a right loop and left loop, wrapping down and around, as before, adding glue to secure.
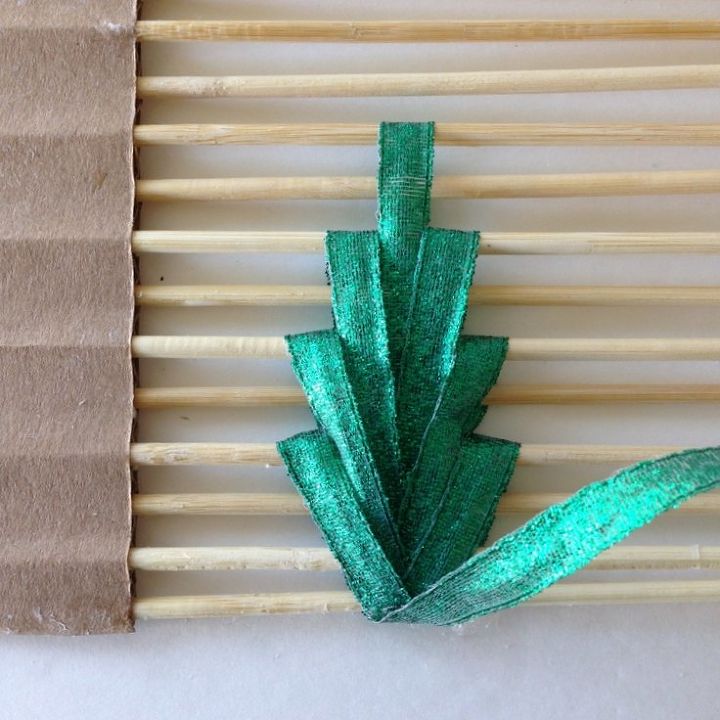
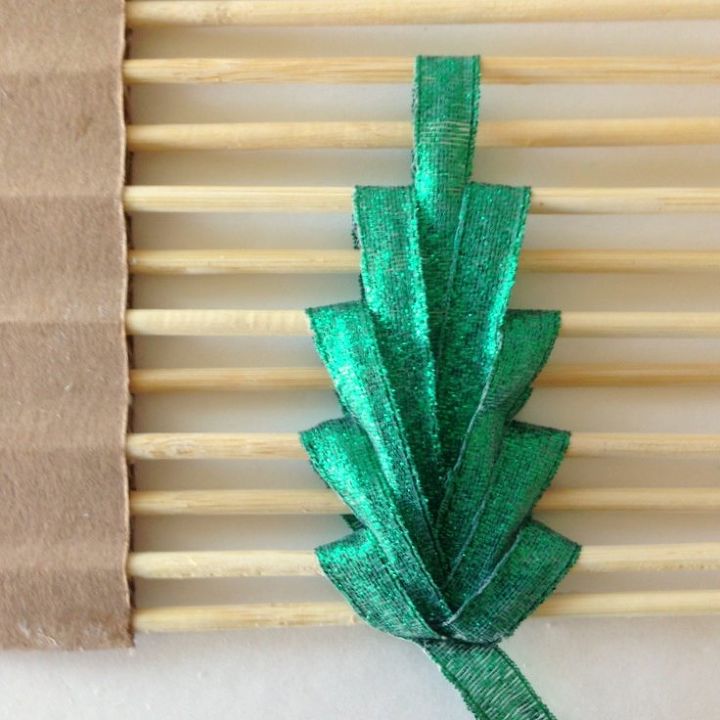
When finished looping, apply a bit of glue to the bottom of the looped ribbon to hold the shape, cut off excess ribbon and remove from comb. Voila! A pretty design for a snowflake ray!
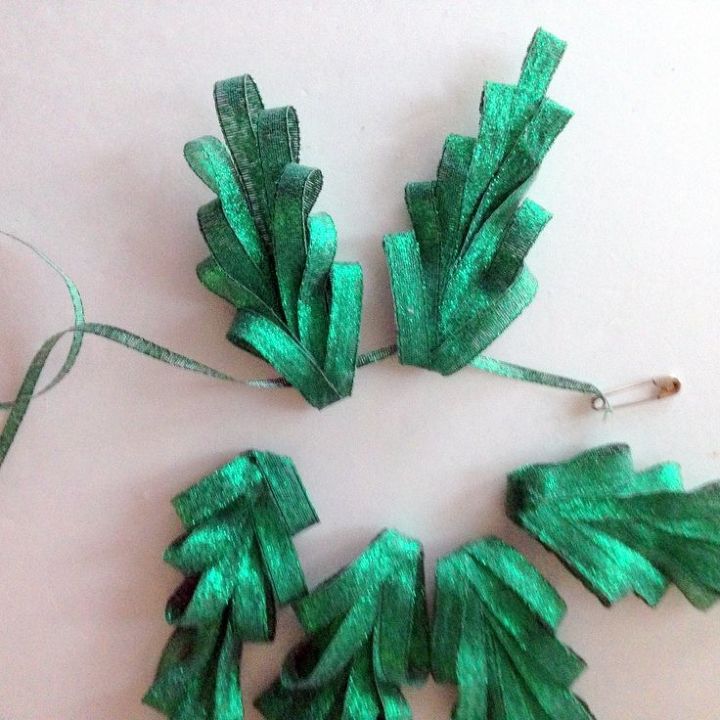
Now make five more! Then take a strip of 1/8 inch ribbon and thread it through the open bottom loops of each snowflake ray . . .
gathering into a circle. Tie into a knot and make a loop for hanging.
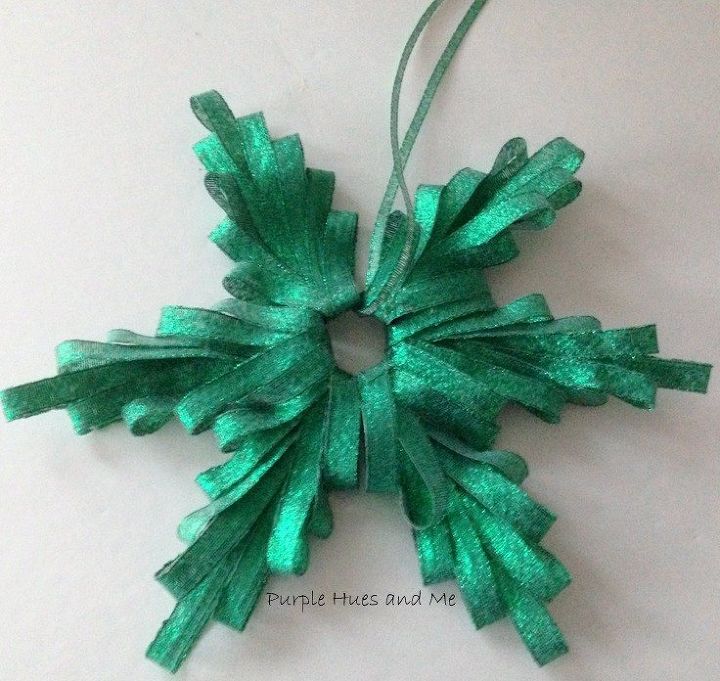
Add an embellishment to front and back center (over hole) and your adorable Ribbon Quilling Comb Ornament is ready for hanging on the tree!


Want more details about this and other DIY projects? Check out my blog post!
Comments
Join the conversation
4 of 75 comments
-
Wow this is beautiful! Oh no, another craft to learn. My list is getting longer by the day! LOL
-
You are very talented! I just love them!💖 Thank you so much for sharing this! Sooo beautiful!


Frequently asked questions
Have a question about this project?