


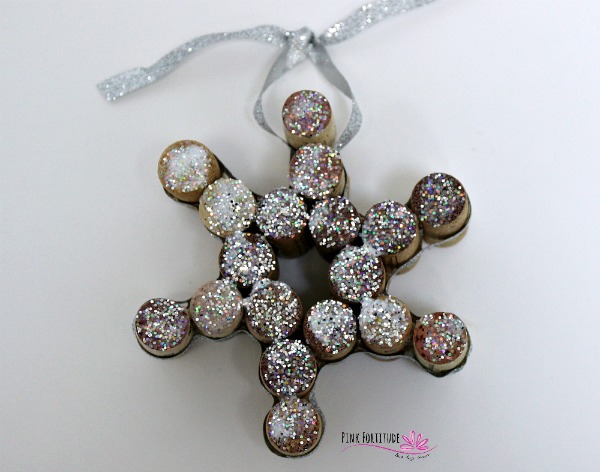
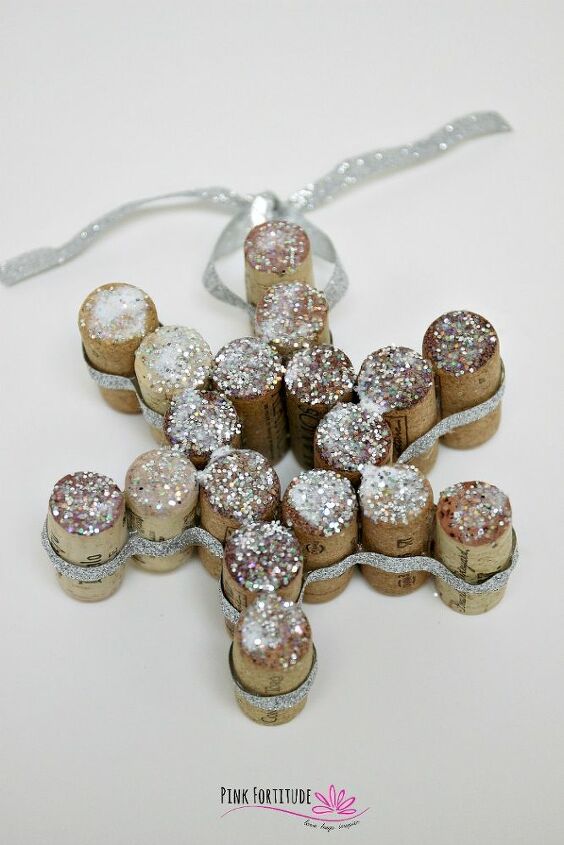
Wine Cork Snowflake Ornament DIY
Are you looking to upcycle your leftover wine corks? Why not make this super cute wine cork snowflake ornament? We’ve got the step by step directions and it’s easier than it looks. Hang it on your tree for Christmas and keep it for winter!
I was in the mood for a cute Christmas DIY to make for myself and to share with you. I wanted something relatively quick and easy because… seriously… who has the time right?!?!?
I saw a few tutorials for these snowflake ornaments using wine corks. They required saws and drills and cutting and… oh my. My goal was to eliminate anything requiring tools (other than a glue gun and scissors) and cut the time in half.
Snowflake Ornament DIY
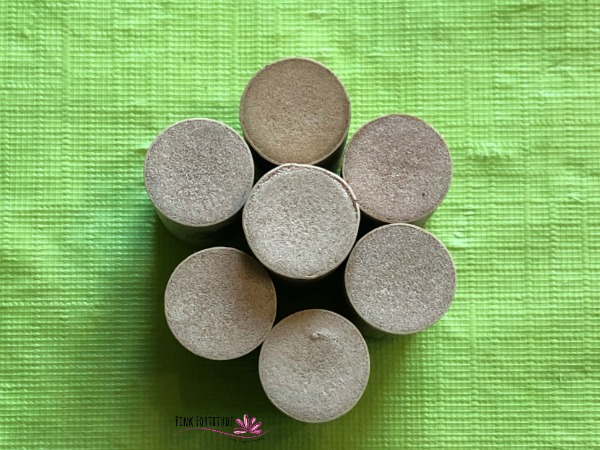
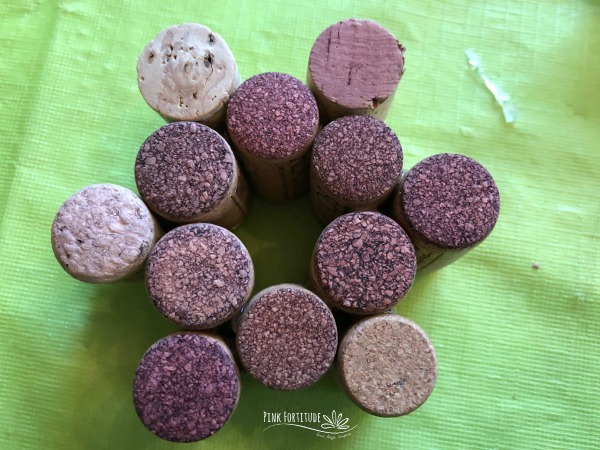
1. Lay out all of your wine corks and find the ones that are most similar in size.
2. Create a rough draft of what the snowflake will look like before you start.
3. Make sure the top is not what was used with the wine cork. It’s ok if it is colored (from red wine) as your glitter (or paint) will cover it.
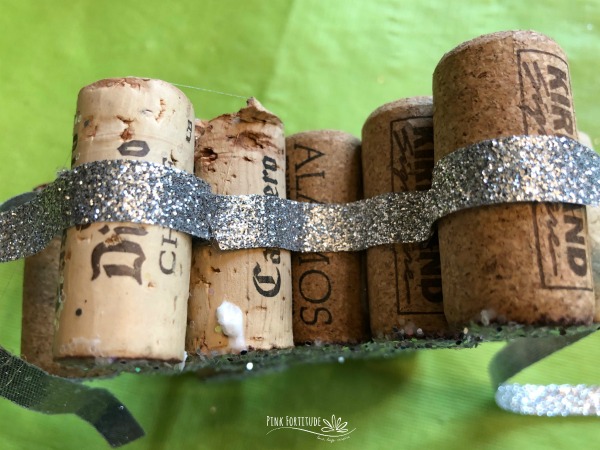
4. Using 6 corks, form a circle.
5. Use a larger size cork in the center to keep the shape. It will be removed.
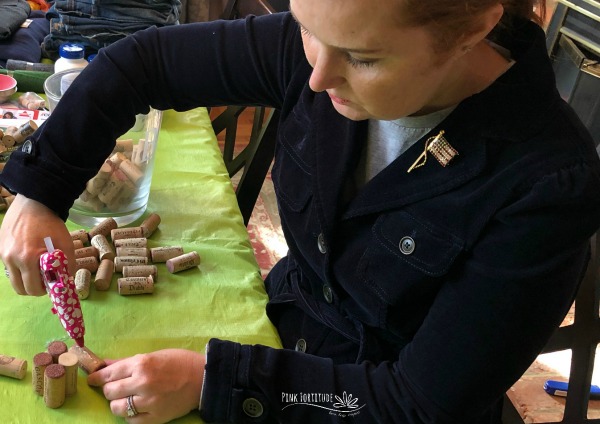
6. Begin with a strip of hot glue and gluing the inner corks together to form a circle.
7. When using hot glue, always be careful not to burn yourself. The glue only takes a few seconds to dry, but hold each cork together for a minute to ensure it’s not going to come apart.
8. Once the inner circle is glued together, remove the inner cork and discard.
9. Next, glue together your “spokes.” You want them to go into the “nooks” of the inner corks.
10. Glue together all of the spokes except for the last one.
11. Take your ribbon and cut at least a foot (if not longer).
12. Hot glue the ribbon to the cork. This will be the ribbon to hang your snowflake with.
13. Leave the snowflake to dry for a few minutes.
14. Place the snowflake on top of parchment paper.
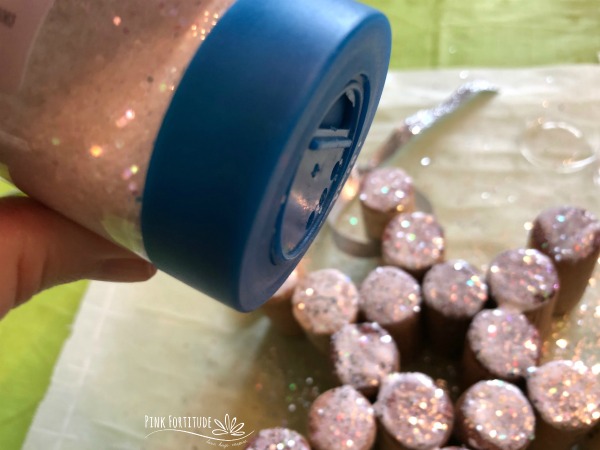
15. Get your glitter ready.
16. With Mod Podge and a brush, quickly and liberally, brush the Mod Podge over the tops of the corks. You will want to be generous with the Mod Podge, keep it on top of the cork, and work quickly.
17. Sprinkle the glitter onto the tops of the corks where the Mod Podge is.
18. If you don’t want to use glitter (and I totally don’t blame you!), you can paint the tops of the corks instead.
19. Let dry for 5-10 minutes.
20. Shake the glitter onto the parchment paper. If you only used one color, you can pour the leftover glitter back into the container. I used 2 different colors, so the glitter bomb just went into the trash.
21. Starting with the top of the snowflake where the ribbon is, take a new piece of ribbon (you can leave it attached) and begin to hot glue it around the perimeter of the snowflake, working in sections. Again, always be careful with hot glue as to not burn yourself.
22. Let dry again for 5-10 minutes.
23. Finally, remove all of the “cobwebs.” I’m not sure what the official name is for them, but those loose stringy things that are leftover from the hot glue gun.
Want to see the entire tutorial and DIY? Click on the link and come on over to the blog. I would love for you to stop by and say hello!
PS - we have some super cool free printables for you too!


Comments
Join the conversation
-
I'm pretty sure that my tutorial inspired your snowflake. Glad you found a way to make it without the use of power tools.
-
I read somewhere to use a blow dryer to make the cobwebs disappear! I've not tried it myself, but worth a try! This is a great Idea!!!


Frequently asked questions
Have a question about this project?