


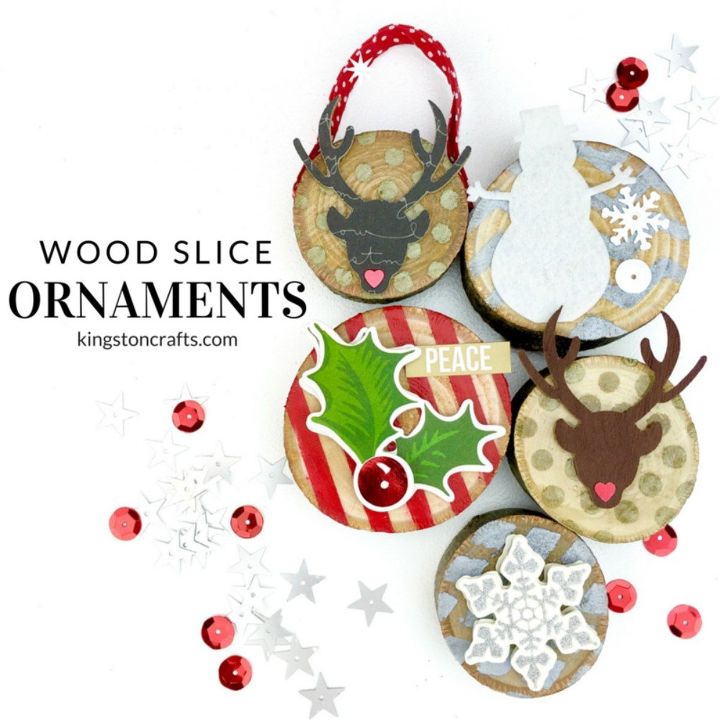
Wood Slice Christmas Ornaments
Learn how to turn some plain wood slices into some festive Christmas ornaments that will be perfect for your tree!
Let me be upfront here - mixed media gives me anxiety. I WANT to make awesome art journals and canvases and I WANT to get my hands all messy and I WANT to try cool new techniques - but I have some sort of emotional issue that has made it a struggle. I once almost passed out in a class Dina Wakley was teaching because I just couldn't deal. True story. It is a miracle she is still my friend.
With that being said, making mixed media wooden slice ornaments was AWESOME!
These gelatos and stencils were so easy and fun to use and it made me feel SO crafty! Now, even though I felt crafty, everything was still "clean" enough that I didn't feel like I needed to hose myself down. Also, the process of making these ornaments didn't involve a million steps or take seventeen hours to dry.
So, if you want to bring some mixed media into your life this holiday season, then learn how to make your own wood slice ornaments!
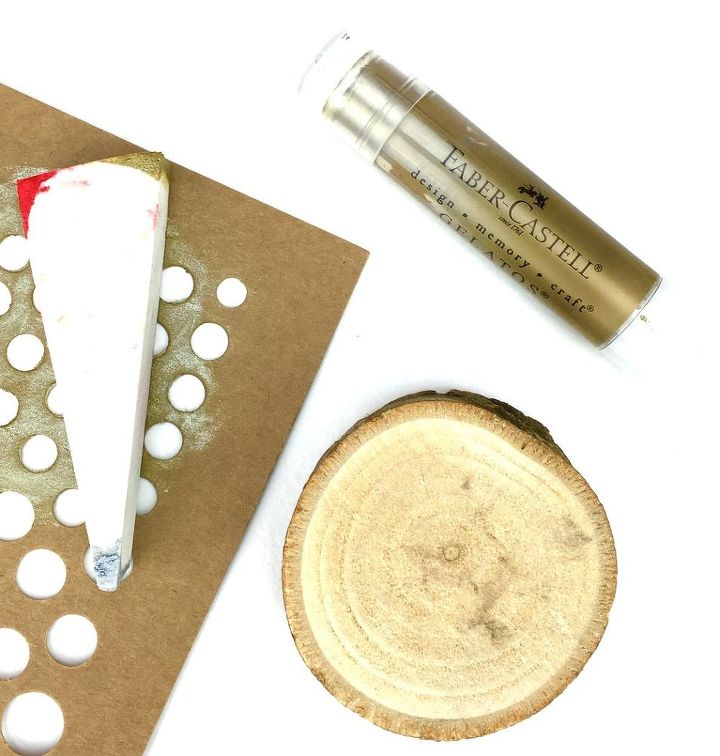
Here are the supplies you will need:
- wood slices
- Design Memory Craft Gelatos in assorted colors - I used Gold Champagne
- Design Memory Craft Stencils
- foam sponge
- Mod Podge in matte (OR a liquid clear drying adhesive - see below*)
- foam brush
- hammer/nails or staple gun - if desired
- coordinating ribbon
- Xyron 3" Sticker Maker
- assorted die cuts/embellishments
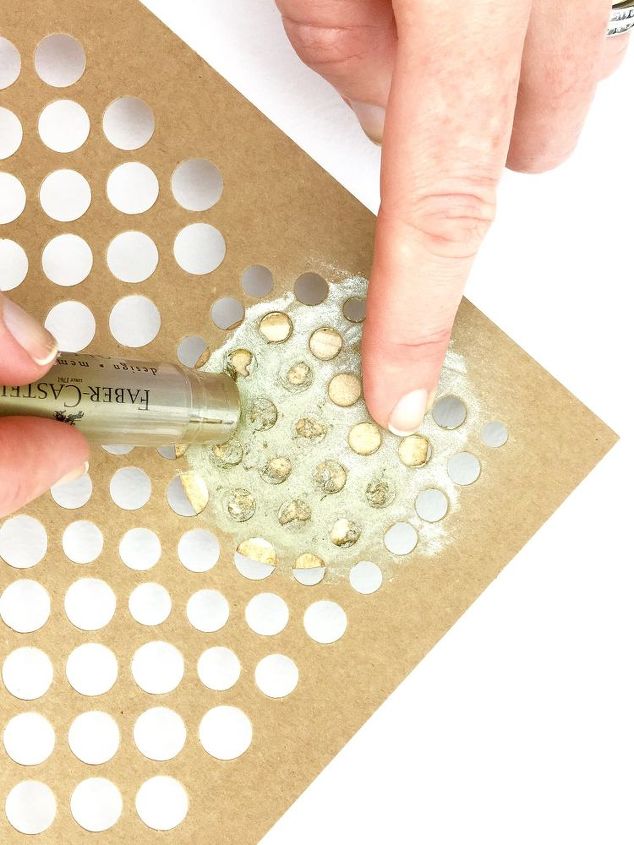
Step 1: Lay stencil over wood slice. Use one hand to hold the stencil in place and the other hand to apply gelato to the stencil pattern.
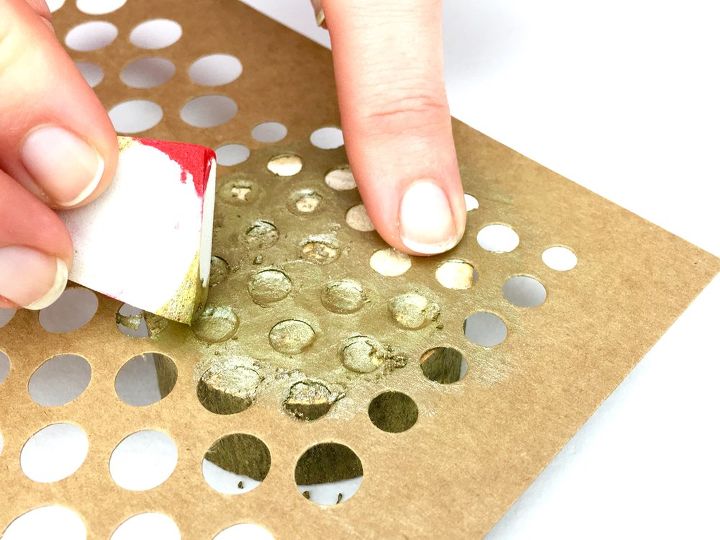
Step 2: The gelato will NOT fill all of the holes, so use a foam sponge to spread the pigment throughout the pattern.
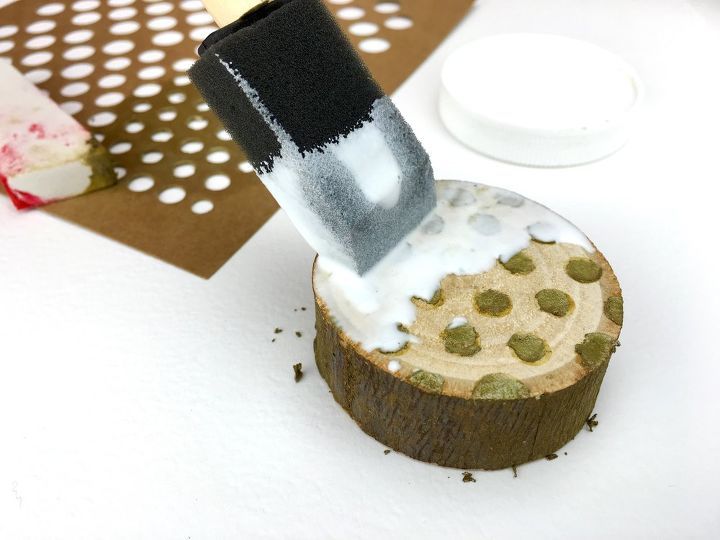
Step 3: Use a foam brush to GENTLY cover the top of the wood slice with matte Mod Podge. If you brush it on too roughly flakes of the pigment will come off and mix with the Mod Podge.
Once your wood slice has been covered in Mod Podge, set it aside to dry.
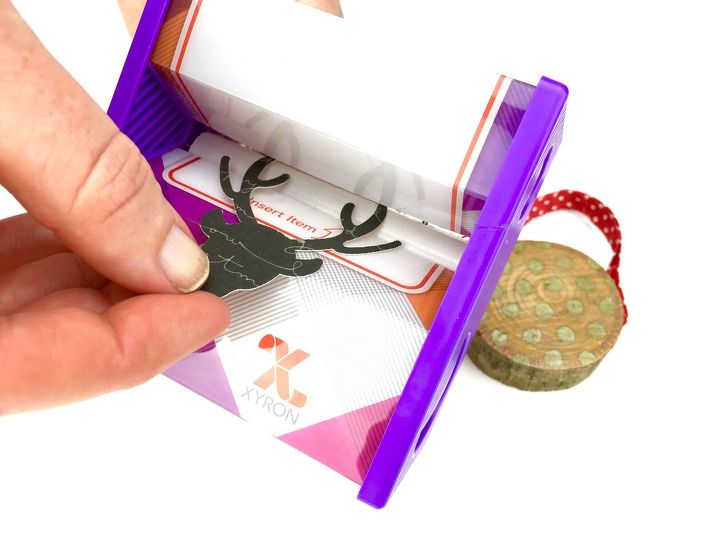
Step 4: Using a deer head shape from the Cricut Tablescapes Fall & Winter Cartridge (and my Explore Air), I cut the shape out of both chipboard (for stability) and patterned paper. I then ran the patterned paper through the Xyron 3" Sticker Maker and applied it to the chipboard.
You can create your own embellishments or use any leftover embellishments you've got in your stash. This is a GREAT way to use those "onesies twosies" embellishments you've got leftover from other projects but like too much to purge.
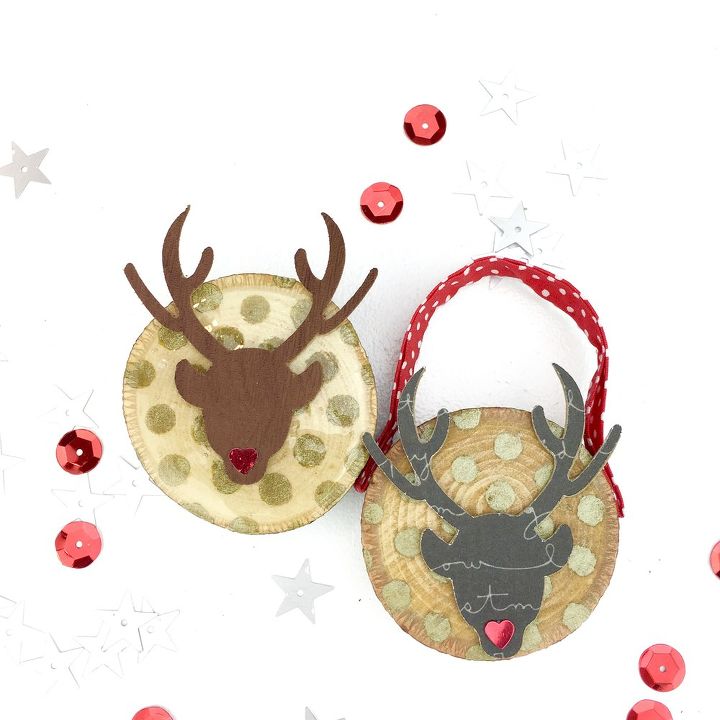
Step 5: Adhere the embellishment to the wood slice and nail/staple a piece of ribbon to the wood slice, if desired to create a hanger.

And voila! With some plain wood slices, you can create your own fun and funky Christmas ornaments in just a few minutes!
To get more project inspiration for your home and to learn more about the products used in this project, stop by my blog!


Frequently asked questions
Have a question about this project?