


DIY Wedding Card Box With Vintage Flair (Using a Cricut)

Make this sweet DIY Wedding Card Box for a sweet addition to your wedding reception. This easy DIY wedding project uses a vintage suitcase and letter banner cut on a Cricut Explore Air.
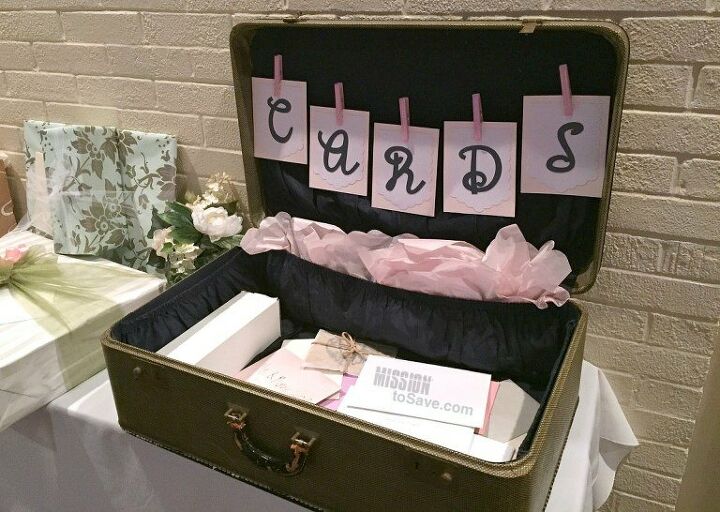
When my sweet niece got married, I had recently become the proud owner of a Cricut Explore Air. So I was excited when she asked me to make a few decoration pieces for her wedding reception. One of the first things she asked me to make for the reception was a wedding card box.
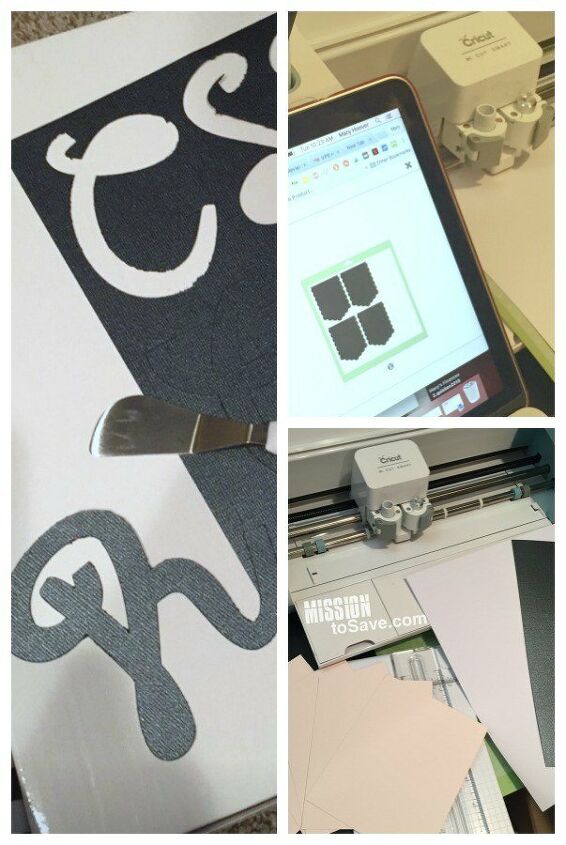
The process is really quite easy. First start with finding a background shape for your letters to attach to. If you search “pennants” or “banner” in the Cricut Design image gallery you will find a ton of options. I chose something with a scalloped edge- “Scallop Edge Pennant” image from the Pretty Pennant collection.
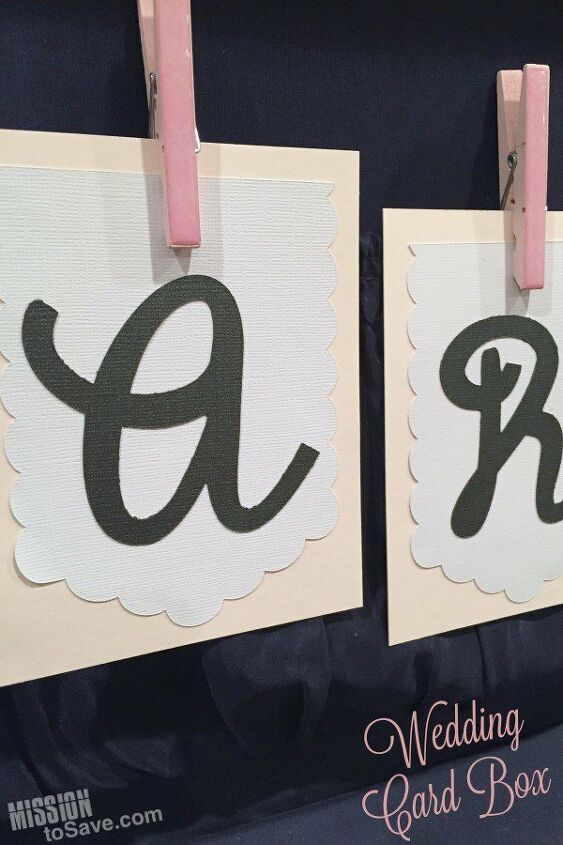
My letters are about 2-3 in tall. And in the video tutorial here you can see, since each letter was going on it’s own pennant, I was able to move the letters around on the design space editor page to make the best use of my piece of card stock.
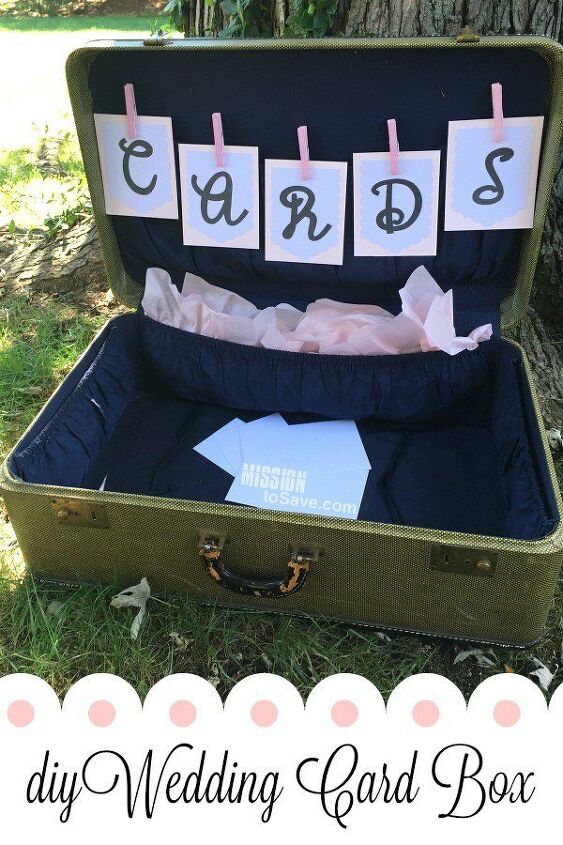
Then it’s as easy as glueing the pieces together. I hung the pennants inside of a vintage suitcase and "fluffed" it up with a little tissue paper. I'm proud to say- it was a hit! What do you think?
Resources for this project:
See all materials


Frequently asked questions
Have a question about this project?