


DIY Pet Feeding Station

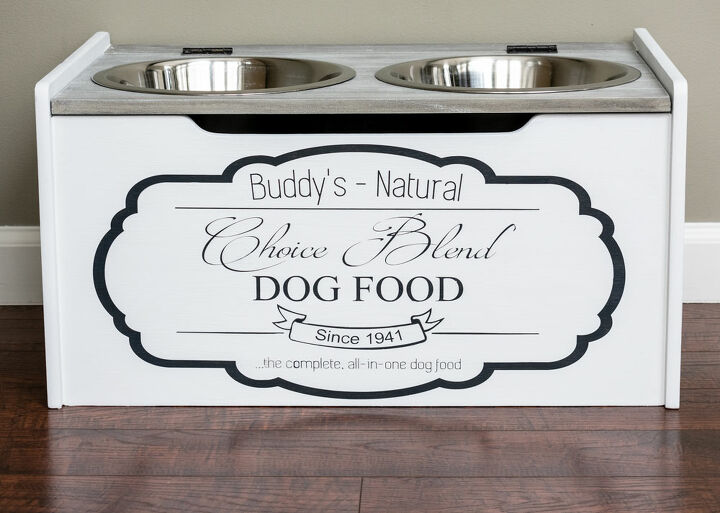
Use a thrift store toy box, hinges & lid support to create an elevated pet feeding station for your favorite furry friend. The basic supplies for this project came in under $10. Please keep in mind that I had the tools, paint and vinyl on hand.
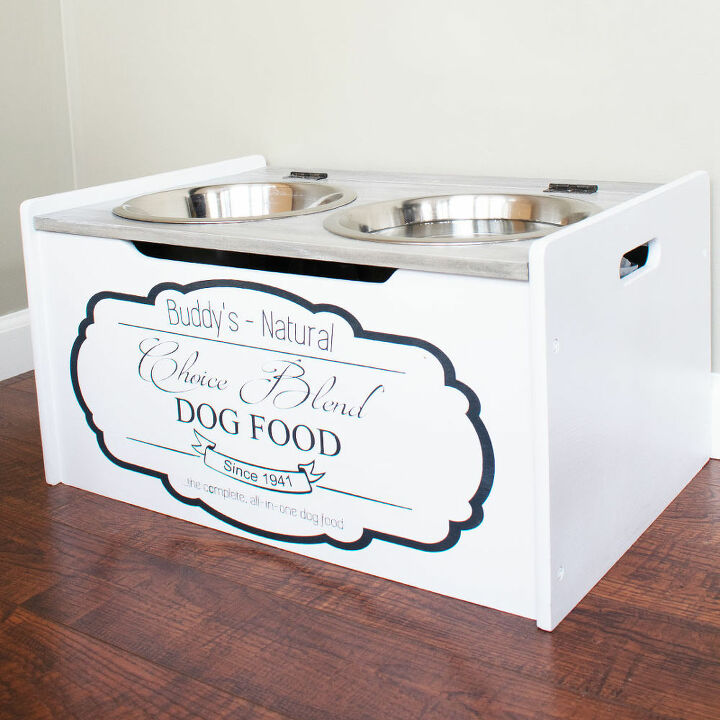
This is one of my favorite projects to date! Mostly because it solved a storage problem and stopped my vacuum cleaner from spilling the water from my dog's bowl. 
THE DIMENSIONS
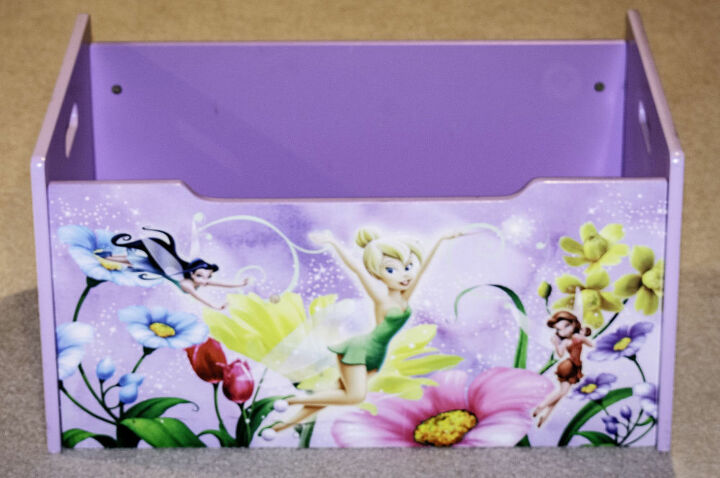
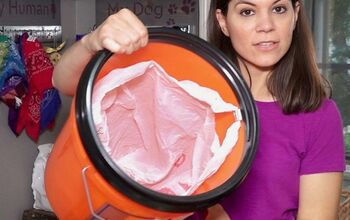
I picked up this toy box from my local thrift store. The dimensions of the box are 22 3/4″ wide, 15″ deep, and 12″ tall.
It does fit an entire 30 pound bag of dog food.
I painted the hinges and lid support with Rustoleum Oil Rubbed Bronze spray paint.
The box was already assembled when I brought it home, but I stilled tightened down all of the screws.
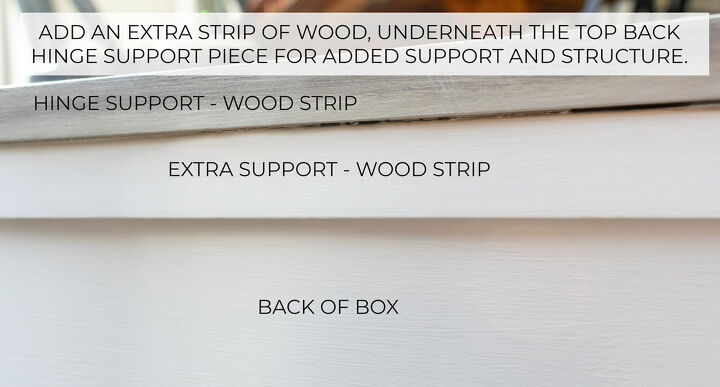
TOP AND BACK SUPPORTS
- I cut a strip of 1/2 inch MDF to fit the length of the top/back of the box (21.5″ x 2.25″) and attached it with corner braces or “L” brackets. NOTE: When working with 1/2″ MDF you need to use screws that are less than 1/2″ long or you will drill through the surface on the opposite side of the wood.
- I added a small strip of wood on the back side of the box, underneath the long strip for added support.
- Next, I cut the lid out of 1/2 inch MDF. The size of the lid is 12.25″ x 21.5″.
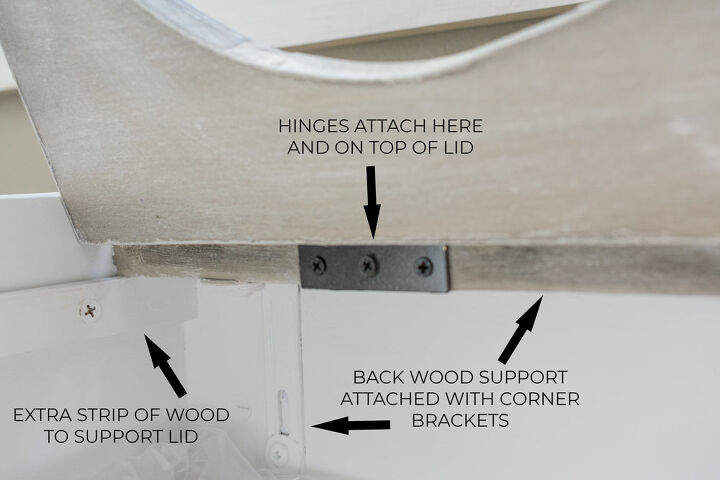
MAIN LID & INSIDE SUPPORTS
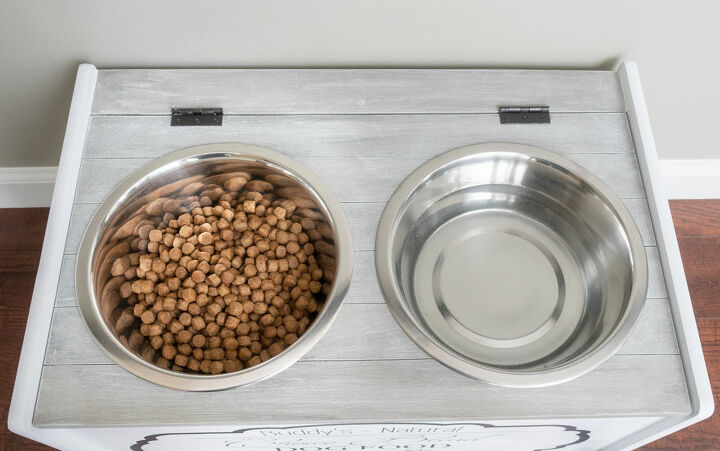
- I flipped the dog bowls over and placed them where I wanted them and traced the circles. Then I measured in about 1/2″ and made another circle. This inside circle would be the guide for my cut. I drilled a large hole on the inside of the inner circle to fit my jigsaw blade. Then using my jigsaw, I cut out both of the holes for the dog bowls.
- I sanded and wiped down all cut edges.
- On the inside of the box, I added a small strip of wood on each side to help support the lid.
- Then I attached the lid with the hinges.
- Finally, I attached the lid support.
- To create the faux planked board effect on the lid, I measured and marked lines down the lid at approximately the same size as the hinge support. I used my Multimax tool with a wood cutting blade to make grooves, using my lines as a guide. Lastly, I ran sandpaper through the grooves to widen and smooth them out.
PAINT FINISH
- First, I lightly sanded and wiped the box clean.
- Then I primed the box and lid with Zinsser Bulls Eye 1-2-3 water based primer.
- The main part of the box is painted with Rustoleum’s Chalked Linen White paint. I did two coats.
- For the lid, I started with a base coat of SW Etheral Mood and let it completely dry.
- Next, I made a mixture of half clear mixing glaze and half Rustoleum flat black. I painted the glaze on the lid in a horizontal direction to mimic the way the wood grain would go. Then I wiped it off in the same direction and let it dry.
- Lastly, select a lighter color beige/gray than your base coat. I used Behr, Toasty Gray.
- Dip the tip of your brush into the paint and dab the paint off on a paper towel. Sporadically make brush marks along the wood in horizontal pattern. Then dry your brush on a paper towel again. Now go back over the whole surface in a zig zag motion with your dry brush. This will really begin to give your finish depth and texture.
- When the paint is dry, add two to three coats of Polycrylic. This step will protect your paint finish from water and scratches.
THE STENCIL
Note: It is very important that you seal the base coat of chalk paint with Polycrylic or your vinyl stencil will pull up the chalk paint when you try to remove it.
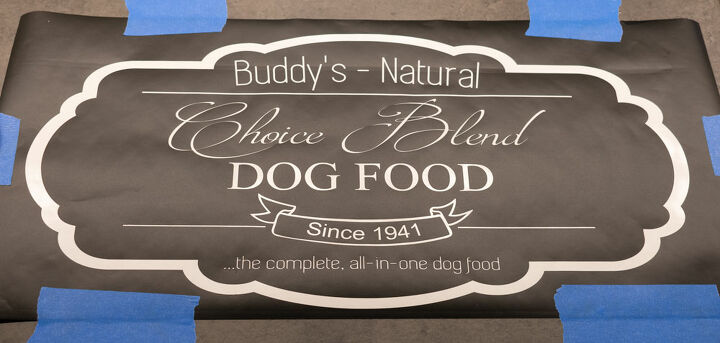
- First, using black matte vinyl, I cut the image with my Silhouette Cameo.
- Then I weeded out the letters which left me with the stencil above.
- Next I cut the transfer paper to the same size as my image, removed the backing from the transfer paper and pressed it on the front of my vinyl. Then I removed the backing of the vinyl, lined my image up and pressed it on the front of the feeding station. You want to rub the back of the transfer paper firmly with a credit card to ensure the vinyl sticks to the surface of your project. Then slowly remove the transfer paper making sure the vinyl is completely adhered to your project.
- Lastly, I used Annie Sloan Graphite Chalk Paint with a stencil brush to fill in the letters. This paint is similar.
- To protect the finish, cover the painted letters with Polycrylic.
Here is a close up of the painted stencil.

For a more detailed tutorial on this project and to grab your copy of this vintage sign stencil, check out this article. To see my latest budget friendly ideas to spruce up you home, visit my blog. Hope you enjoy this project!
Laura


Comments
Join the conversation
-
Very nice save. Looks amazing. Now just so your pup doesn't learn to lift the lid himself 😂
-
Too funny! He hasn't yet...but I never thought of that.


Frequently asked questions
Have a question about this project?
I have something similar to this and water is always getting splashed and ends up inside the box so I quit storing anything inside the box because of this. Do you not have this problem?