


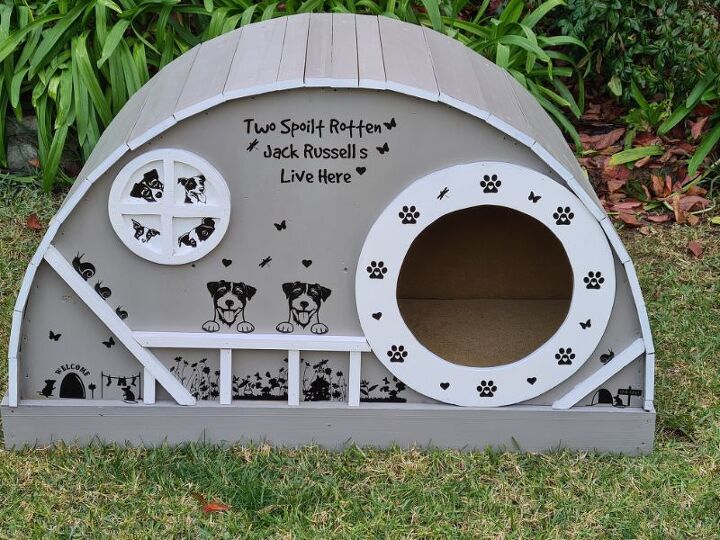
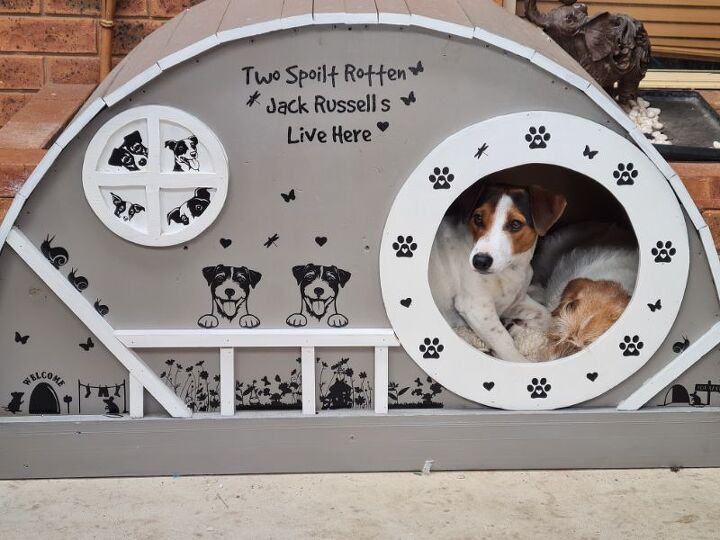
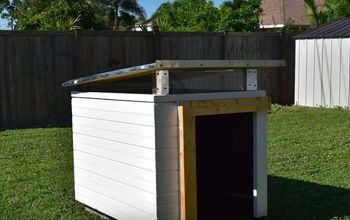
Hobbit Style Dog House
Late last year we added two new Jack Russell terriers puppies to our family and boy are they a handful. Their latest stunt is pushing my 14-year dog out of her bed so they can have it. So my idea for this project was to make them a little hobbit style dog house of their own.
Our dogs are spoilt rotten and sleep inside. But on the days that I work, they do have to go outside for a few hours. In Australia, it can get really cold in the winter, so I wanted somewhere warm for them to sleep. I was determined not to give in and buy them more soft beds because they have already destroyed 6.
My idea was to build them a wooden dog house that they would have more trouble destroying. To look at these two sweet puppies you would think how cute, but they are destructive little demons. lol
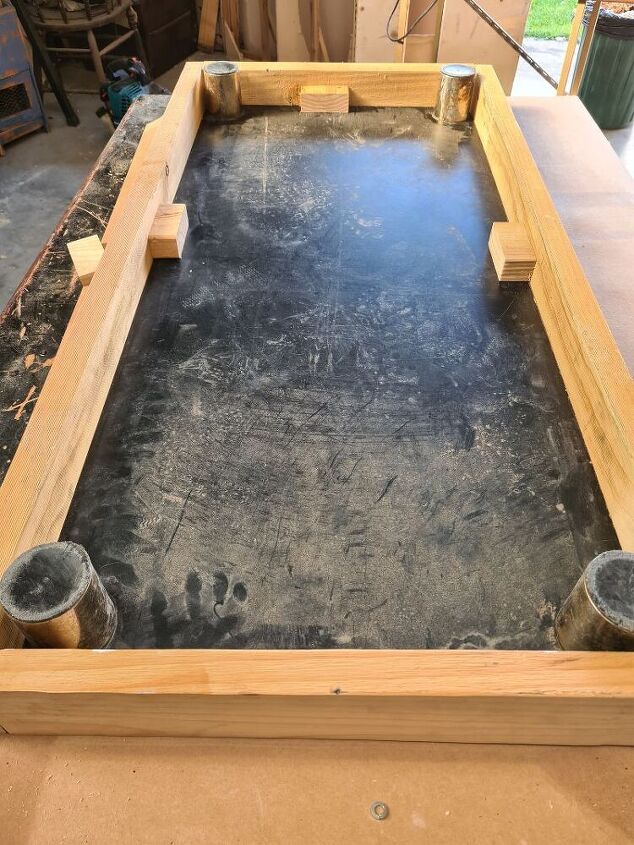
To make the base I used a recycled coffee table which was 1150mm x 600mm. It came with legs which I cut down to 10cm to lift the base off the floor.
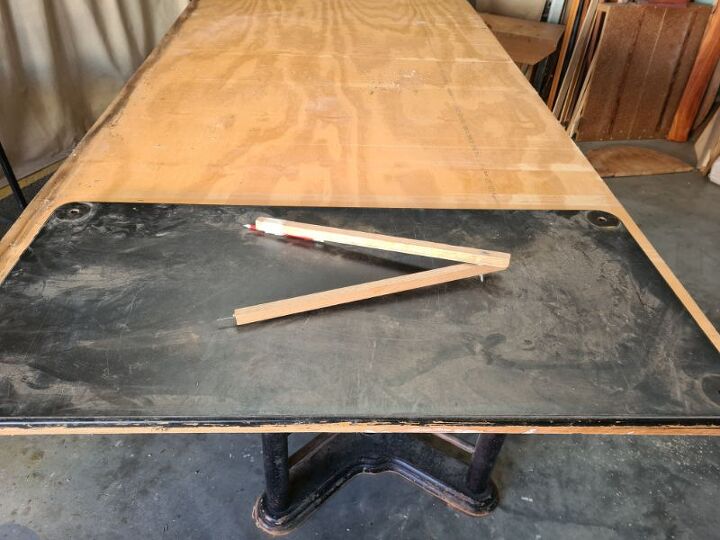
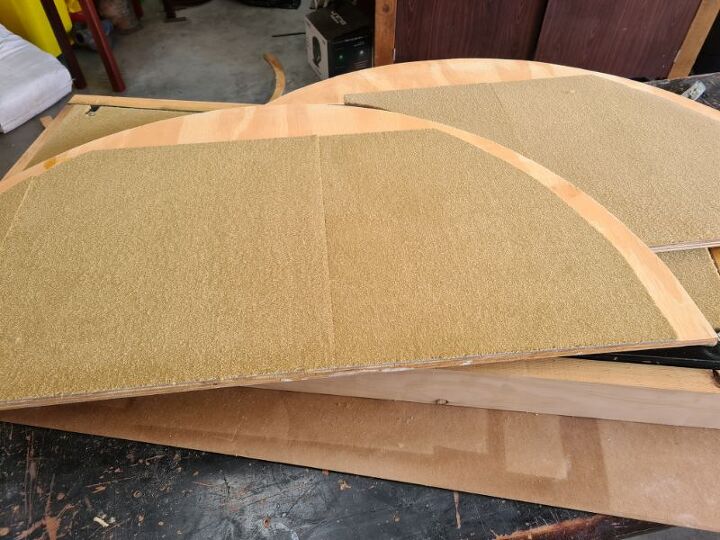
I used some 12mm plywood for the sides of the dog house. To draw the shape of the hobbit house I used a large wooden compass that I made. I must also mention that I make up my projects as I go along and they don’t always go to plan, so I have to make changes to fix them up.
This project was just one of those where everything went wrong because I messed up in the beginning. My first mistake happened straight away. Instead of waiting until the base was boxed in to make the arch, I cut it first so the arch was smaller than the base and did not fit.
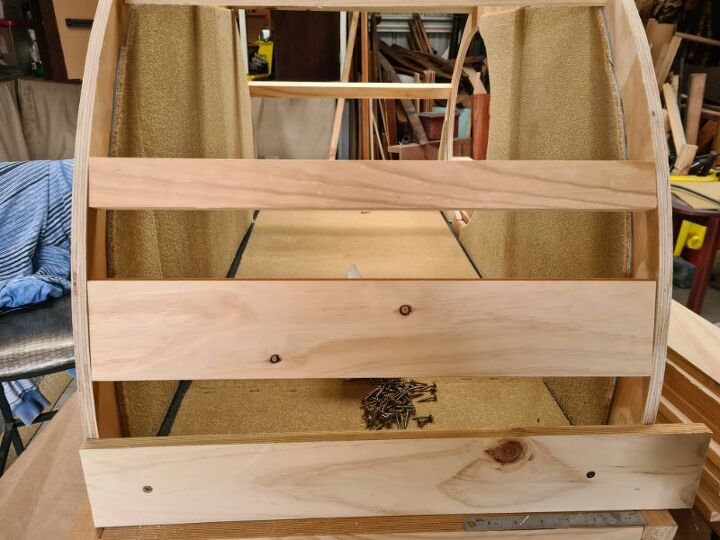
But I did solve this issue down the line. I used 2×4’s and framed the base. To attach the frame to the base I used offcuts of wood that were glued and screwed to the base. The original idea was the side arches would be screwed into the 2 x 4 pieces of wood.
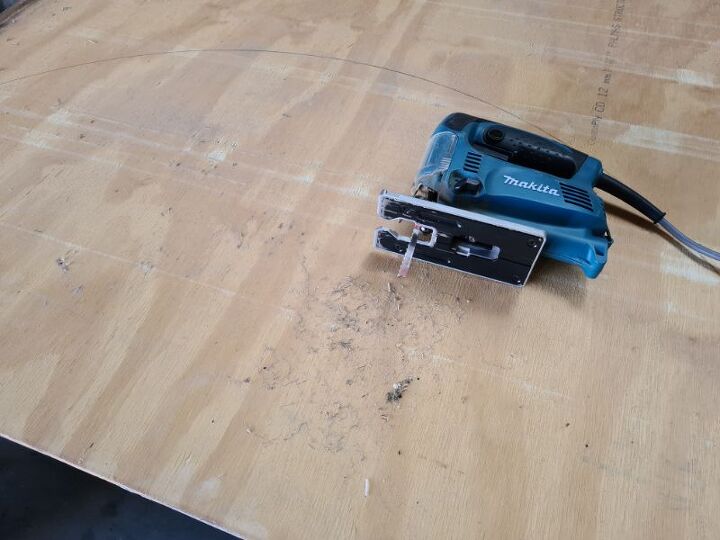
You can now draw your arches based on the size of the already boxed base. The plywood I used was also recycled and was in poor shape, but the paint will cover all the damage. Cut out your shape using a jigsaw or suitable saw.
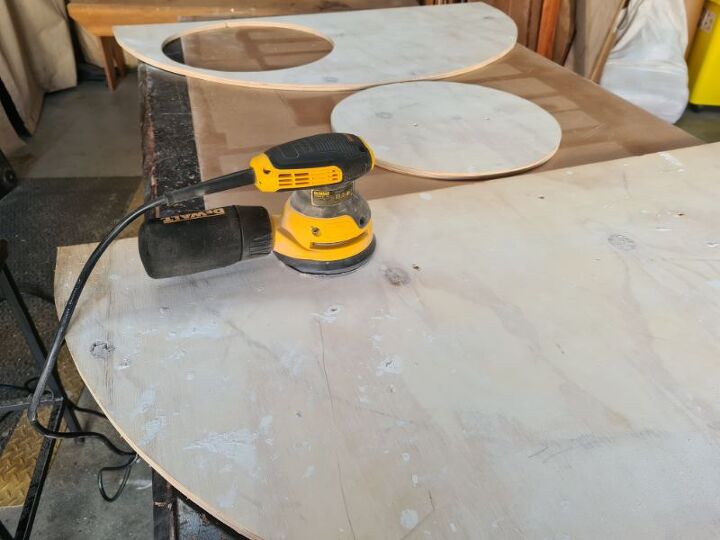
It is easier to sand the sides before they are attached to the base.
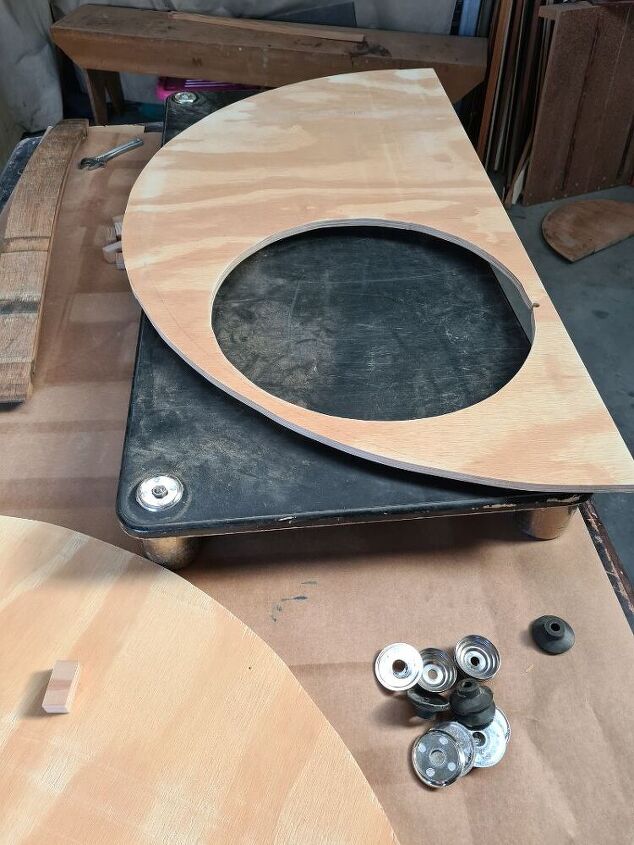
Next, drill a hole large enough for the blade of the jigsaw to fit through and cut out the door. I must have been in la la land when I cut the door because it was huge. I must have thought I owned great Danes based on the amount of destruction they cause. A suitable size hole for Jack Russell terriers is about 25 cm. I will fix the door further down.
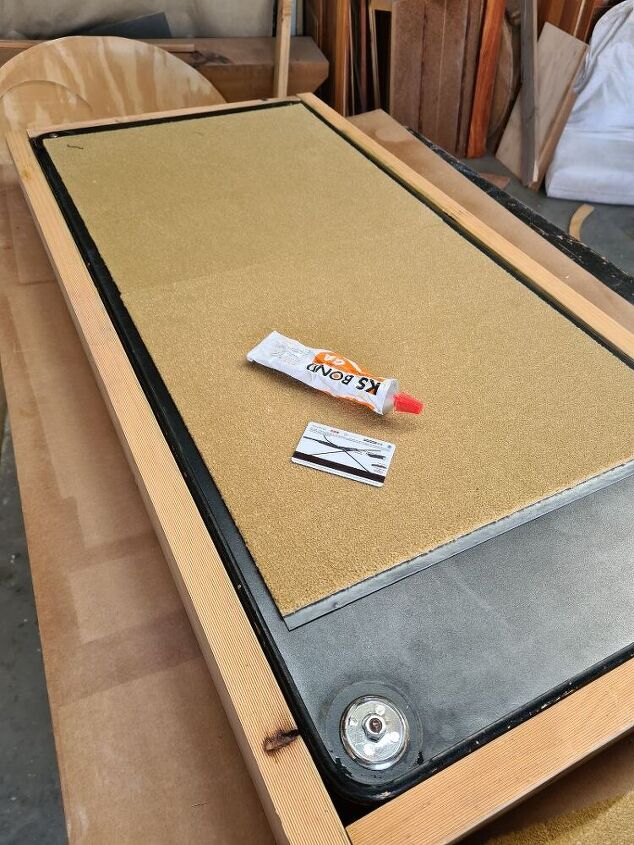
Carpet the base To make the house cosier I bought some carpet tiles that I glued and stapled to the base.
You can also add some carpet tiles to the sides to keep it warmer inside.
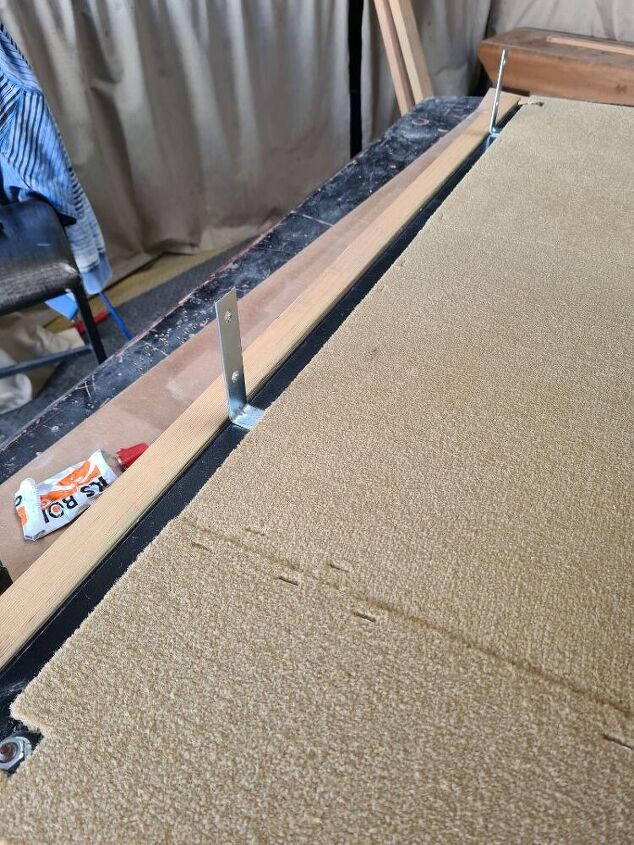
As I mentioned above, I had cut the sides too short to screw into the frame. So my solution was to add some brackets to the base that will screw into the sides. I added 2 brackets on each side to support the sides of the house.
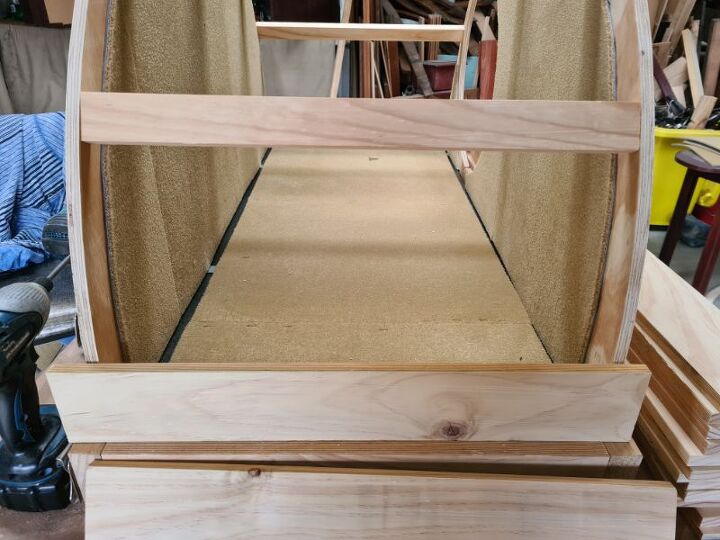
I screwed some smaller pieces of wood as supports to hold the two sides together.
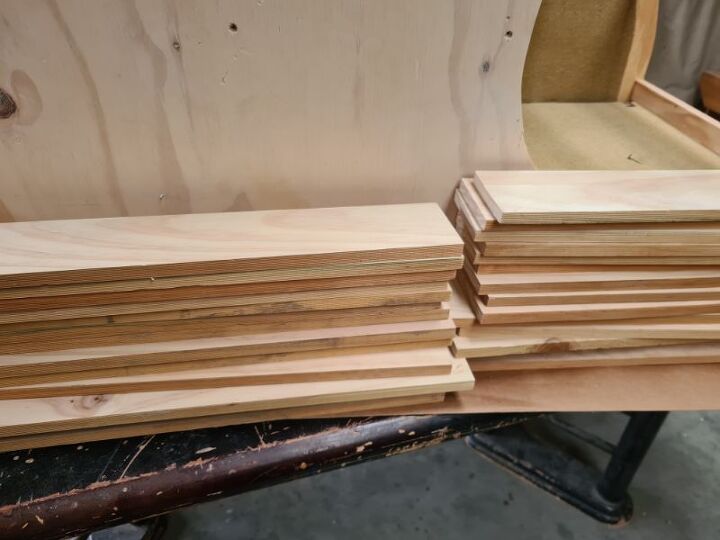
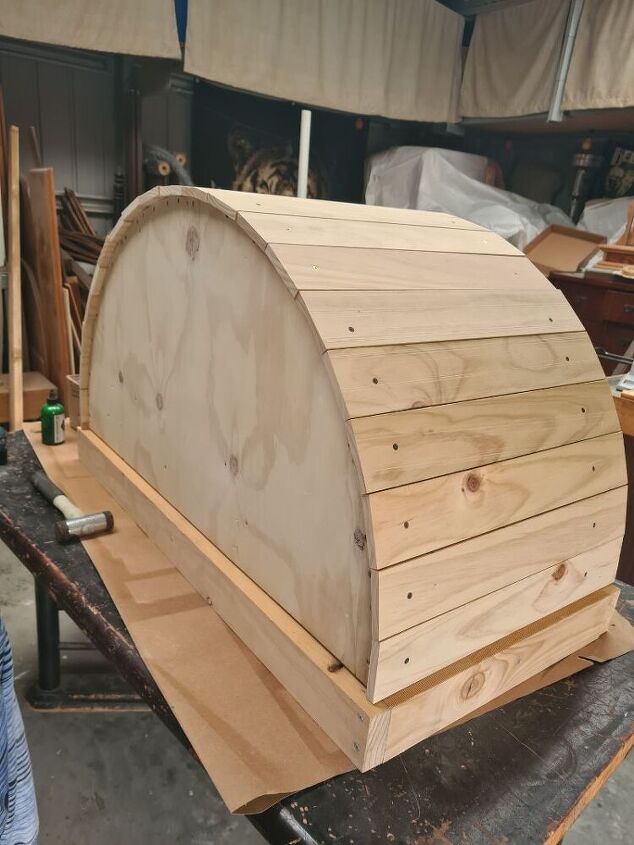
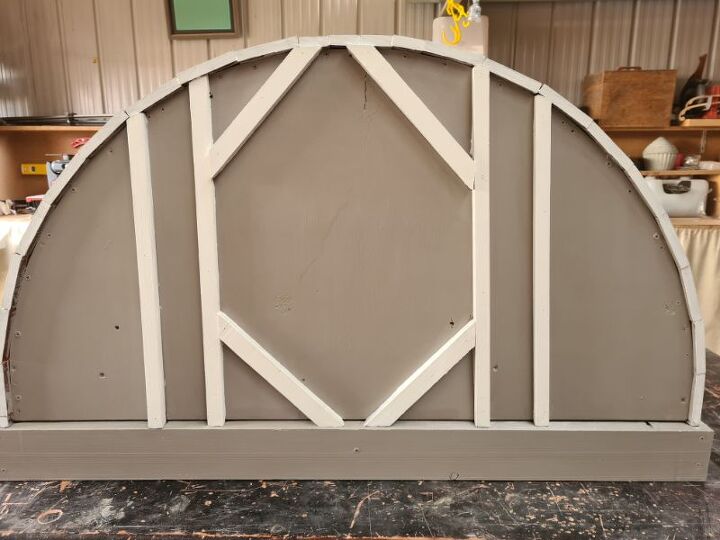
Making the roof To make the roof I cut some 2 x 4 in half lengthwise using a table saw. I felt using 2 x 4’s would make the house too heavy and hard to move. If you want to go with the hobbit style dog house and have the astroturf on the roof you can screw them directly in between the two sides. My dogs ripped up the astroturf that was to go on the roof before I even started. Because of this, I had to change the roof and add an overhang which I thought would look better. This was more work to attach but I felt it looked better. My dog house will be under a large well-sheltered pergola so I did not add any waterproofing before I added the roof. If yours is going to be outside in the elements you will need to add some sort of waterproofing to prevent the inside from getting wet.
Because I used plywood for the sides it would not be possible to screw the roof slats into the sides without them splitting. To give the roof slats something secure to screw into, I added some supports around the inside. You can also use small blocks of wood instead of full support pieces.
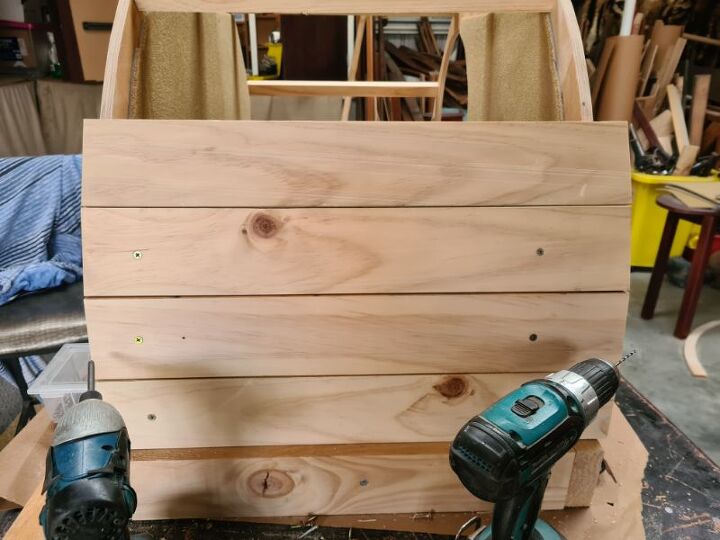
You start at the bottom and work your way over, screwing the roof slats into place.
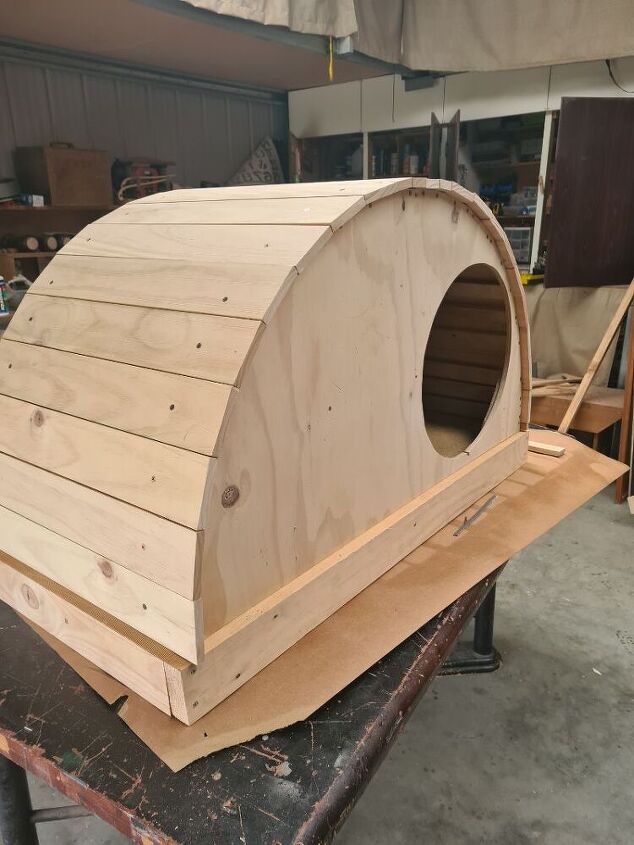
When you get to the top of the arch you may need to cut the slats a little thinner so that they sit flush with the sides.
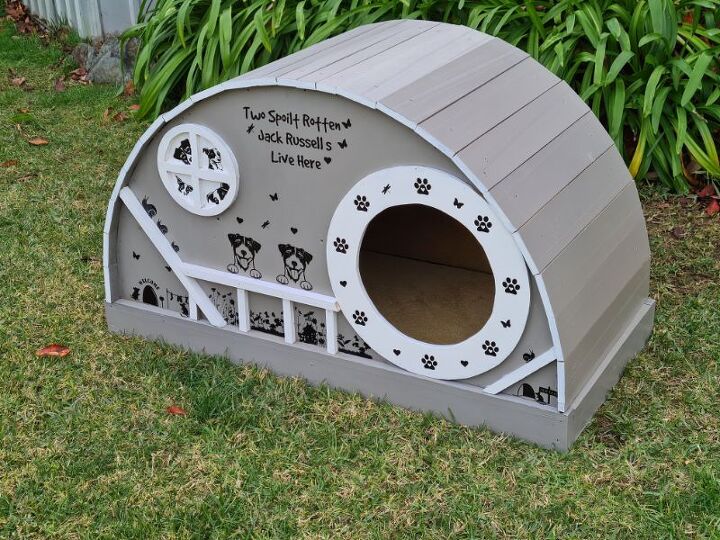
View from the back
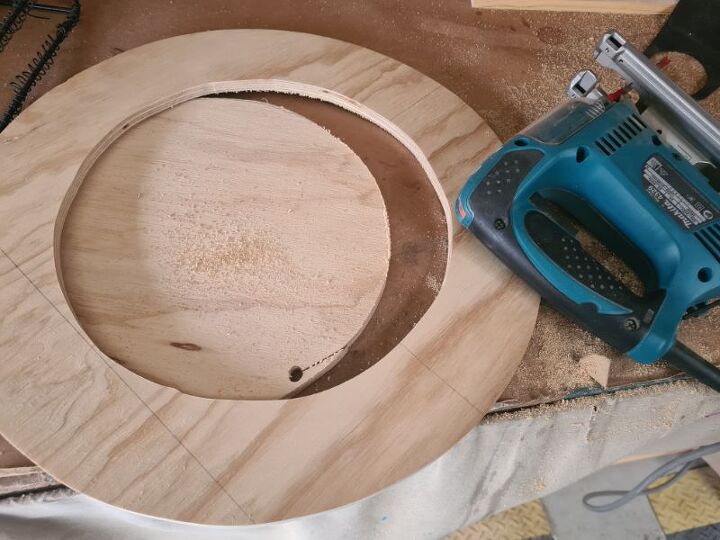
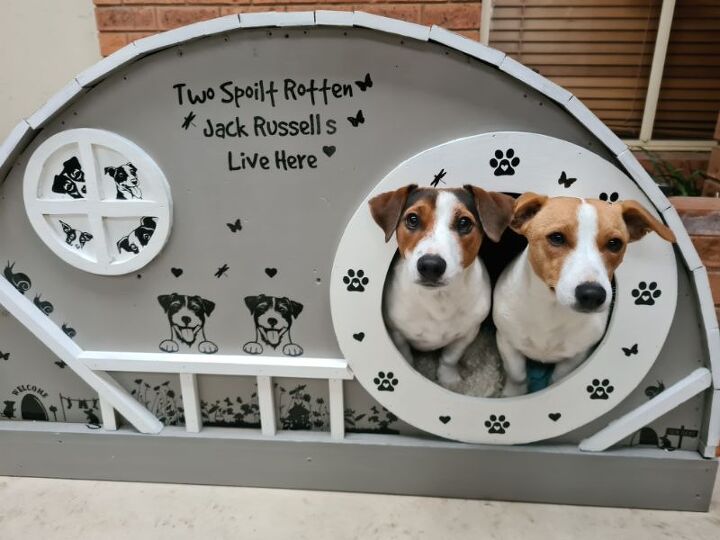
Make the door I had all intentions of having a door frame, so this helped me fix up the large opening I cut for the door. I drew a circle on some plywood and cut out the middle. The circle was screwed over the door frame making the hole smaller at the same time. The leftover piece of plywood from the middle was used to make the window. The doorframe was so big I was able to get inside and add some carpet tiles to the inside of the roof. Yes, the whole top part of my body fit inside, that’s how big the hole was. lol
I painted the dog house using grey acrylic paint and sealing it with 2 coats of polyurethane. I would recommend exterior varnish if your dog house is going to be exposed to the weather. Mine will be under a sheltered pergola. The dog house was too boring for my liking, so I glued some painted offcuts of wood to the sides to give it a country cottage look.
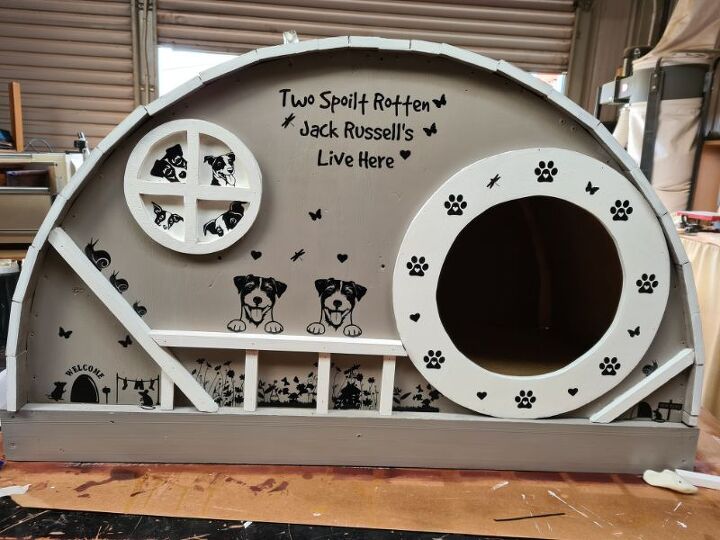
To give the front a fun look I went overboard and decorated it with decals.
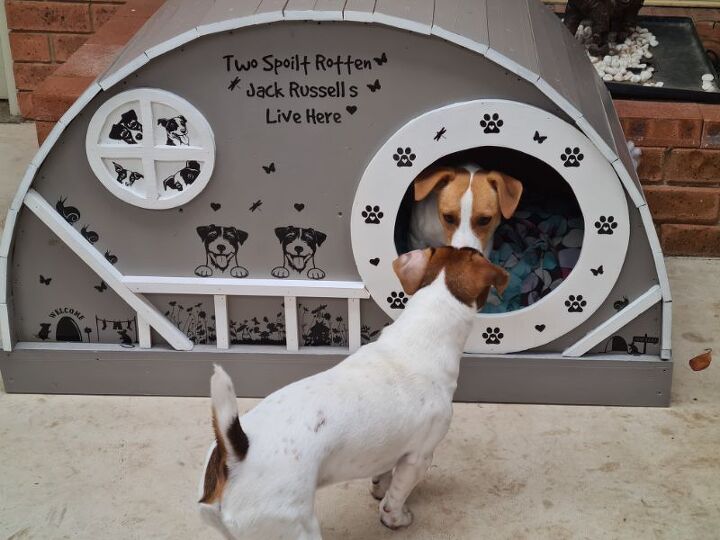
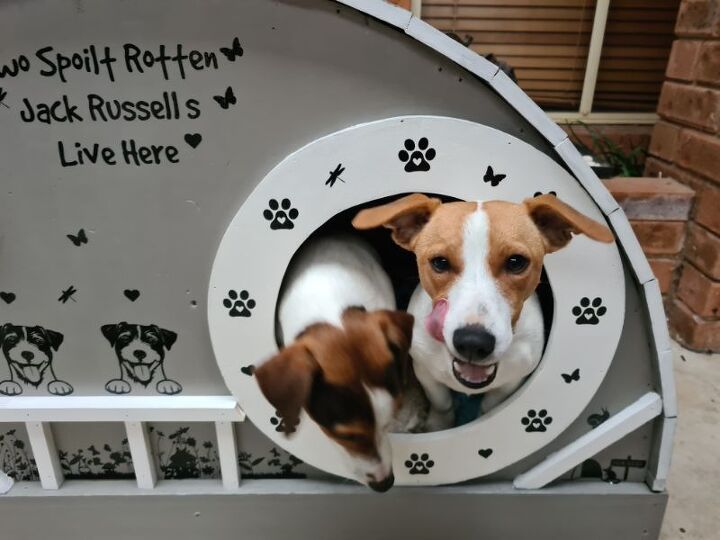
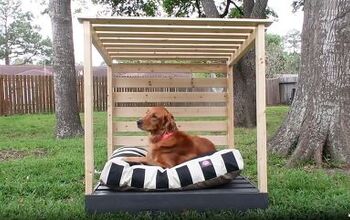
The only thing left to do was to add some soft bedding and let the terrible two at it. Pepsi and Max checking out their new daytime house below.
The look of disgust on Max’s face because my old girl took a nap in their new bed.
My cost for this project was very low because I used mainly recycled materials. Your cost will be based on what materials you have at home.
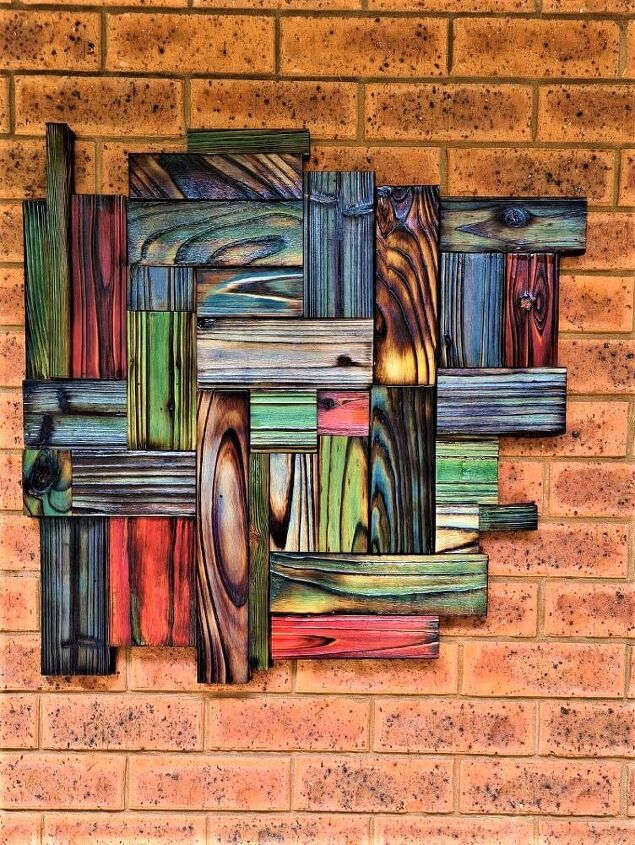
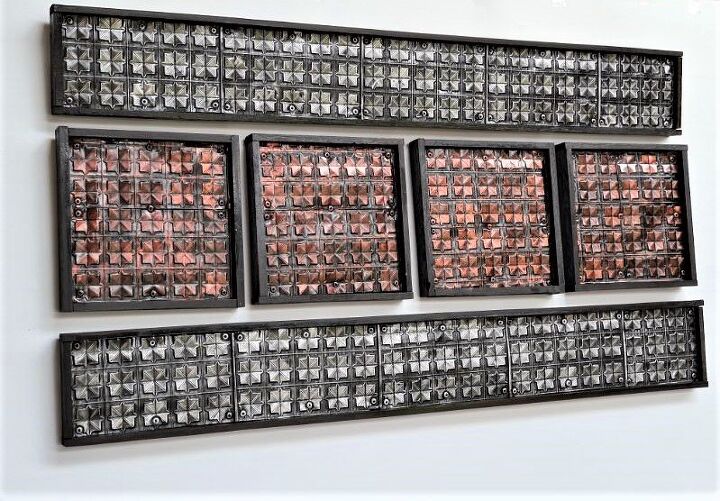
More Unique DIY projects for you. This Unique wall hanging was made from scraps of wood that I burnt and coloured.

Comments
Join the conversation
-
Soooo adorable and cozy!!!
-
Yes! Me too!
Sunday, six weeks ago, I found a tiny kitten running to me in my side yard. His eyes had just opened. He's doing great & am trying to pick a name for him.


Frequently asked questions
Have a question about this project?