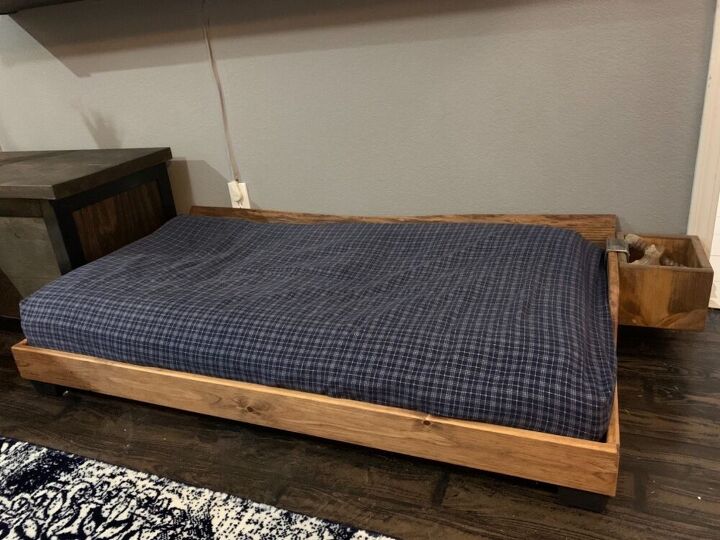
Raised Dog Bed From Crib Mattress

My human babies have outgrown crib and toddler beds, but my fur babies are at the point where they need something more supportive and off the ground.
Orthopedic pet beds are expensive and usually only last a year or so before they are completely flat. Crib mattresses are made to be supportive and if you don’t already have one your kids have outgrown, they are easy to find used for cheap or free.
Supplies:
- (1) 1x4x10’
- (1) 1x8x10’
- (4) furniture feet (these were taken off an old couch, but you can buy basic furniture feet, or even use scraps of 4x4
- base material for under the mattress (we used leftover OSB, but you can use slats or plywood)
- pocket hole screws and jig
- wood glue, screws and sandpaper
- stain / paint
- jigsaw or other saw to cut angled section from sides
- optional: router with a rounded bit
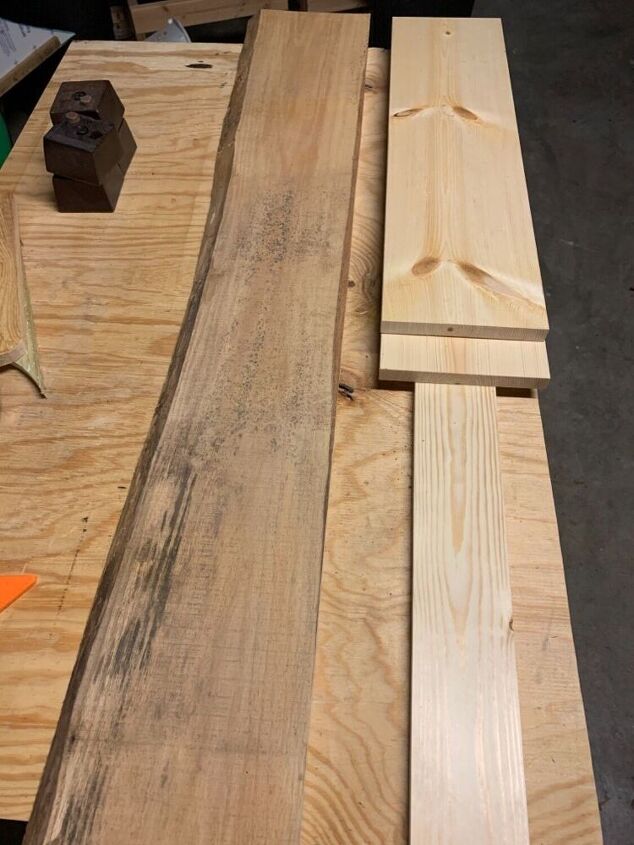
We had a slab of live edge wood we chose to use as the back but otherwise you can use 1x8 for the back. (I will write as if we used a 1x8, because that is essentially what the dimensions were.) Also, the only materials we had to buy were the two boards, the rest was already on hand.
Our crib mattress dimensions were 51” x 28” x 4”, so that is what we made the inside dimensions of the bed.
Using 3/4” thick wood, our cuts were as follows:
1x8 (including back piece): (2) 28” sides, (1) 52.5” back
1x4: (1) 52.5” front, (2) 28” supports
We used the remaining 1x4 cut in half lengthwise to make additional supports along the front and back
About halfway down the length of your sides, draw how you want to cut the angled portion.
I started by lining up the front board along the bottom edge and marking that height onto the 1x8. Then used a speed square to draw a 45° line and drew a curve at the edges.
Cut the line out with a jigsaw or something similar, then trace the cut onto the other side piece and cut.
Using a pocket hole jig, drill pocket holes into the inside bottom of the side pieces. Remember to drill these on opposite sides so they are mirror imaged. (See next photo)
To keep the pocket holes below the mattress line, I only drilled into the bottom half of the sides. If you plan to paint instead of stain the frame, you can drill higher and fill the holes.
Attach the sides to the front and back with pocket hole screws, but DO NOT GLUE YET.
Attach the 28” supports using two pocket holes at each end and three along the long sides.
The supports will look like this from the top side and will keep the frame square.
To add extra support to hold both of our large dogs, we also added wood pieces along the inside front and back.
Optional, but really makes everything look nice: use a router with a rounded bit along the edges. (We rounded all edges except for the live edge back)
Take the pieces back apart, stain, then glue and screw it back together.
Attach feet to the corners then place your base material.
Optional: using leftover 1x8 pieces, make a small box to hold dog bones or toys. I used pocket holes on the bottom, and otherwise used glue and corner clamps along the sides.
My husband welded a bracket for me that attaches to the box and hangs over the side of the bed. This way, the box can easily be taken off or moved to either side of the bed.
Another option would be to screw the box into the side of the bed or possibly use long L brackets and bend part of one side down.
My favorite thing so far, is how easy it is to take off a crib sheet to be shaken off outside and washed weekly. No more struggling to get a floppy pillow back in it! And crib sheets are easily customizable to match your decor or change out for holidays and seasons!
Enjoyed the project?
Resources for this project:
See all materialsComments
Join the conversation
-
-
 Steph knepper
on Dec 31, 2022
Love, love, love this idea! A real mattress IS the best and most comfortable place for all of our beloved pooches to sleep!! After all mine go from by my bed to (now) another great place to rest their weary bones!! Thx!
-












Frequently asked questions
Have a question about this project?