


Bedspring Snowman Christmas Decoration
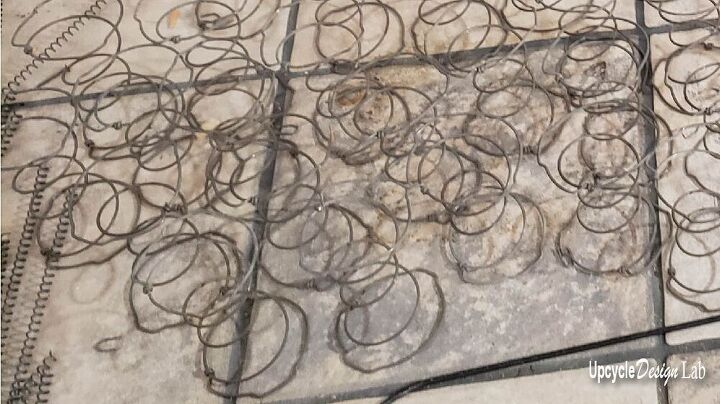
A few months ago, I tore down an old mattress and box spring, and I saved all the springs. Since then, I’ve been wondering what to do with all of them. So today’s project has a quick and fun way to make a little bobblehead bedspring snowman Christmas decoration using recycled materials.
I missed Christmas in July, so now it’s all about Christmas in August. I’m not usually ready for Christmas until well after Thanksgiving, but I’m trying to prepare for a Christmas craft show this year, so I’m going all-in with Christmas stuff right now.
You can check out the quick video demo or scroll down for the step-by-step instructions.
Step 1 – Gather supplies for bedspring snowman Christmas decoration
The first thing you need to do is gather all your supplies. For this project, you will need the following.
- One plastic water bottle
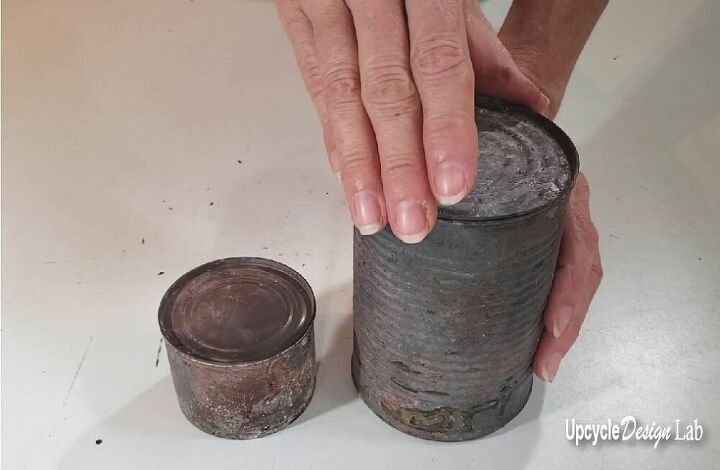
- One 4 and a 1/2 ounce tin can (rusted)
- One 22oz tin can (rusted)
- A safety can opener
- Tin Snips or heavy cutters
- White spray paint
- Scissors
- E6000 glue
- Fabri-tac glue
- A pen with a removable cap
- Small paintbrush
- Orange acrylic paint
- Small black buttons
- Small red ribbon for Bow
- Sand or rice or some other weighted material
- Mod Podge
- Old bed spring
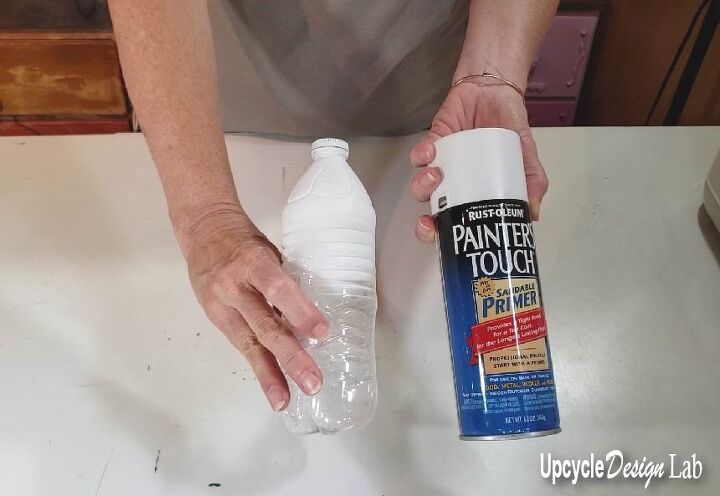
Step 2 – Paint top of plastic water bottle.
Next, with the cap screwed on the empty water bottle, use the white spray paint to paint the top half of the plastic bottle.
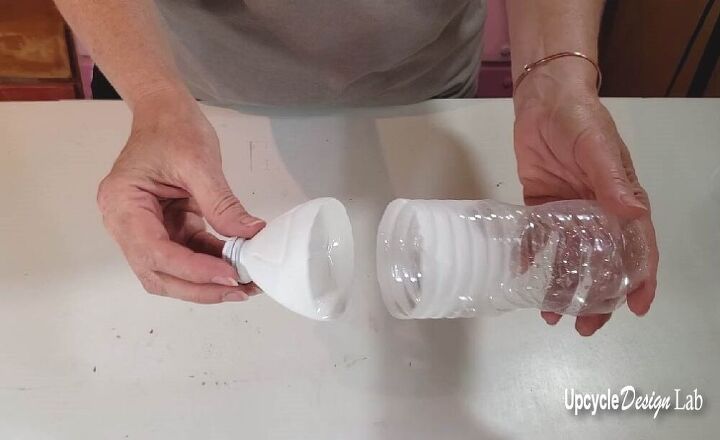
Step 3 – Cut off bottle top
Once the paint is dry use the scissors to cut off the bottle top just past the curve on the bottle’s neck.
Step 4 – Preparing tin cans
To prepare the tin cans use the safety can opener to remove the lids and empty the contents of both cans. By using this can opener allows you to place the can lid back in the can and it leaves no sharp edges on the can or the lid.
Next, rust the metal cans. Check out this tutorial on how I quickly rust tin cans for all of my projects.
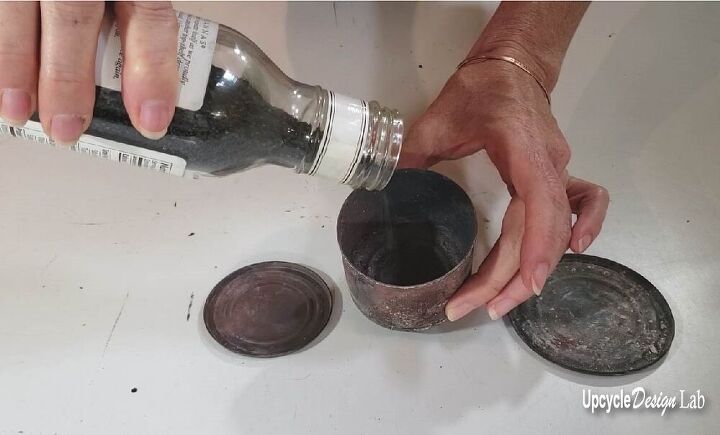
Step 5 – Fill small can
Fill the small can approximately halfway with your weighted material, rice, sand, etc. Then use the E 6000 glue to secure the lid back in place.
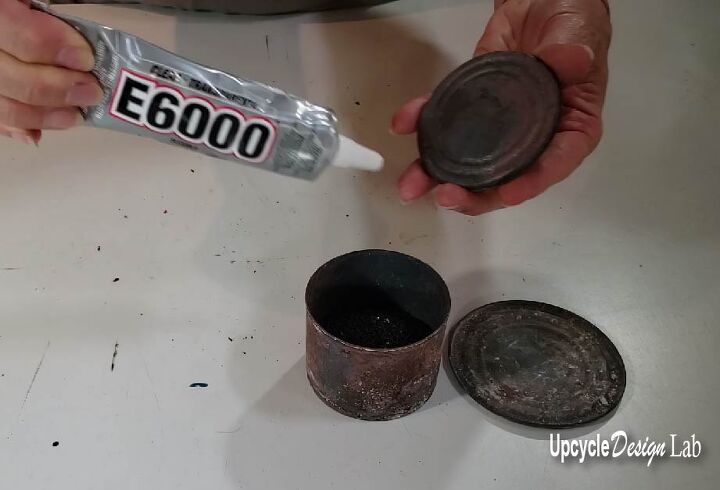
Step 6 – Glue cans
For this project, you will not need the larger can, but you will want the lid. First place the top on a flat surface with the edges curled upward and then use the E 6000 glue to attach the smaller can to the middle of the larger lid.
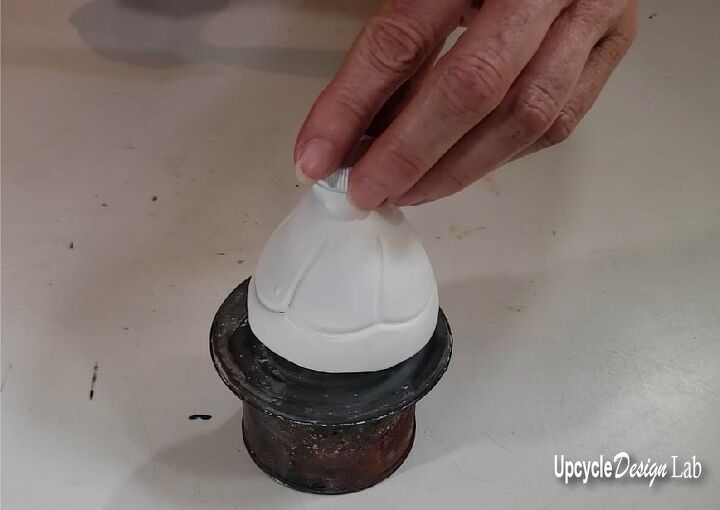
Step 7 – Glue plastic bottle to cans
Once the E6000 glue has had a chance to set, you can flip the can piece over and glue the plastic bottle to the center of the large can lid using more E6000 glue.
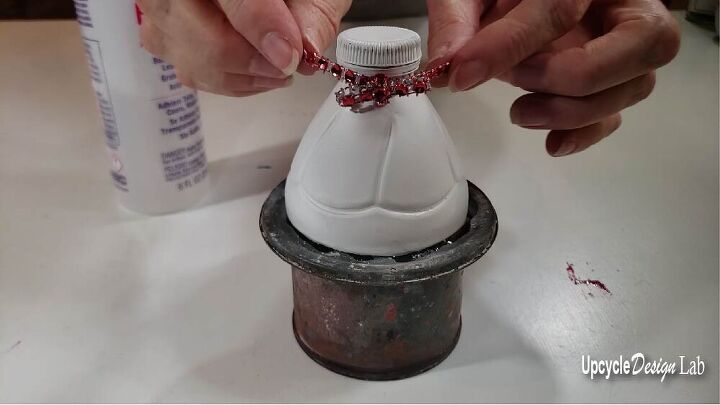
Step 8 – Add Bow
To make the bow you can use ribbon or fabric. Once the bow is complete secure it around the neck of the plastic bottle. Fabri-tac glue is suitable for this step as it dries quickly. But, E6000 glue can also be used for this step.
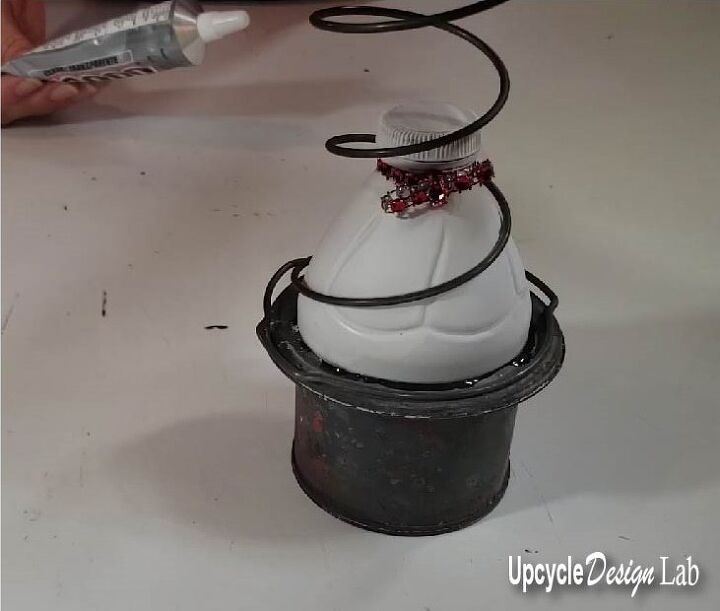
Step 9 – Attach Bedspring
Once the bow is in place use the E6000 glue to attach the bedspring to the underside of the snowman’s tin can top hat. Allow the glue to dry before proceeding to the next step.
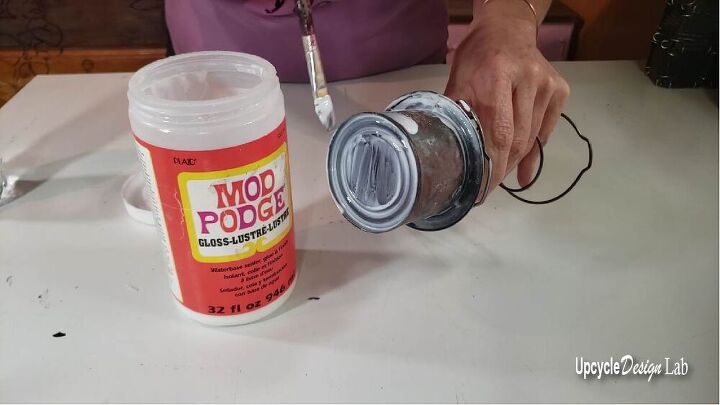
Step 10 – Seal tin cans
Because the cans are rusted they will need to be sealed. To do this use a small paintbrush to apply a coat of mod podge to the rusted tin can pieces.
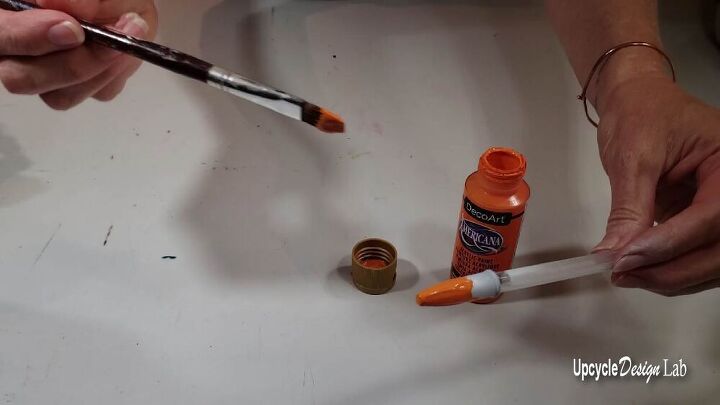
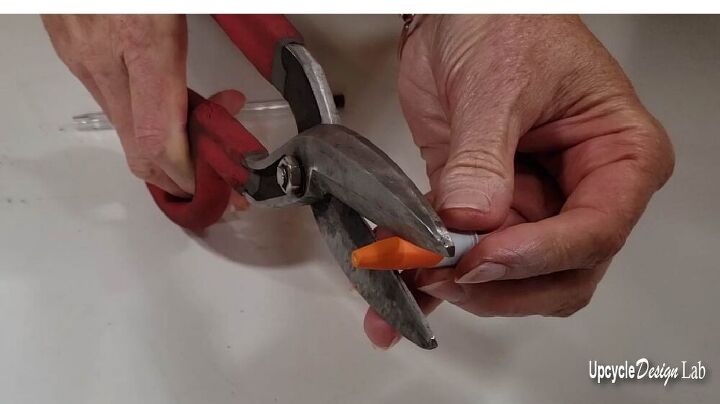
Step 11 – Finishing touches
Lastly, you can personalize your bedspring snowman Christmas decoration with some finishing touches. For my snowman, I drew on some small eyes with a pen, then I used the cap of a pen for the nose, and some small black buttons for the final details.
Finished bobblehead bedspring snowman Christmas Decoration.
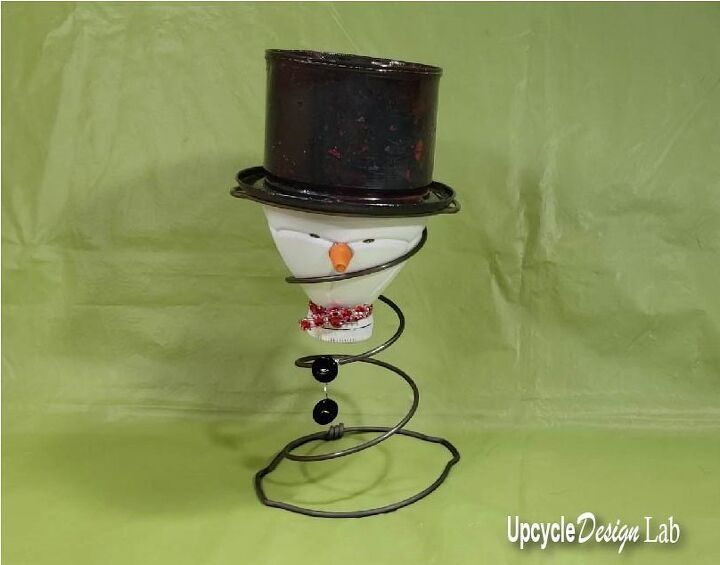
So, he looks a little grumpy, doesn’t he?
Happy Upcycling,
Cindy
Because you are still here you might also like My Trashy Christmas House Tour
Resources for this project:
See all materials


Comments
Join the conversation
-
The headline pic of the spring doesn’t do justice to all the pieces being upcycled. Nicely done. Would work with a light globe as well I think.


Frequently asked questions
Have a question about this project?