


Bee Happy Door Wreath
5 Materials
$20
60 Minutes
Medium
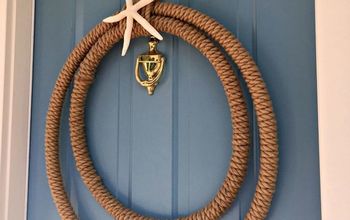
Check out this DIY Bumble Bee Wreath! If you’re looking for a summer wreath, this is a gorgeous idea for your front door.
I love how summery this bumble bee wreath looks. I can just imagine a happy yellow bumble bee flying into his hive surrounded by summer flowers.
You can always add a wooden bumble bee to the outside of the beehive if you’d like to. Otherwise, enjoy the wreath as is with some bright summer flowers.
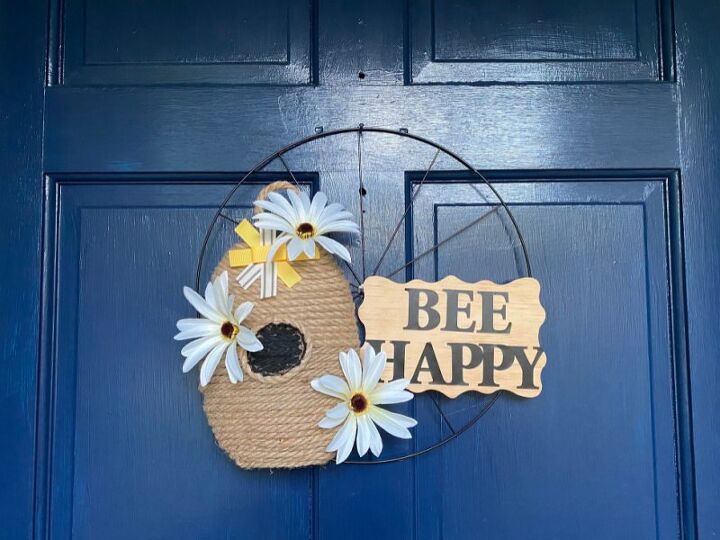
This isn’t weather-treated. So unless you have an outdoor door to protect it from the rain, I would hang this indoors.
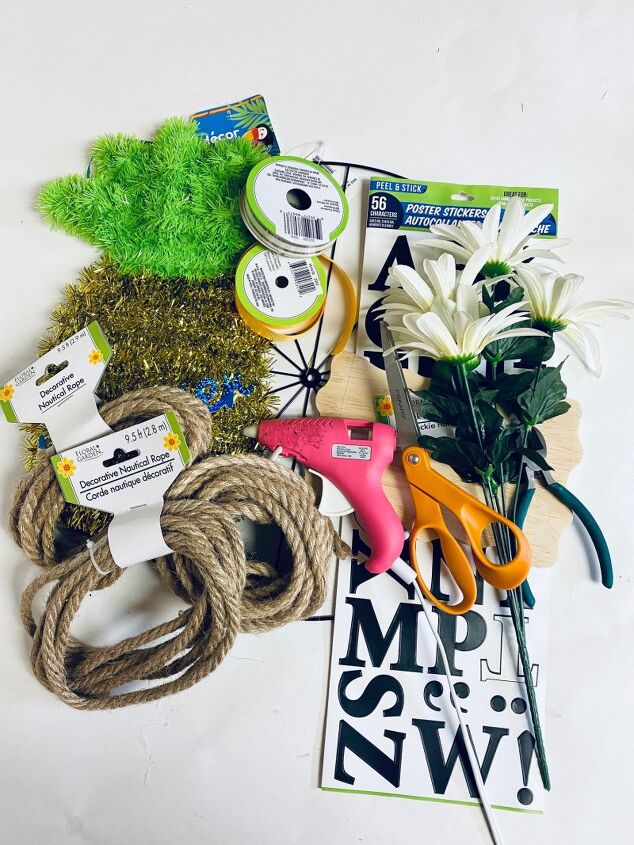
- Wheel Wreath Form
- Nautical Rope
- Scissors
- Hot Glue Gun/ glue sticks
- Pineapple wire wall décor (use this one from Oriental Trading)
- Wooden scalloped edge plaque for the sign
- Letter Decals
- Wire Cutters
- White or Yellow Sunflowers
- Black and white striped ribbon and yellow ribbon
- Paint Brush
- Waverly Ink Chalk Paint
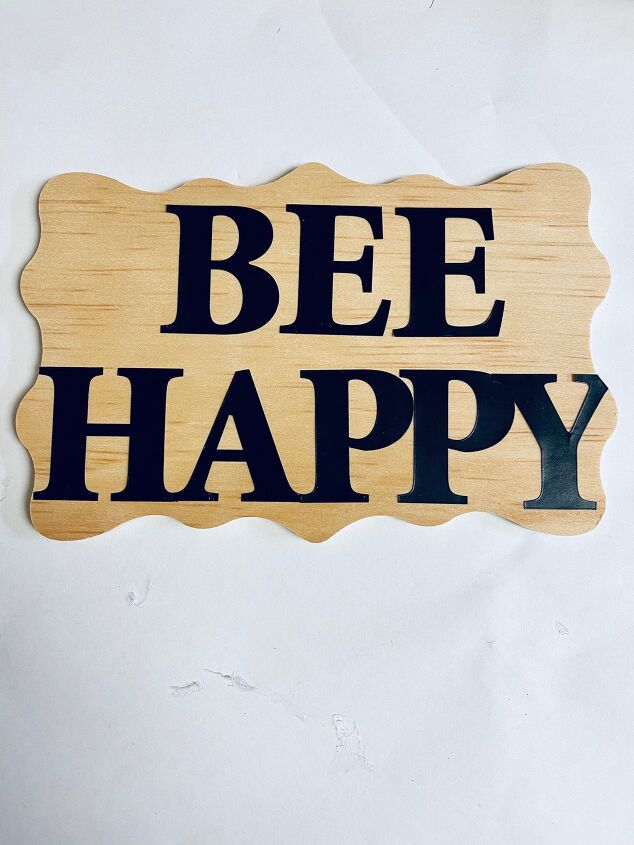
- Start by adding the letter decals to the wooden sign.
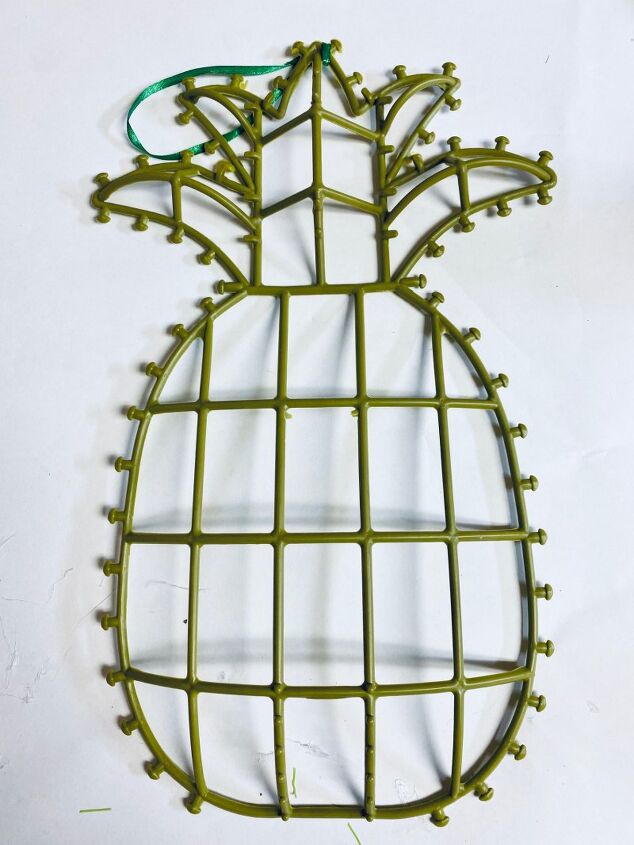
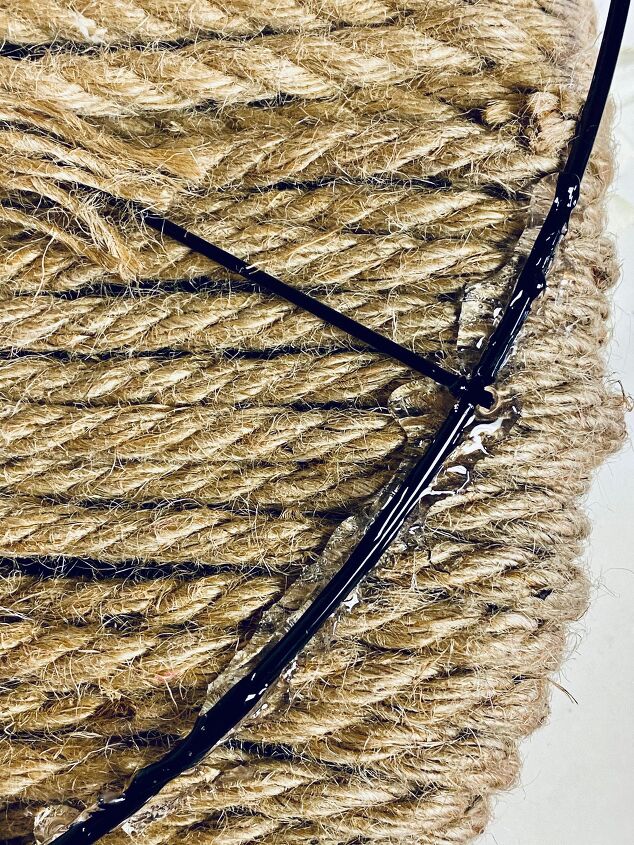
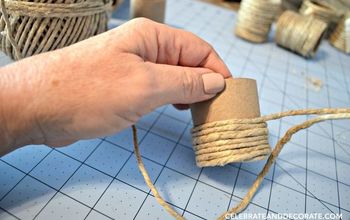
- Strip the wire pineapple form down to the base if it has added tinsel, fabric, ornaments, etc.
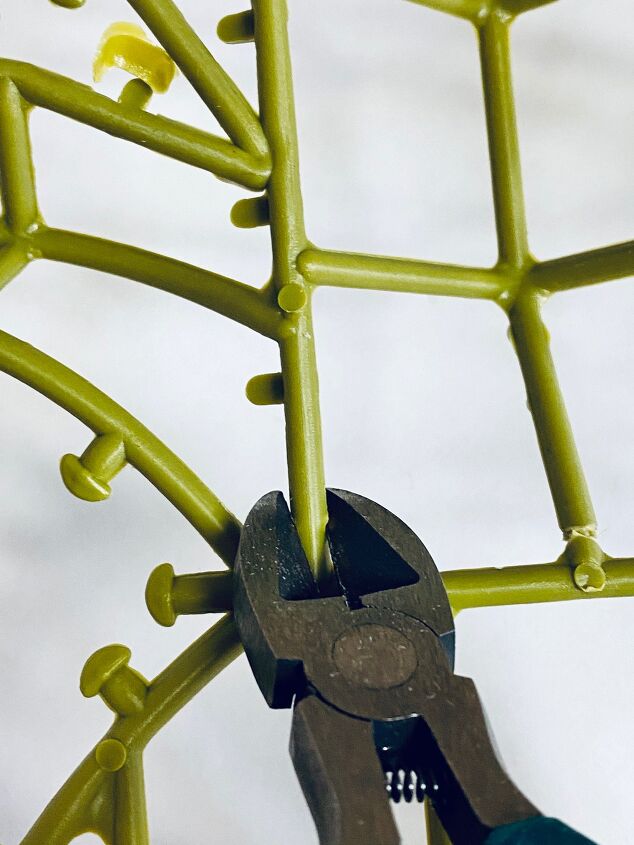
- Next using your wire cutters, cut the top part of the pineapple frame, then try and clip the edges that stick out from the pineapple so that the rope with have a tighter fit.
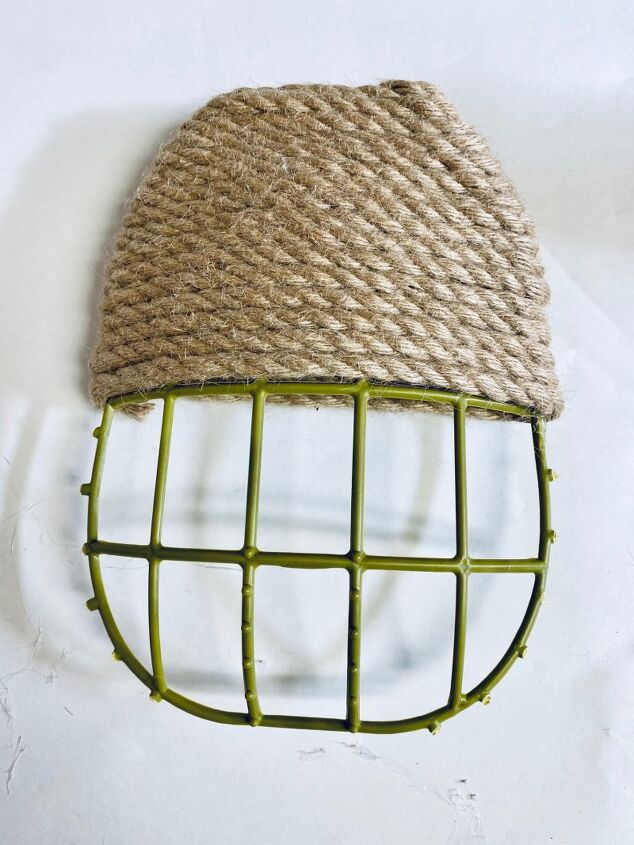
- Next, add some glue to the top piece, and add the nautical rope on top. Repeat this process, adding glue to the edges of the pineapple so that the rope has something on the frame to adhere to.

- Once you have reached the bottom, add some glue to the bottom piece and trim the end off. I tucked the little bit that was left inside of the other rope.
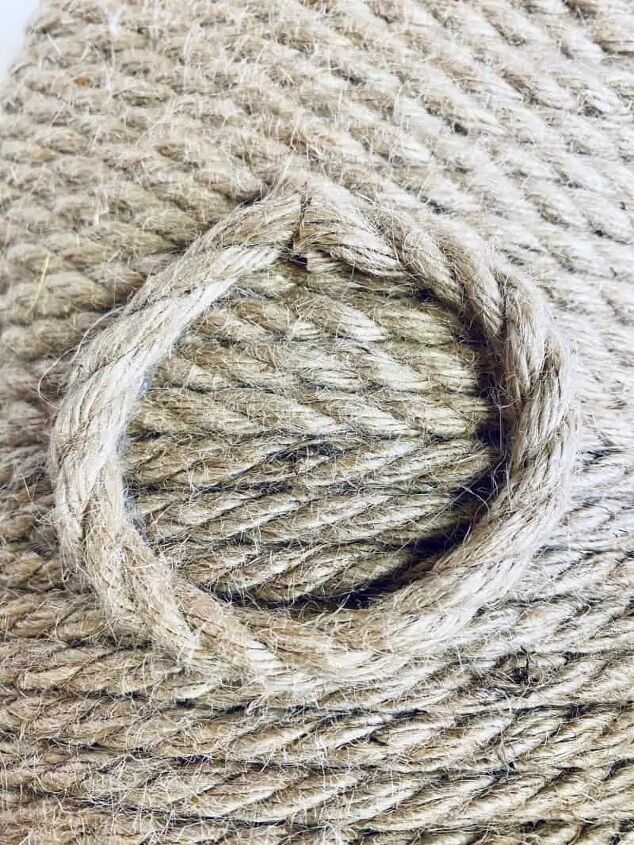
- Cut another 4-inch piece of rope to create the circle for the beehive, attach the backside of the rope and add to the beehive.
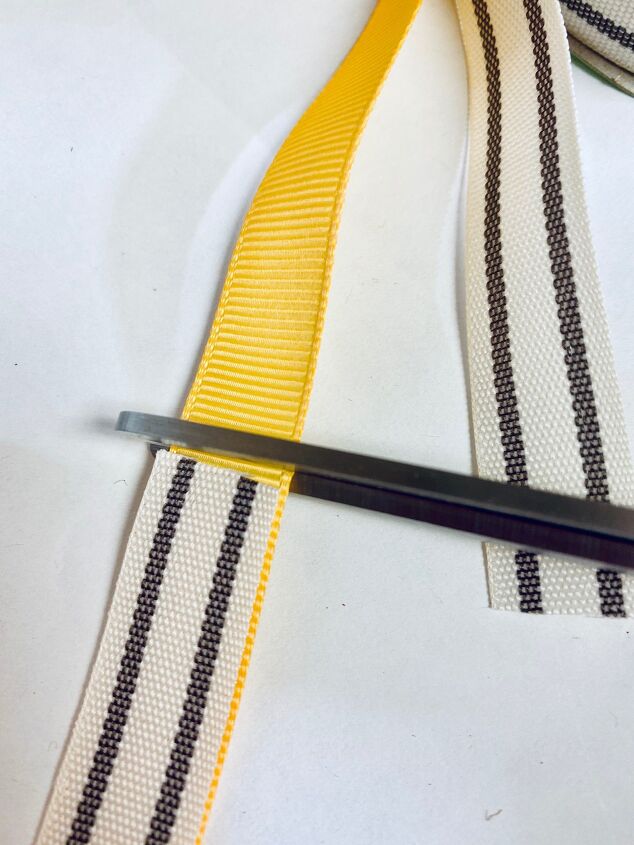
- Cut (2) 4-inch sections of the yellow ribbon, and (2) 4 inches of the black and white ribbon. To make the bow place a yellow ribbon on the bottom, add a dab of hot glue, then a piece of the black and white ribbon, and repeat this for the other pieces. For the last piece that goes in the center, fold the piece so both ends meet flat, and attach. Review placement, then attach it to the beehive.
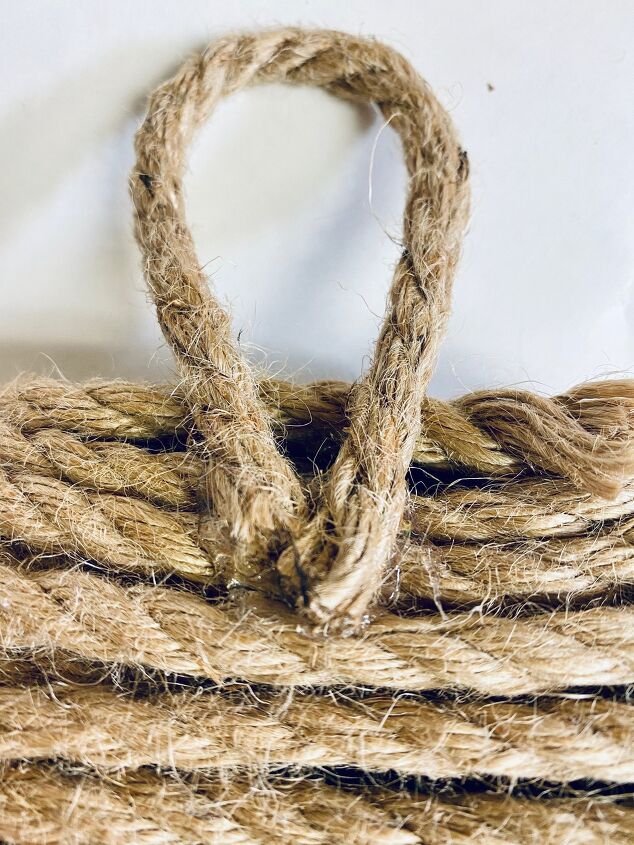
- Next cut a 4-inch piece of rope to create the top loop and glue.
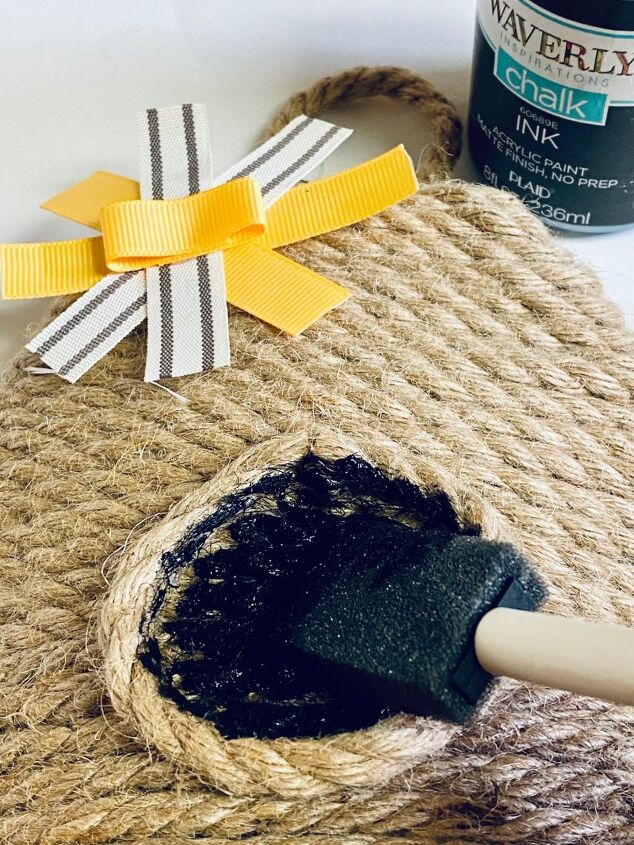
- Next using the Waverly ink chalk paint, or whatever black chalk paint you prefer, fill in the center of the round rope section. Let the center dry.
- To attach the beehive to the wheel wreath form, cut some leftover sections of rope and unravel it so that you have 3 pieces of rope.
- Then tie the beehive to the rope in a few spots to secure it.
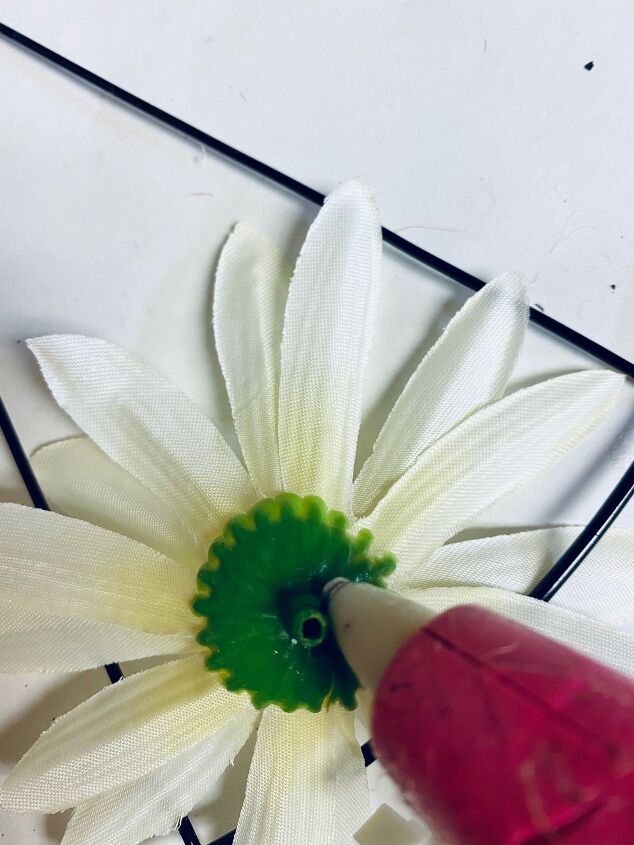
- Next, pop the flower off from the stem and add some hot glue to the bottom of it to add it to the beehive. Be sure you use enough so that beehive attaches to the wreath form.
Resources for this project:
See all materials


Any price and availability information displayed on [relevant Amazon Site(s), as applicable] at the time of purchase will apply to the purchase of this product.
Hometalk may collect a small share of sales from the links on this page.More info

Want more details about this and other DIY projects? Check out my blog post!
Comments
Join the conversation
2 comments
-
Very pretty! Just needs some butterflies on the wheel spokes!


Frequently asked questions
Have a question about this project?