


Coastal Summer Decorating (Large Cylinder Vase Centerpiece)
This cylinder vase centerpiece is one of the decor items I created for my Summer Home Tour this year.
It would look great as a table centrepiece either inside or outdoors. I styled my coffee table with this display and it's the first thing you see when you enter the lounge from the hallway.
This is an abbreviated tutorial. The full tutorial is far too long for me to reproduce on Hometalk, but you can find the detailed tutorial including more photos by clicking the link to the full blog post here: 'Easy ways to decorate your home for Summer' or through the link to the blog at the bottom of this Hometalk post. Thanks for understanding!
IN CASE YOU WERE WONDERING: You will find an estimated cost of the project below. If you are a DIYer like I am, you probably already have most of the materials on hand to complete this project. I've estimated for if you had to buy them all from scratch so that's why the estimate may seem a little high.
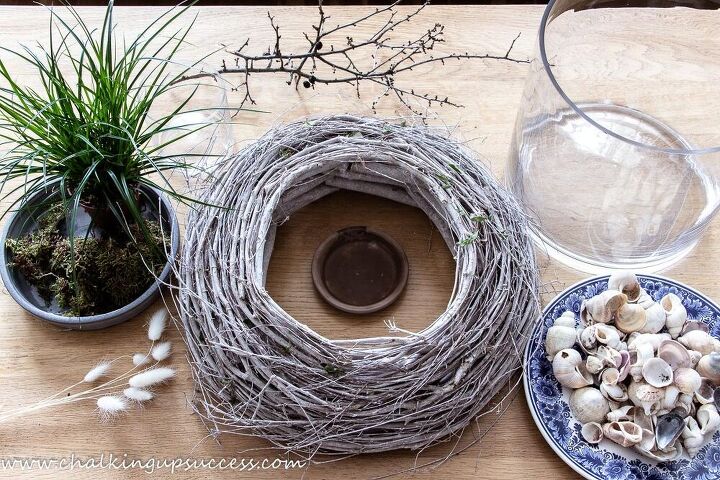
Materials for making a coastal summer centerpiece. You will find links to the materials in my original blog post.
- Large glass cylinder vase
- Small glass cylinder vase
- Large round placemat (Not shown)
- Small potted plant (grass or fern)
- Dried moss
- Dried Bunny Tail Grass
- Plant pot saucer – or alternative
- Seashells
- Large round twig wreath
- Fresh or faux green foliage
- Fresh or faux garland
- Gnarly twigs or driftwood (Taller than the vase)
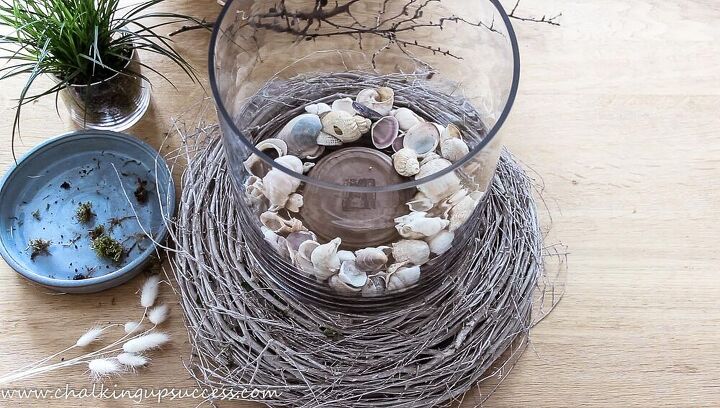
Turn the plant pot saucer upside down and place it in the centre of the large cylinder vase. We're using it to add some height.
Fill the bottom of the large cylinder vase with seashells as high as you like.

Pop the potted grass or fern inside the smaller cylinder vase.
Push dried moss between the sides of the plant pot and the glass vase until the plant pot is hidden.
Place the small cylinder vase on the saucer.
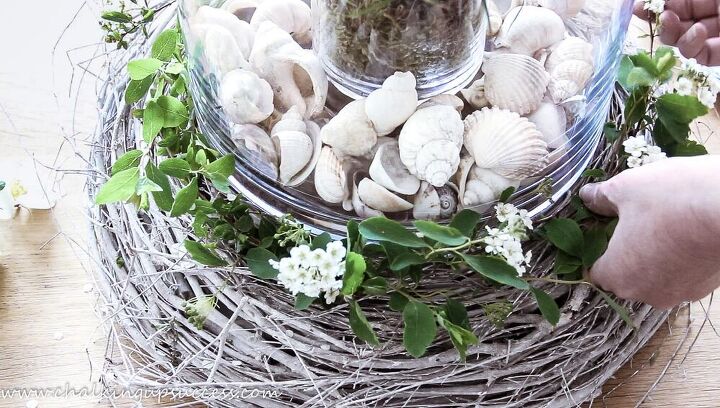
Add some green foliage and summer flowers around the glass vase.
I use fresh foliage and change it out every few days or so. Although, I find that it also looks good once it has dried.
If you don't want to bother with changing out the foliage, you could also use faux foliage for this.
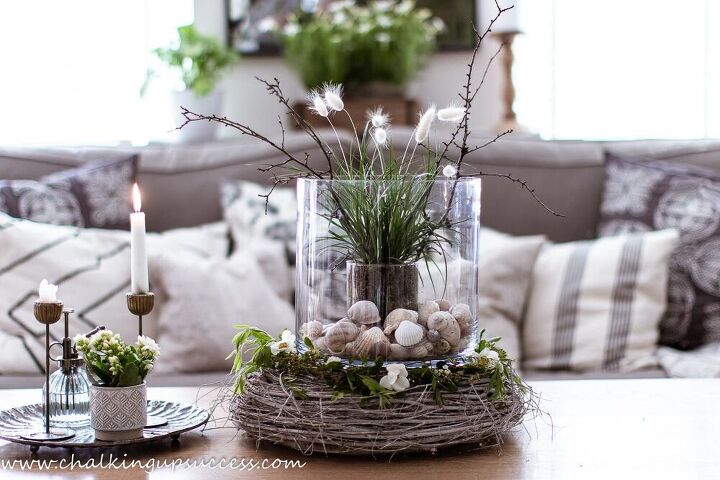
After I had collected all the bits and pieces, it only took me a few minutes to make – such an easy summer DIY!
WAIT!
Before you go, if you’re not part of our amazing creative community yet but would love to join us, I would love to have you stop by my blog Chalking Up Success for the full tutorial or to sign up for my latest posts, DIY, inspiring home decor, natural home recipes and more.
FREE RESOURCES
By signing up, you’ll also receive a copy of the free ‘Furniture Flip Checklist’ and gain access to all the other printables, e-books and labels in the VIP Resource Library.
FOLLOW CHALKING UP SUCCESS
CHALKING UP SUCCESS ON YOUTUBE
Subscribe to my YouTube channel to see more DIY, home decor and crafts - https://www.youtube.com/channel/UC4uyVGrJxoo8-7qlAg5_x-g?sub_confirmation=1 I can't wait to see you there!
(Copy and paste the following links)
Join our Facebook Group for creatives - Why not? It's FREE!
https://www.facebook.com/groups/organizedecoratecreatechalkingupsuccess
Like us on Facebook:
https://www.facebook.com/chalkingupsuccess/
Follow us on Instagram:
https://www.instagram.com/chalking_up_success/
Follow us on Pinterest:
https://www.pinterest.de/chalkingupsuccess/
Phew! That was a lot but thanks so much for your support, I really appreciate it! 

Comments
Join the conversation
-
Thats pretty 😍
-
Love the rustic look. Well done.


Frequently asked questions
Have a question about this project?
Where can I find a twig wreath that size.