


DIY Affordable Summer Wreath
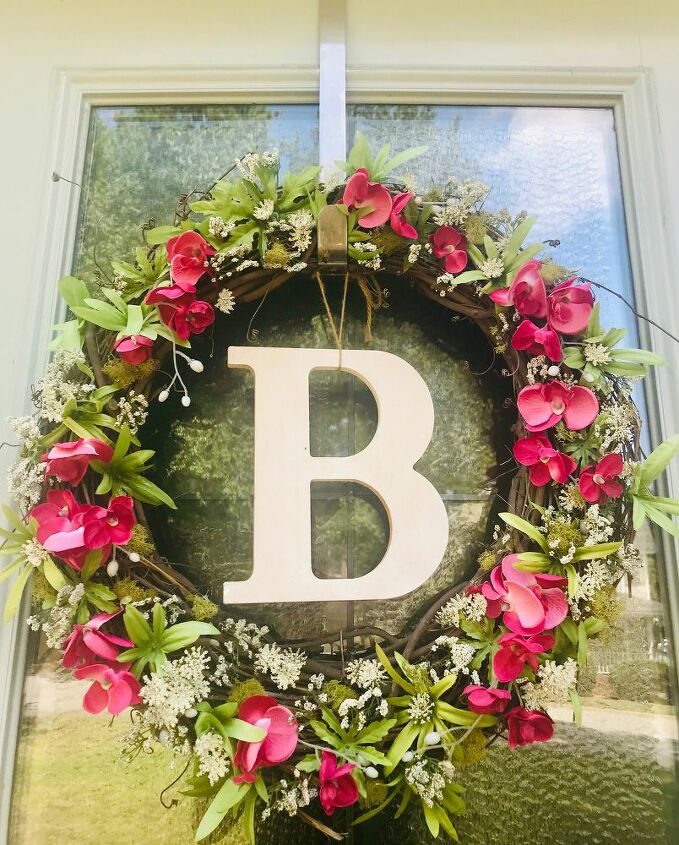
Brighten up your front door with this simple, cheap DIY summer wreath! You don’t have to spend a mint for a wreath that you can easily make yourself!

Making your own wreath is a fun way to get your creativity out and share your style. It adds a homey feel, brightens up your house, and you’ll feel great every time you look at it knowing that you made this beautiful wreath that you can save for years to come.
You don’t have to put it on your front door… if you want to make your house feel more summery, then put it in your kitchen or living room. It’s totally up to you!
Cost: $11 – Isn’t that fantastic!
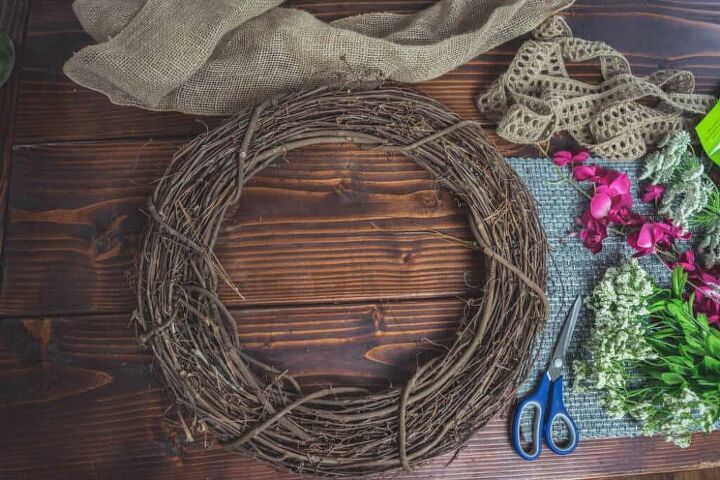
- Natural Grapevine Wreath
- Artificial flowers: For this specific wreath, we used artificial pink orchids, gypsophila, and baby’s breath
- Reindeer Moss
- Wire cutters and/or scissors
- Hot glue gun and glue sticks

The best place to purchase artificial for this project is Wal-Mart or Hobby Lobby (if the floral section has a sale going). The Dollar store has a few good finds, and its best to get the reindeer moss there if you want to add it to your wreath. We love the color of it!
We got the flowers for this wreath at Wal-Mart and are so happy with it.

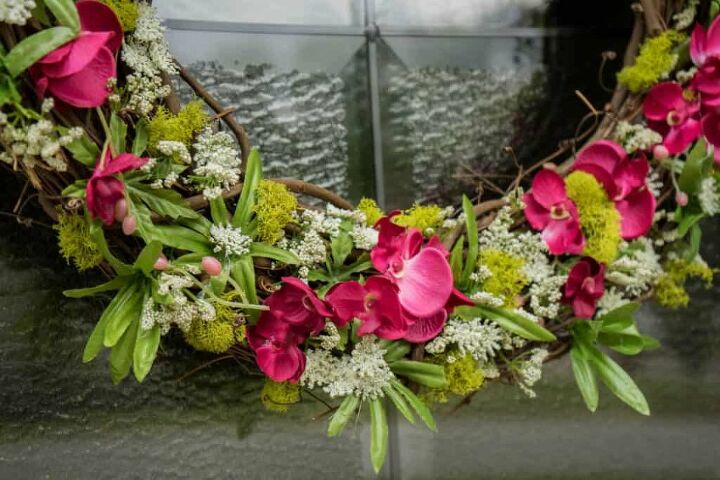
It’s best to start by cutting all of the flowers, leaving the stems long enough to push between the grapevines. Don’t waste a bit and use all of the green stems as a base.
You can use scissors, but we’ve found it is so much easier if you use wire cutters to cut the stems.
With the hot glue gun, glue all of the greenery – leaves & reindeer moss first.
Tip: When gluing, put the glue directly on the artificial flowers or greenery, then hold onto wreath for 3-5 seconds. If more glue is needed later, you can press the glue gun directly into the wreath to adhere the flowers.

Next, begin gluing your “focus flowers,” for us that is the pink orchids.
Then, fill in the gaps with your baby’s breath and voila!
Obviously, you can use whatever type of flowers you’d like, but the more you add, the more costly it will be.
It’s as simple as that! We’d love to see what you come up with. Share with us by tagging @nocompassnecessary on Instagram.
Resources for this project:
See all materials


Frequently asked questions
Have a question about this project?