


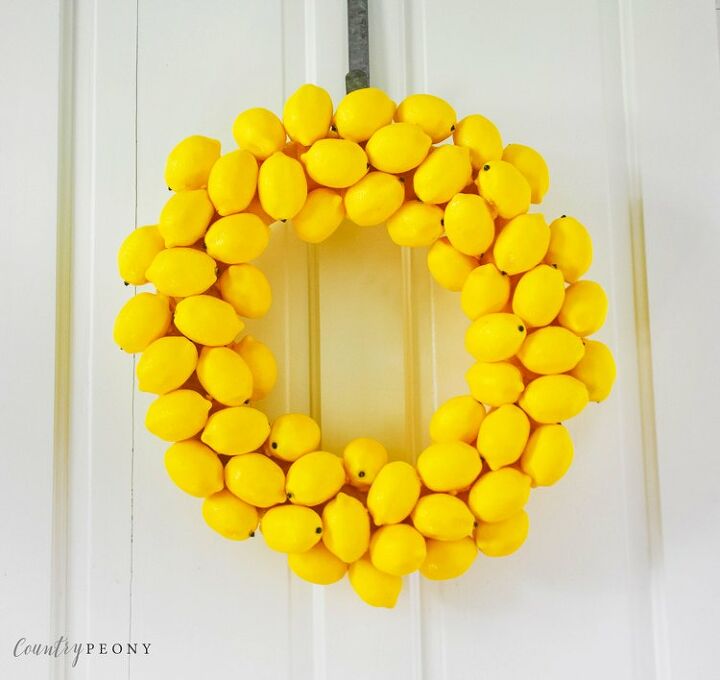
DIY Lemon Wreath
Bring lemons to your decor all summer season with this very simple, DIY lemon wreath tutorial.
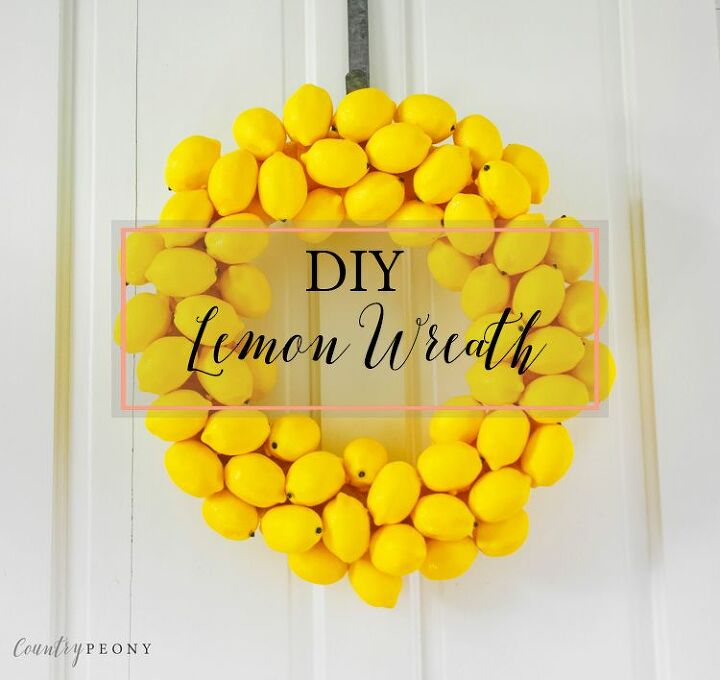
Summertime lends itself to bright, cheerful decor inside your home to match what is happening outside of your home. I am loving lemons this time of the year, and I am loving lemons in decor even more. Since my lemon glass plates bring me so much joy I wanted to expand on the idea, and bring in more lemons that are able to stay up longer than at dinner time. Enter this DIY Lemon Wreath!
The technique is very simple, and you have seen it from me before with the DIY Speckled Easter Egg Wreath (found on my blog). I love its whimsy nature, pop of color against my white door, and reminder of the bright and sweet days that summertime brings!
I hope you enjoy bringing in a piece of summertime into your house with this DIY Lemon Wreath. Full tutorial with supply list below.

To make your own lemon wreath, you will need: *All of these supplies are based on an 18 inch wreath. If you want to make a smaller or larger wreath adjust your supplies appropriately.
- (affiliate link) 60 Faux Lemons. I used these lemons from Amazon, and I was happy with their size, color, and quality especially since they were the best price I could find online.
- 18 Inch Wreath. You may use whatever material you would like. Foam, straw or grapevine wreaths would all be good options. I chose an 18 inch wreath, because I wanted to make a large impact on my white door, but you can choose any size that you want.
- 12 Yards of 1 1/2 Inch Yellow Ribbon
- Scissors
- Hot Glue Gun with Glue Sticks
- Not Pictured: 1 Pipe Cleaner to act as the hanging treatment.
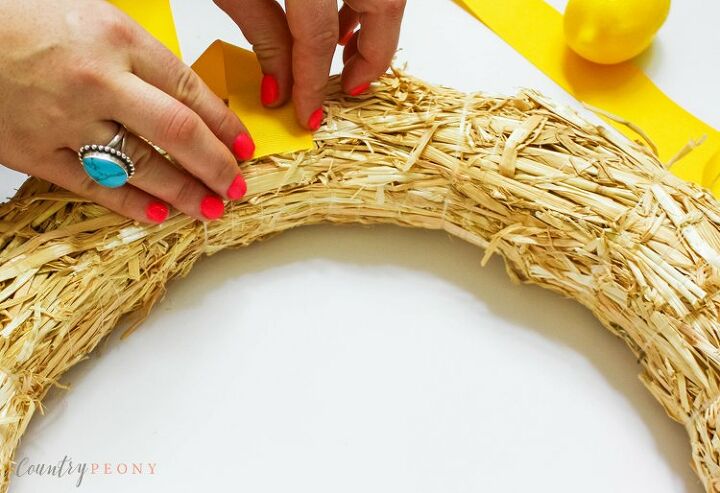
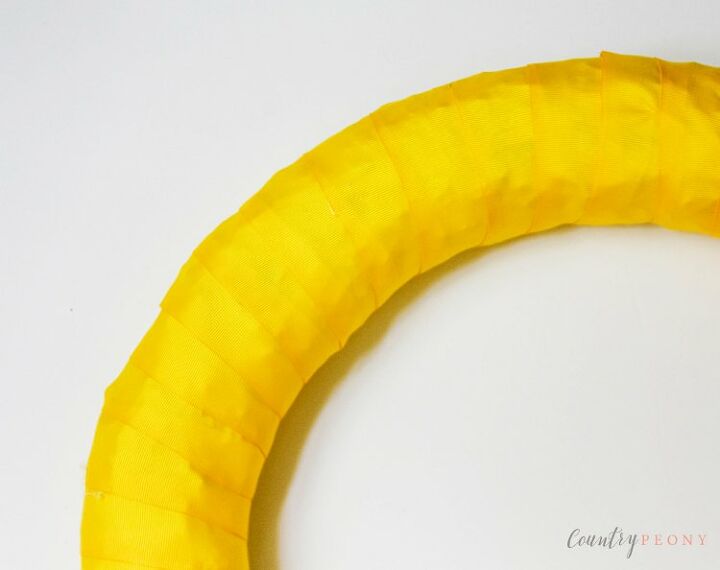
Step 1: Hot glue and wrap your ribbon around the wreath to add a base layer of yellow for the lemons to attach to.
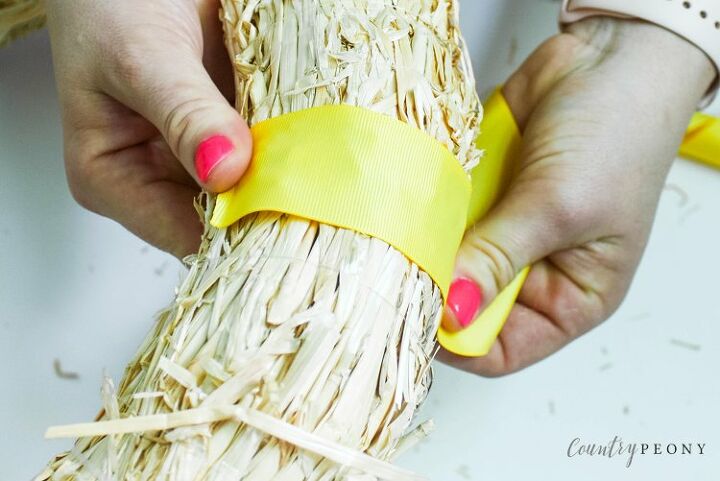
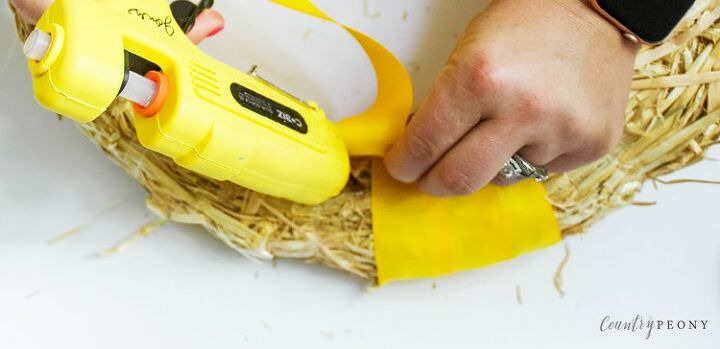
Hot glue the ribbon to the wreath every third time you wrap the ribbon around the wreath.
As you wrap the ribbon around the wreath ensure it is very taut and that you overlap the ribbon so none of the original wreath texture shows through.
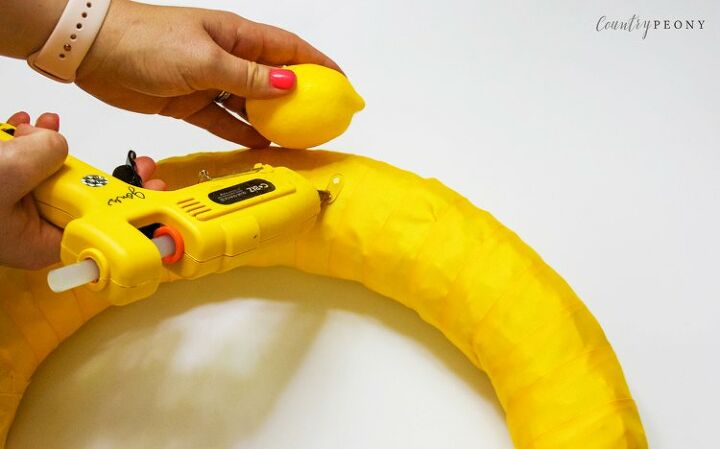
Step 2: Once the yellow ribbon is covering the wreath, (on the lowest heat setting) hot glue the lemons directly to the ribbon to the front face of the wreath.
*I found it easiest to attach the lemons to the front of the wreath first. You can start to connect them to the wreath, and then to each other. Hold the lemons in place while the hot glue dries so that they securely stay in place.
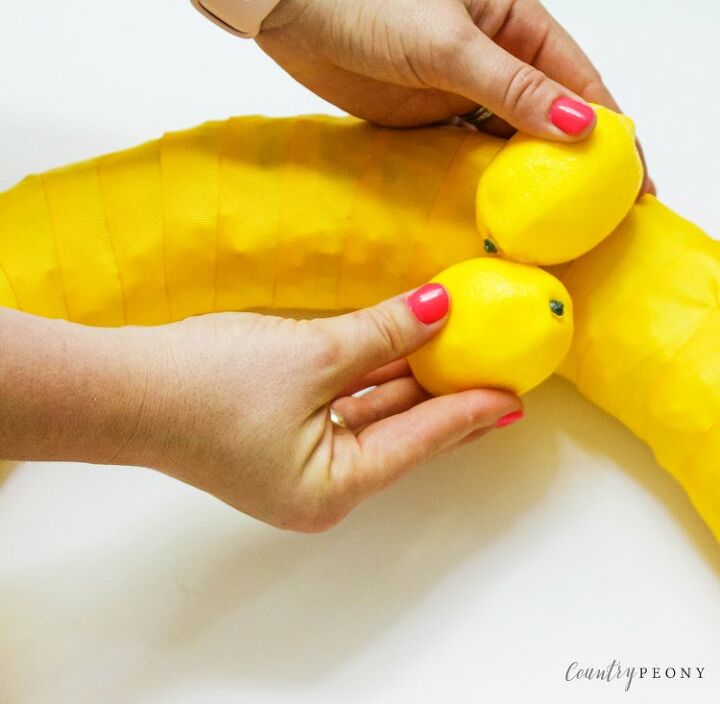
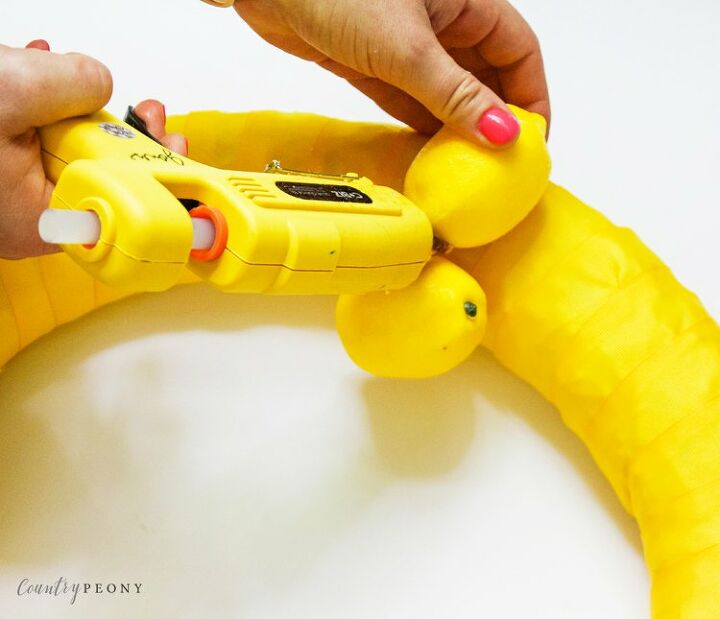
Step 3: Once you have the lemons covering the front face of the wreath, then slowly add them to the inside and outside sides of the wreath. It is crucial here that you hold them in place while the glue dries because gravity will bring them down before they set.
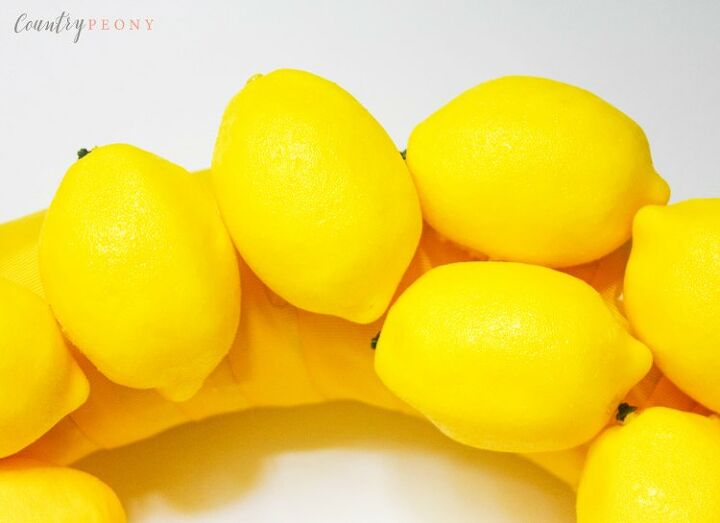
Step 4: Then take a step back from your budding wreath and continue to fill in the gaps with lemons to create a full looking lemon wreath.
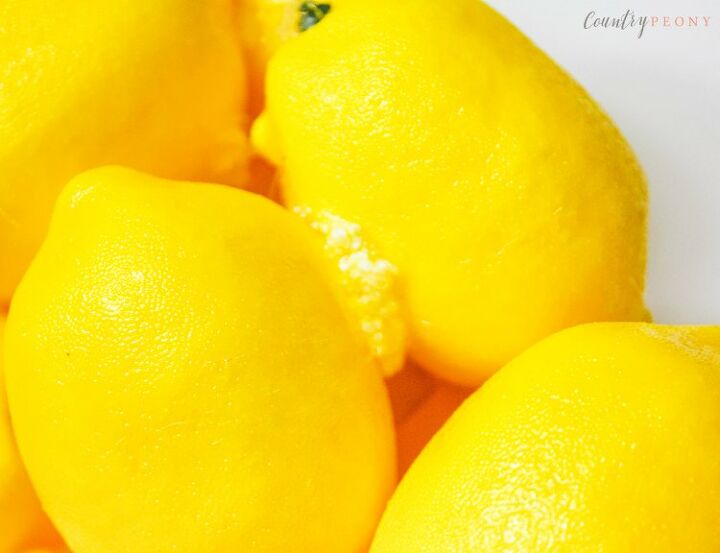
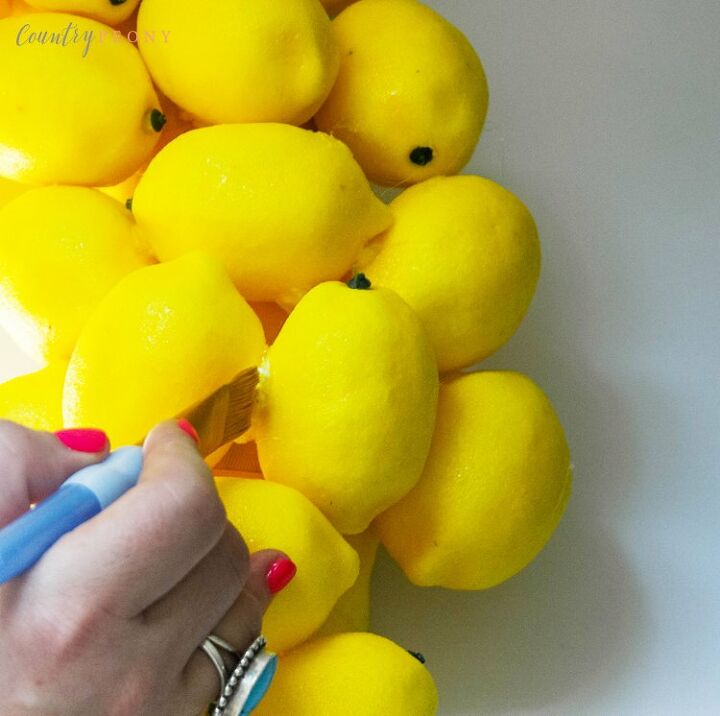
*As a sidenote, since the lemons I purchased were made of styrofoam they expanded when the hot glue passed the lemon shell and hit the interior of the lemon. I fixed the unsightly styrofoam balls that seeped through the lemon coating by painting them a similar color with craft paint as you can see in the picture below.
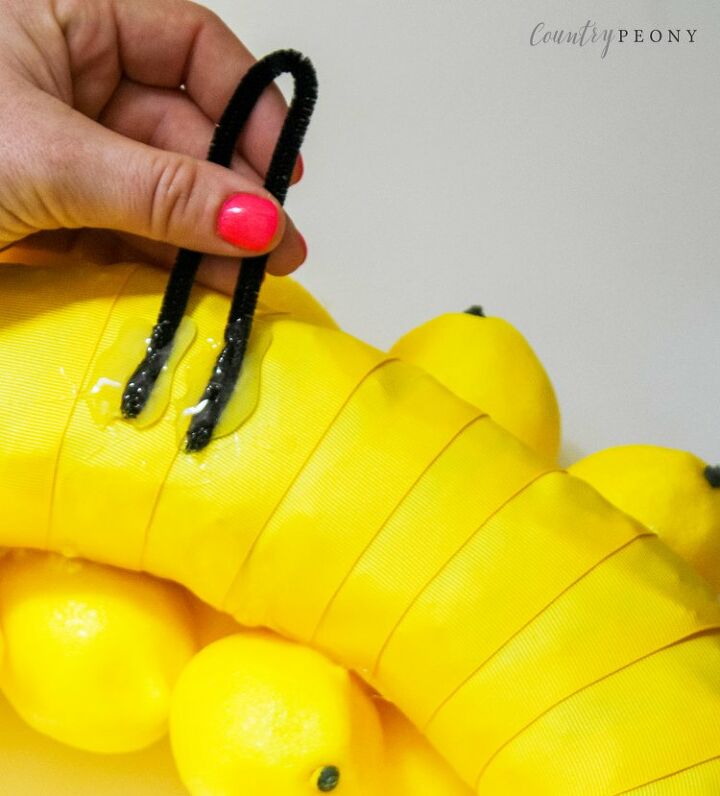
Step 5: Bend your craft pipe cleaner and hot glue it to the back of the top part of the wreath to create a hanging system for your wreath.
Once the hot glue on the wreath hanger dries, it is time to enjoy your new, cheerful wreath!
Resources for this project:
See all materials


Frequently asked questions
Have a question about this project?