


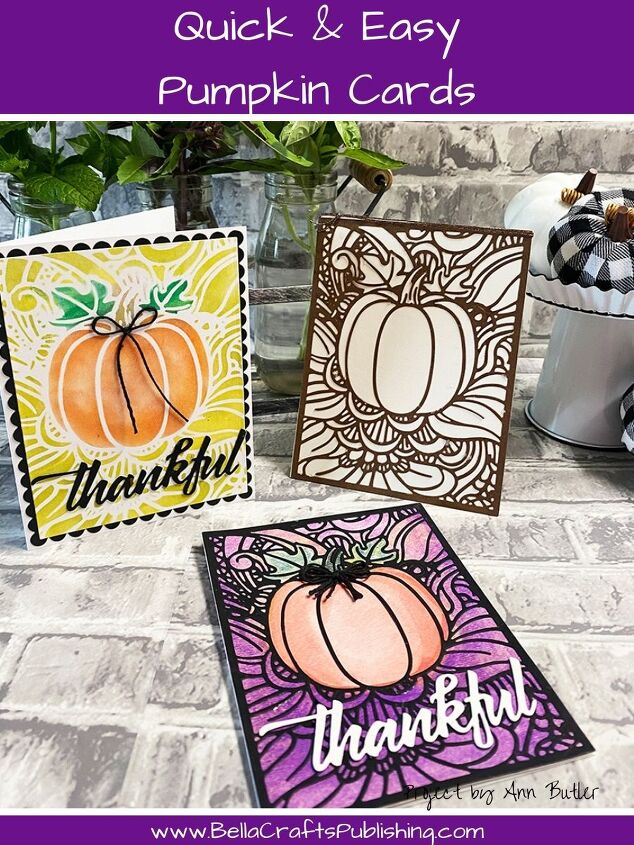
Easy Die-Cut Pumpkin Cards
These Easy Die-Cut Pumpkin Cards show how to use your supplies in another way.

They whip up quickly and turn out great! Give this technique a try.
Let's get started:
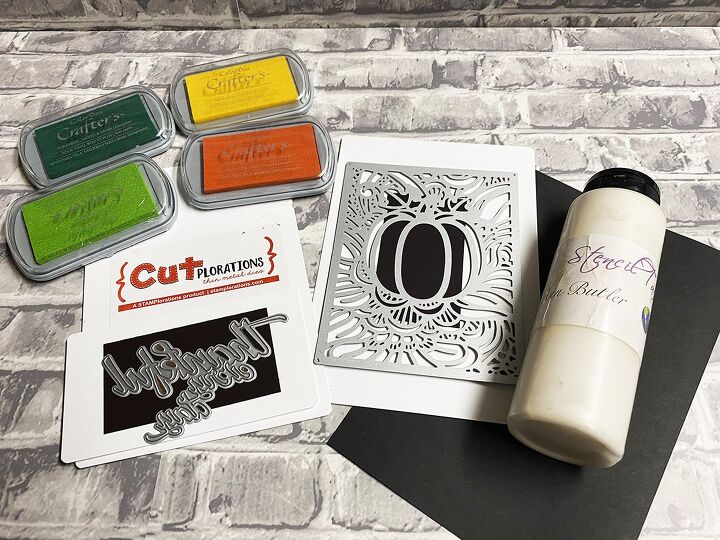
Gather your supplies.
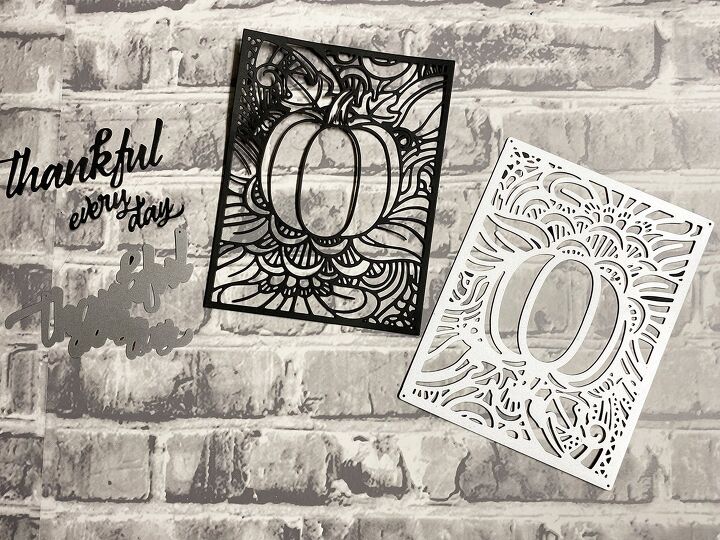
Die cut the pumpkin and sentiment with black cardstock.
Remove the die cut pieces, the pumpkin with become a stencil for the card. Trim the “Thankful” from the rest of the sentitment.
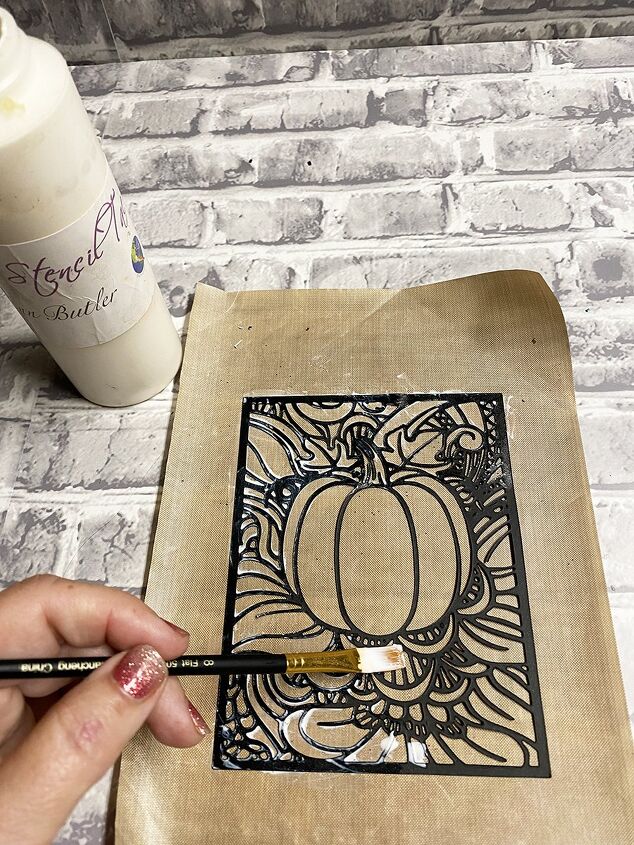
Apply a light coat of Stencil Tac to the back of the pumpkin stencil. Let dry, this only takes a few minutes.
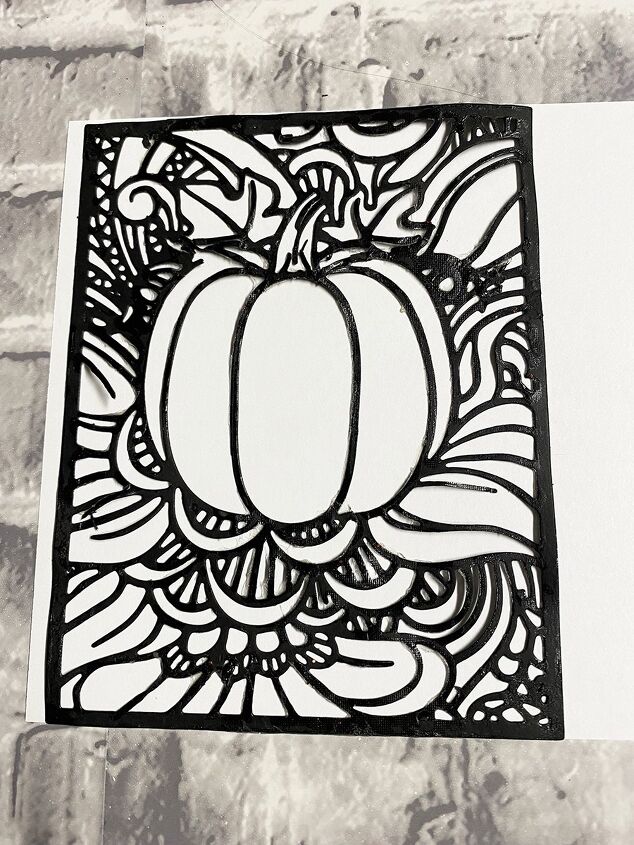
Adhere pumpkin stencil onto a piece of white cardstock.
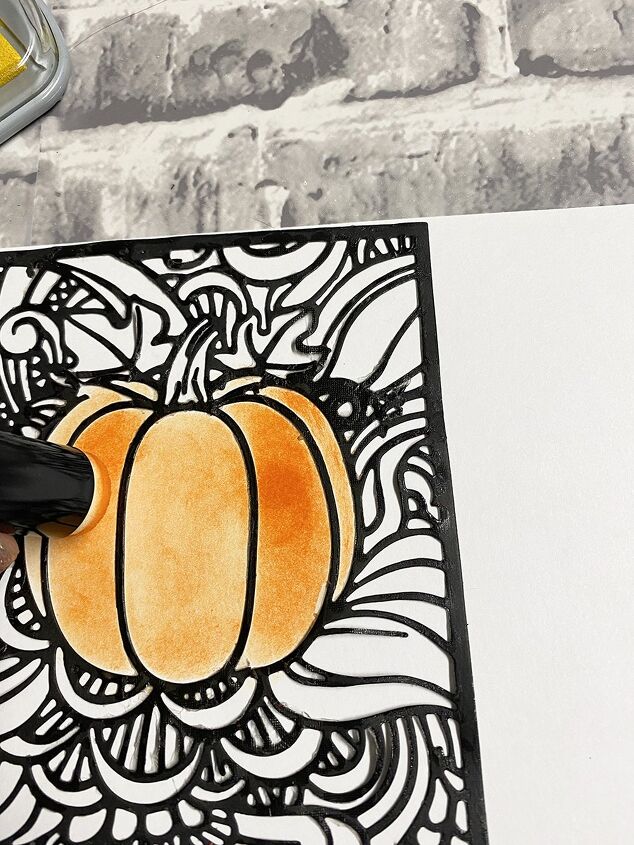
Apply Tangelo in the pumpkin area, blending with a dauber.
Apply Limelight and Evergreen to the leaves, start out with a dauber and then use a q-tip to blend the small area.
Use Desert Sand for the stem.
Blend Sunshine over the background. You could use a variety of colors in each area of the background, but I opted for one color.
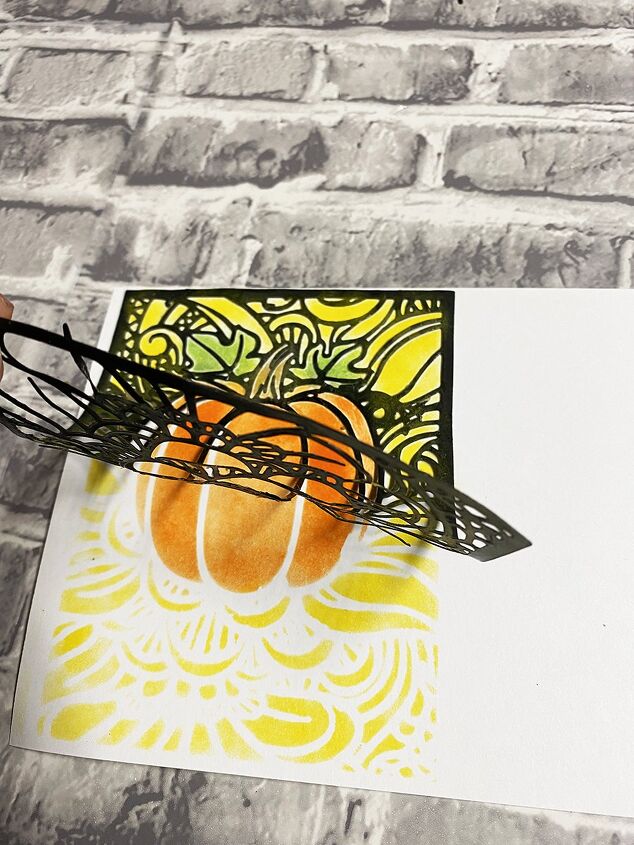
Pull the stencil off the cardstock. This can be placed on a piece of wax paper to be used again. The Stencil Tac last for several uses before loosing its tac.
You can easily line the stencil back up if you need to fill in any spot.
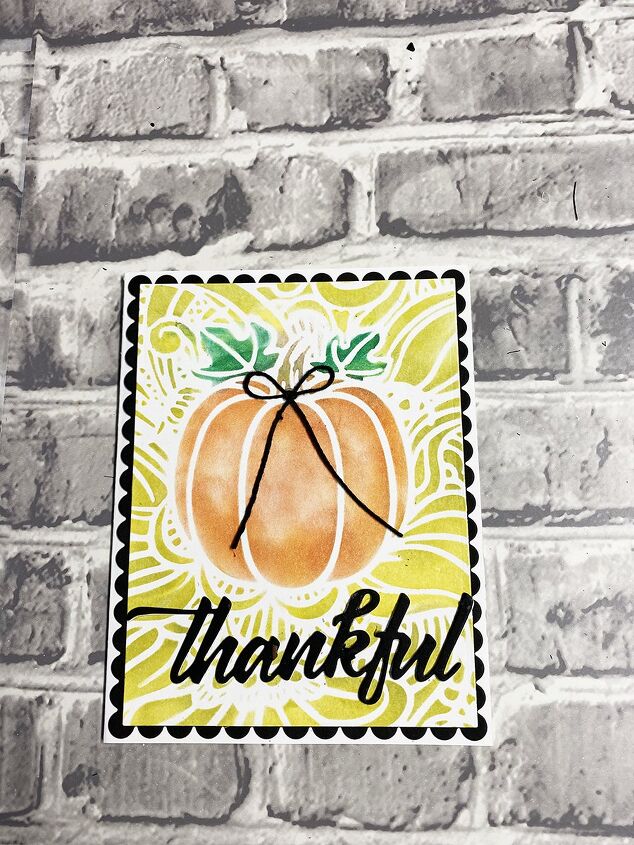
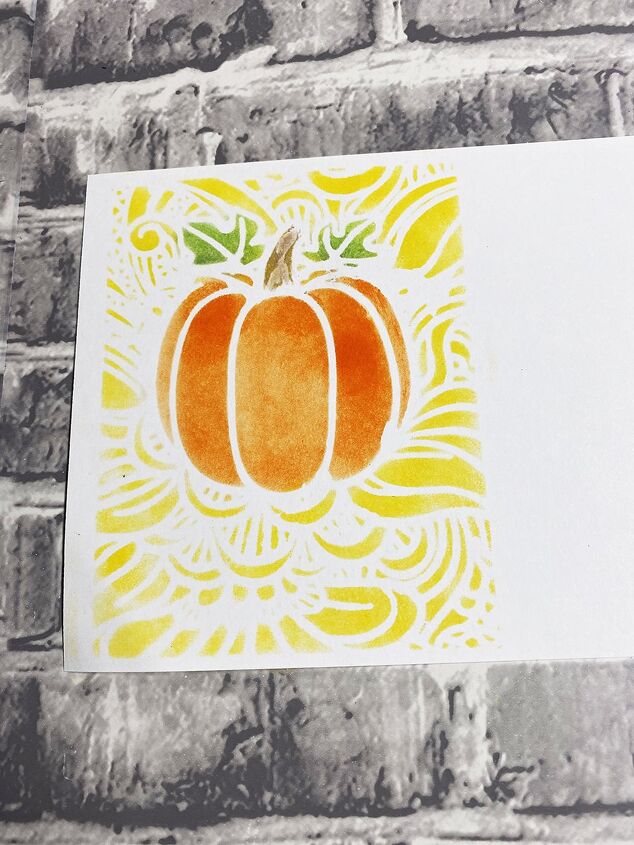
Cut the card front to fit an A2 card base. I chose to layer this with a scalloped black background.
Attach the layers to the card base. Tie a black piece of twine into a bow and glue to the pumpkin as shown in the photo.
Here is another PIN to share!
Supplies for making Easy Die-Cut Pumpkin Cards
- Stamplorations Dies: Pumpkin, Thankful
- Ann Butler Crafters Inks: Sunshine, Tangelo, Limelight, Evergreen, Desert Sand
- Big Shot
- A2 Card Base
- Cardstock: White, Black
- Adhesive
- Twine, Black
Here is a video from a Facebook Live last year for this card.


Frequently asked questions
Have a question about this project?