


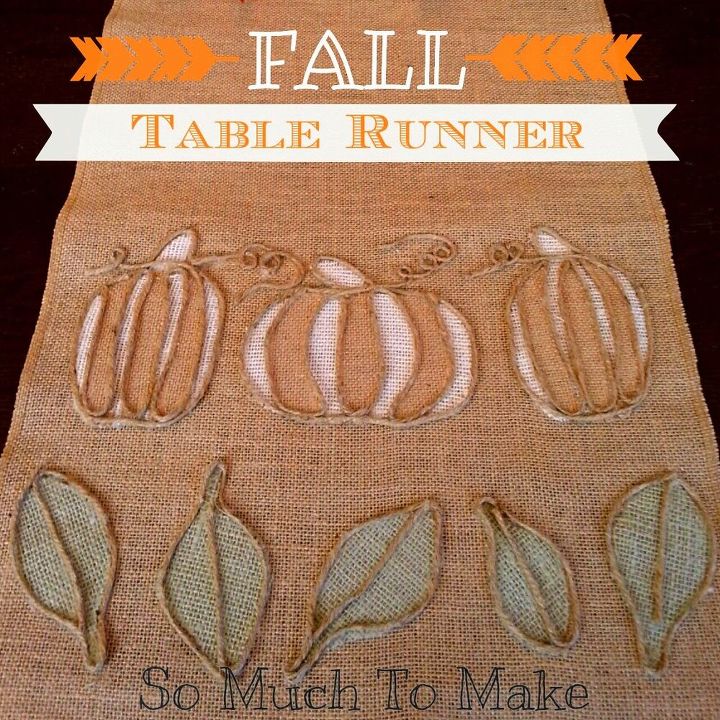
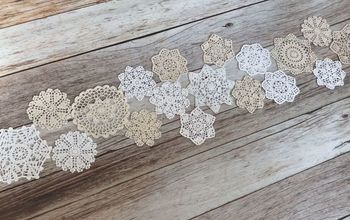
Fall Table Runner
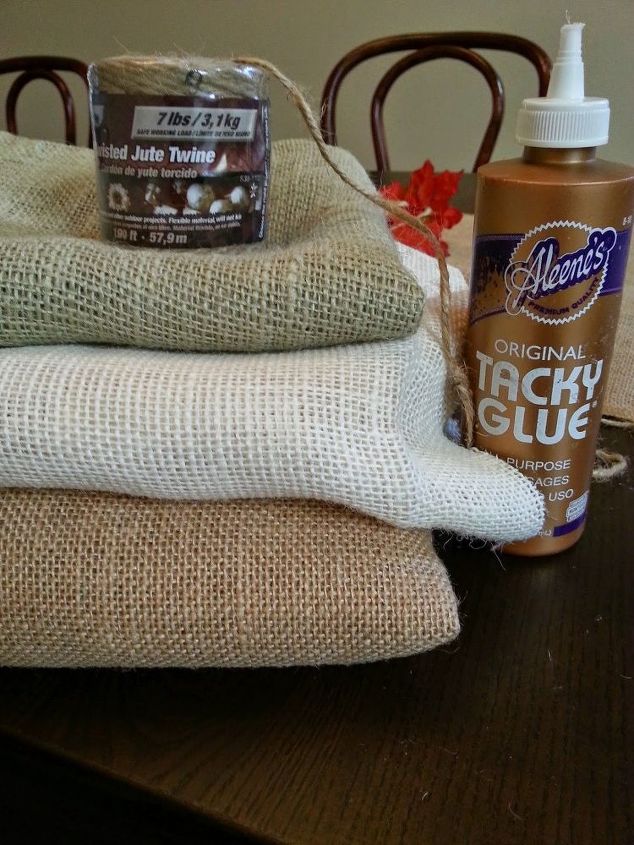
4 Materials
I tend to lean on the side of contemporary--rather than country--in most of my decor, except when I am decorating for fall. Then, I pull out the burlap, the wood, the leaves, and the twine. I love the cool air and earthy smells of fall. I LOVE the warm colors. And I LOVE this table runner.
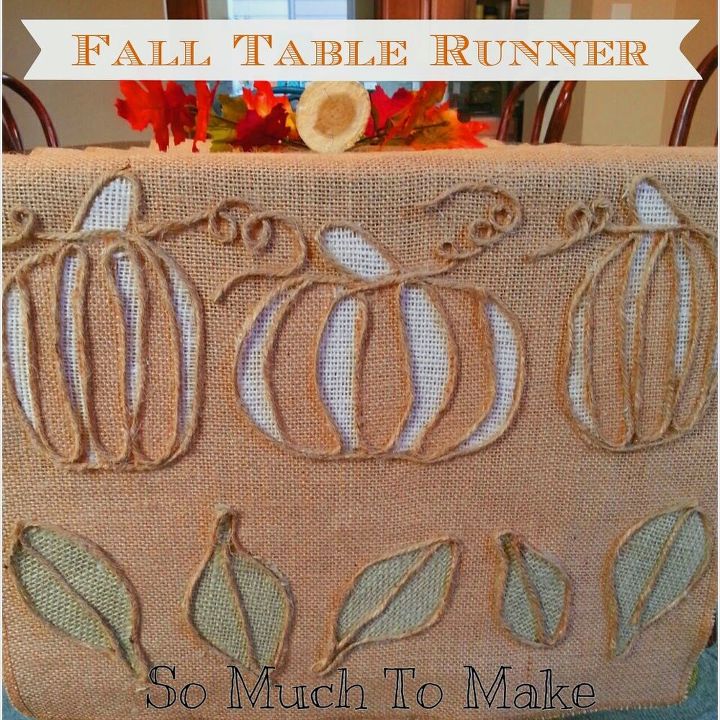
This is a highly customize-able craft. Once you see how it is done, you can create your own design and make it fit your aesthetic desires.
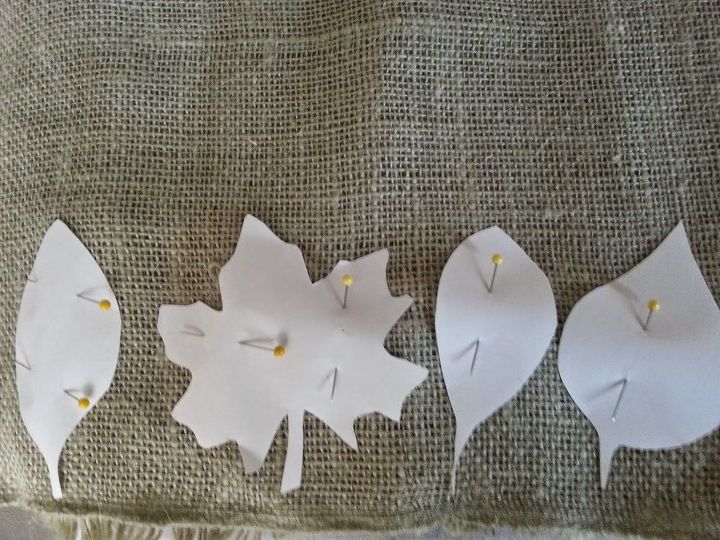
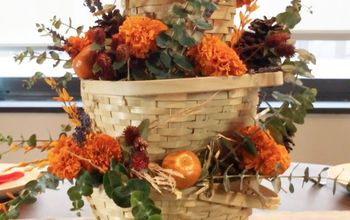
Find or create some pumpkin and leaf stencils/patterns out of paper. I traced some leaf decorations I already had and free-handed the pumpkins. Many templates are available online.
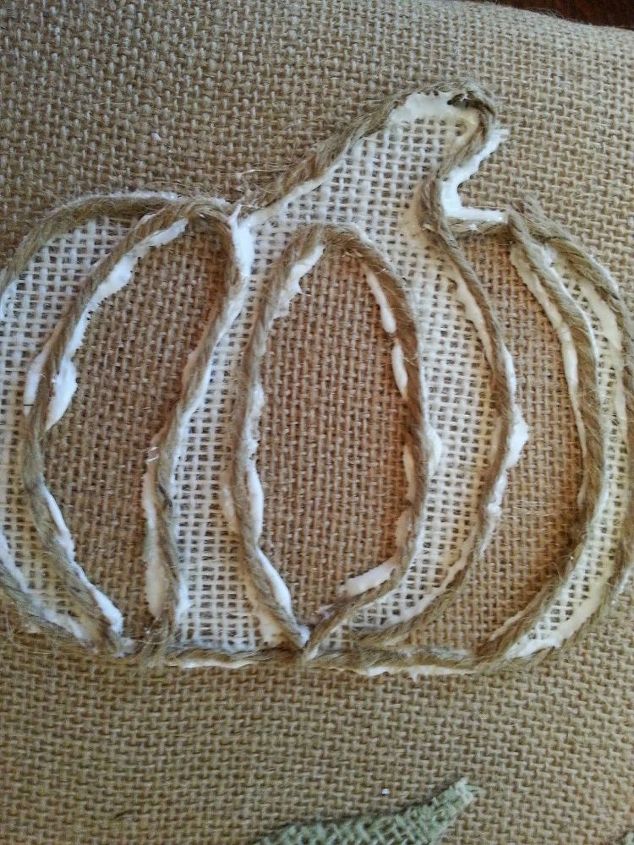
To make the coordinating parts on the pumpkin: Cut a pumpkin shape out of two different colors of burlap. Here the white burlap is on the bottom, the brown on top. Trace lines as shown to divide the pumpkin into 7 curved strips. Cut the strips out. Repeat this for each pumpkin you are making.
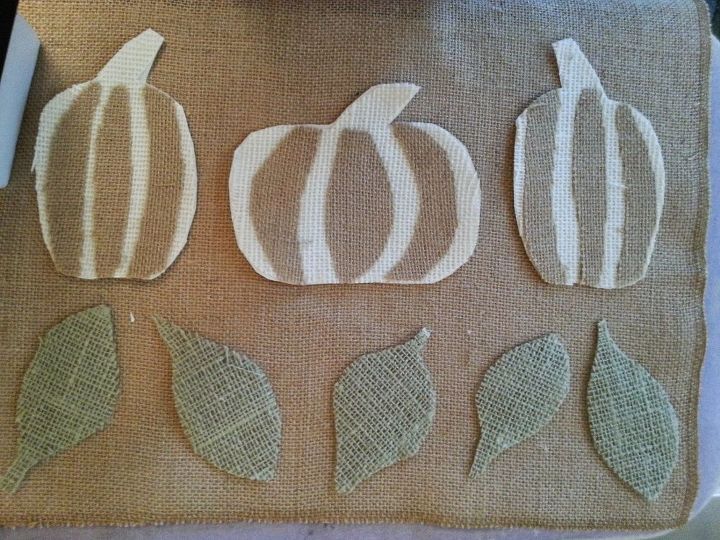
Beginning with the top layer of the applique (here, the pumpkin strips) bond the Heat-n-Bond to the back (paper will still be attached).
For more information on this project, visit my original post. :)

Want more details about this and other DIY projects? Check out my blog post!
Comments
Join the conversation
4 comments
-
Super cute! 😊
-
Love this! So creative and unique!


Frequently asked questions
Have a question about this project?