


How to Sew a Simple Gingerbread Cookie Garland to Welcome the Snow
If there's one thing I love around the holidays, it's a fresh bit of snow. Watching the snow fall while smelling some fresh gingerbread cookies, and I'd call that pretty much a perfect day. Sadly, cookies don't last long around my house, so I wanted to make a project that would let me enjoy that perfect moment without having to slap people's hands away from a plate o' cookies!
So I created this fun DIY felt garland that reads "Let it snow" (singing in my head!). Think of the felt and all the extras we'll add onto it like those fancy elaborately piped cut out cookies you buy in bakeries for $5 a pop without the mess.
It's a relaxing sort of project you'll love to make between eating some real cookies.
First things first, you'll need the pattern for the garland. You can get that when you sign up for the Elizabeth Made This newsletter. When you sign up, the pattern will zoom its way to you. It's available in PDF as well as SVG format, so you can use it with your Cricut machine if you like.
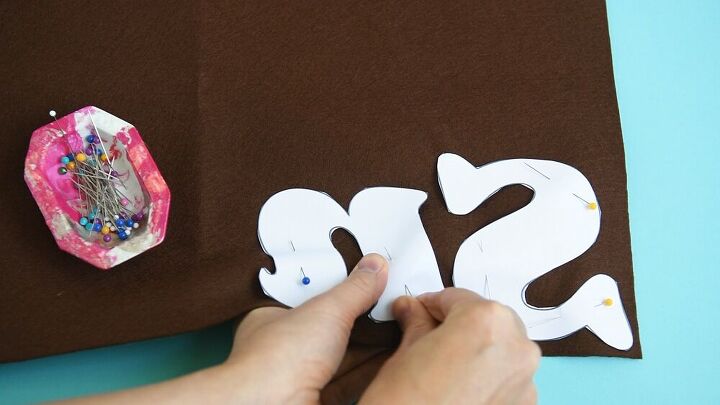
After you've printed and cut out the pattern, cut out one felt letter of each of the pieces. Also cut out 2 snowflakes. The letters are backwards, but you'll see why in a little bit. Set aside the pieces
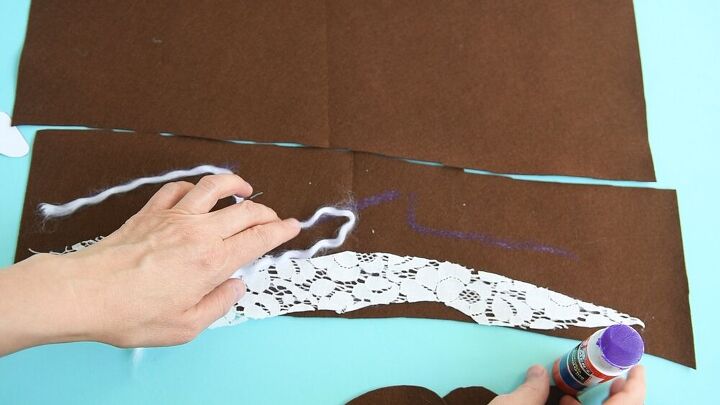
Cut out 3 rough rectangles of felt big enough to fit each one of the words.
Next, grab your glue stick and glue on strips of lace, tiny felt squares and wisps of yarn. Go wild here. This is going to create some cool textures on your letters after you stitch everything down.
Once you've finished adding all the goodies on one piece of felt, make two more felt bases for the other two words. Set them aside to dry.
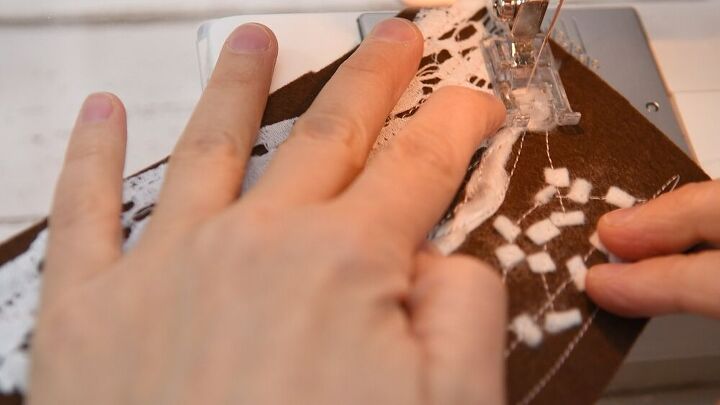
From here, thread up your machine with all-purpose thread in the bobbin and embroidery thread on top.
Stitch down all of the glued elements with a meandering sort of straight stitch horizontally across the rectangle.
The snow pieces will likely want to pop up. When you get to an area of the base with snow, lift the presser foot and use the stiletto to lay the pieces back down again. Lower the presser foot and continue stitching.
When you get to the end of the rectangle, raise the presser foot again, leaving the needle down. Turn the work back towards the machine, then keep on stitching. For the yarn, you can choose to zigzag it in place or continue with the wavy meandering kind of stitch.
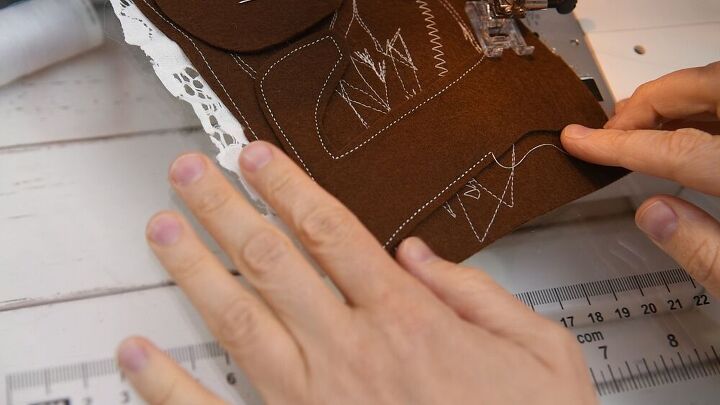
To create the letters, Flip your stitched out base to the wrong side. Lay the letters on top. They should be backwards just as you cut them out earlier. Pin the letters in place.
Stitch around each letter close to the cut edge with a straight stitch. For letters with internal bits like the "e" and "o", stitch around the centers close to the cut edge as well. Pivot and turn the letter as you need to around the outside while you're stitching.
Stitch a few stitches past where you started stitching for each letter.
Repeat this stitching for all of the letters.
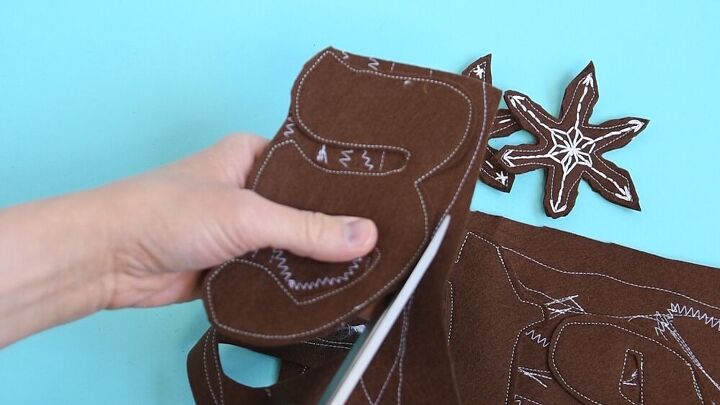
Finish off sewing the letters by cutting away the excess felt around each letter. Cut close to the cut edge of the original letter. Cut out any internal bits as well.
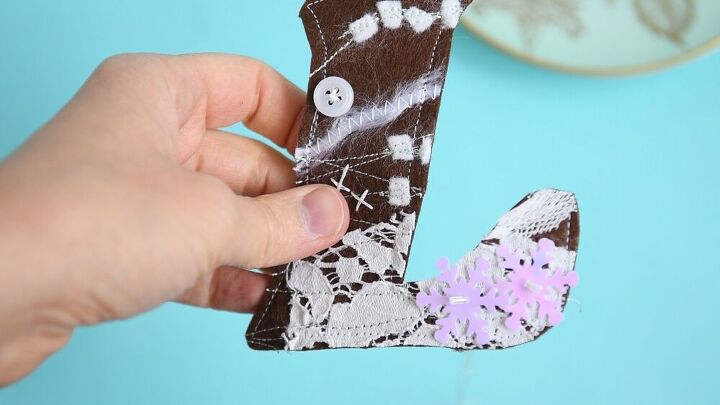
To give the letters a little more oomph, stitch on some Xs with embroidery floss and a few buttons. Even better: add on a snowflake sequin, using a small bead to hold the sequin in place.
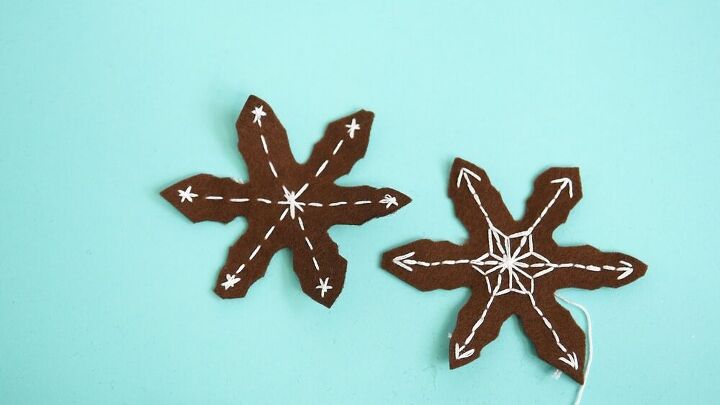
Add some simple stitches to the snowflakes with embroidery floss.
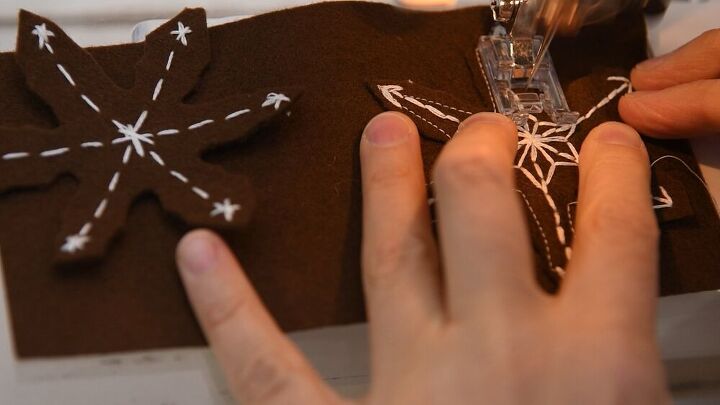
Once you've finished this, stack the snowflakes on top of felt squares and stitch around them just like you did with the letters. Cut out the snowflakes.

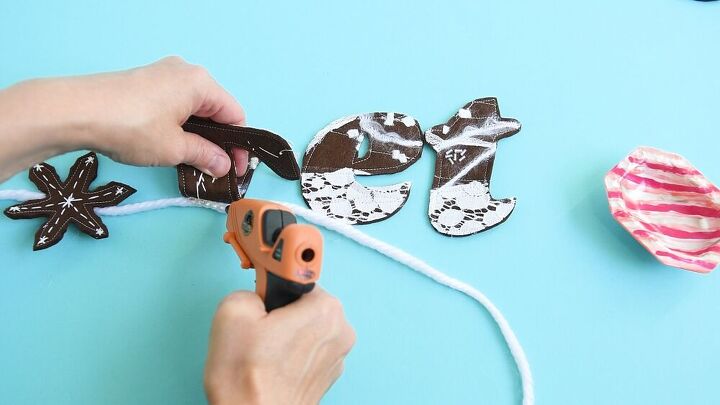
Finish the garland by hot gluing the words and the snowflakes to a length of yarn.
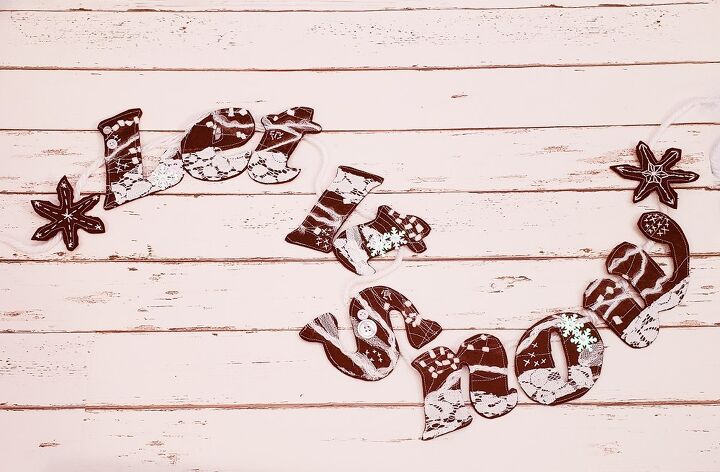
Hang up your new garland and kick back with some hot chocolate!


Frequently asked questions
Have a question about this project?