


Ice Cream Cone Storage Bin From Old Paint Tin

This ice cream cone stores both children’s toys and a ball and is made from an old paint bucket.
I was staring dejectedly at a project flop when my daughter said “Hey, that looks like an ice-cream cone!” And indeed it did - either an ice cream cone or a camping toilet. Obviously I decided to go with the ice cream option. And so started my quest to create the ultimate plastic ice-cream storage drum.
Since it was an exploration there are probably many ways in which the design could be improved upon and I would love to get your feedback. Also, apologies if my steps don’t quite follow logically, there was quite a bit of redoing and rethinking along the way.

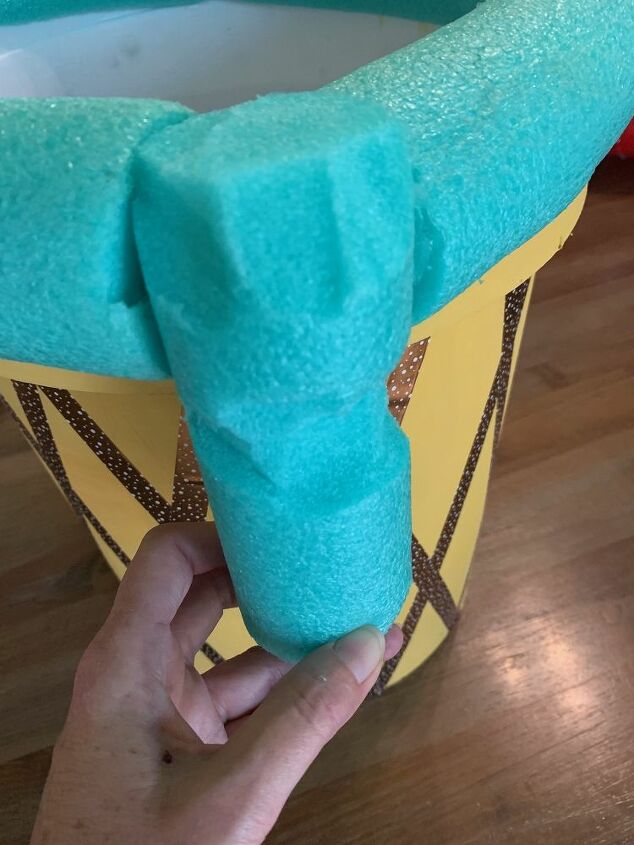
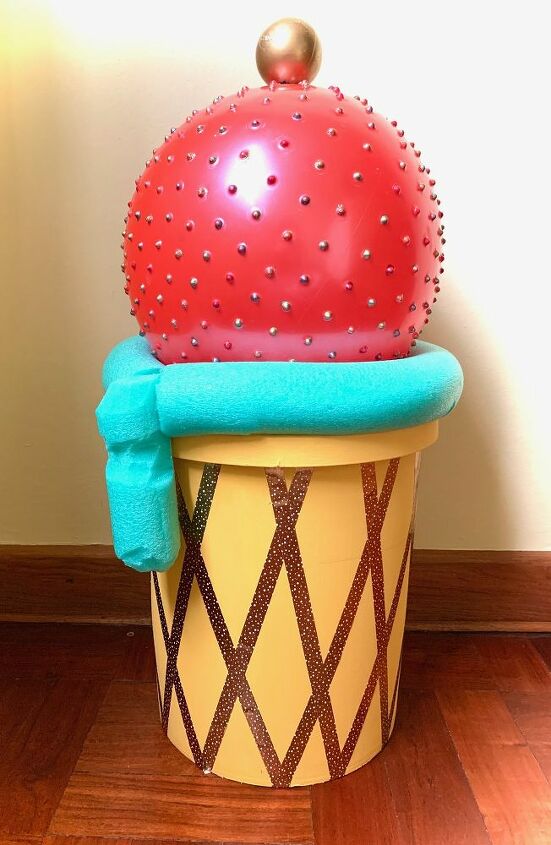
What started the whole process was a big plastic paint bucket that was rimmed with a pool noodle. I had intended to make a nice rim around the entire thing but kept cutting it too short. My final version still has this gap but I had cute workaround for it.
You need to make a mock-up to ensure that you get the correct size ball or lid. Choose the colour of the noodle and ultimately plastic ball (more about this later) carefully because it will prescribe your colour scheme. I tried to paint the noodle with chalk paint but it chips. The same applies to a plastic ball, size and colour matters.
To make the mock-up:
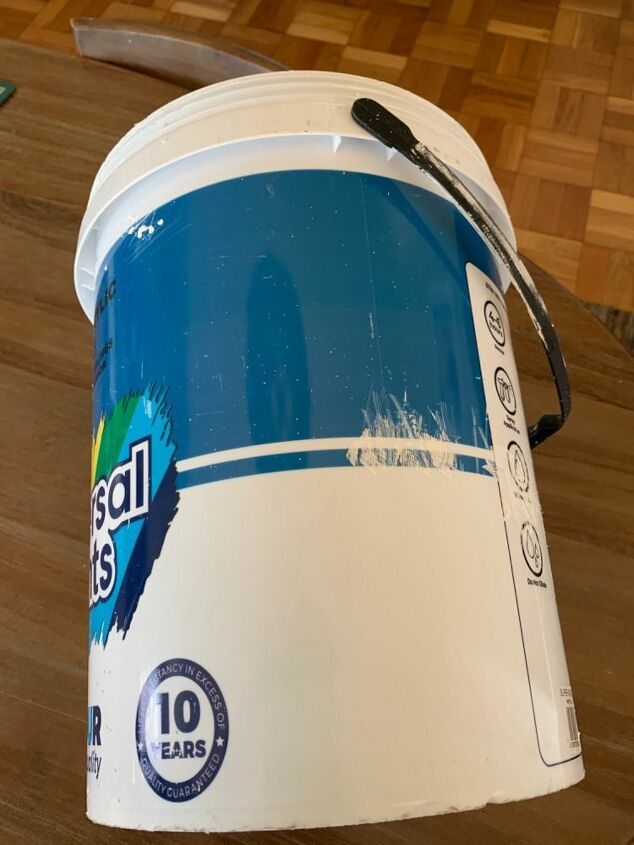
Clean a bucket
Mine was a large plastic paint bucket. I didn't bother to remove all the dry paint inside but made an attempt to scrape off the most uneven parts on the outside.
Fit a pool noodle on the bucket
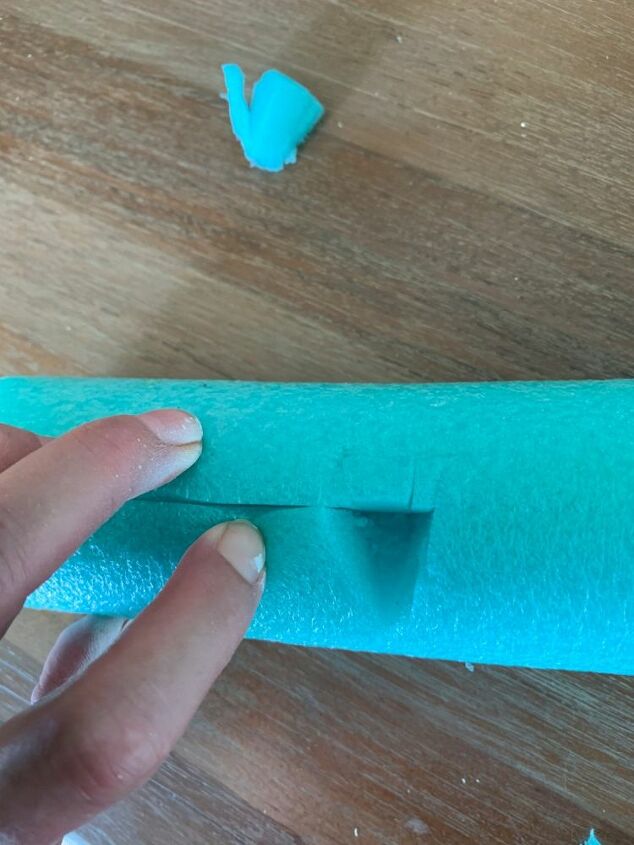
1) Cut a slit and wedges:
Using a craft knife I cut a long, deep (to approx the centre of the noodle) slit on the length of a solid pool noodle. Next, I cut wedges out at 15-20cm intervals, starting from the slit and taking care not to make them too large to be visible once the noodle was fitted. The idea with this was to make it easier for the noodle to bend around the bucket's rim. Perhaps someone technical can comment and say if this actually made a difference.
2) Slide the noodle over the bucket and trim to size
This is quite easily done. I didn't even glue mine in place. You will see that the red noodle above is too short and doesn't go around the rim entirely. My fix was to make a 'drip'. If you don't like the 'drip' - when cutting the noodle, add a very large margin and only trim it once fitted. Also cut one edge on the diagonal to compensate for the missing wedge. Do not simply measure the circumference of the bucket and cut the noodle accordingly, it will be too short.
Once fitted I had a mock-up to take with me to the shop to fit the ball.
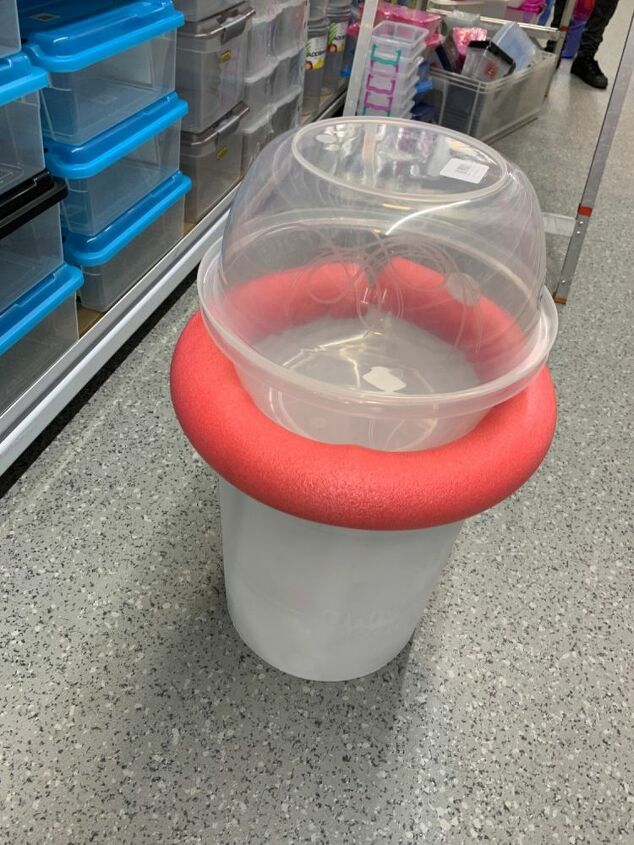
So I went shopping, basically with a camp toilet in hand, to find a suitable lid that would look like a ball of ice cream. I wonder what campers who would recognize the item were thinking whilst I was happily fitting plastic salad bowls over it. Finding the right lid was a bit of a challenge, you could use a polystyrene ball or very round plastic bowls (see above - although you would have to find a way to paint them and to clip them together). I thought it would be cool if I could have a functional ball but that also meant it had to be big enough and of a suitable colour because I couldn’t paint it. It also had to match the pool noodle which was also left unpainted.

I finally managed to find the perfect ball. It already had little 'nubbies' that look like sprinkles if you use your imagination. I painted them with various colours of nail polish. If you had a normal ball you could stick sprinkle-shaped contact paper shapes to it.
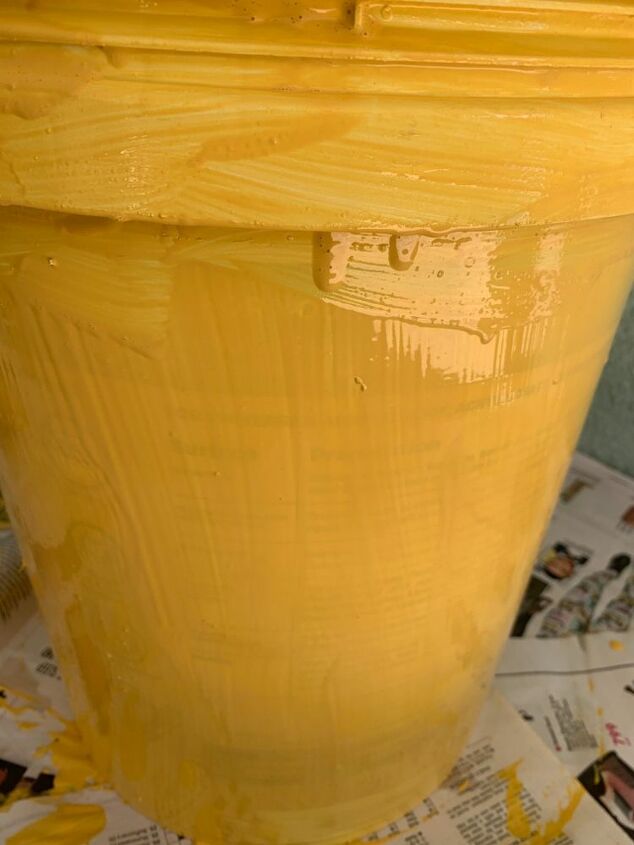
Remove the handles from the bucket and give it a good clean as described above. Give it an undercoat suited to plastic and then a couple of coats of paint. I used chalk paint but you could spray it.
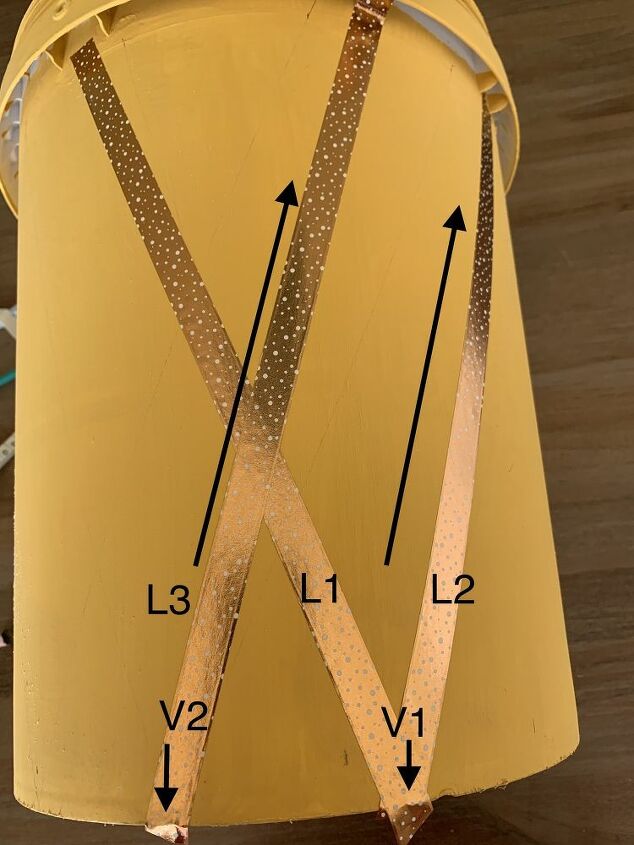
Using a sewing measuring tape, measure the circumference of the bucket’s base and divide it by 11 (my arbitrary pick). Mark these out on the base. Unless you are a mathematician, don't try and do any maths beyond this. I tried and failed, just eye-ball it!
Start by laying a piece of washi-tape (L1) at an angle with the base covering the 1st mark (V1) you made. Now lay another piece of tape (L2) as a mirror image of the first ie. you get a v-shape.
Starting on the next of the 11 marks (V2), stick a piece of tape (L3) parallel to L2. Now complete V2's 'V' by sticking a piece of tape parallel to L1. I hope this makes sense.
Or said in another way:
You are sticking similarly angled 'V's at each of the 11 marks. To ensure that they are all at the same angle you use a previous line that leans in the same direction as a reference and stick the new line parallel to it. All right-leaning lines should all be parallel to each other and all left-leaning ones should be parallel to themselves.
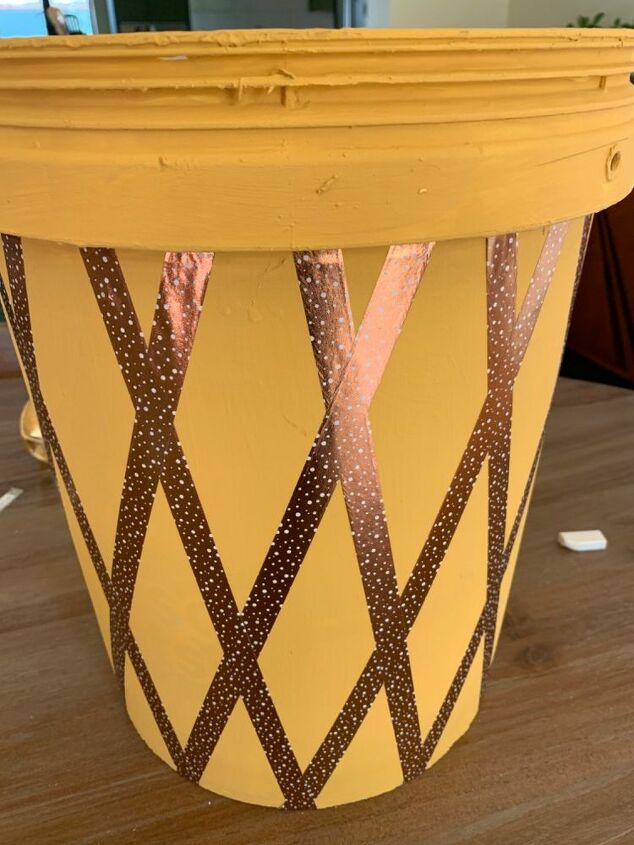
Continue all the way around the bucket and...Ta-da!

The instructions are as the previous. You can see my blue noodle no.3 also came short. Oh well, time to get creative.
You will find that you can easily shape a 'drip' with a craft knife and then stick it into the gap with a glue gun.
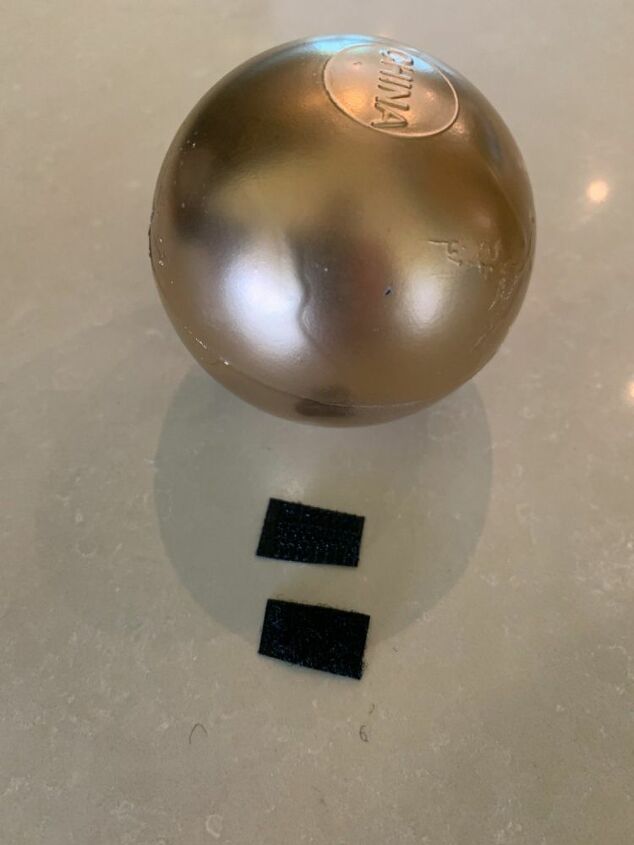
Because my ball of ice cream was already red I decided to paint my kiddies ball pond plastic ball gold. I then added a tiny bit of velcro to the red ball and the burr-part of the velcro to the smaller ball. The idea is that the smaller ball can be removed from the larger and that a child could still play with the larger one. The smaller one will possibly chip or scratch.
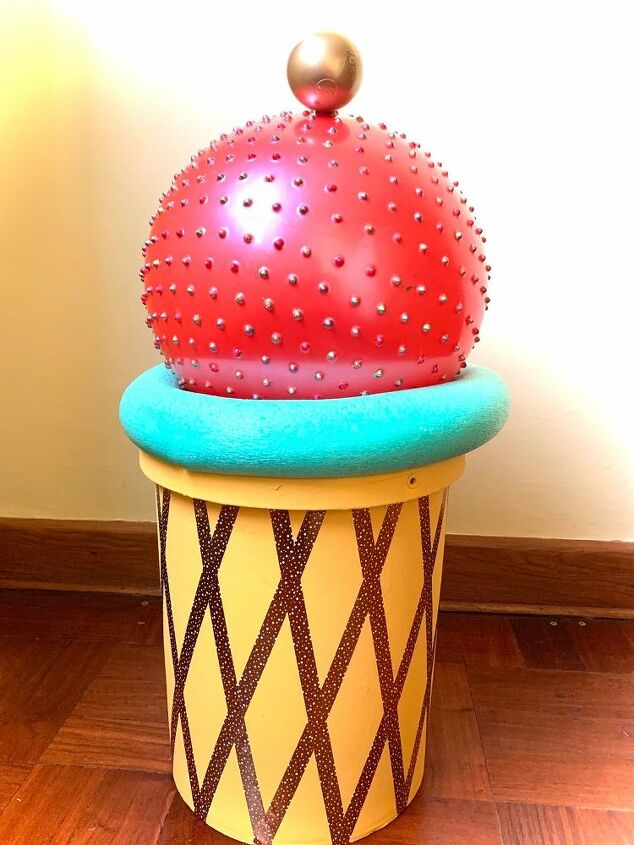
Stick the cherry on top and the ice cream is ready to be used. I am holding thumbs that it also reads as an ice cream to you.


Frequently asked questions
Have a question about this project?