


Snow Garland With Cotton Balls and String | Creating a Winter Wonderla
Who knew something so simple could be this magical? Snow garland is my new favorite thing.
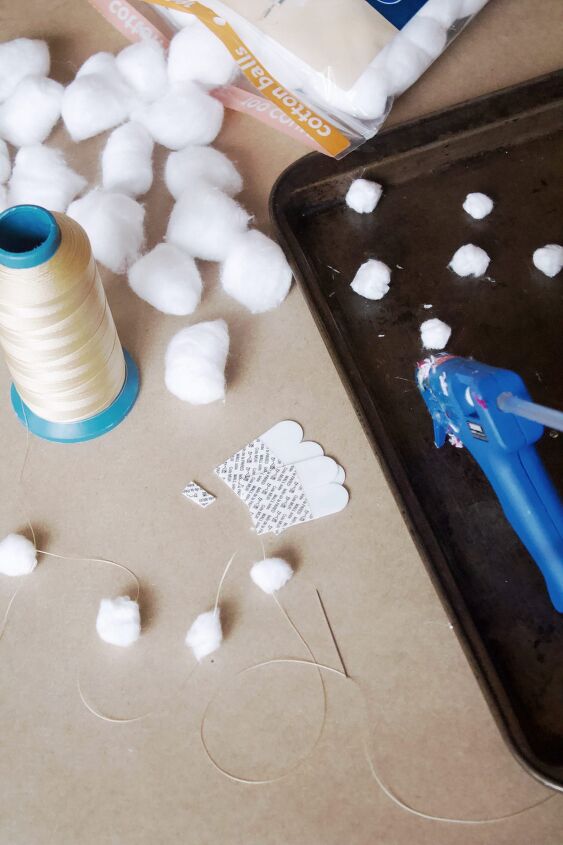
I mean, isn’t it dreamy? And all it took to make this snow garland was one Christmas movie, (While You Were Sleeping), a hot glue gun, one bag of cotton balls, and some nylon thread. I watched the movie, sipped coffee, and put together these strings of “snow”.
Originally when I saw a similar garland it was made with wool balls. Making the wool balls sounded time consuming. Rolling and rolling. And Purchasing them added up fast. I saw some on Etsy selling 200 for $75. Yikes! This project only cost me $1.99, because I had the thread already on hand.
How to make snow garland
These are so darn simple! It’s a perfect mindless project that you can do while having a great conversation, watching a movie, or listening to a podcast. Kind of similar to my Decorate with Gift Tags 6 Different Ways craft or the popular Paper Christmas Trees. Other great ones to do while watching a movie.
- Cut string the length you want it to hang. (I used this -> nylon string because it’s on the stronger side, but use whatever you want or have on hand!) I did mine almost touching the floor.
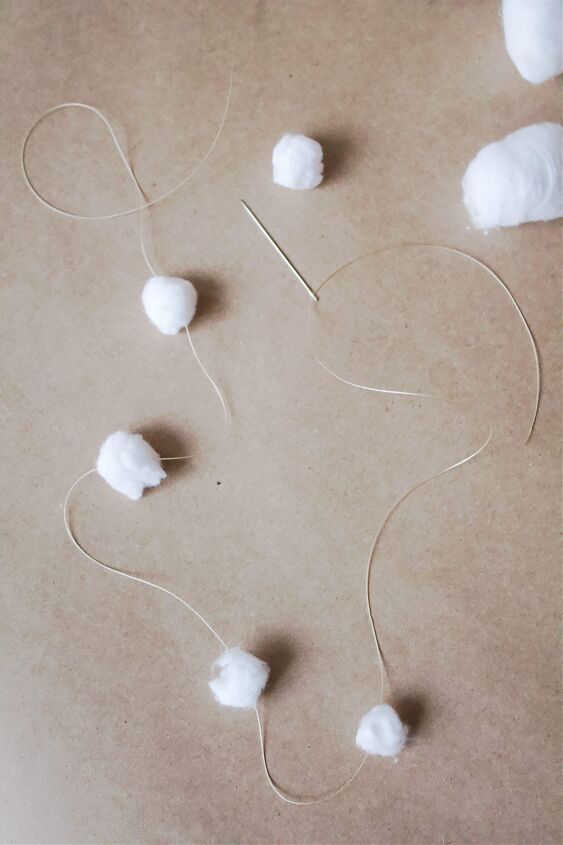
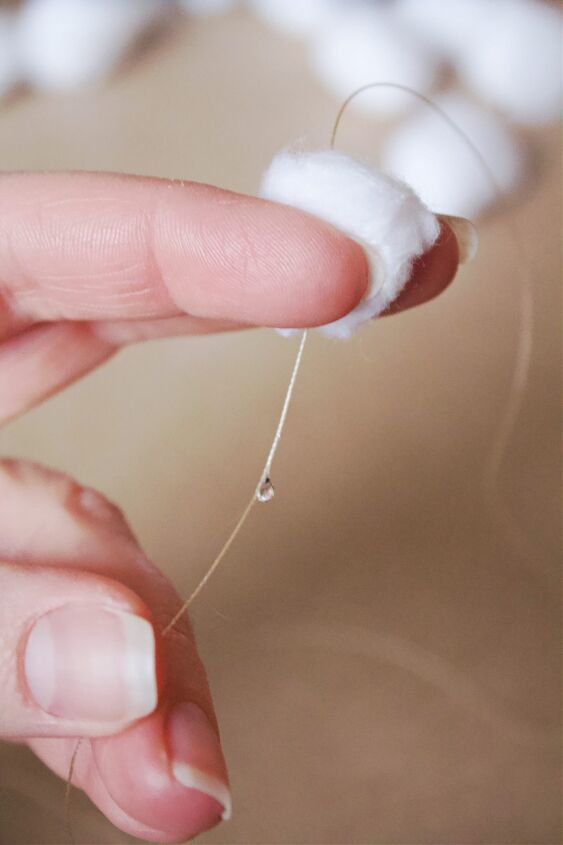
- Taking a larger needle, thread string. Don’t tie or knot, you’ll be securing the cotton balls with a dab of hot glue
- Taking a cotton ball, pull apart into four pieces, rolling each one back into a ball form. Do this to several cotton balls so you have a lot to work with when threading. I did about 40 strings of garland and only used 3/4 of one bag!
- thread cotton balls onto string
5. Secure cotton balls to string with a dab of hot glue. I placed my “snow” pieces about a foot apart on the string, with a total of about 5 to 7 on each string. After placing the hot glue on the string, pull the cotton ball over glue and let dry in place.
6. Repeat these steps with as many garland strings as you need to complete your project.
Tips so they don’t tangle
These can tangle! I found that you don’t need to hang them very close together. Keeping them around a foot and a half apart seems to be the key to making sure they fall back down straight and not become hooked together.
How to hang
First off, if you’re not following along with all my crafting and DIY on Instagram, you need to jump over real quick and hit follow! Then you’ll be crafting with me in real time. And believe me, we have a ton of fun!
Now that we have that business covered, it’s onto hanging these garlands!
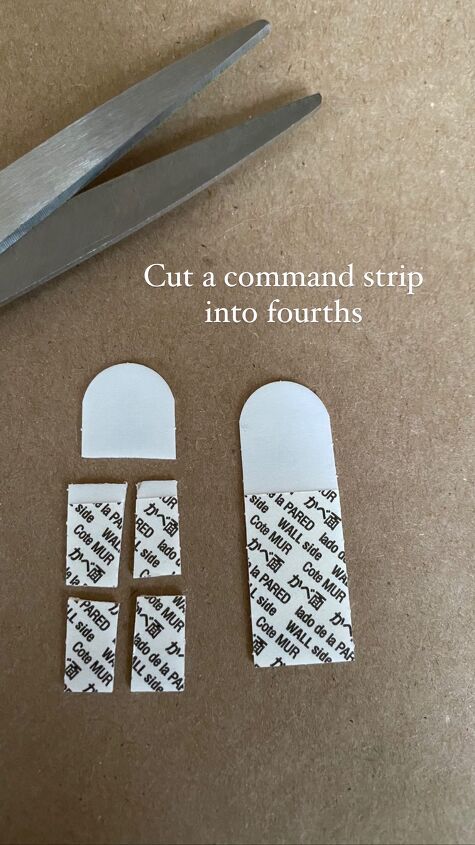
I used command strip refills. (I should have stock in command strips because I use them for alllll my crafts.) You don’t need the hooks for this project, just the adhesive backs.
Because these garlands weight practically nothing, and you don’t need much to get them to stick to the ceiling.
Here’s what I did:
- Cut the command strips into fourths
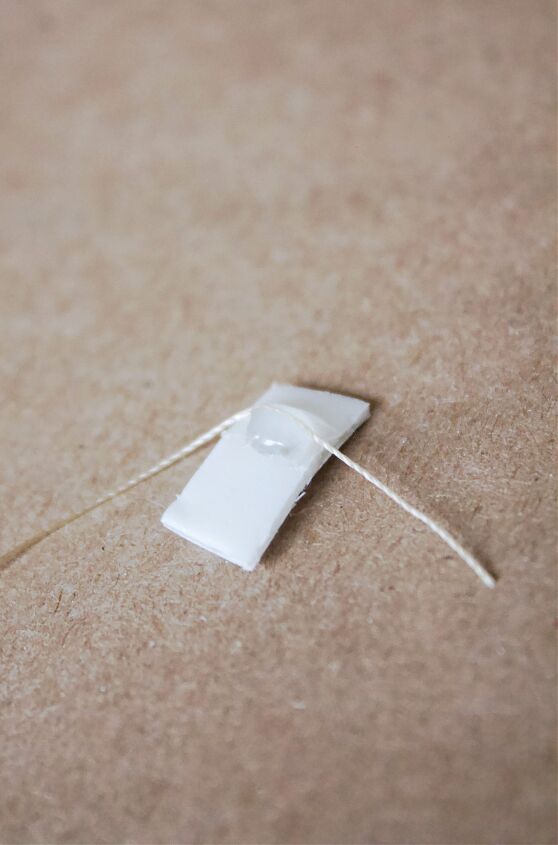
2. Remove the film from one side and attach the end of the garland string onto the sticky surface. They place a dot of hot glue over the top to make sure it’s secure.
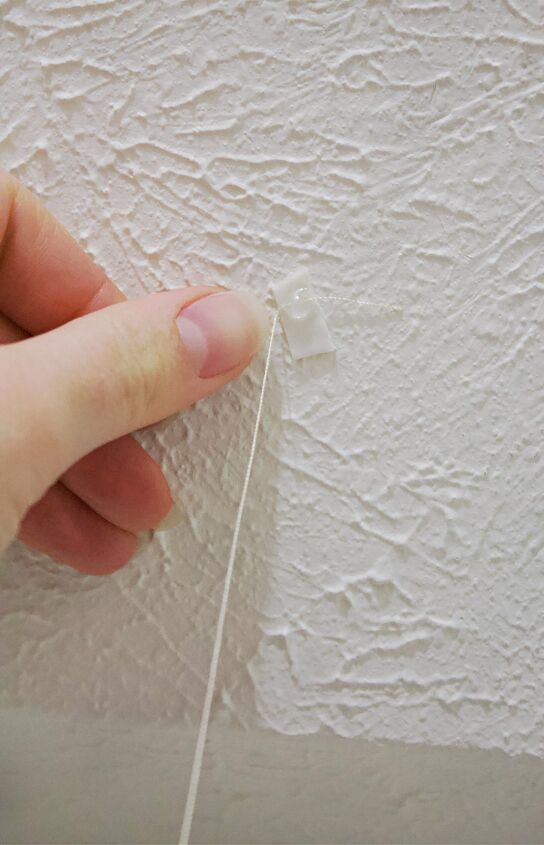
3. Once dried, remove the film backing and stick to the ceiling.
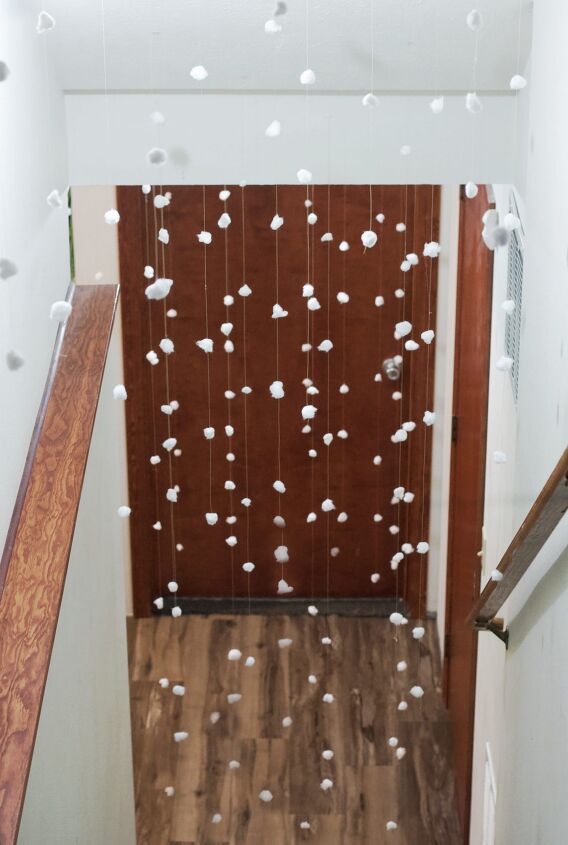
Put together your snowy winter wonderland
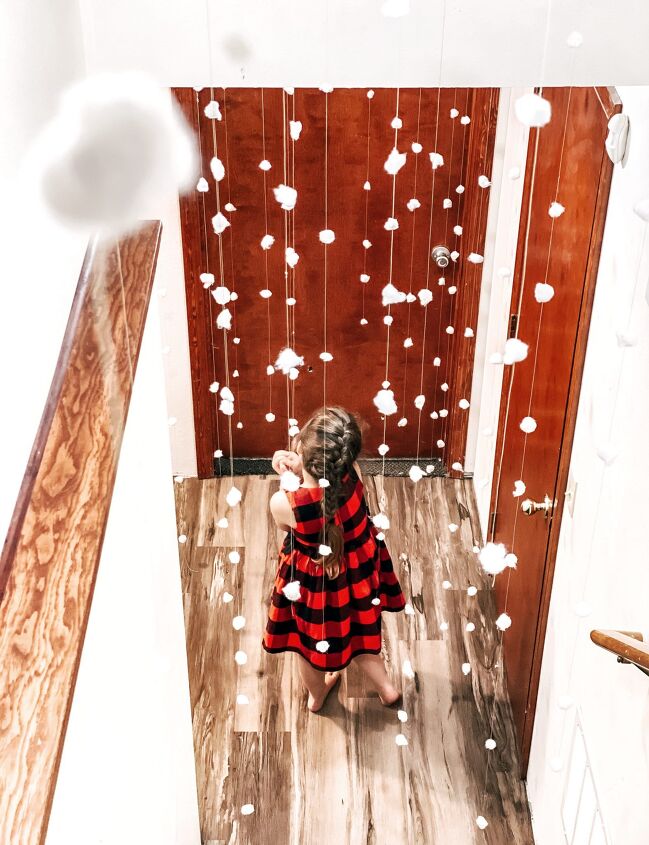
First, figure out how large an area you want to make your wonderland. We chose the stairs headed to the basement and the basement landing. I staggered the garlands out, standing back often to see if I was placing them evenly and not adding too much garland in one area, making it garland heavy.
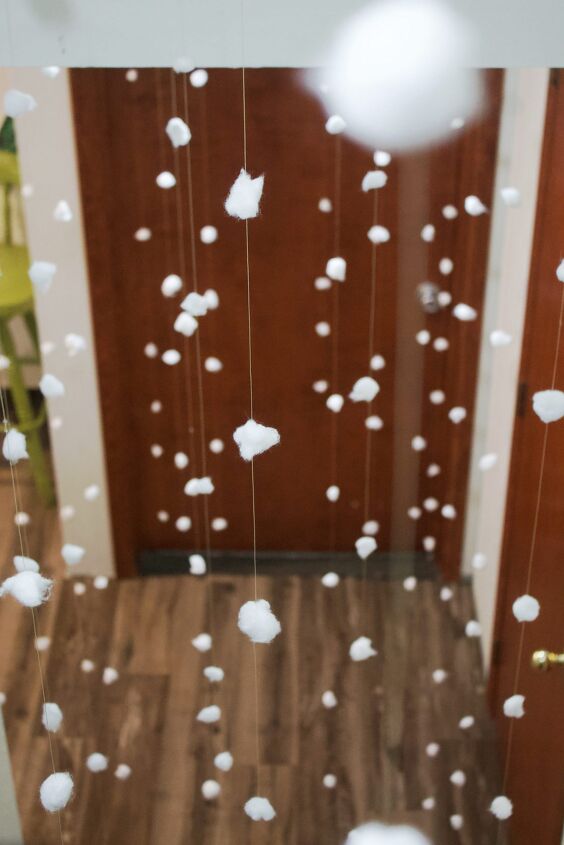
I was giddy putting it up because it looked amazing! Sometimes it’s the simplest things that make my heart jump for joy. And what was even better than the magical snow? My daughter seeing it for the first time. She clasped her little hands together, her eyes lit up with pure joy and she said, “Mom! It’s a winder wonderland!” She spent the next hour singing about snow while she twirled around on the landing. It was precious.
More Budget Friendly Crafts
Want some more beautiful Christmas craft ideas that cost next to nothing but pack a big design punch? You’ve got to try your hand at making a dried orange garland. These easy paper Christmas trees are also stunning and so easy to personalize! And these dry mason jar snow globes have been such a hit!
Have fun crafting and making your home a winter wonderland!


Comments
Join the conversation
-
Fishing line will work great. It says to curl, so you may have to weight it or wind it off the spool and weight the ends for a while. What a great idea!
-
If you want to save the garland for next year, roll them on a paper towel tube then place in a plastic bag.


Frequently asked questions
Have a question about this project?
What would be the best way to store them so they don't tangle?
How did you get the command hooks to stay on the textured ceiling??