


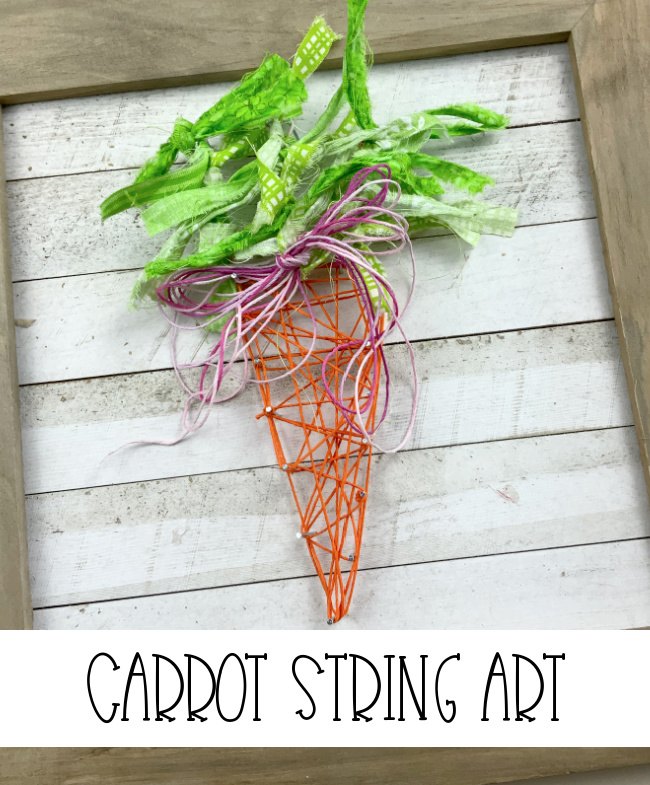
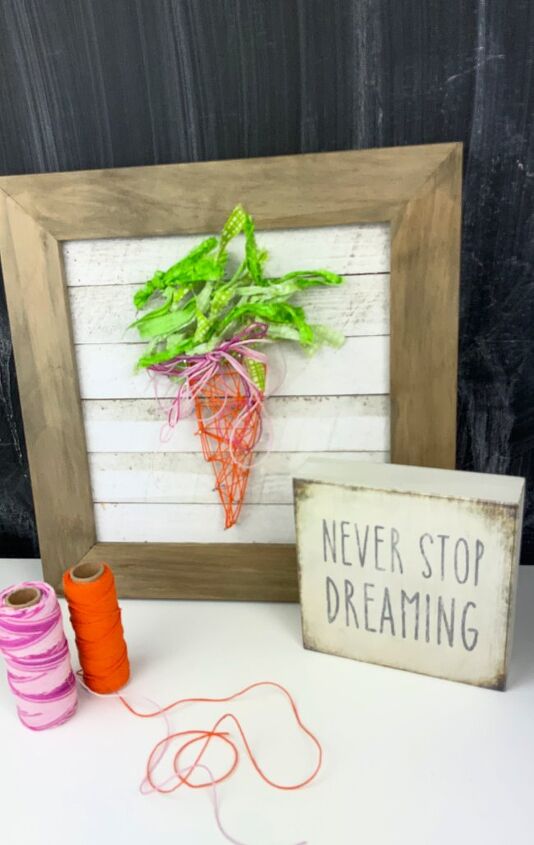
String Art Carrot
This string art carrot might just be my most favorite DIY project ever. I love decorating for every single holiday, occasion and celebration but without a double, carrots are at the top of the list when it comes to spring. String art is so simple when using the right product and the cord from Hemptique is perfect. I think it rocks that it comes in so many fantastic colors and lengths.
Too busy to create this masterpiece today? Pin it for later! Pin this craft project to your favorite artsty crafty board on Pinterest and it’ll be there for you when you are ready!
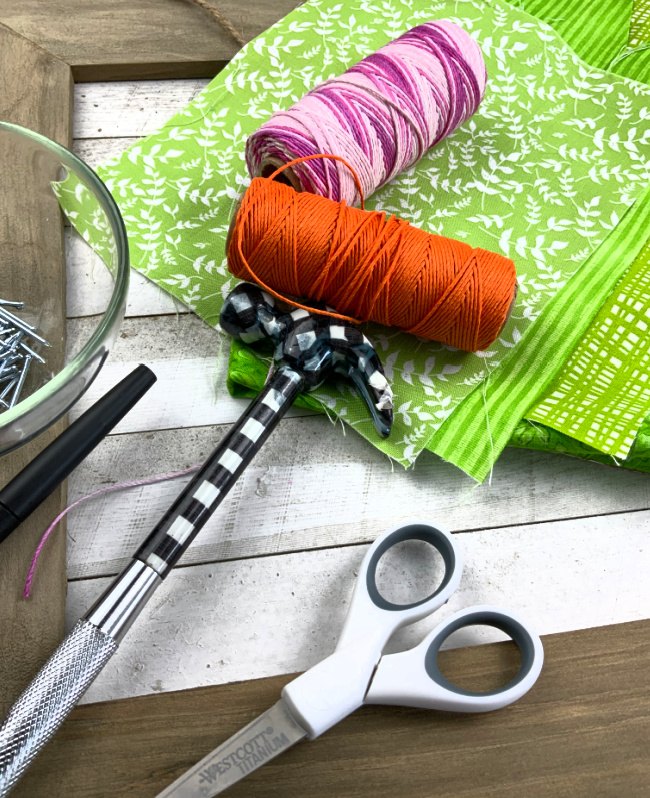
Materials Needed for DIY String Art
- Twine or Cord. The type you use depends on the look you want to create. I love the hemp cord because it works well and creates a beautiful finished look. If you want something more delicate, try a thinner twine.
- Nails. Small, regular nails from the hardware store work great. Just make sure they have a large enough head on them to keep the cord from slipping off the tops when stringing.
- A surface. Wood is my favorite option. You can use wood that is plain like a board, or you can use painted, wood and/or covered in felt or cloth.
- Pattern. The easiest way to make a pattern is to use thin paper. I recommend parchment paper.
- Craft Hammer. The smaller size comes in really handy for this project.
- Scissors. Smaller scissors are easier for getting in to the nailed areas to trim cord.
For this project, you will also need fabric scraps.
STEPS TO MAKE STRING ART
Start by creating a pattern. Trace your wood surface onto parchment paper to get an idea of exactly how much space you have to work with. If you are wanting to create a specific logo or design, print it first then cut it out. If you can trace it to the parchment paper, it will make it much easier to remove once all of your nails have been hammered into the wood because it tears so easily. Inside that space, draw a simple pattern and cut it out. Adhere it to the surface if desired. Washi tape works great for this step.
Next, nail the pattern to the wooden surface, spreading the nails apart between 1/2 inch to an inch.
The final designs will look very different depending on how far apart the nails are placed.
For this string art project, add a few rows of nails to the top of the carrot pattern for adding the green fabric later.

Remove the pattern.
Before you start stringing, Unwrap your string and find the end. Determine your starting point and tie a knot around that nail. If desired, dab a bit of clear-drying glue or clear nail polish on the knot and let it dry to create extra stability. This is a good step when working with kids.
Wrap the string around the nails, creating as you go. This can be done any way. It is sometimes good to go around the outside edge but not required. It is a totally different look depending on whether or not it is done.
Once you are complete, tie off the cord. Again you can seal with clear nail polish if desired.

Use pink twine to create rectangles around the nails at the top of the carrot.
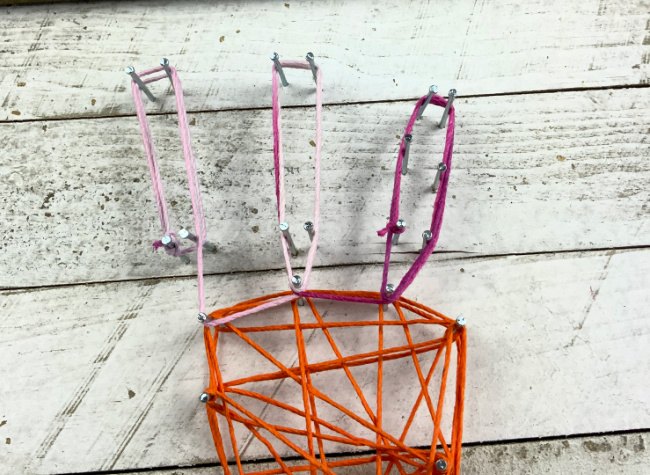
Tear strips of green ribbon and tie them in knots to the pink rectangles to create the pretty carrot tops.

Finish the project by looping pink hemp cord and tying a big bow on the carrot.
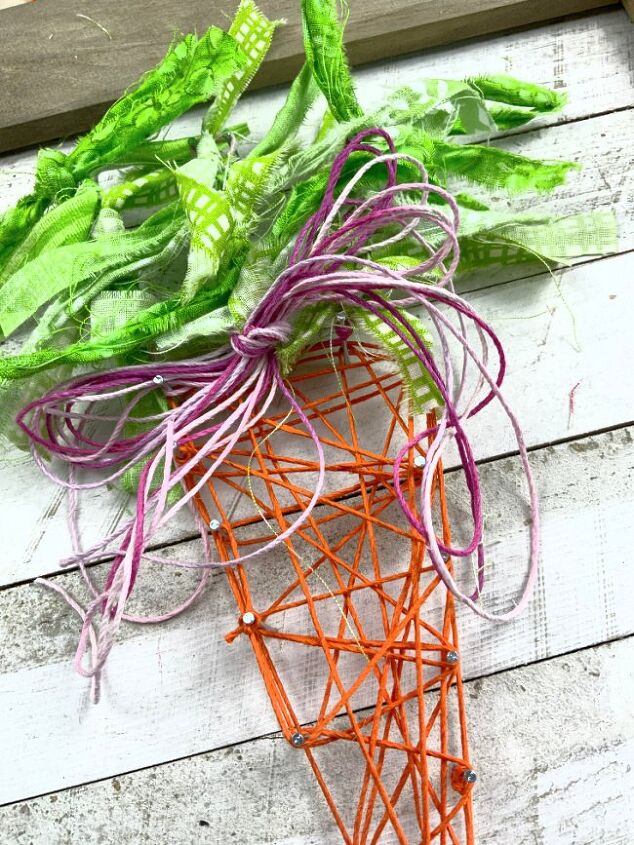
It makes an adorable carrot string art masterpiece that is perfect for decorating.


Comments
Join the conversation
-
Adorable! Would look great on the front door. Thanks for your share!


Frequently asked questions
Have a question about this project?