


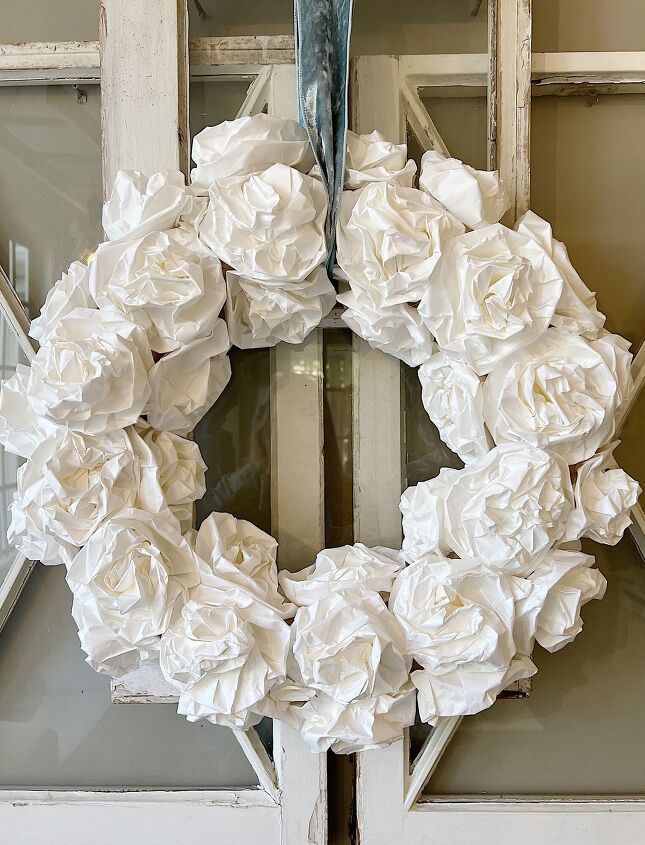
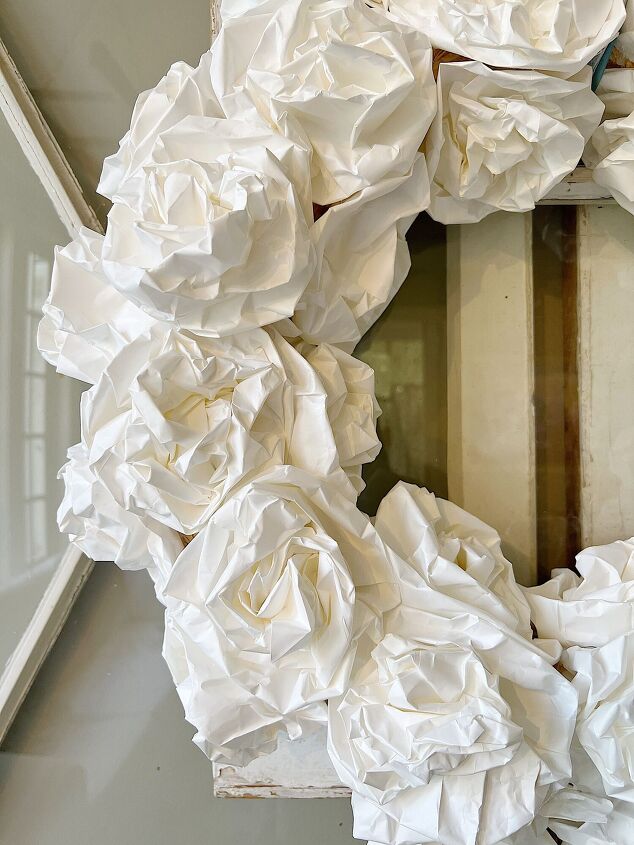
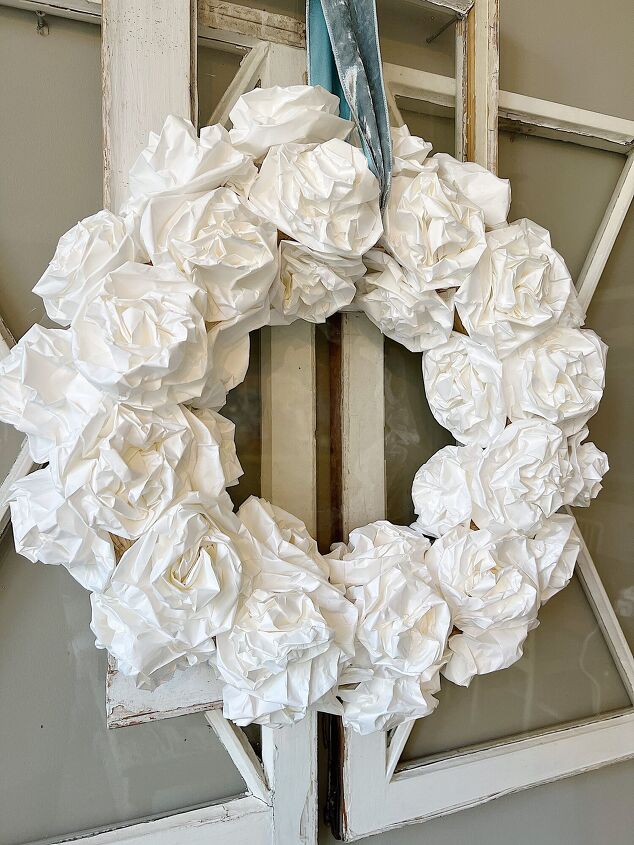
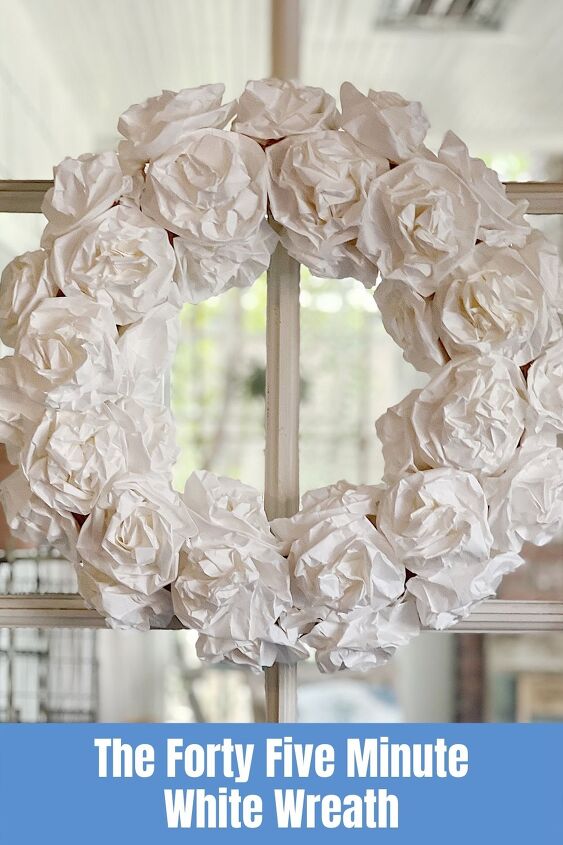
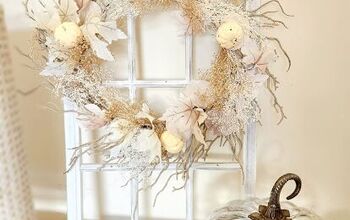
The Forty Five Minute White Wreath
You all loved the five-minute wreath I made last month so I decided to make another one. This time I am making a Forrty-Five Minute White Wreath with paper lunch bags!
Yep, you read that correctly, with paper lunch bags! If you have a little bit of time, no crafting ability whatsoever, and want to give crafting a try, this is the craft for you!

I have been crafting for my whole life. I literally cannot remember a time when I wasn’t attempting to make something. Sewing was my first love, but I quickly learned about macrame, crochet, jewelry making, and glue guns and I have never looked back.
While I am an experienced crafter, I always strive to make sure that what I have to share is meaningful and approachable to everyone who reads my blog and follows along. So I have started adding some really simple, no crafting knowledge, experience, or ability required!
I don’t know about you, but I learn from watching a video, so I made one for you. I think it’s easier than trying to follow a step by step. Watch and then do!
*I uploaded a new video that isn’t quite so fast. this should help!
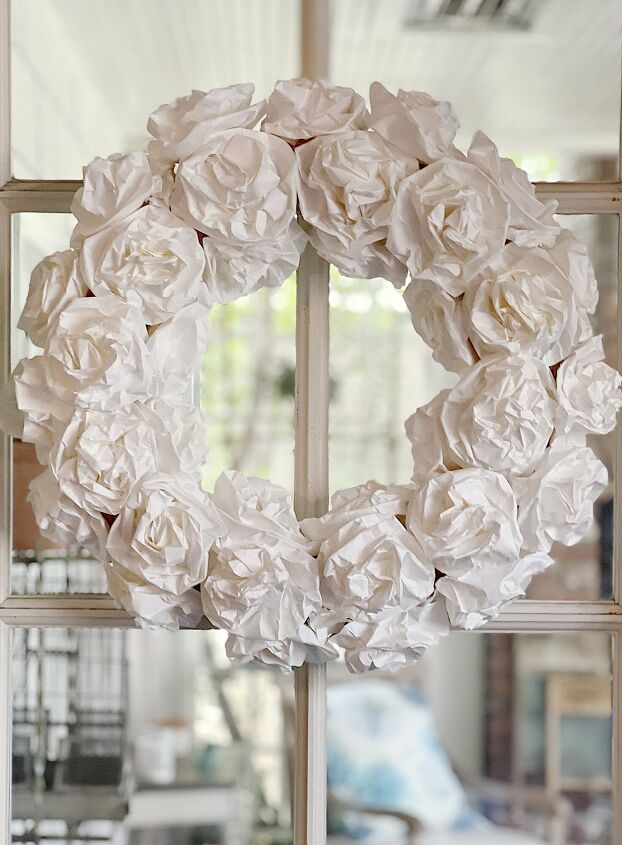
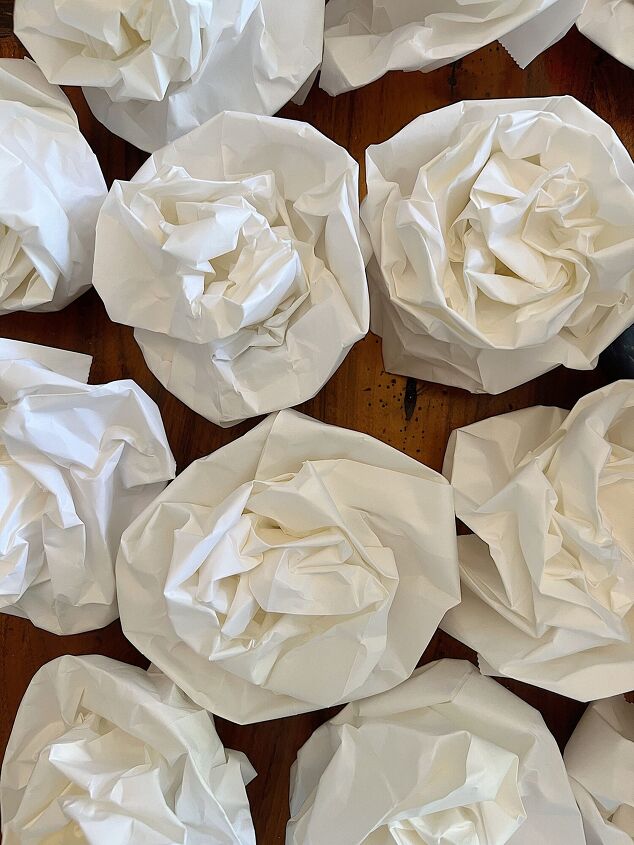
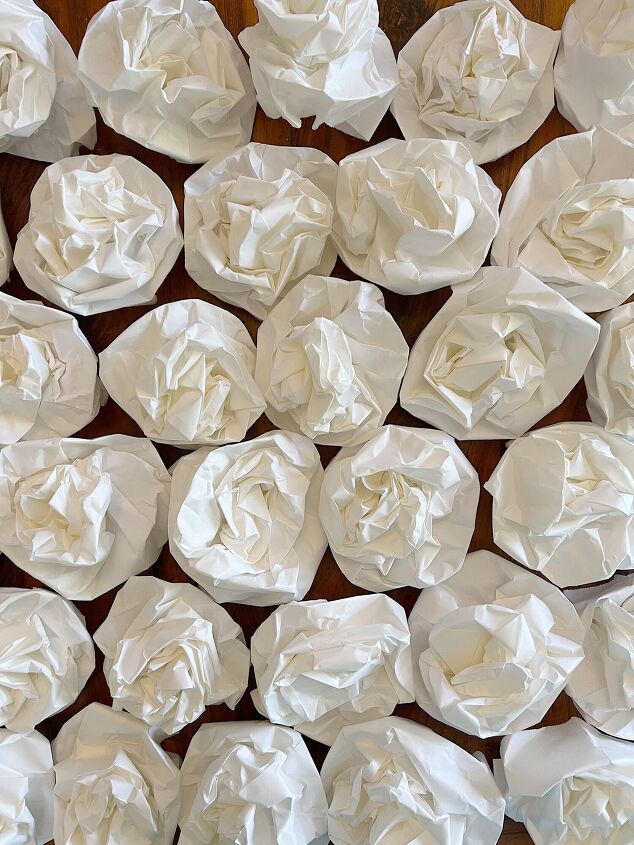
What do I love most about this wreath? I love that it does not look like it is made from paper lunch bags!
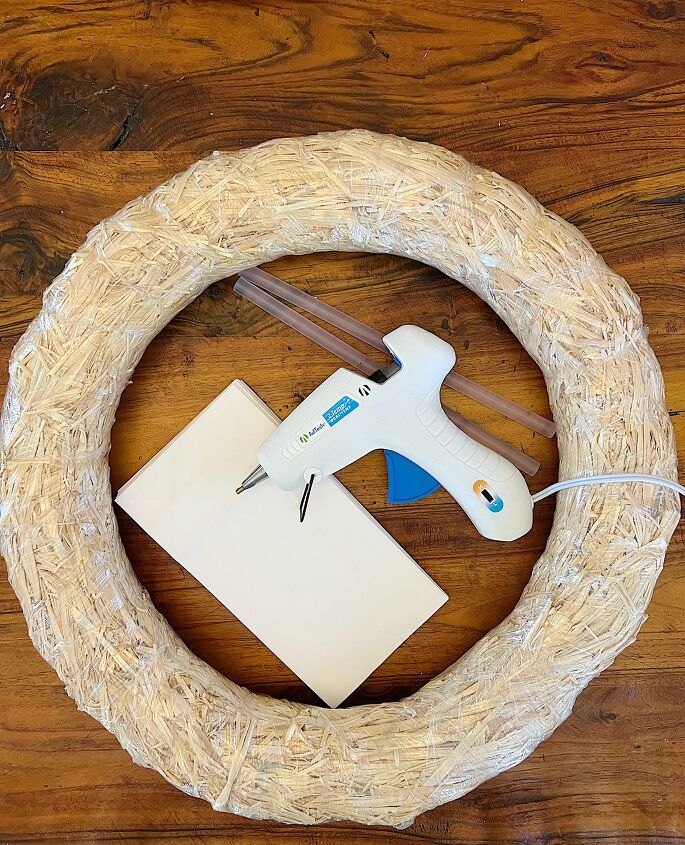
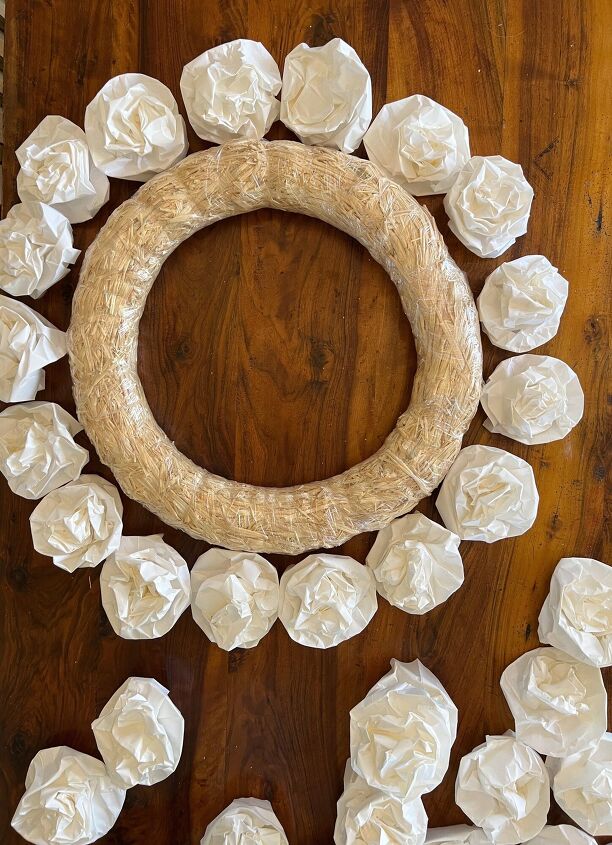
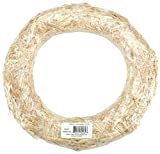
- 18″ (or smaller) straw wreath, leave the plastic on or the straw will disintegrate and shed everywhere
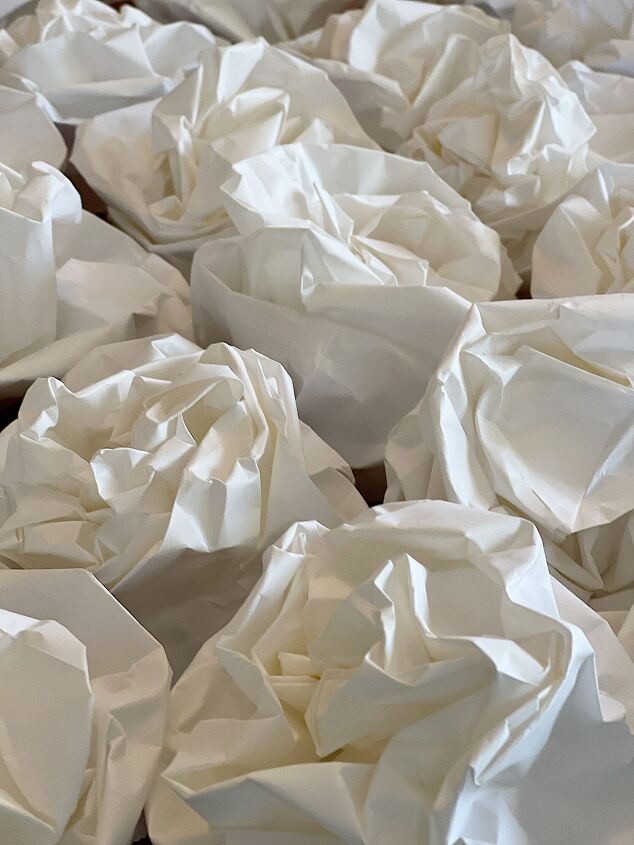
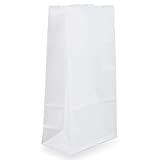
- 25-35 white paper bags
- Glue gun
- Glue sticks
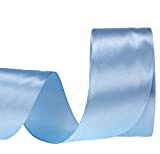
- Ribbon
For those of you who prefer a step by step, here you go!

- Watch the video for reference
- Open the bag
- Put your hand inside the bag and punch in the two outside edges of the bottom of the bag.
- Pinch the center of the bottom of the bag with your thumb and forefinger
- With your other hand, twist the bag while maintaining the pinch in the bottom of the bag
- Twist the bag 2 times
- Remove your hand from the bag
- Turn the edges of the top of the bag up towards the twisted area
- Ta-da, you have a paper rose
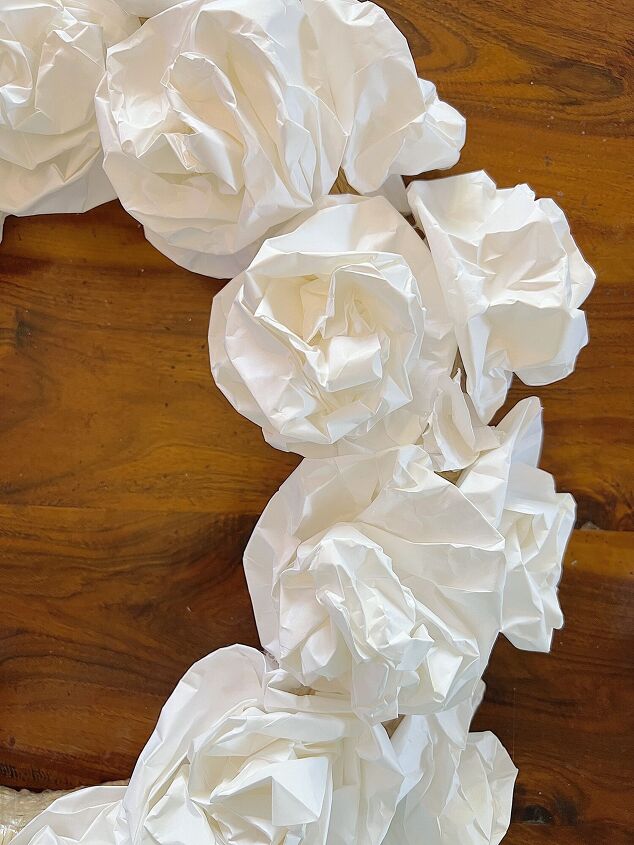
To assemble the wreath, I glued three rows of flowers onto the wreath. the first row was alongside the outside edge. The second row was on top of the wreath. And the third row was on the inside of the wreath.
- Plug in your glue gun to warm it up
- Begin by glueing the roses in a horizontal line, one on top of the wreath, one on the inside of the wreath and one towards the outside of the wreath so that the roses are all snuggly together not leaving any gaps
- Continue glueing the roses around the circumfrence of the wreath until the entire wreath is covered. The top, inside and outer edge
- Once the wreath is covered in paper roses, cut a length of stain ribbon and thread through the middle of the wreath around the top of the wreath to create a loop. You can tie a knot or glue gun the ribbon together
Have fun with this craft. I left the paper bags white, but you could paint them also. How much fun would that be to do with your little ones? Perfection is not required, only imagination!


If you are enjoying my blog, you can sign up to receive my blog updates here. .
I love having the chance to talk with all of you about all of the things that I love.
I am now sharing a few Amazon Live broadcasts every week and I hope you will tap on the links to see what’s new.

Here are some great tips for things to serve at a Big Game party! Click here.
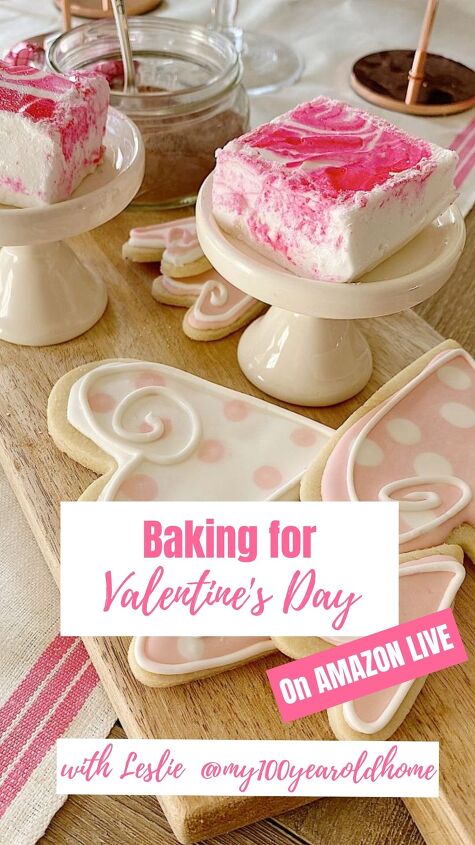
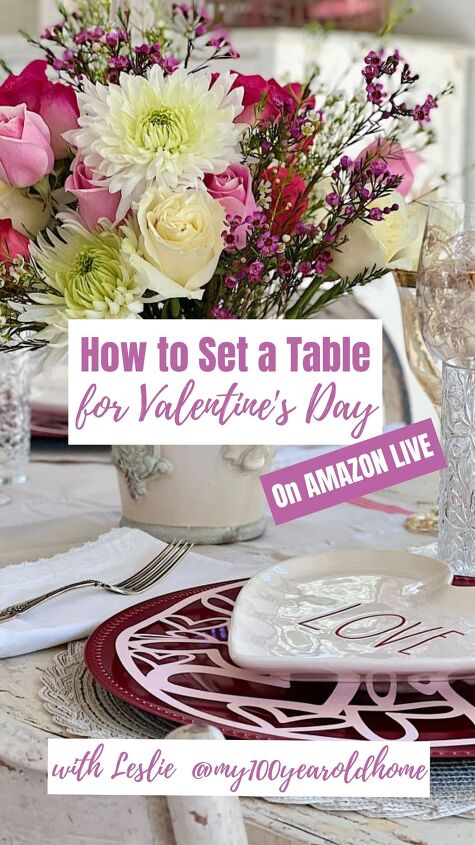
Looking for ways to set a fun and romantic table for Valentine’s Day? Click here.
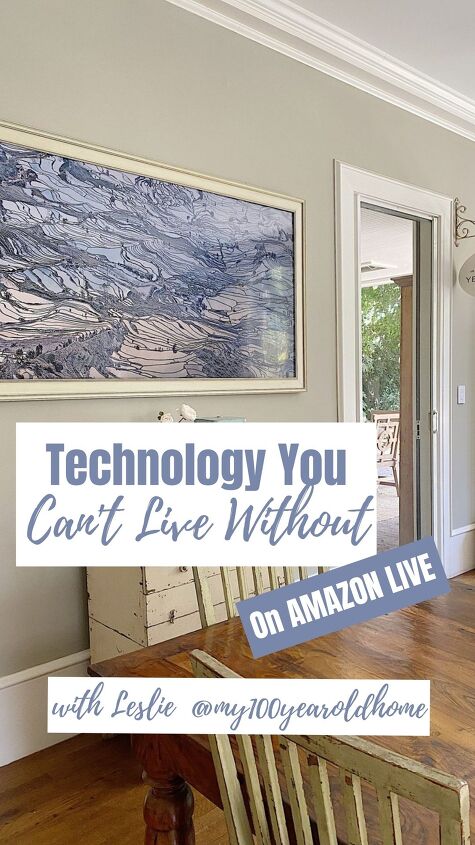
Are you curious about the latest tech items you need to know about? Click here.
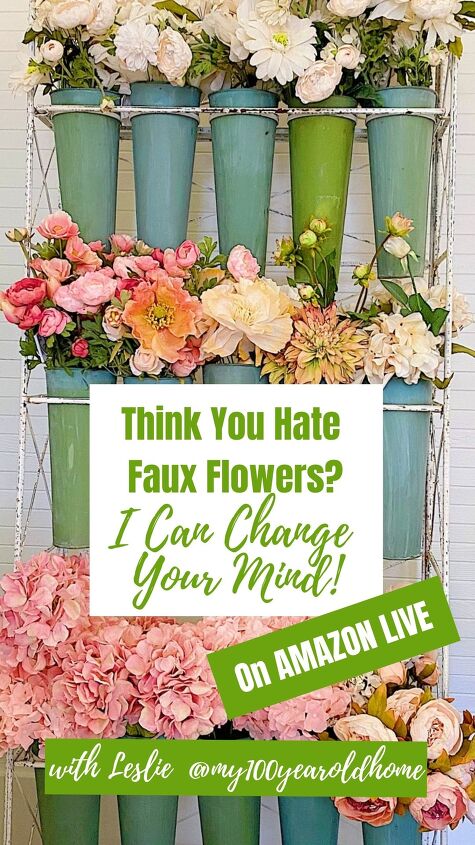
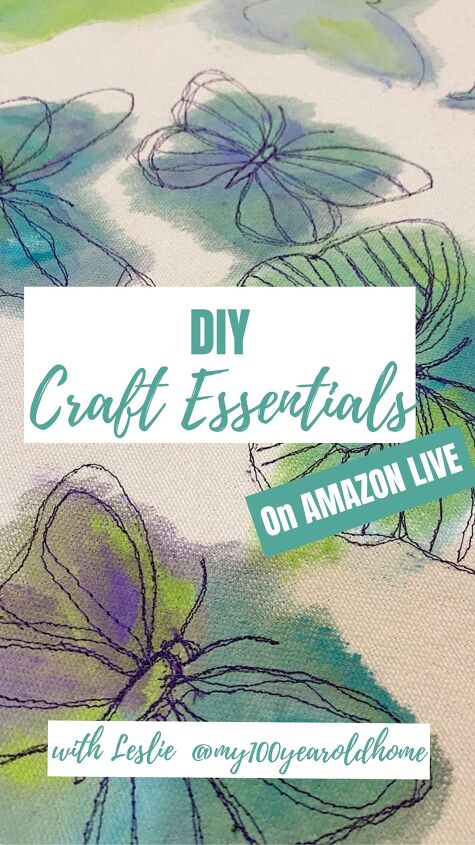
Want to see the items I use to make my crafts? You don’t need them all but some are essentials. Join me here.
Pin the image below to your boards on Pinterest (just click the Pin button in the top left corner). You can also follow along with me on Pinterest!
For more real-time updates, follow me on Instagram @My100YearOldHome

ABOUT LESLIE
Welcome to My 100 Year Old Home. I started my blog so I could share my passion for entertaining, décor, cooking, and crafts. You will find all this and more right here. Read more…

Comments
Join the conversation
-
When people do a lot of crafting & make a video, it's never as slow as they think it is. I'm new to crafting so I need it to be s-l-o-w, really s-l-o-w! It's beautiful! I wish I could make it. I'll enjoy it vicariously through you. 🙃
-
Your paper roses are awesome! Perfect decorations for any event. How about covering the homecoming float with them?! Easter bonnets! Paper roses prom dress! 😁 Thank you for sharing


Frequently asked questions
Have a question about this project?
Where is the video??
Video?
Where is the link to the video?