


A Unique Christmas Wreath Idea!
This project is all about creating a gorgeous front entry decoration - something that isn't a wreath but will hang on the front door and wow your guests!

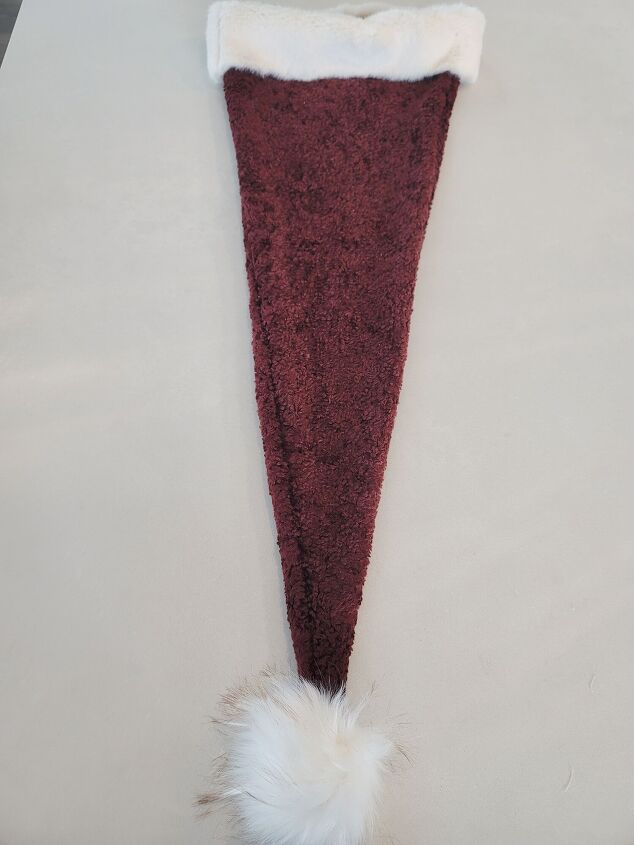
One night as sugar plums were dancing in my head, I dreamt of a beautiful old Father Christmas style hat. Rich cream colored fur on the trim, a deep burgundy material for the stocking cap, extra long in length and a creamy white fur pom pom on the end. It was so beautiful. I woke the next morning still remembering the beauty of the hat and wanted a reason to recreate it, but why? Was I just going to hang it somewhere in my house? Drape it over a chair? Then it occurred to me…it would make the perfect alternative to the traditional front door wreath!
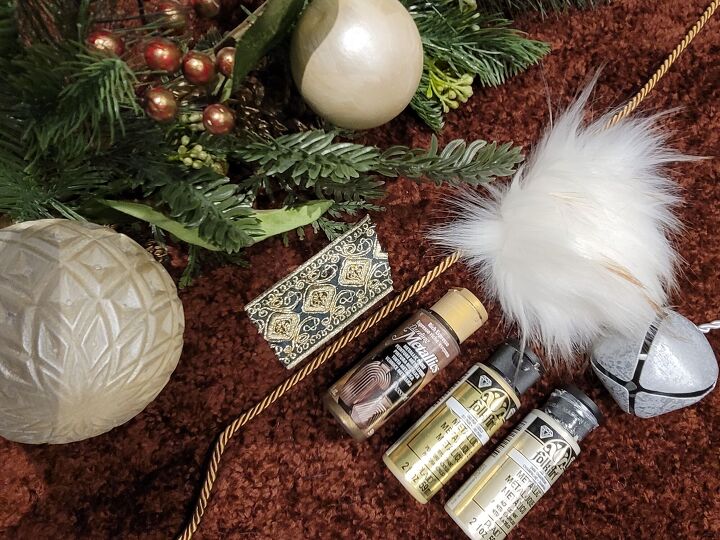
When choosing your materials go for an old world feel - stay away from bright reds or pure white. I found this knotty type of burgundy material that was so appropriate for a Father Christmas or Old Saint Nick look. Then I tied in bobbles in ivory and deeper berries on the picks. There is a story to that, though which you will hear about later. Also in terms of paint, choose aged golds, ivory and bronzes.
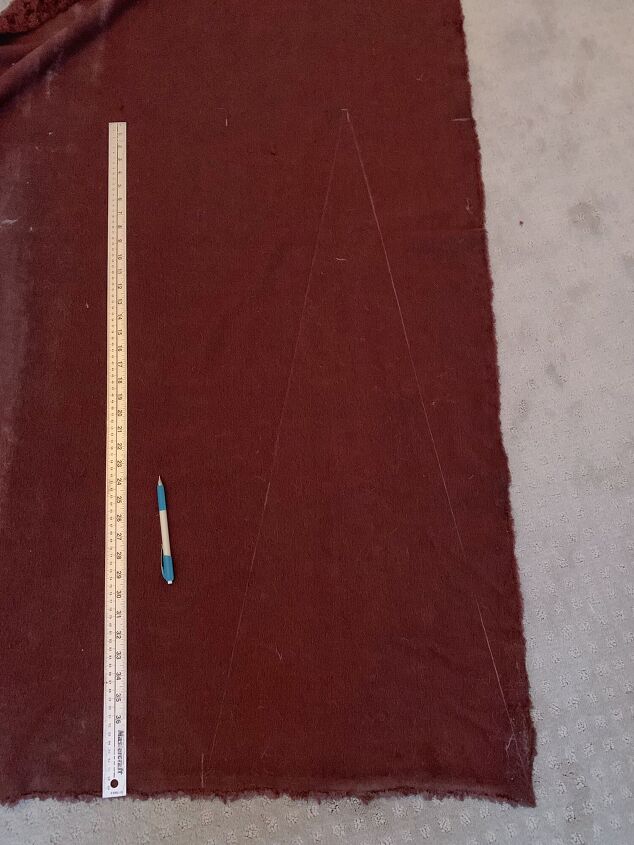
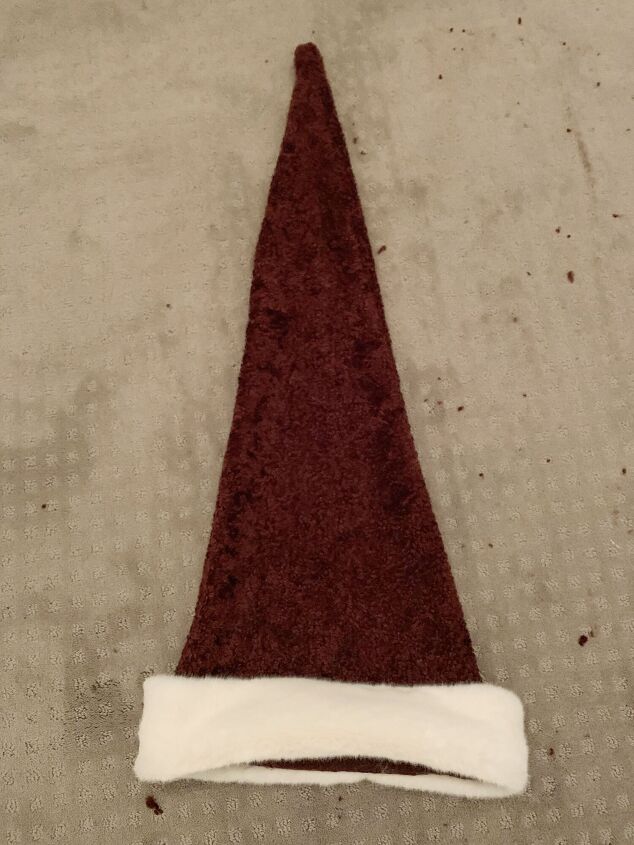
Lay out your fabric and use white chalk or a fabric pen to draw a triangle with a 17″ base and a height of 39″. Cut that triangle out.
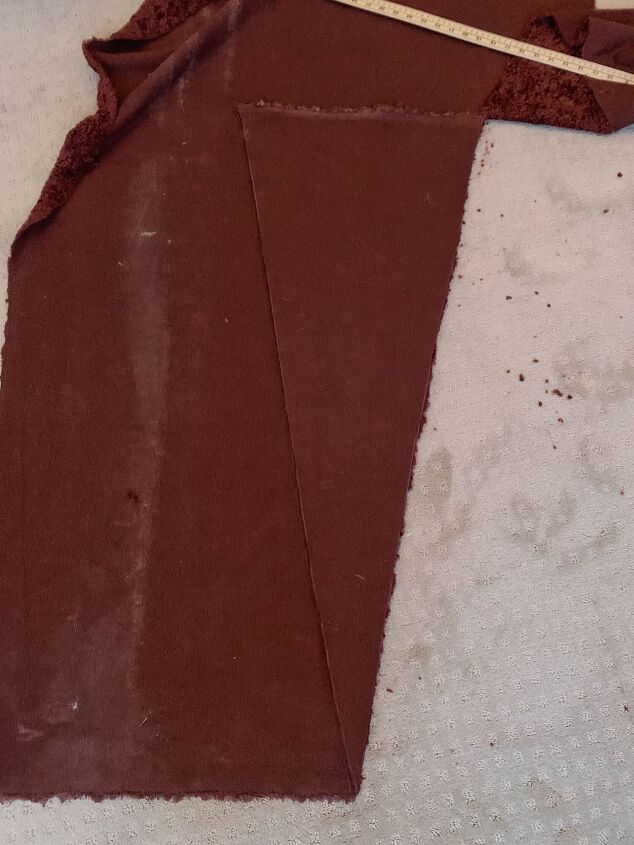
Lay the triangle on top of the fabric and trace a second triangle and cut the second triangle out. Lay the pieces on top of each other with the good sides on the inside. Pin and allow a 1/2″ seam on the two long sides of the fabric. Sew those pieces together.
Right side out the stocking cap (ie the good side of the fabric is on the outside). You may need a stick of some sort to poke out the end of the triangle as it is quite tight in that area.
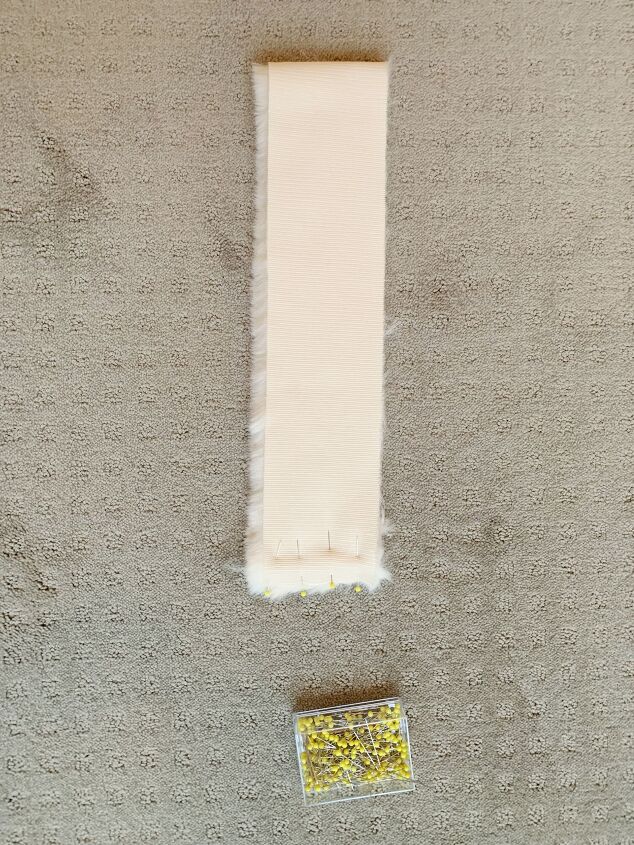
Fold the fur (33 inches) in half, pin at the ends and sew a 1/2″ seam.
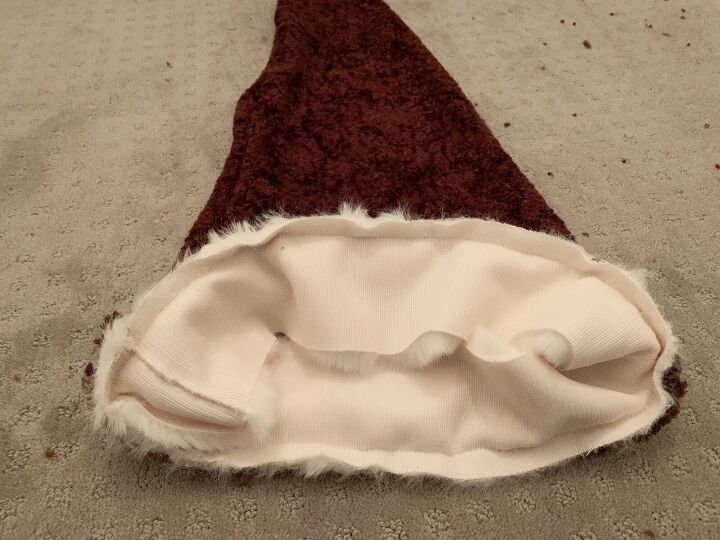
To attach the fur trim to the stocking cap, the good side of the fur should be facing the bad side of the stocking cap, pin and sew together allowing 1/2″ for the seam. This picture above will help.
Flip the fur over now so that the right side of the fur is showing.
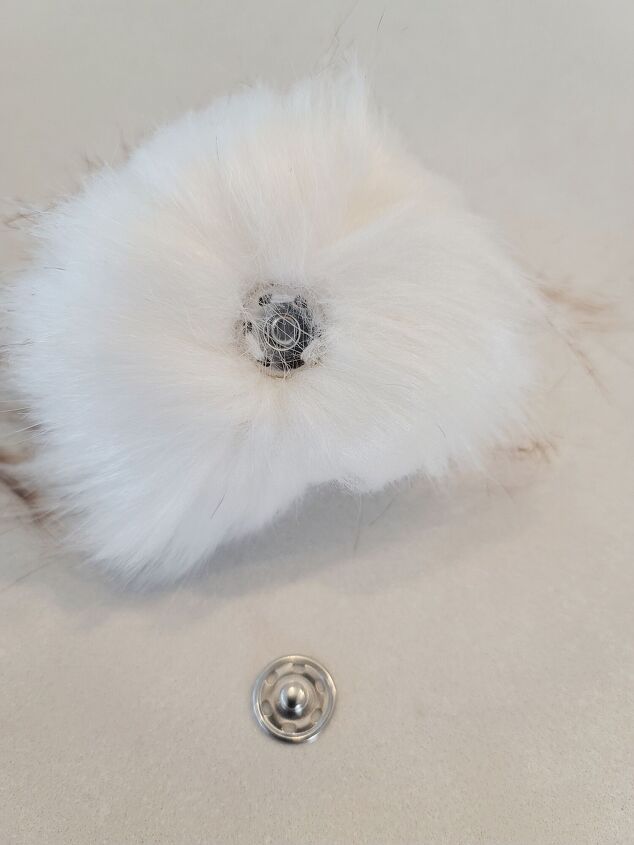
The pom pom came with a snap fastener attached so all I had to do was attach the other fastener to the end of the stocking cap.
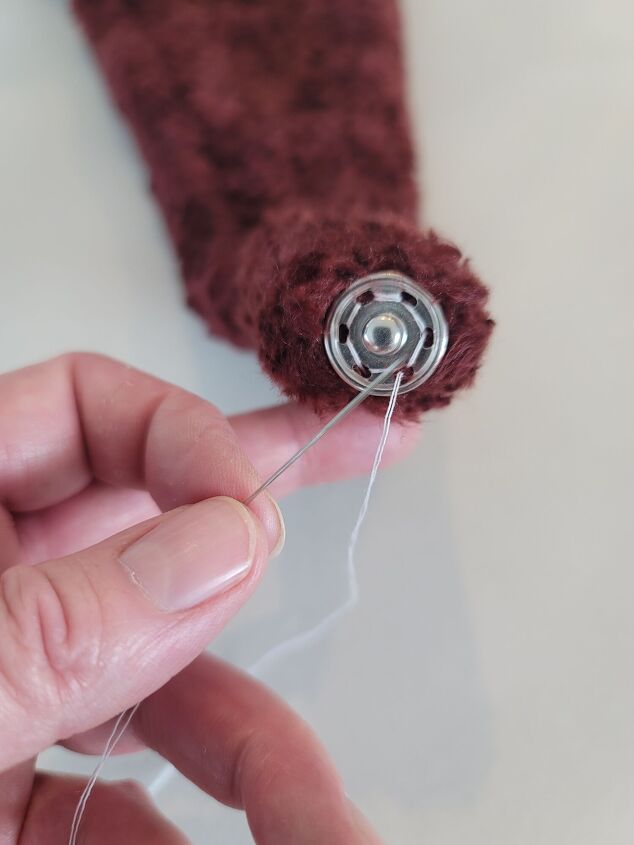
I hand stitched it on as seen above.
Then I snapped the pom pom on. The wispiness of the fur pom pom really added to the old world look.
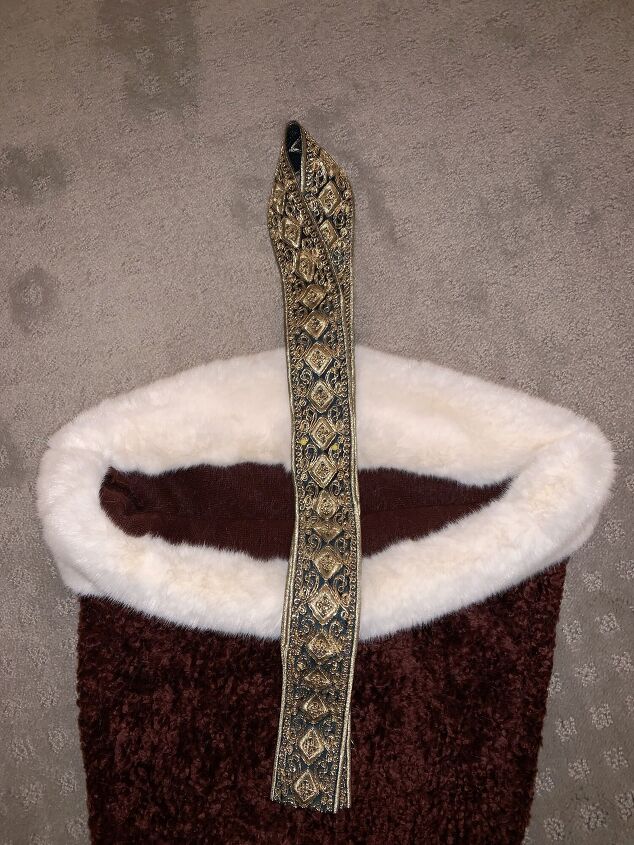
Embroidered hanging loop -
Fold the embroidered trim in half in a U shape. Make sure the good side of the trim is showing at all times. Attach this ends of the loop to the middle of the back of the hat. I made the loop 12″ in height (ie half of 24″) as I wanted to see some of the trim above the greenery. You could also make it even longer and attach it tot the top of a door.
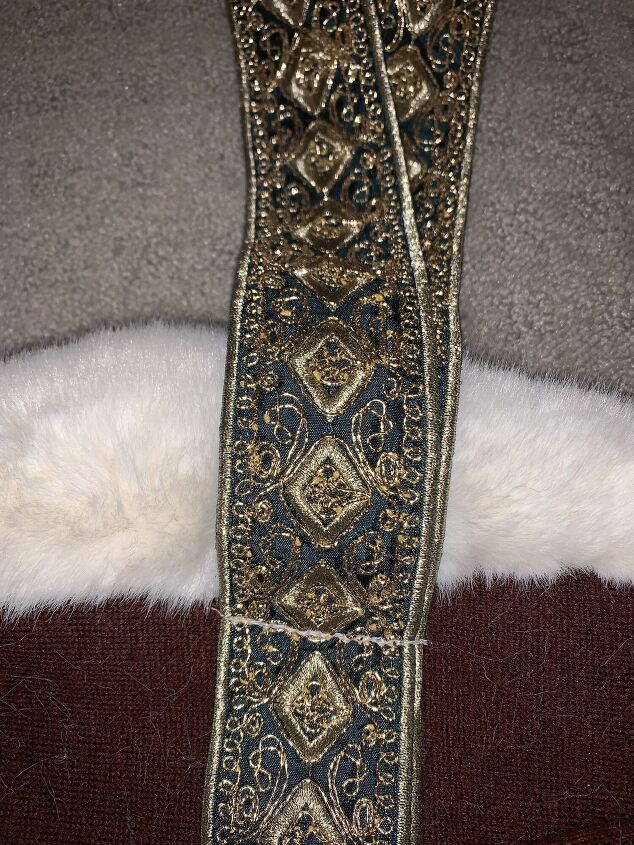
To attach the loop I used a sewing machine as it had to be secured strongly to be able to handle the weight of materials and the evergreens. Go back and forth several times to ensure it is attached securely.
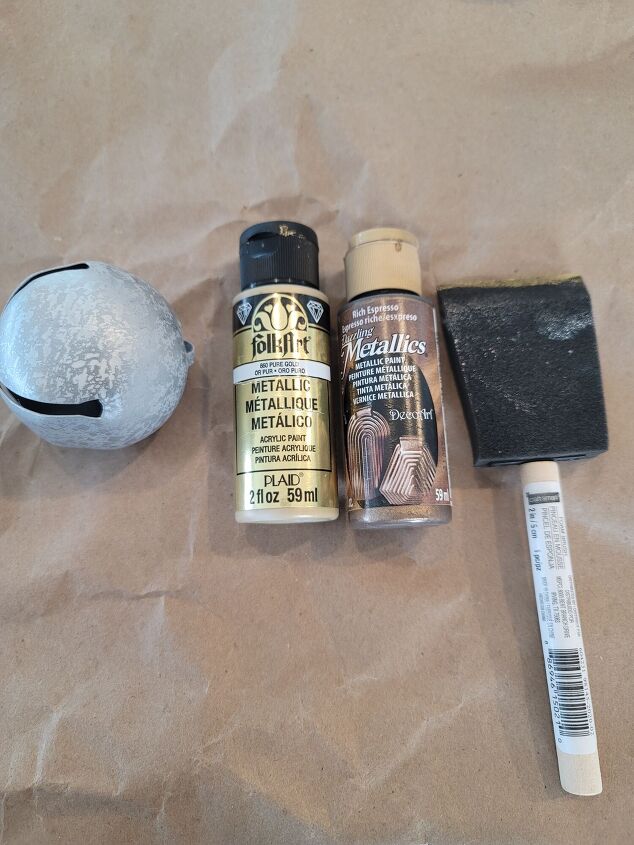
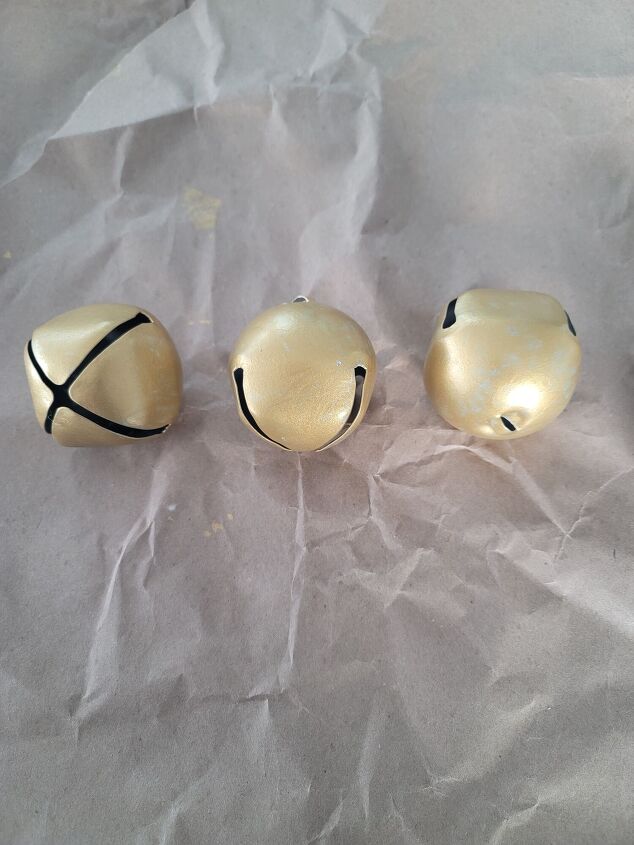
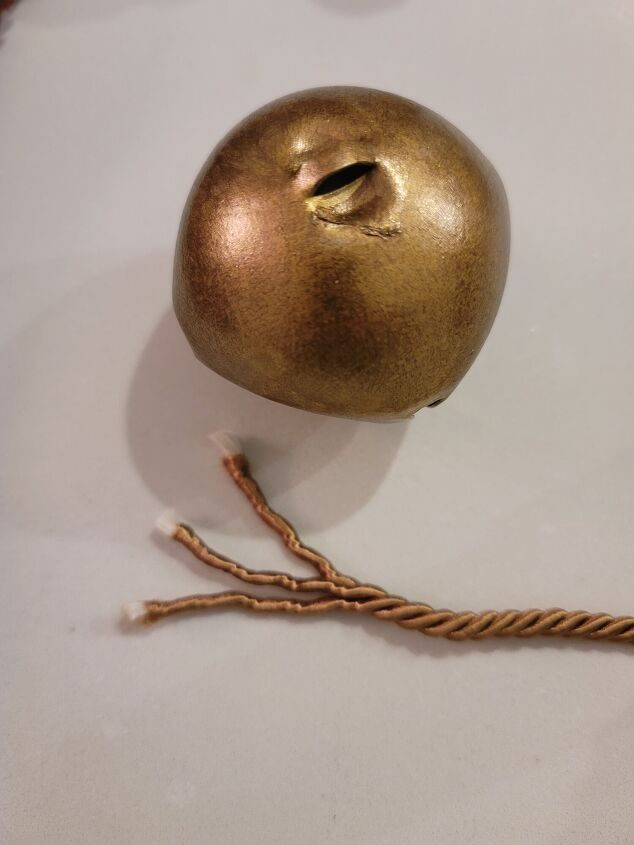
Antiquing jingle bells
I had three very silver large jingle bells on white cords. I tried to order some old antique bells, but they would not arrive on time. I would suggest using them, but if you can’t find any like this, then antique newer looking ones like I did. If you have antiqued bells with gold cords, you can skip to the step "Stuffing hat with evergreen boughs"
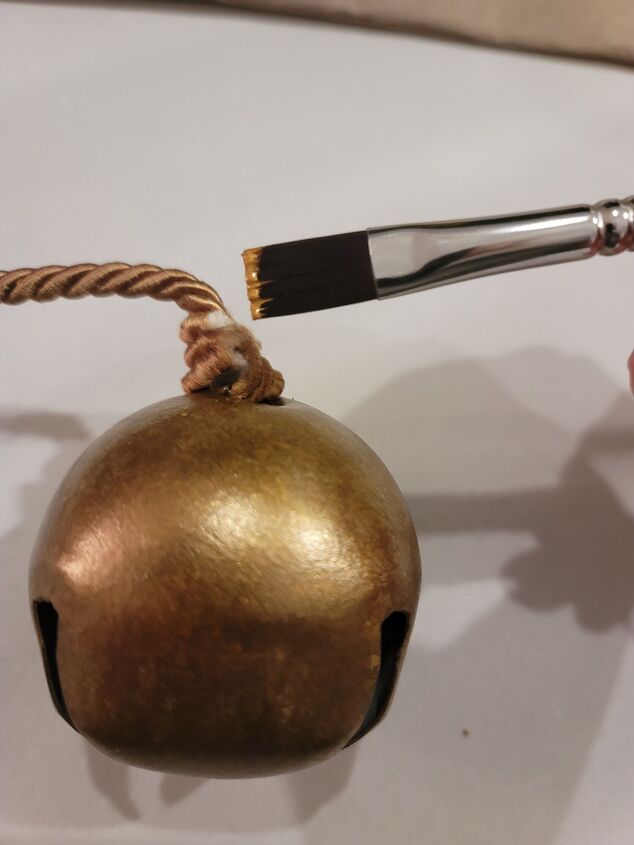
First I gave the bells a light sanding. Then I painted them solidly in gold acrylic paint with a sponge brush and allowed them to dry for 30 minutes.
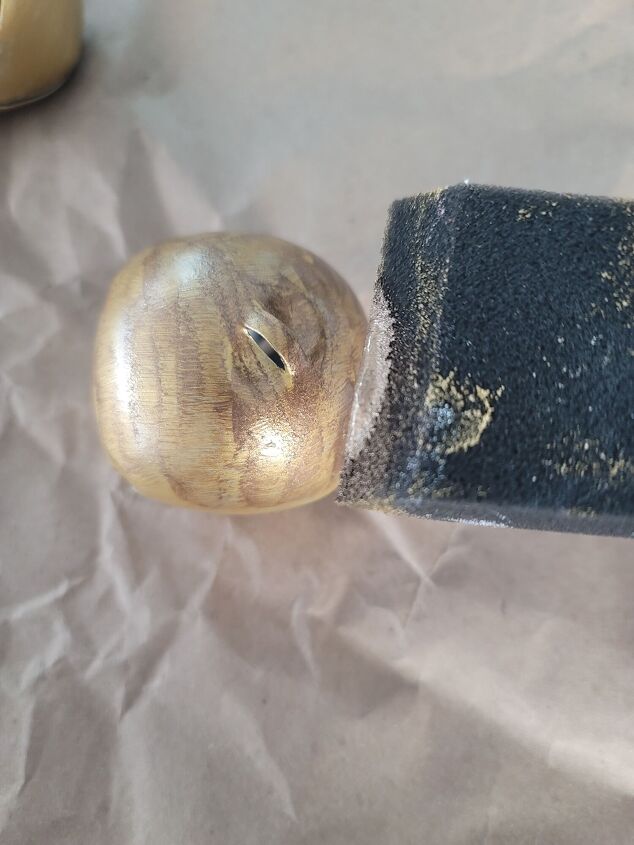
Then I lightly dabbed on Rich Espresso acrylic paint and rubbed it in with a slightly dampened paper towel to achieve a mottled, aged look.
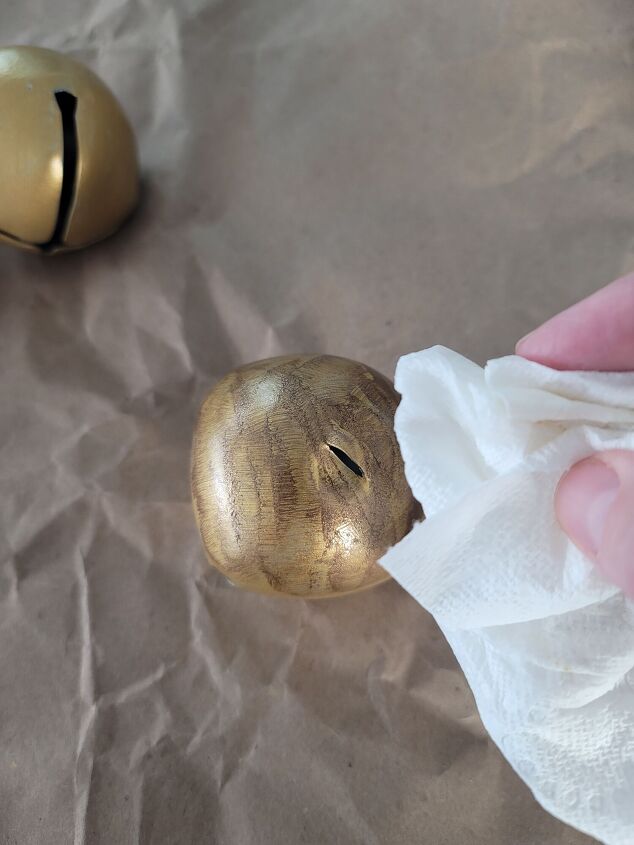
Using a slightly dampened paper towel allows the Rich Espresso to blend but still achieve an aged look.
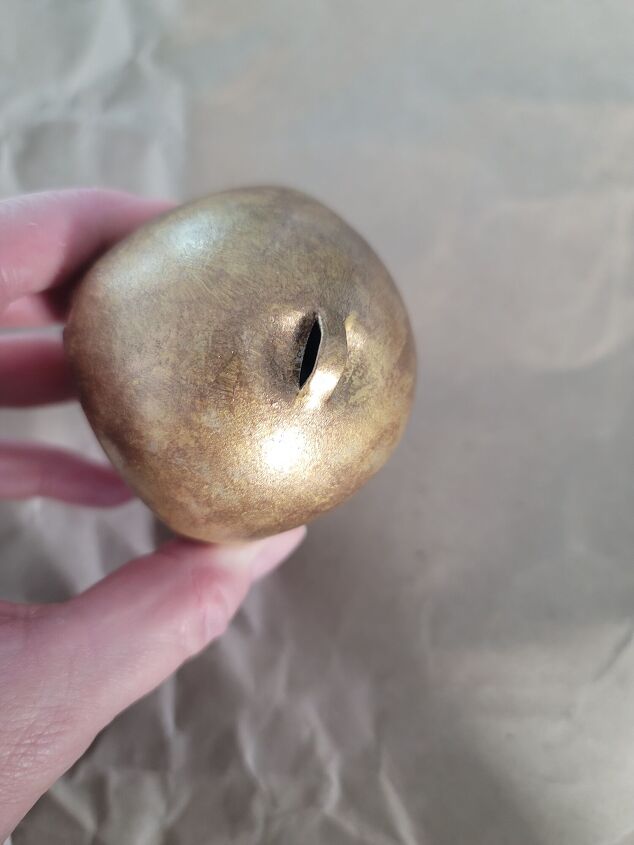
They turned out so pretty.
Attaching cords to jingle bells
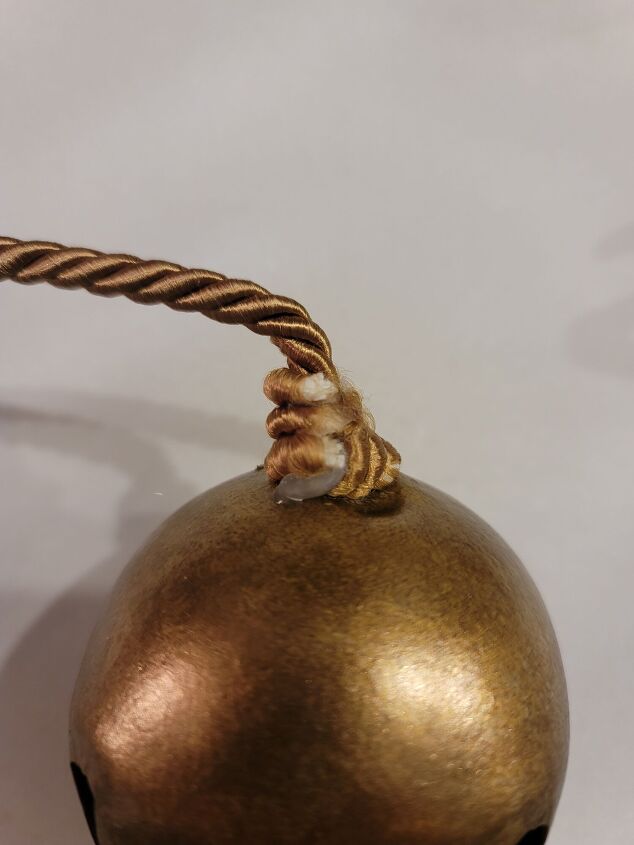
Cut the cord in lengths of 11″, 17″ and 24″. Unwind approximately 1 1/2 inches of the cord so that it will side through the hook on the top of the bell.
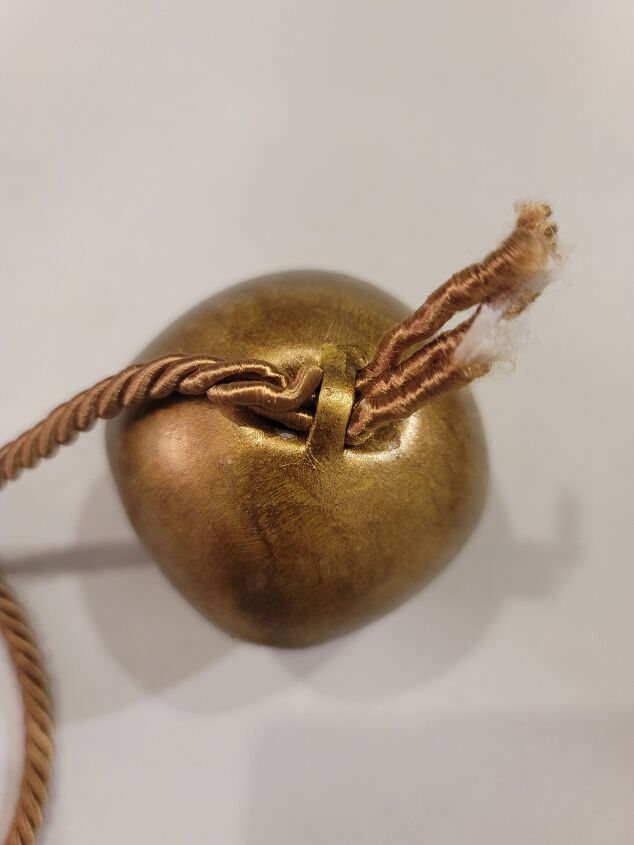
Push the cord through the hook. Make sure the cord is fully wound on the long side of the cord.
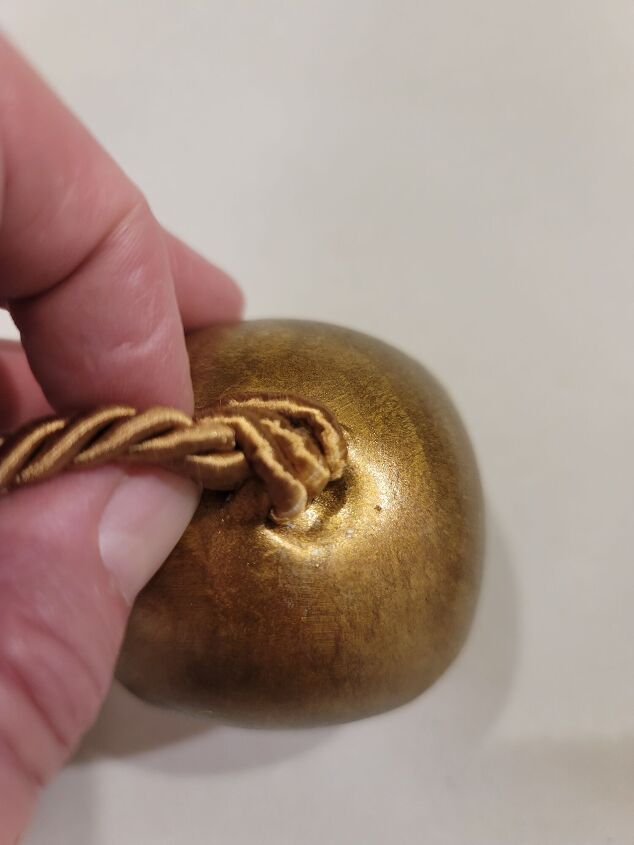
Where the three individual pieces of the cord come out of the hook, twist the cords around the upright piece of the cord and hot glue in place.
When my cord was cut it revealed a white interior which did not look good.
So I simply dabbed on gold paint to cover the white interior.
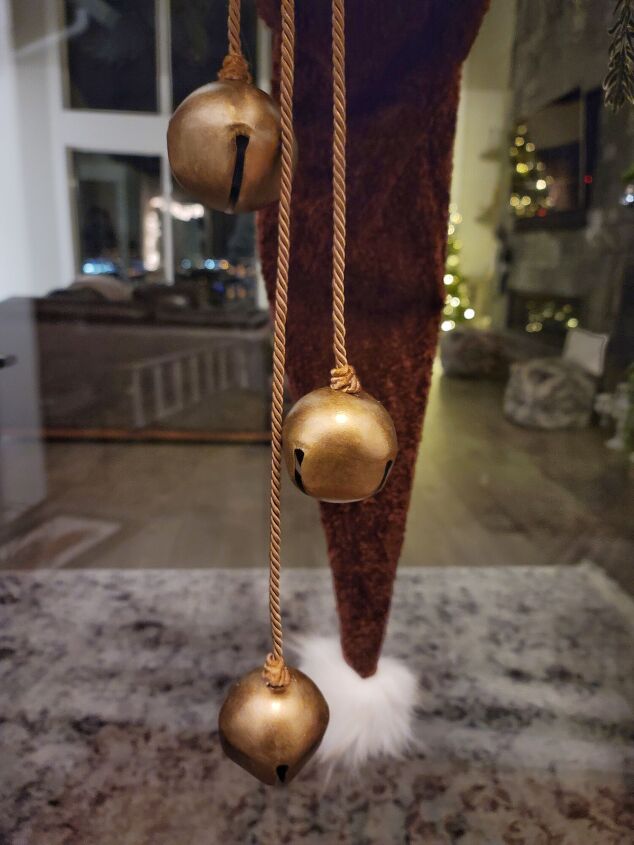
Hot glue the ends of the three cords under the fur trim. My bells were evenly spaced 3 1/2″ apart from the bottom of the top jingle bell to top of the bottom jingle bell. I chose to glue them as it was faster. You could sew the ends of the cords under the fur trim as an alternative.
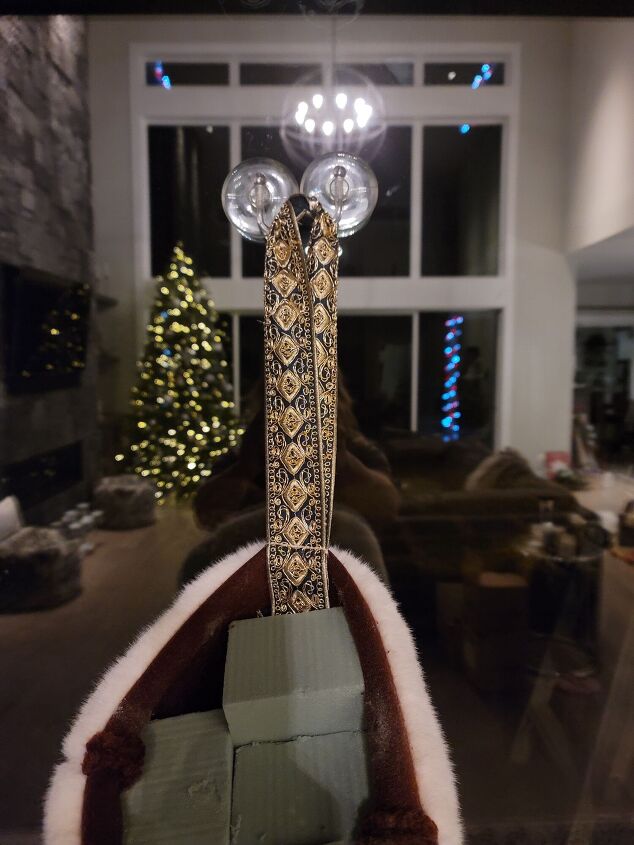
Stuffing the hat with evergreen boughs and picks
Hang the hat on the door with a wreath hook or clear suction cup hooks. It is important to do this part of the project in place as you want to ensure that you get the boughs properly placed. If you are able to get picks that have the colored ornaments that you like, then great. I was not so fortunate and mine had very bright red bobbles and berries in them. I painted the bobbles and aged the berries and it turned out lovely. I have left out this step because I think most people will be able to get picks they like. If, however, you are like me click on this link and it will take you to my blog where I show you how to transform the picks.
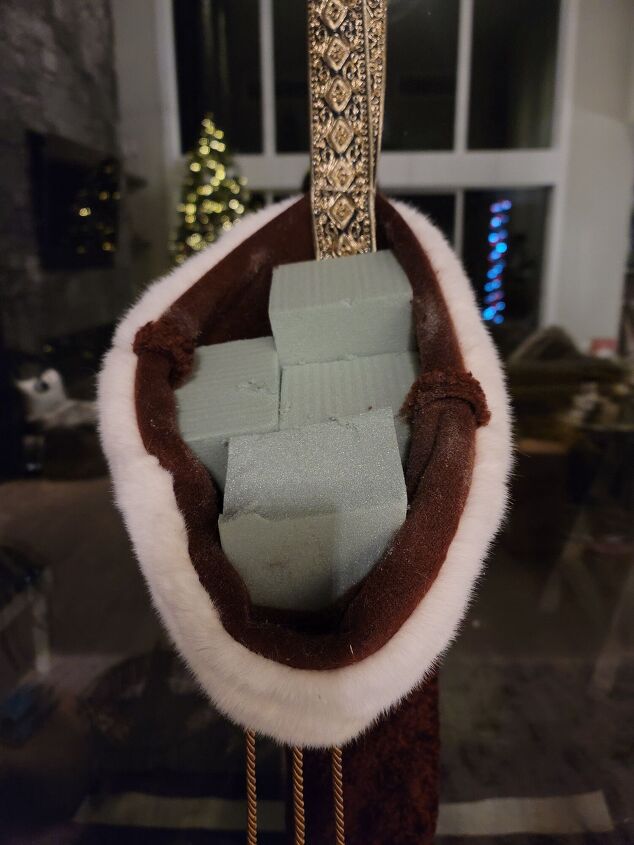
First I stuff the widest part of the hat with oasis foam. I then added the two prepared evergreen picks. I tried having them stand up to give height but it just looked awkward. I bent the two large picks so that they hung over the edges of the hat and then stuffed the hat with pine and cedar. This part truly is a matter of personal preference, some will like it full, some will like it wispy, go with what makes you happy.
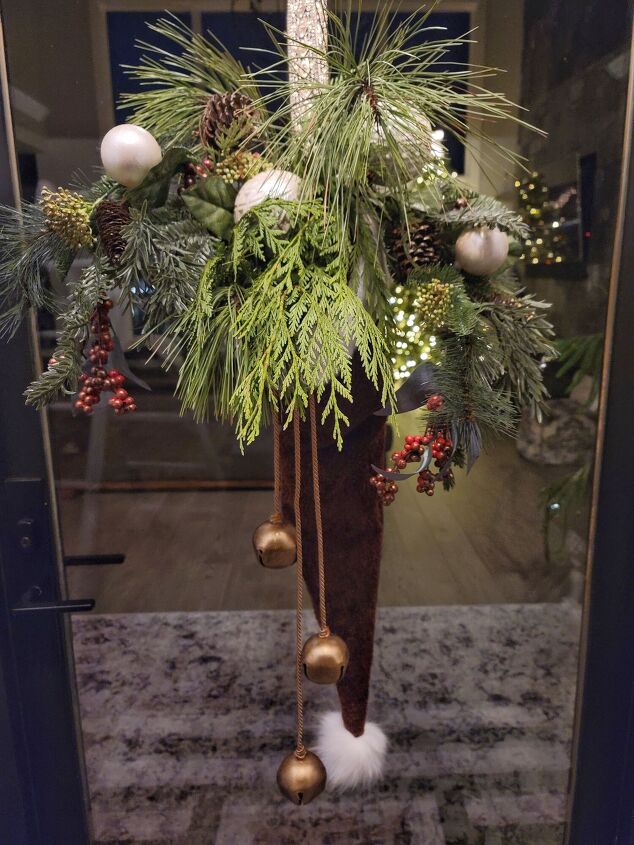
I am going to be very honest with you. The hardest part of this project was stuffing the hat with the boughs. It is a bit tricky because it can become very wild looking very easily. It can become top heavy and you lose all sight of the hat. So be careful. Enlist help. I asked my daughter to help me and one of us would steady the hat while the other stuffed.
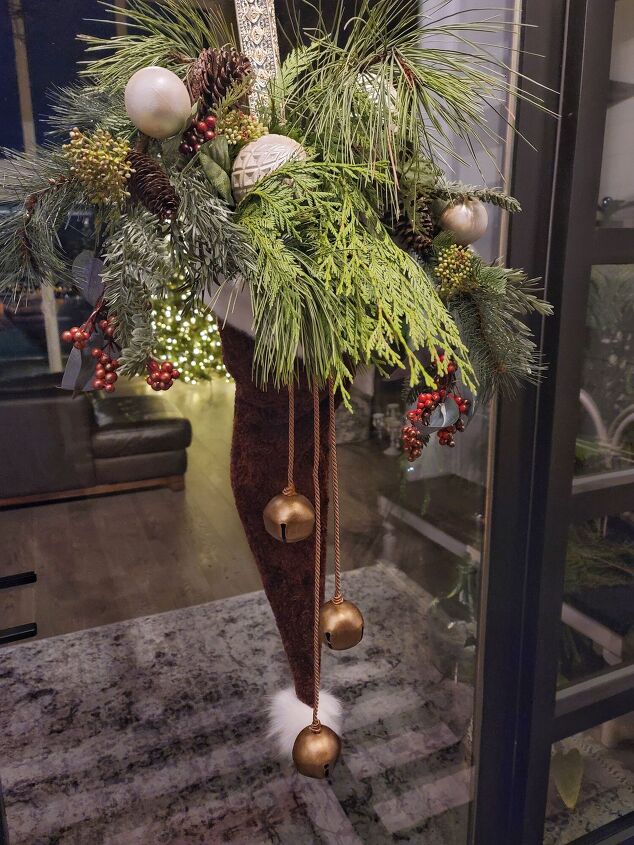
Part way through this project, I wondered if I really had missed the mark, but now that it is up I am absolutely in love with it. It even won the praise of my kids!!! Woweee!!! Let me tell you that is not an easy thing to do. It is richly elegant looking and so unique! I hope you enjoyed the project! Please head over to my website to check out all the goings on at Sweet Valley Acres!
Resources for this project:
See all materials


Comments
Join the conversation
-
So clever 👏 Hubby and I love this DIY... turned out real nice!
-
I like you recycled. If hat doesn’t seem your style why not a Christmas stocking? This is pretty and open to your tastes. Thanks for sharing inspiration


Frequently asked questions
Have a question about this project?
Very pretty and unique idea . I like the bells but don't they hit the door glass when opening and closing ? I wouldn't want to scratch the glass so perhaps I'd makes the cording shorter .
What is babble?
Oasis is not available this year. Does anyone have suggestions on what would hold the boughs and piks instead?