


Buddy the Elf Christmas Wreath DIY

Why not make your Christmas décor more fun and whimsical this year? We could all use it in 2020! This easy Elf Christmas Wreath tutorial can be made for under $15 and adds a whole new dimension of joy to your Christmas door.
If you enjoy themed wreaths and would like other ideas for the upcoming season, you may want to also check out this Football Themed Super Bowl Wreath perfect for January and the Feb 7th Big Game.
For a February 14th themed wreath, check out this Valentine's Day Wreath I made for my kids' doors. They loved it and felt very special and didn't want to take them down.
If you prefer, view this short (under 4 minute) video tutorial. It was created without sound so you can watch it anywhere.
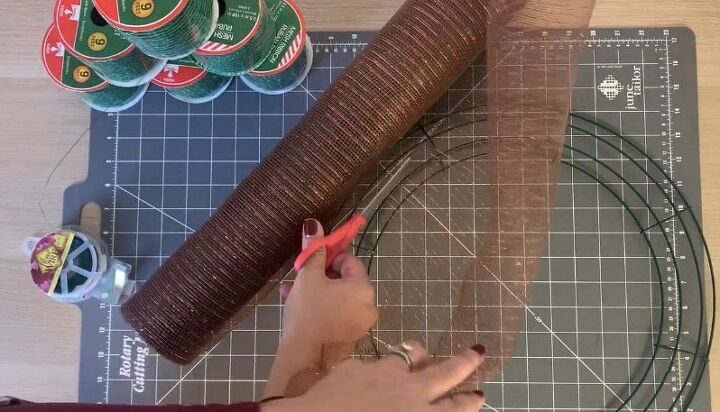
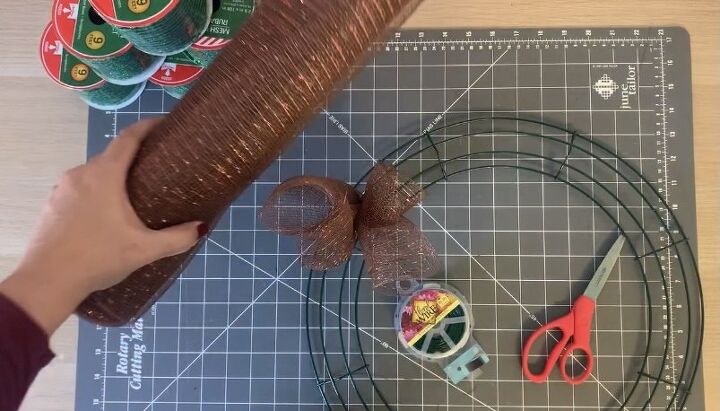
You'll take about 8-12 inches of mesh ribbon. It's just enough to curl over on itself twice. Cut and hold the curled mesh piece you just created.
You'll fold the mesh piece in half and cut the folded end, this way you'll start seeing the "curls" of Buddy's hair.
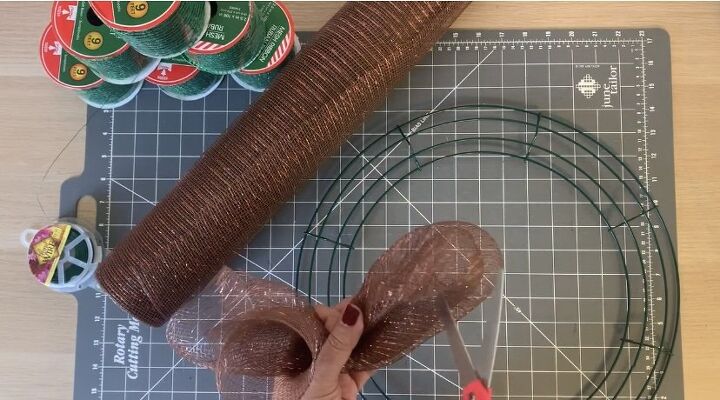
Wrap the mesh curls in the center. I used planters wire. It's thin and easy to use, and I had some laying around the craft room. Twist ties may work as well, if you have those laying around instead.
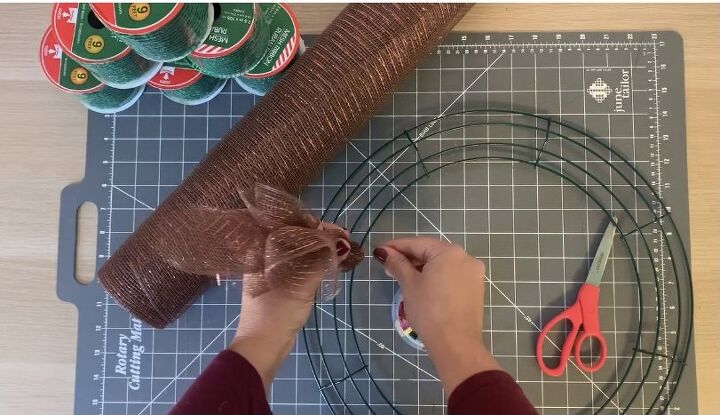
Secure your newly made curl (really it looks like 4 curls) onto the wire form.
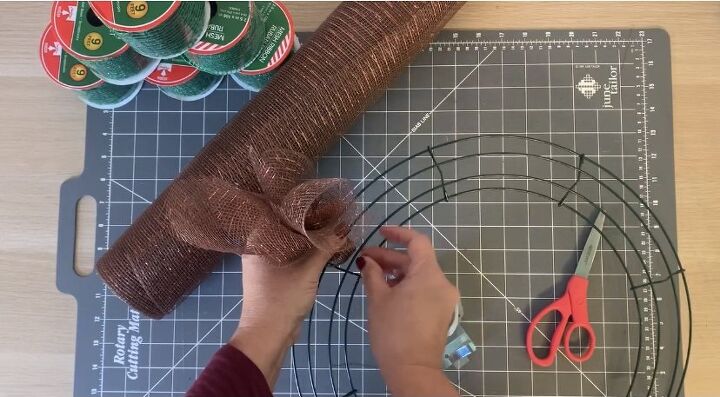
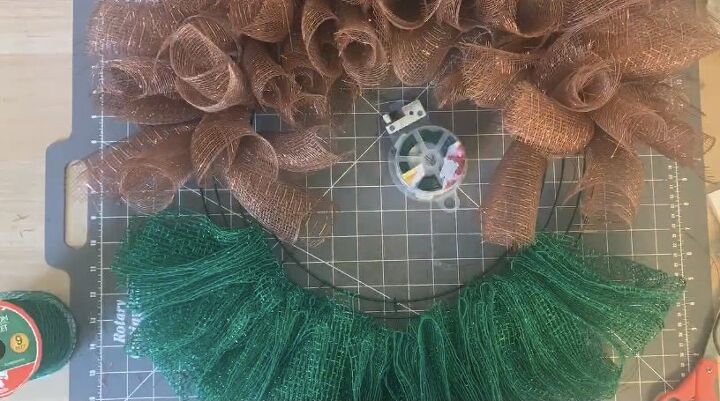
Here you can see how the first set of curls look secured to the wire form. You'll repeat the above steps until you've gone approximately half way around the wire wreath form.
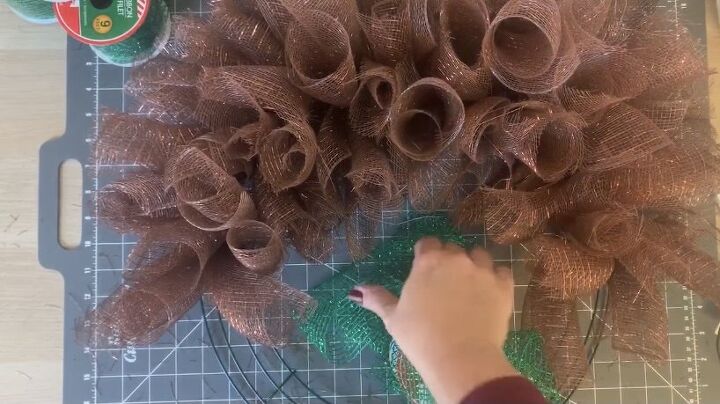
Here's a photo showing the completed Buddy the Elf hair. You'll notice that the hair goes around the form approximately half way.
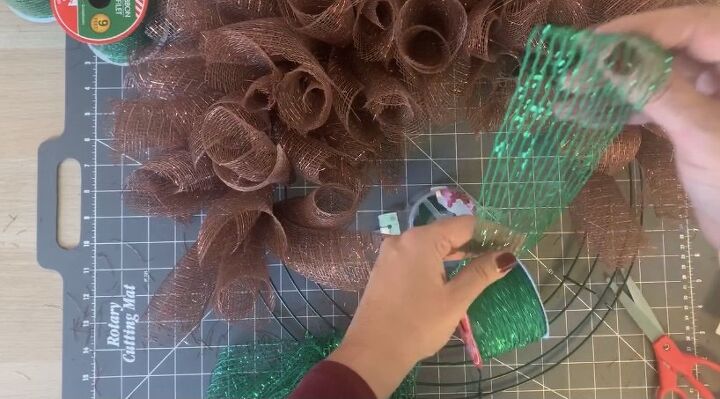
Buddy the Elf wears a green Christmas outfit and so I used this green ribbon from the dollar store. The ribbon I used didn't have much form to it.
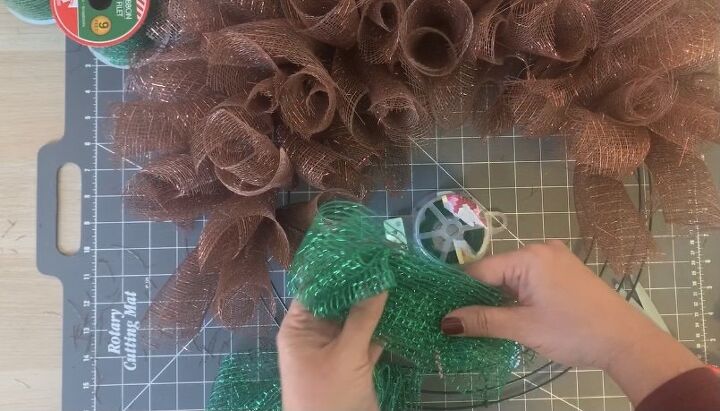
Since the ribbon I was using didn't have any form to it, I found that the best way to incorporate it into the wreath was to fold several pieces accordion style.

You can run your wire through the top of the folded green ribbon and secure this to the wreath form.
This image shows you how it looks when the green ribbon is secured. You'll keep going until you fill the bottom half of the wreath.
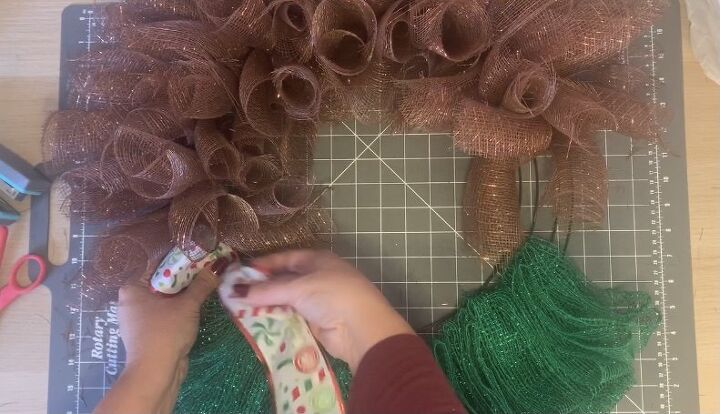
You can get creative here, depending on what ribbon you have handy. If you're going to stay true to form, the elf character has a white collar. But this was a bit boring to me, and I had this cute decorative Christmas wired ribbon, so I decided to use it as the collar.
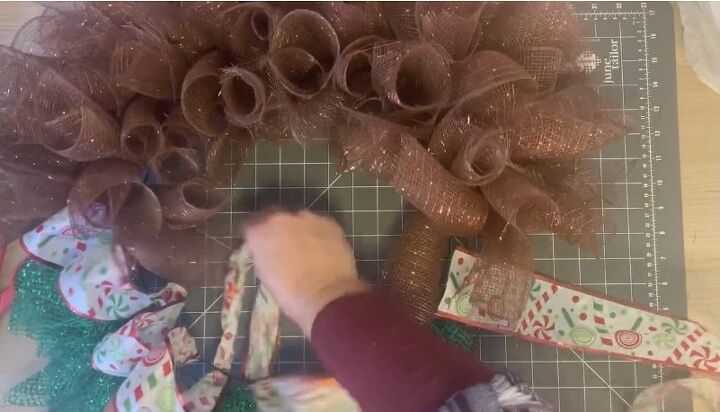
Take your collar ribbon and weave it through the form. Using wired ribbon makes this very easy and then you can fluff up the ribbon at the end to make it look nice and full.
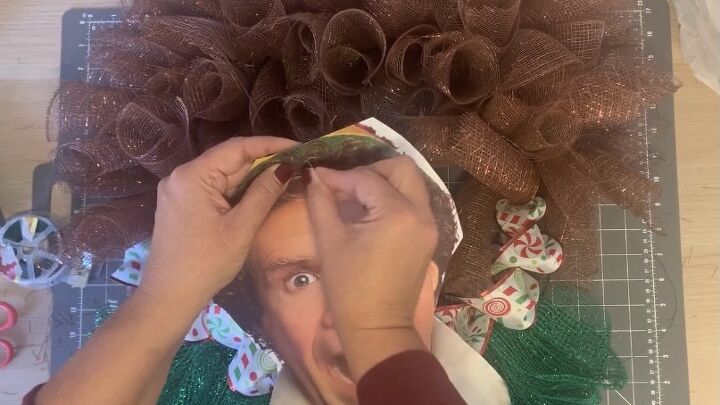
This Christmas wreath really comes alive once you add the face to it. Here's how I did it. I downloaded a picture of Will Farrell as Buddy the Elf from the internet. I printed it out and glued it to a piece of cardboard. The I cut it out, removing all of the white space around the image. I placed pin holes (using a straight pin) at the top and on the two sides. Run your wire through these holes. You'll use this to secure the face to the wreath form.

Secure Buddy's face to the back of the wreath, again using your wire. I secured it at the top, and on the two sides.
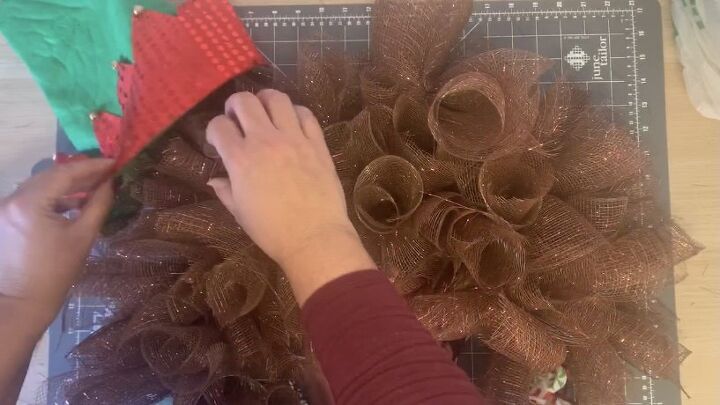
Adding a Christmas hat gives this wreath the final touch it needs.

Don't be afraid to trim up your elf's mesh hair. This way the face will be nice and visible.
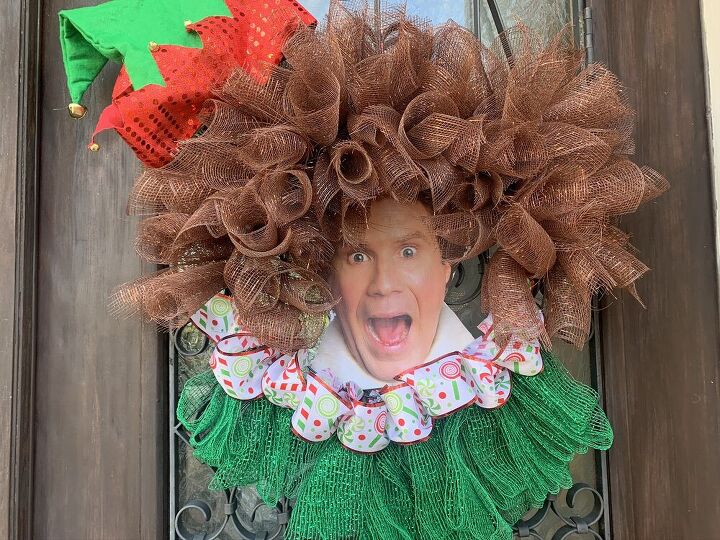
Hang your DIY Christmas wreath on your door and enjoy the reactions of your family and visitors.
Resources for this project:
See all materials


Comments
Join the conversation
-
Love it. I’ll have to add this one to my collections of wreaths. 😂
-
Thanks! Love people with a sense of humor....😂


Frequently asked questions
Have a question about this project?
Too funny!!! Who doesn’t love Buddy the Elf???