


Cheap Wreath for Fall

Are you looking for a cheap DIY wreath for fall? You’re going to love this one! It’s so budget-friendly, you’ll want to make two! Let’s get started!
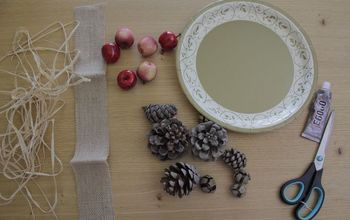
If you need any supplies or tools, I have gathered some links for you! Thanks for shopping via the links. It really helps to support my blog and the free tutorials we offer here. If you purchase via our links, we do receive a small commission at no additional cost to you! Click here to read the full disclosure. Thanks so much!

how do you make a fabric wreath?
One of my Instagram followers messaged me and told me about an amazing deal she came across at my local Habitat for Humanity. She thought I might be interested so I hustled myself over there to see the deal.
And I am so glad I did! There were two full boxes of pre-cut squares of flannel fabric plus lots of scraps from cutting the squares.
Each box was only five dollars!! Yes, 5 buck-a-roonies!
That was late last fall and I didn’t have time to take a good look at what the boxes contained. Come to find out, the pre-cut fabric was wool, not flannel like I originally thought.
There were various plaid patterns in lots of colors. I knew I could come up with some kind of project! Plus some of my blogging friends had a plaid (flannel) challenge going on and I wanted to join in!
You can see their projects at the end of this post. You can also see our challenge from last month by clicking the button below:
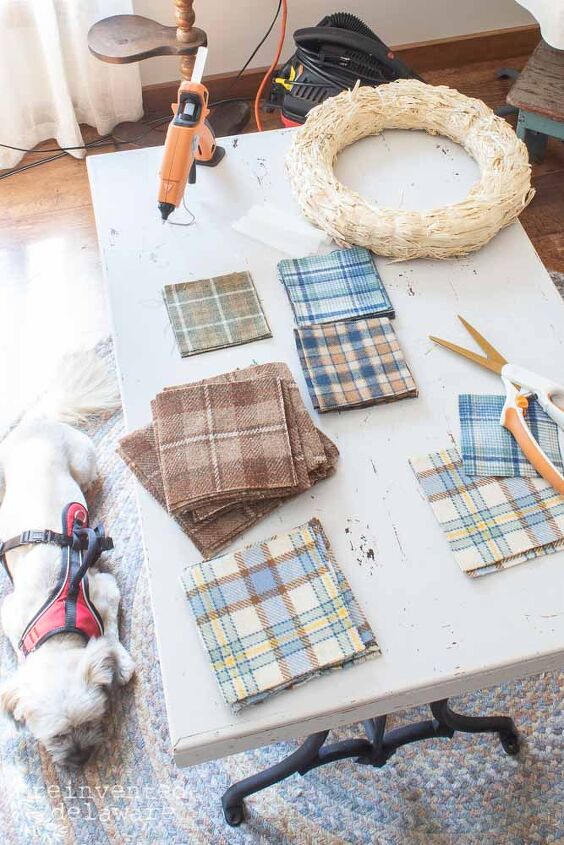
Let’s talk supplies for this month’s easy and cheap wreath for fall:
list of supplies for fall wreath:
- 12″ straw wreath
- fabric scissors
- hot glue gun
- glue sticks
- fabric – wool or flannel plaid shirts, skirts or by the yard
- jute twine
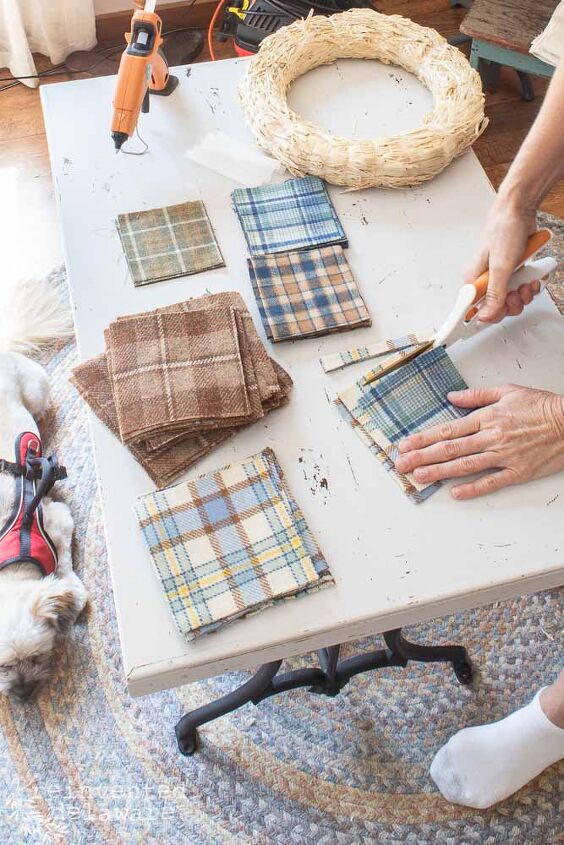
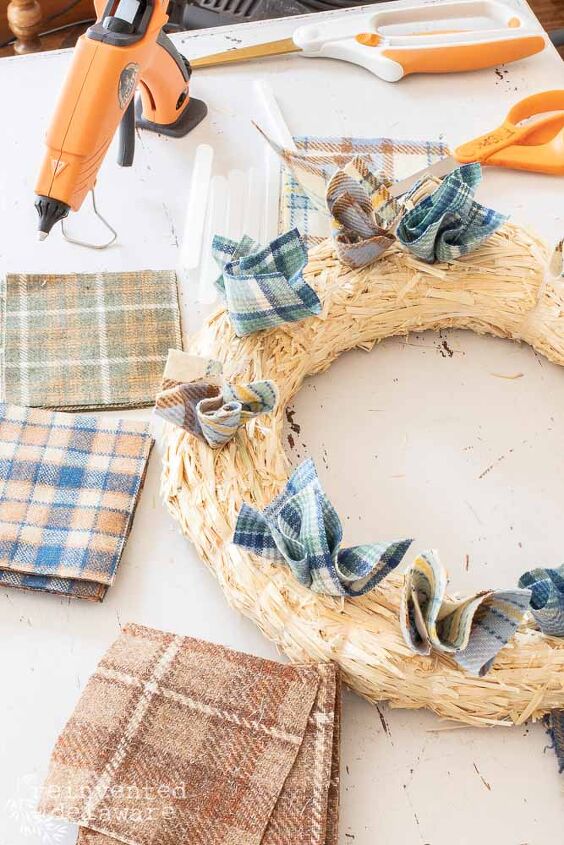
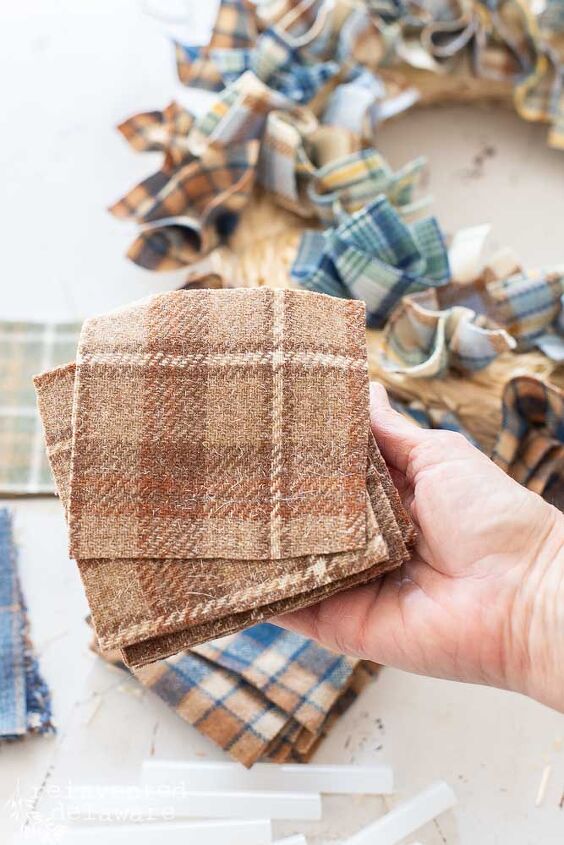
My squares were precut but they were in different sizes. I cut about 70-3″ squares so that they would be uniform.
I also picked through the box of wool and selected colors and plaid patterns that would work together for this cheap wreath for fall. Browns and blues looked so good together and they said ‘fall’ to me!
**If you don't come across a box of pre-cut squares of flannel or wool like I did (not your typical thrift store find for sure!!) then you can use thrifted clothing like shirts, skirts, wool jackets, and scarves. You can even purchase wool by the yard at your local fabric store.
steps to make a budget fall wreath
This inexpensive wreath for fall is so easy to make. The steps are the same throughout the whole process.
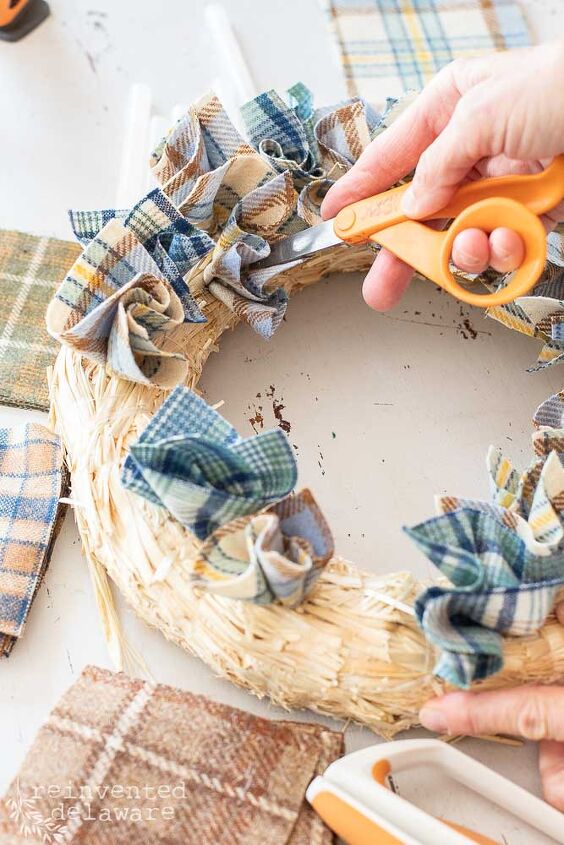
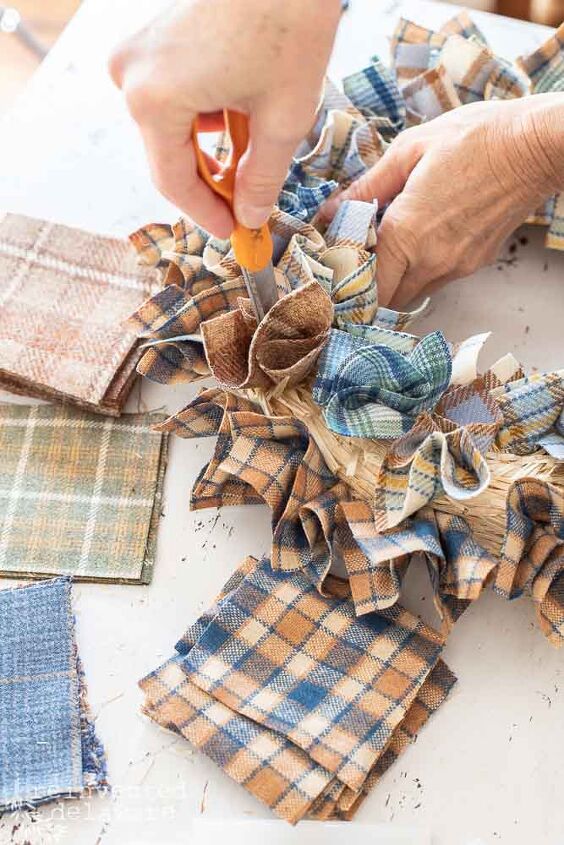
- grab a 3″ square
- find the center of the square with a blunt tool (I used the blunt end of my scissors)
- wrap the square around the end of the tool
- apply hot glue to the tip
- push into the straw wreath
Repeat, repeat, repeat.
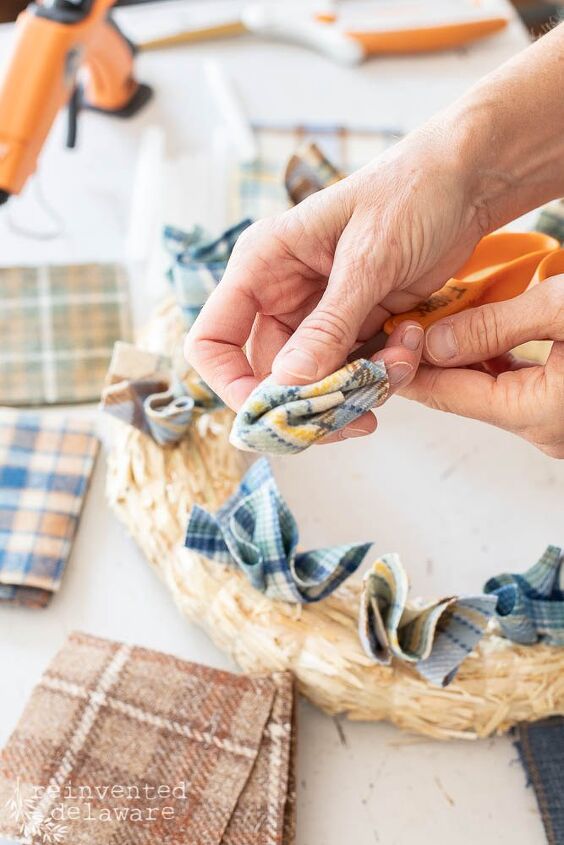
I spaced the squares around the top of the straw wreath leaving space in between.
how do you make a homemade wreath?
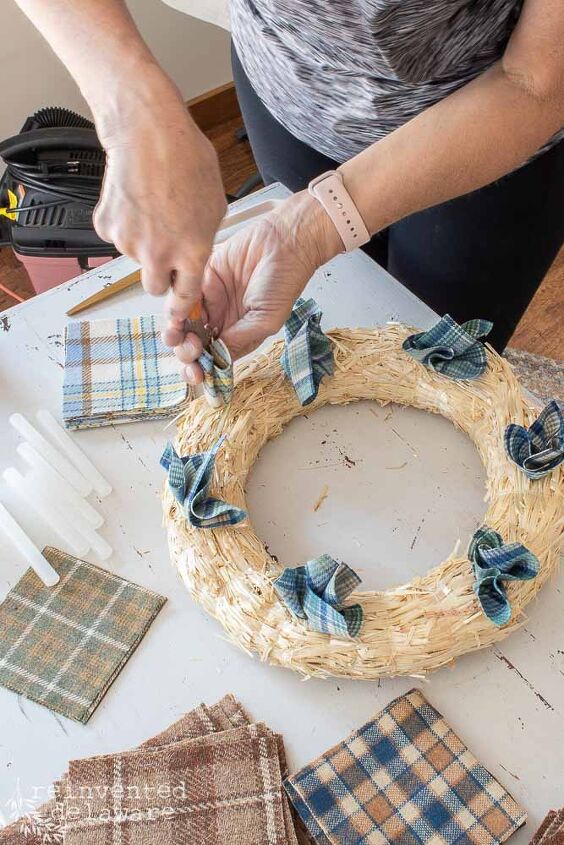
This wreath is definitely homemade so I’m not worried about perfection. I added the squares to the top of the wreath first.
After the first pass, I went back around the circle and added more to fill in the empty areas.
I also left room for the other colors and patterns of the wool fabric.
You can see below that the wreath is starting to get fuller with each pass around the circle shape of the straw wreath.
how to make an easy fall wreath
Seriously, that’s it.
This is one of the easiest and inexpensive wreaths for fall that you can imagine!
Really, for any season, not just fall.
In fact, I have red, gray, and black wool squares in my boxes!! Christmas is just around the corner!
how much fabric do I need for a fabric wreath?
That question can be answered only by you. With this type of handmade project, you get to decide how full or how sparse you want the finished wreath to look.
If you want a fuller look, purchase more of the clothing items I mentioned or wool yardage. One yard of fabric (measures 44″ wide by 36″ long) will give you about 168 3″ squares. You could purchase a 1/3 yard of three different wool fabics and have enough to make two wreaths! One for you and one for a friend 🙂
Keep those measurements in mind as you look for clothing items. A large woman’s skirt that has lots of fabric will yield more squares than a small child flannel shirt.
While you shop, look for pieces with large areas of fabric. The sleeves can be used, the fronts and back of shirts, scarves and of of course skirts!
how to finish this cheap wreath!
Let’s get back to this amazing and affordable wreath for fall!
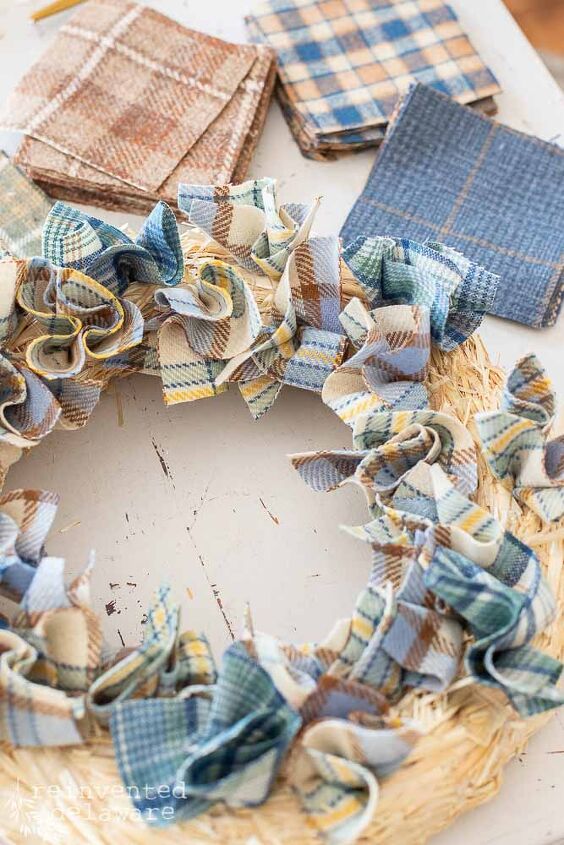
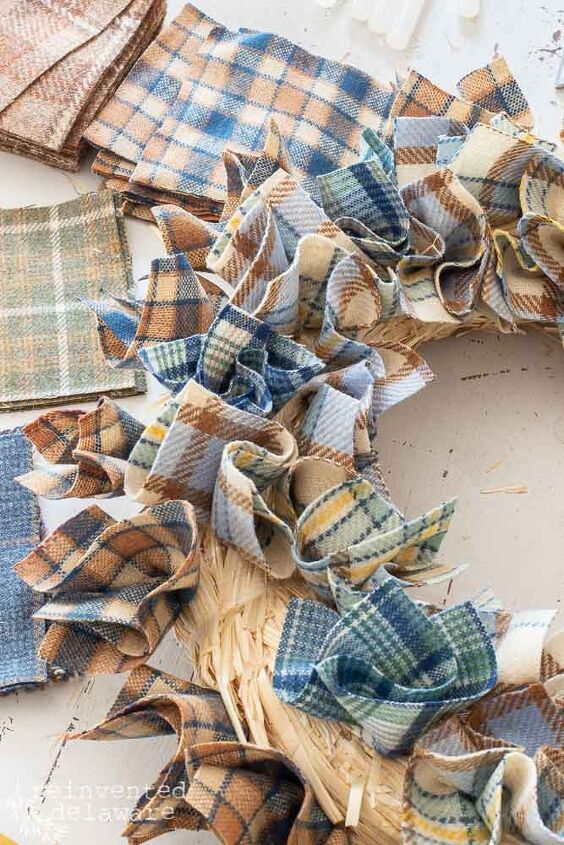
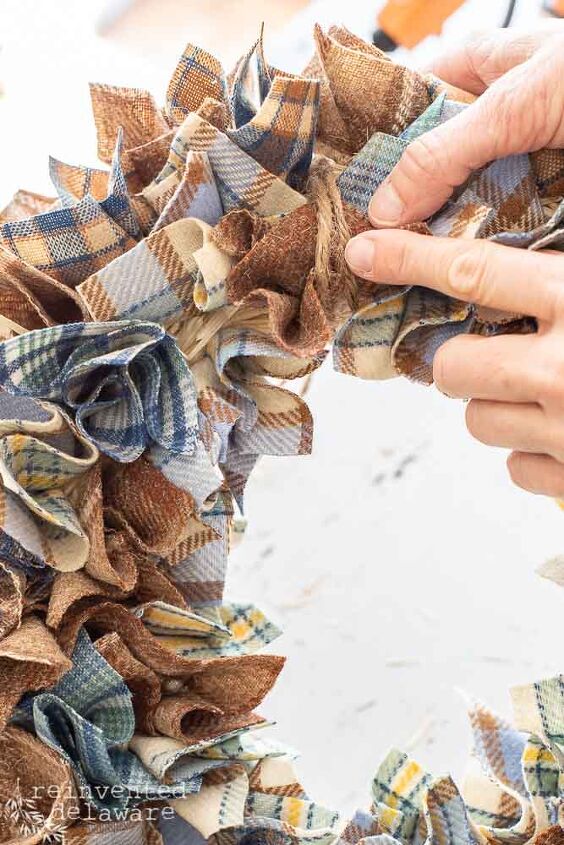
After going around the circle two times, I started to add some of the other patterns and colors to the fall wreath. The browns and the blues looked so good with the first fabric.
I could hardly believe the hard part of selecting fabrics was already done for me! Look how well all these coordinate!
Just for fun, I made two wreaths using the blues and the browns. You can see both of the wreaths for fall towards the end of this post.
And you can watch how I created the second wreath in the YouTube video I created for you. The video is a little lower down in this post.
full or sparse – you decide!
This wreath can be made as full or as sparse as you like. I suggest that if you want a sparse look, cut the squares smaller – around 2″ – so that the squares won’t flop around after being inserted into the straw wreath form
I also suggest that if you have several patterns and colors like I do, space them around the straw wreath evenly to keep the wreath looking uniform 🙂
Enjoying this post? Want to see more? Sign up below to receive new posts!
finishing details for this cheap wreath
Next, let’s get this adorable and affordable wreath for fall ready to hang!
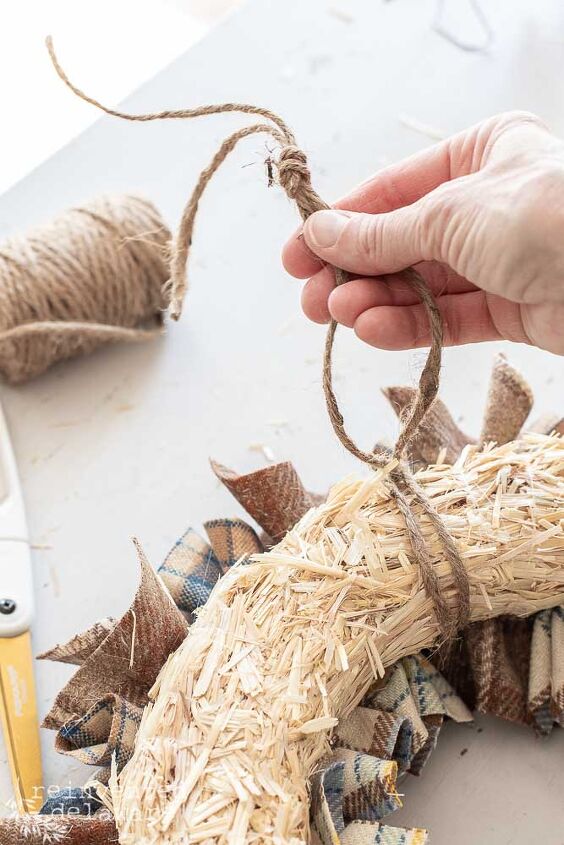
Cut a piece of jute twine about 20″ long. Join the ends so that you create a loop.
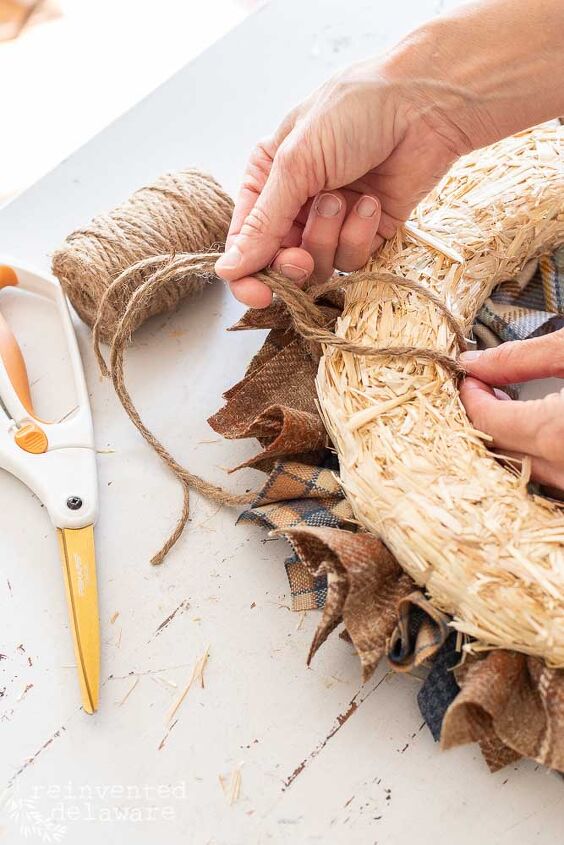
Wrap around the wreath and make sure to weave between the fabric squares so you don’t smash them down.
Go through the loop and pull it tight.
Make a knot and you are ready to hang your gorgeous wreath!
YouTube Video for you!
Here is a video I created for you if you like video tutorials too! Be sure to give me a thumbs up for the video and subscribe to our YouTube channel so you don’t miss any of the fun tutorials we offer!
how to hang a wreath
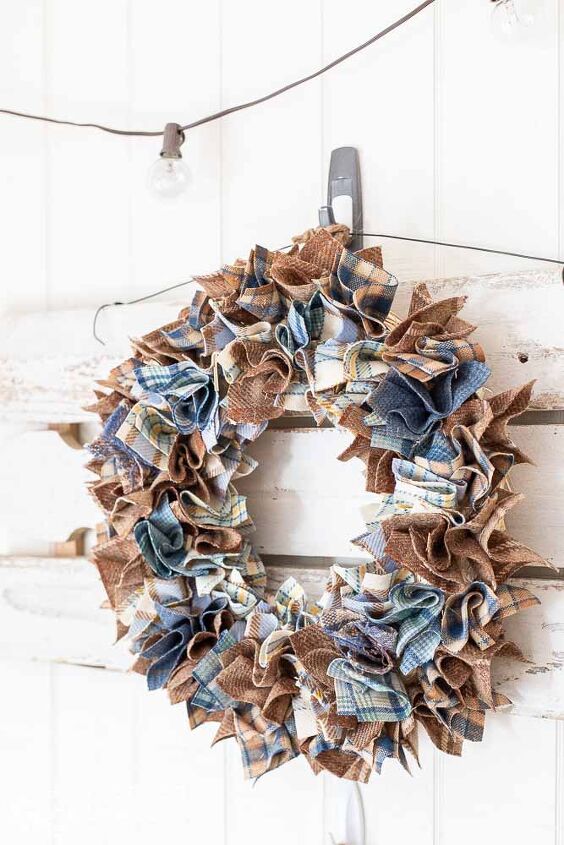
And now your wreath is ready to hang!
Mine is hanging on a picket fence wall hanging that I made. I love layering decor pieces like this!
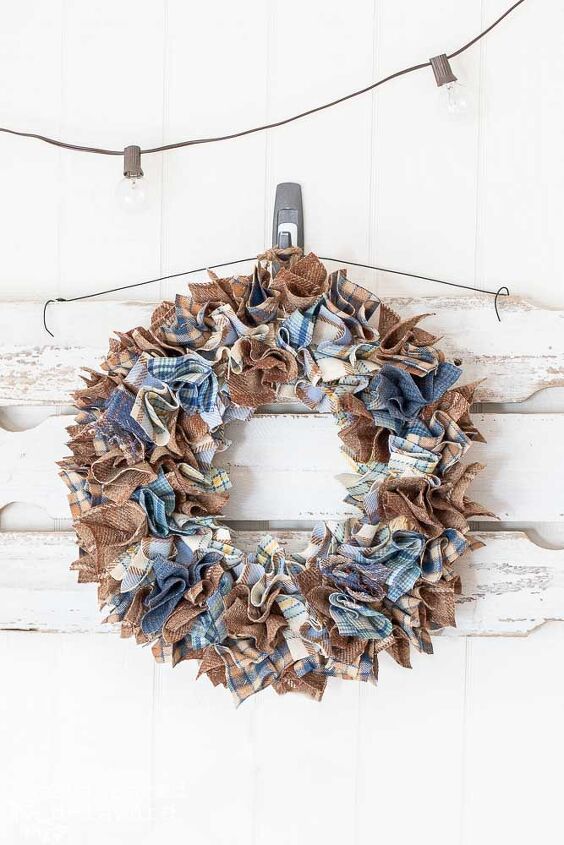
For now, this wreath is hanging in my sewing room. By this weekend or next, this inexpensive fall wreath will be on my front door!
What do you think of this project? Super easy, right??
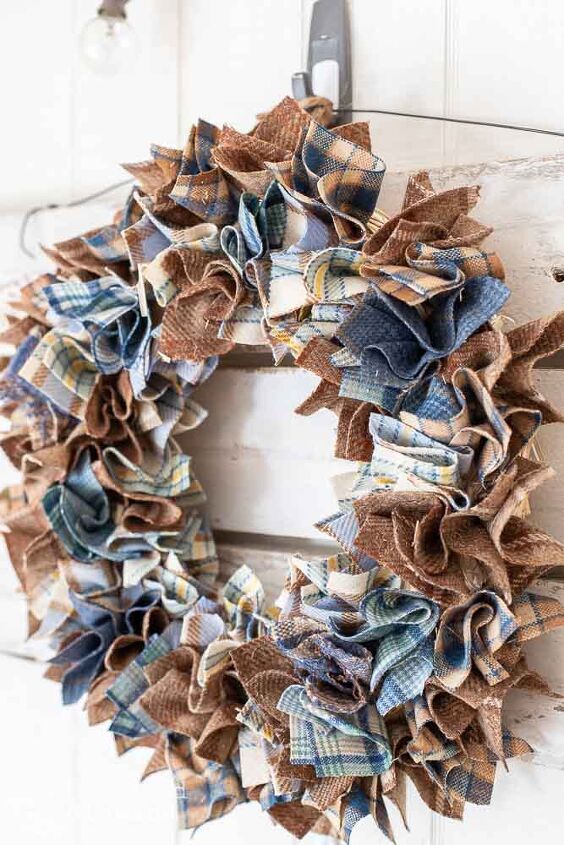
two wreaths |two looks
Remember I said I made two wreaths? Here they are!
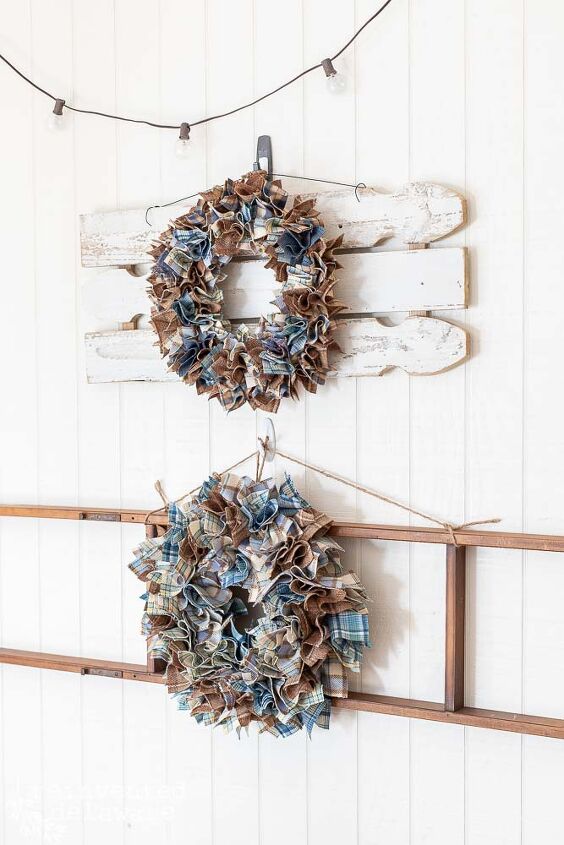
I switched up the amount of the blues and browns I used in each and it created a bit of a different look for each.
Which one do you like best? The one with more brown on the top or the one with more blue on the bottom?
Let me know in the comments!

So glad you stopped by!
Wasn’t this cheap wreath for fall such an easy and fun project?? I hope you enjoyed this tutorial! Let me know in the comments!
Feel free to pin any image in this post to Pinterest so that you can reference it later. Share it with your friends on Facebook too! They are probably looking for some easy and quick fall decor projects to do!

Pin the image below to your home decor and fall decor boards! Just click the pin button at the top left corner!

More Thrifted Ideas
Be sure to check out my blogging buddies posts for more Thrift Store Decor Ideas! This group is so creative and I know you will love their projects. Tell them Cindy from Reinvented Delaware sent ya’!
**Many of the projects you will see were inspired by my blogging friend, sarah, who wrote an amazing crafting book called Crafting with Flannel. Sarah, creator of SadieSeasonGoods.com has some fun craft projects using flannel. The images and the instructions are so helpful! If you would like a copy of the book for your crafting adventures, you can purchase it by clicking the link below! She would really appreciate your support and you will love the book! Win, Win!!
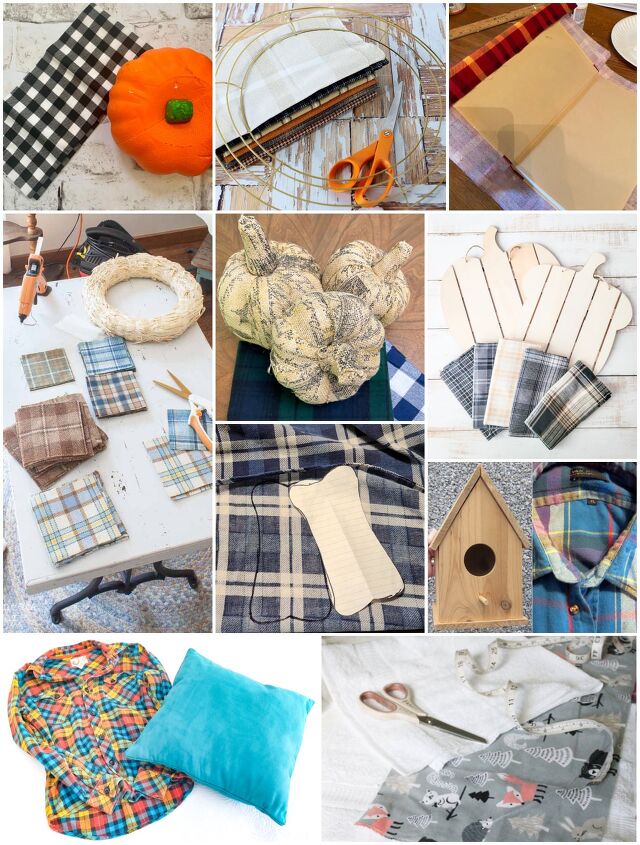
My Uncommon Slice of Suburbia Easy DIY Fall Flannel Pumpkins
House of Hawthornes Rag Wreath DIY
Organized Clutter Flannel Covered Books
Reinvented Delaware Cheap Wreath for Fall (that’s me!)
Our Southern Home No Sew Flannel Pumpkins
Domestically Speaking Plaid Pumpkin and Acorn
My Repurposed Life DIY Flannel Scraps | Easy Projects
Petticoat Junktion Flannel Wrapped Wreath
Sadie Seasongoods Blue Fall Decor With a Pumpkin Throw Pillow
Shop at Blue Flannel Embellished Hand Towel
Looking for more fall inspiration: Here are a couple of posts you will enjoy. Just click the image to go to the post!

Thanks for joining our journey!
We would love you to join our journey over on Instagram and Facebook! You can also find more inspiration on our Pinterest page! We’re always pinning fresh ideas!
Are you looking for ideas to reinvent? Sign up below and I will send you a list filled with inspiration! Plus, you’ll get the free tutorials sent straight to your inbox!
Until next time…

Resources for this project:
See all materials


Comments
Join the conversation
-
I love this wreath idea, you can make so many different ones and you could always make ones for your favorite sports team😁
Thank you for sharing! I like top one the best!
-
I have been making his kind of wreath for years. I don't like plaids and flannel would give us heat stroke here in Georgia! So, I use a mixture of cottons. I also have used foam wreaths with the fabric squares pinned on using bobby pins in the middle of the fabric that has been folded like a fan. I also use TWO pieces of cotton placed back-to-back since the back side of many cottons are so light in color. I mix up all the pieces. Also I leave a space at the bottom to tie on and them pin a large bow of some of the same fabric I used.


Frequently asked questions
Have a question about this project?
I can’t find a link to Sadie’s book?
oh - and I like the top one best - it looks more like a wreath.