


DIY Dried Hydrangea Wreath
My DIY Dried Hydrangea Wreath is so easy to make.
I have been making these stunners for years.
Hang them on your front door or a gate!
Use them as the centerpiece for your tablescape.
The BEST PART…….
The cost is minimal if you have these beauties growing in your backyard. There is also no complex drying method.
You do not need expensive tools.
Any color will work. My hydrangeas are Annabelle Aborenscens.
You can create one 18 inch wreath from one mature hydrangea bush (approximately 30 blooms)
Supplies
Approximately 30-35 dried hydrangeas
18 inch grapevine wreath form
A pair of clean, sharp snips (wipe them down with alcohol before you start cutting)
A basket to harvest your blooms (optional)
Glue Gun (optional)
Directions
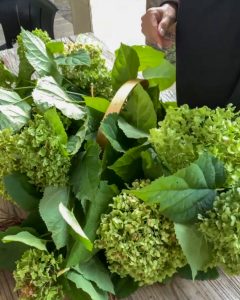
- I always harvest my blooms in the early morning or late evening so that the harsh sun does not stress the blooms.
- Make a diagonal cut on the hydrangea stem approximately 12-14 inches below the bloom.
- Repeat until you have around 30 blooms of all sizes (large, medium, and small).
- Remove all of the leaves from the hydrangea blooms. Discard the leaves.
- Make another diagonal cut approximately 4-5 inches below the bloom. This gives the hydrangea plenty of support within the wreath as the blooms dry out.
- Gently stick the stem into the grapevine wreath so that the bloom is sitting directly on the grapevine wreath. If you cut your stems too short, you can use a glue gun to hold them securely in place.
- I like to use all of my large blooms first, and completely encircle the wreath form.
- Then I go back with the medium and smaller blooms and fill in the gaps.
- Make sure you fill in the center and the sides of the wreath as it can be seen.
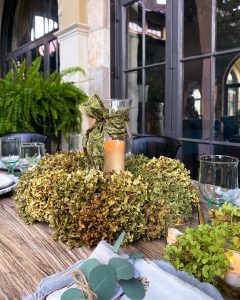
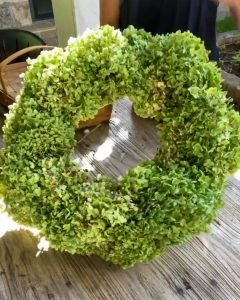
I used a hydrangea wreath as a centerpiece for my tablescape.
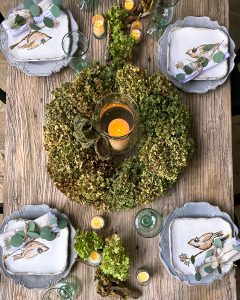
An overhead view of a wreath I made and used as a centerpiece.
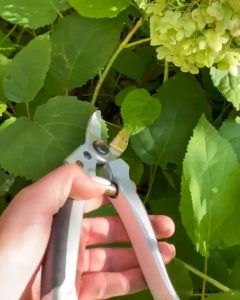
Gather your blooms in the morning or evening. Use clean snips.
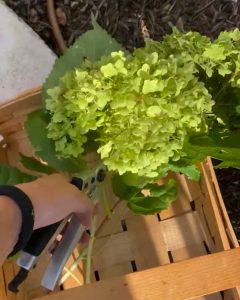
Place your blooms in a basket while you cut the rest.
Your basket will fill up quickly.
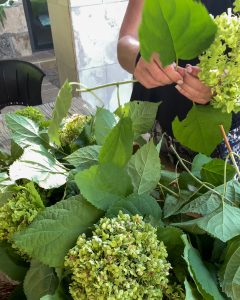
Remove all of the leaves from the stems and discard.
Without the leaves, the basket is not as full.
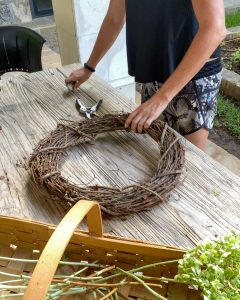
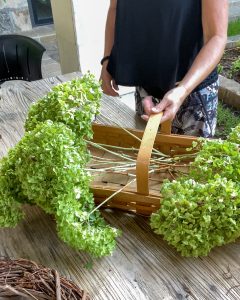
I used an 18 inch grapevine wreath form.
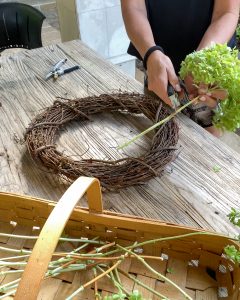
Cut the hydrangea stem on the diagonal about 4-5 inches below bloom.
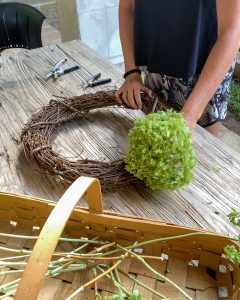
Stick the stem in on the diagonal and place the bloom flush on top of the wreath.
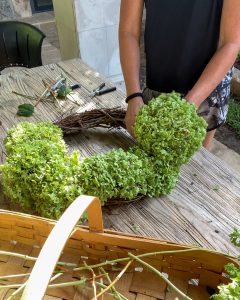
Repeat this all the way around the wreath using the biggest blooms first.

Once you have placed blooms around the entire circumference fill in with smaller blooms around the inside and outside.
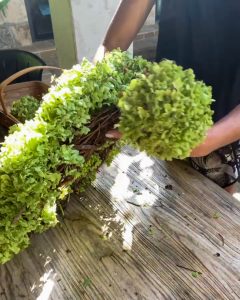
Make sure to check around the wreath for any gaps where the grapevine shows and fill in accordingly.
Tips
- If some of the stems break or do not want to go into the grapevine, use your glue gun to secure the stems.
- As the hydrangeas dry out, there may be a few small gaps. Plan to add a few more blooms to fill in later.
- This wreath will last years and years with proper storage. I have one I made many years ago, I just add a few blooms to it each year and enjoy it every fall and winter.
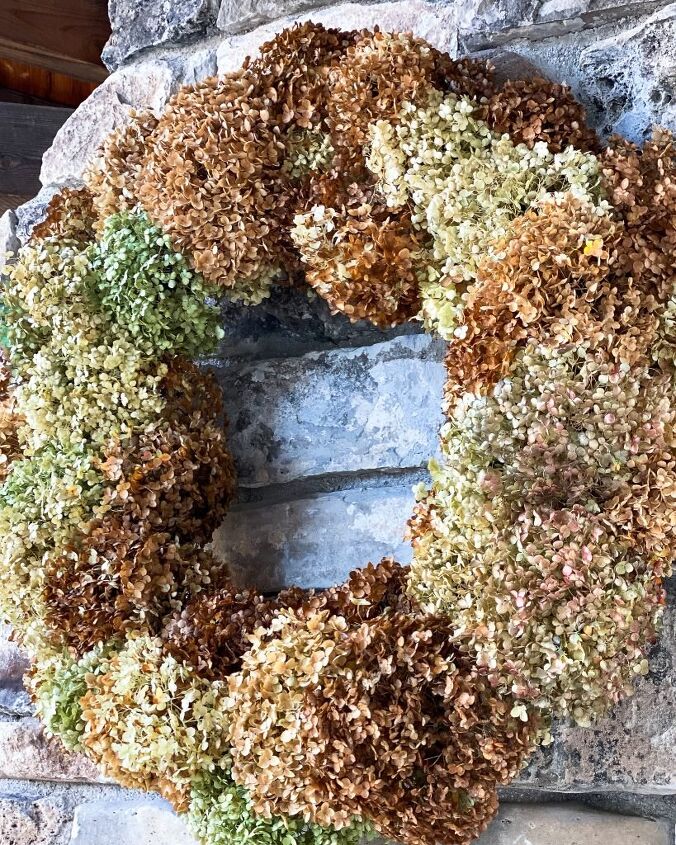
Here is my large old hydrangea wreath hanging over my outdoor fireplace. I just add in a few fresh blooms (3-4) each year to keep it full.
Resources for this project:
See all materials


Frequently asked questions
Have a question about this project?