


DIY Recycled Metal Christmas Wreath Tutorial
A few months ago, I decided to tear down an old box spring and salvage what I could from the dismantled pieces. Little did I know that it would lead to this fun project. You might not realize it, but there are a whole lot of springs in those old beds, and well, me being me, I saved every one of them. So I need to find some good projects to use them. Feel free to offer any ideas in the comments. To date, these recycled metal Christmas wreaths are only my third project using any of the springs, and that still leaves me with boxes full.
Anyhow, I have been on a tin can upcycling kick lately, and well, metal bed springs go with metal cans, at least in my mind, and so my idea was seeded. And I was inspired to create these bed spring and tin can Christmas wreaths.

You can find the complete tutorial in the video below or scroll down to get to the step-by-step overview.
Material Requirements
- 7 bedsprings
- 7 coil springs
- Tin cutters
- Rusted tin can sheets
- Nail pulling pliers
- Hammer
- E6000 Glue
- Hot Glue
- Giltter hot glue (optional)
- Mod Podge (optional)
- Flat head screw driver (optional)
- Acrylic paint (optional)
- Dapping block (optional)
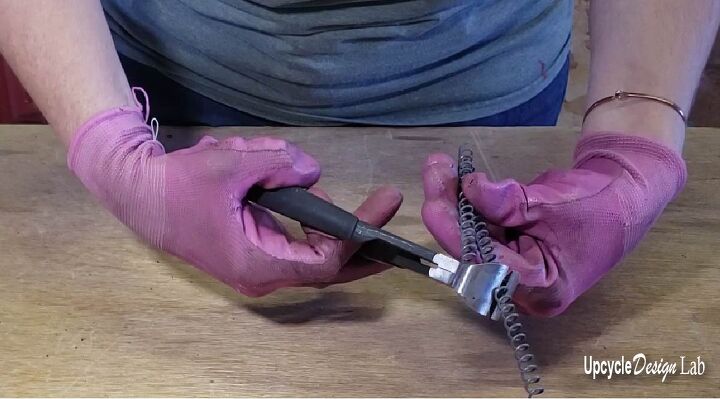
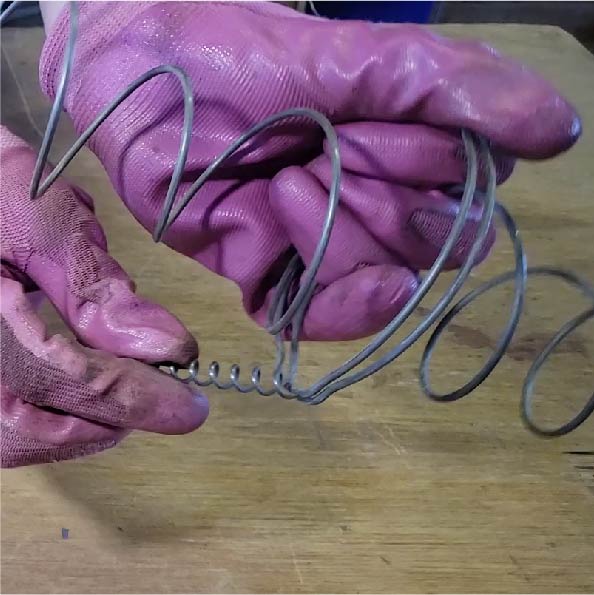
Step 1 – Cutting the coil springs.
If you have seen some other bed spring projects, you are probably picturing the single springs that support the mattress, but all those springs are held together with these long coil springs, and for this project, you need seven pieces of the coil spring cut to 4 inches long. The easiest way I found to cut this wire is with a pair of nail-pulling pliers.
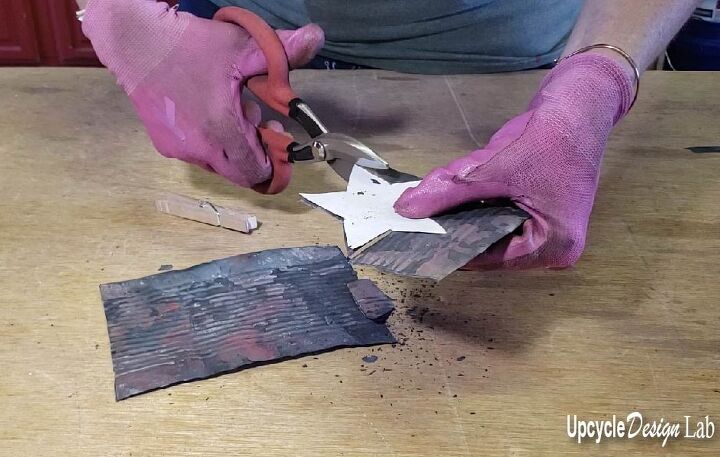
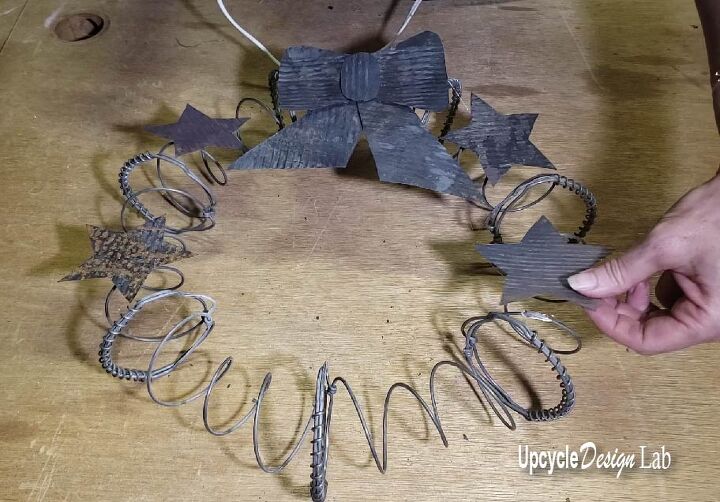
Step 2 – Cut metal shape for decoration
I should probably back up here and mention that you need to prep the metal sheets. The sheets are made from tin cans in three easy steps.
Once you have some rusted metal sheets, it is easy to cut out some decorative shapes with tin snips and a paper pattern.
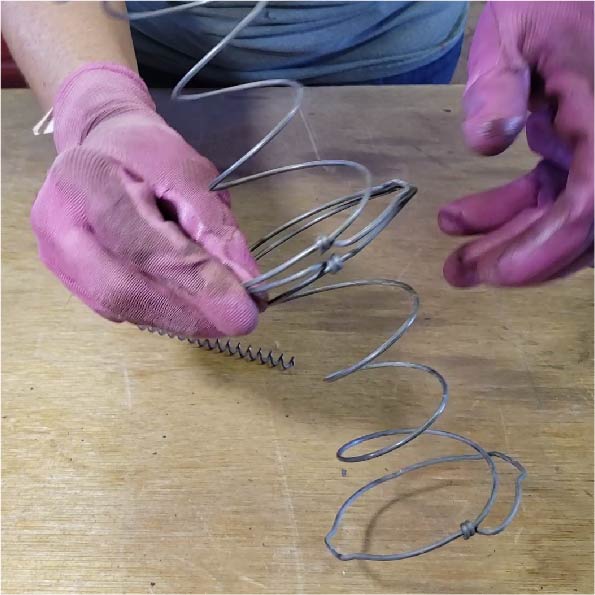
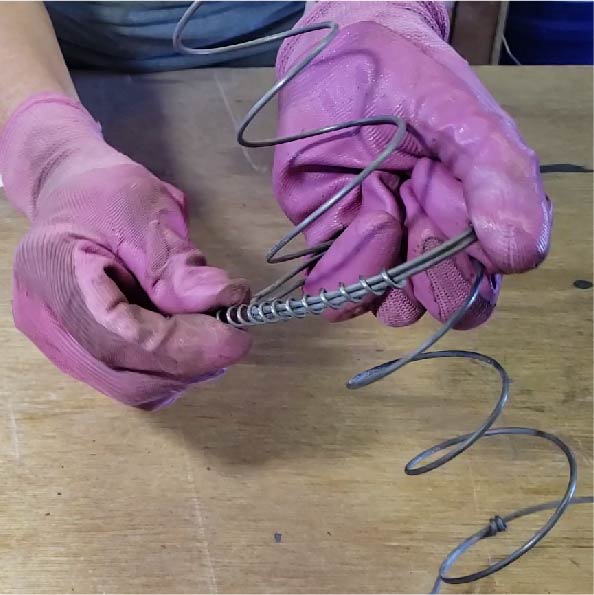
Step 3 – Assembling the wreath ring
This step is much easier than it looks. First, the coil spring is twisted onto the bedsprings two at a time to hold them together. Then, once all seven bedsprings are hook together, the ring is made by connecting the ends in the same fashion.
I know that not everyone has access to box springs, and since I have an excess of them, I decided to make some wreath kits.
Purchase Rustic Metal Wreath Craft Kits
Step 4 – Decorate wreath with tin can pieces
To attach the tin can pieces to the springs, I used hot glue to place each piece where I wanted it, and then I flipped the wreath over and used E6000 glue on the back for a stronger bond between the parts.
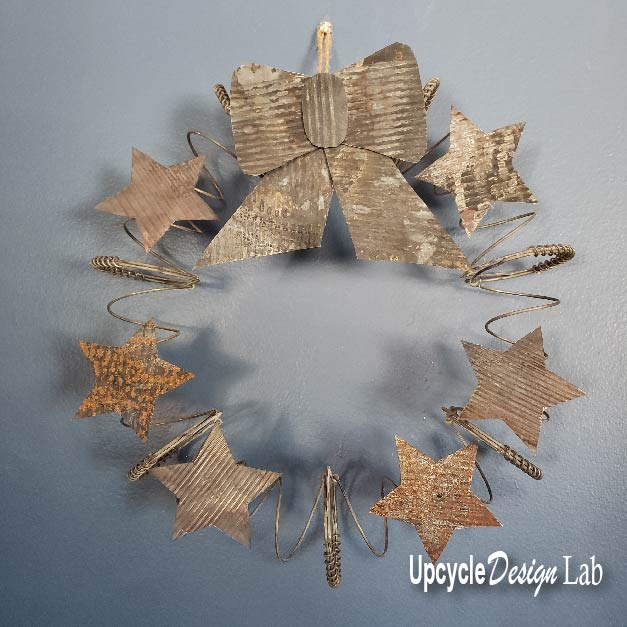
Step 5 – Add cord and hang
Once you add a cord, you are ready to hang the wreath. This is the simplest version, but there are lots more ways to decorate these wreaths. Check out the video for more ways to embellish and customize your wreath with sealing, coloring, adding safety edges, and adding texture to the metal pieces.
Happy Upcycling
Cindy

Comments
Join the conversation
-
This is so new and original, great use of found materials!
Possibly use hangers or other wire to make the spring spirals if there are no bed springs around.
Love designs that are non-traditional!
☆☆☆☆☆ for you!!
-
Unique and whimsical, love it! Love the expressive pictures of you too, they add so much character 😹


Frequently asked questions
Have a question about this project?
I love your wreath! What a great idea. I think I'd drill small holes in the ornaments and use wire to attach to the bed springs. In my house, somehow glued items have a way of falling off during off-season storage. How on earth do you find bed springs? I've actually seen mattresses by the side of the road and now thinking about dragging one home with me! Thanks so much for sharing your project with us.