


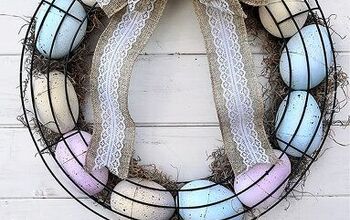
Dollar Tree Easter Egg Wreath
Today I am going to show you how to create this stylish Dollar Tree Easter egg wreath for just a few dollars. Let’s get started!
I stopped by my local Dollar Tree today to see if they had put out their Easter products yet. I was in luck and picked up a few craft staples to use in upcoming Spring projects.
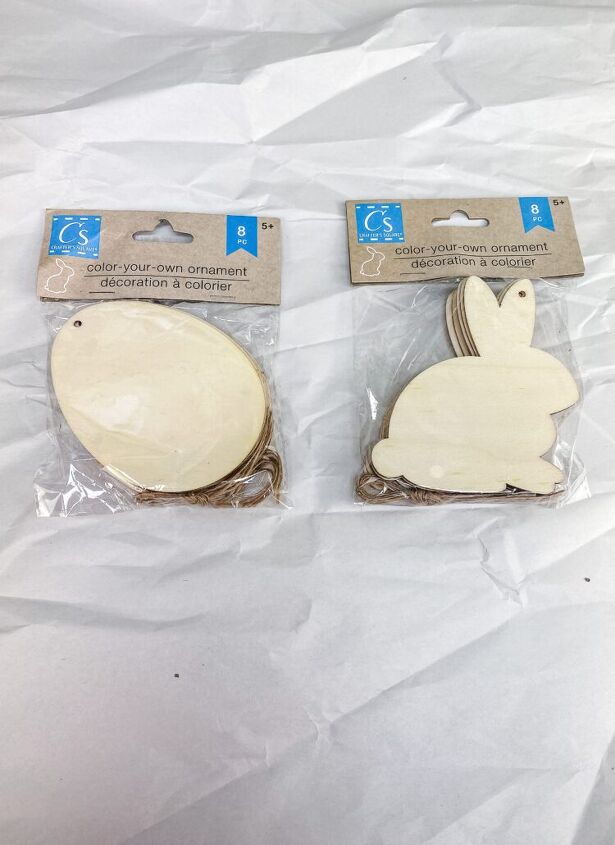
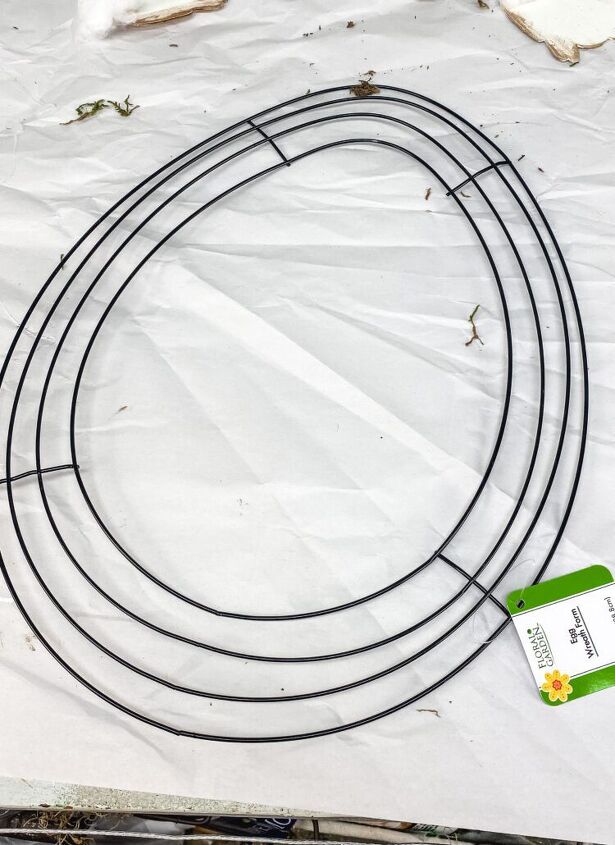
For this Easter wreath, I’m will be using a bag of each of the wood eggs and bunnies, one of the wire Easter egg wreath forms, and a bag of Spanish moss.
Get some non-candy Easter egg ideas for your egg hunt.
Dollar Tree Easter Wreath Supplies:
- Dollar Tree Wood Eggs
- Dollar Tree Wood Bunnies
- Dollar Tree Wire Egg Form
- White & Green Paint
- Waverly Antique Wax
- Clear Glue or Mod Podge
- Green Preserved Moss
- Spanish Moss
- Cotton (bunnies tails)
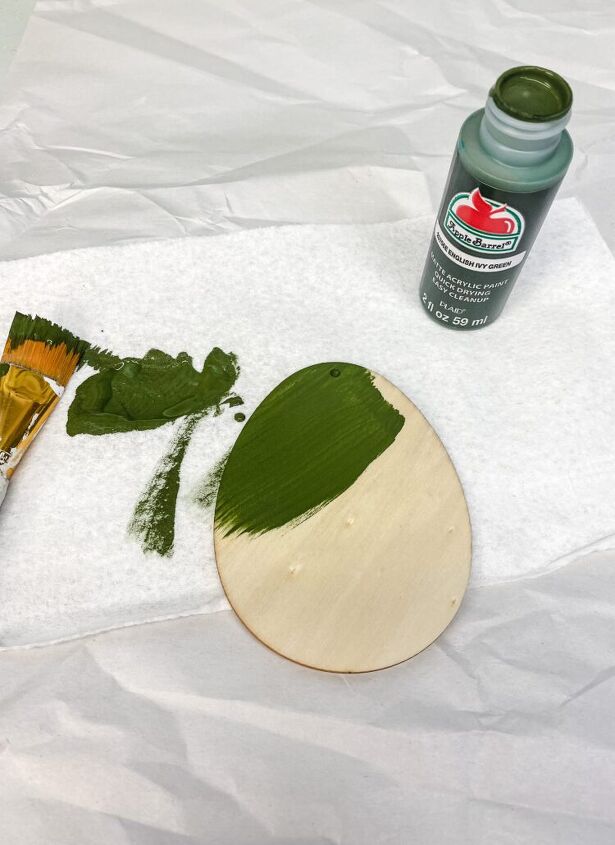
To start this wreath project, I painted the wood Easter shapes. For the eggs, I did a coat of ivy green acrylic craft paint.
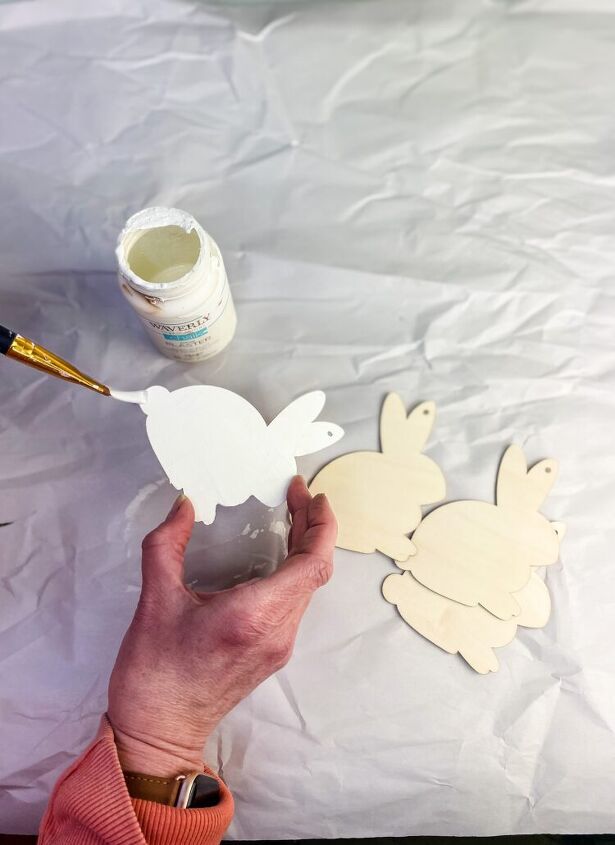
On the wood bunnies, I used Waverly chalk paint in the plaster shade. You could use cream-colored acrylic craft paint as well…use what you have on hand.
After the green paint on the eggs dried, I brushed the top of the egg with clear glue. Mod Podge would work great too…but does anyone know where my jar is??? Because I can’t find it anywhere in my studio!!
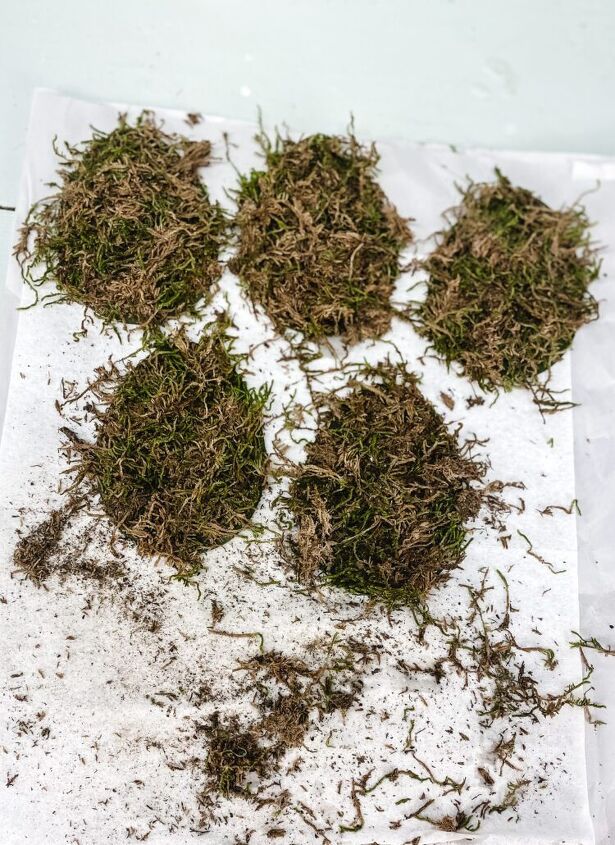
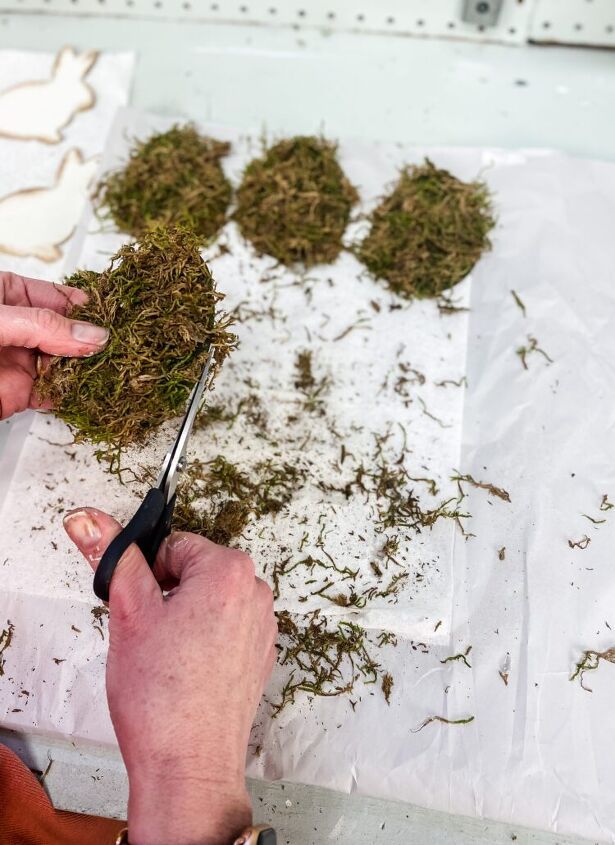
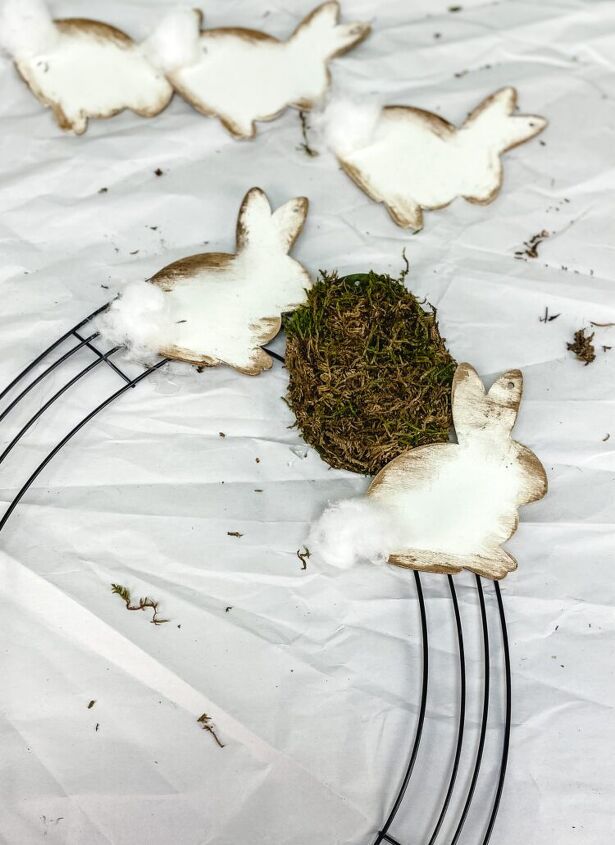
Then I covered the top with pieces of preserved moss. The moss I am using comes in large pieces and I broke them up into small pieces.
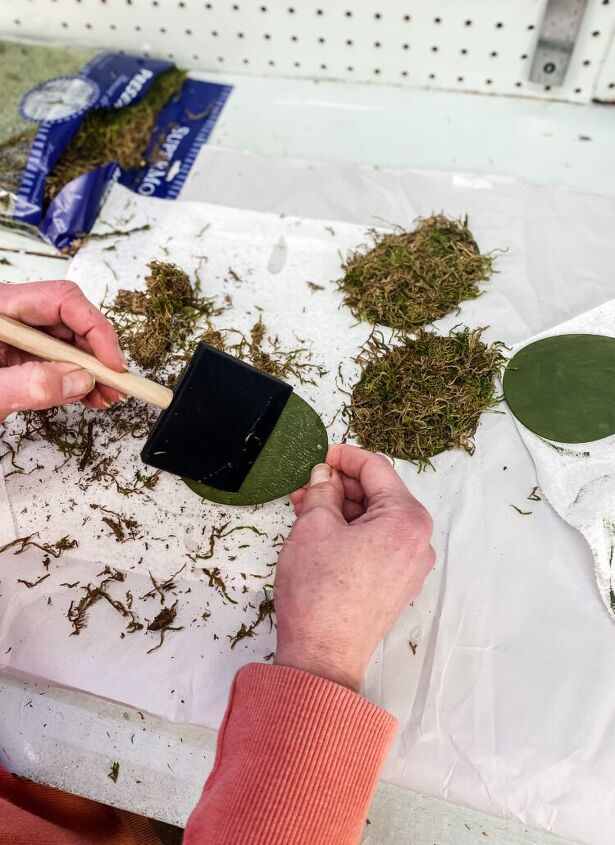
My trick for flattening out the moss..and not getting my hands sticky and covered with moss..was to put a paper towel over the egg and push it down.
Once the glue had dried, I trimmed the moss that was hanging over the edges of the wood eggs.
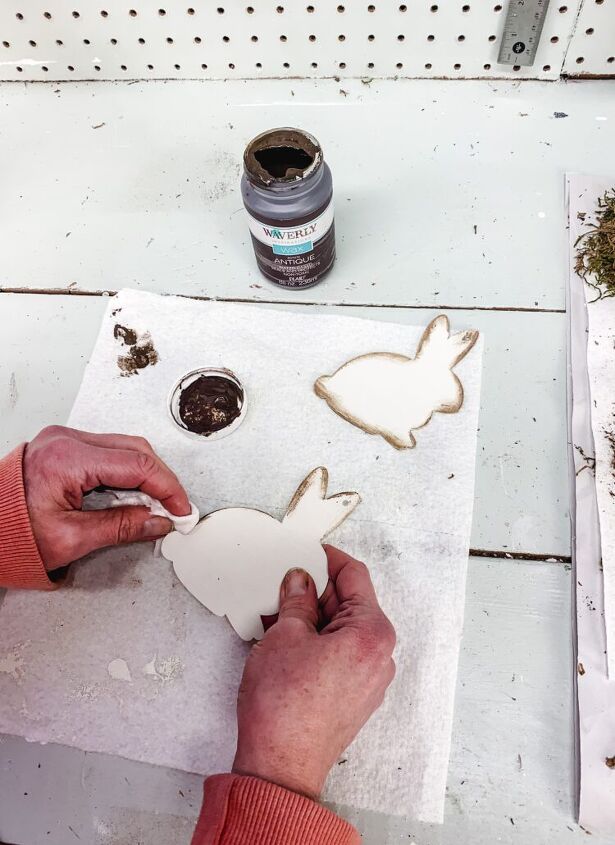
Once the paint on the bunnies was dried it was time to add a bit of detail to them with a little antique wax. I used the Waverly Antique Wax for this.
What I really like about using this wax is that it is on the thinner side and is so easy to use. I dipped a piece of paper towel into the wax inside the lid…dabbed most of it off…and then ran the paper towel lightly over the edges of the bunny.
To put the wreath together I used my hot glue gun. Once it was heated up I used it to glue pieces of cotton on the bunny tails (optional but it sure looks cute!!)
Starting at the top of the Easter egg wreath form I glued one of the bunnies, then alternated going around the wreath with the mossy eggs.
Don’t worry about the black wire showing between the bunnies and eggs..I have a quick solution for that!
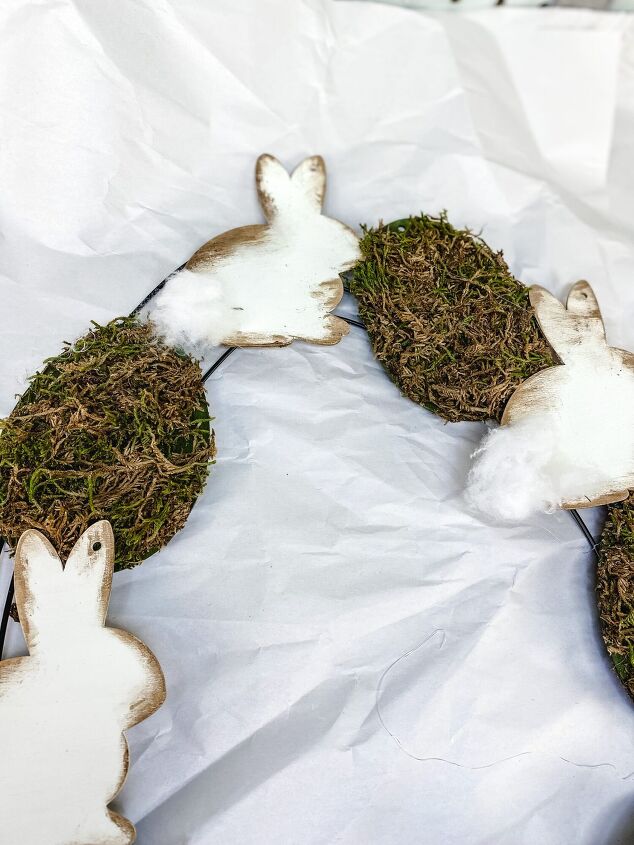
A little bit of Spanish moss pushed in between the shapes hid the wire egg frame and added another natural touch to my Easter wreath.
I just pushed little clumps of the Spanish moss right into the wire…no hot glue was required for it to stay in place.
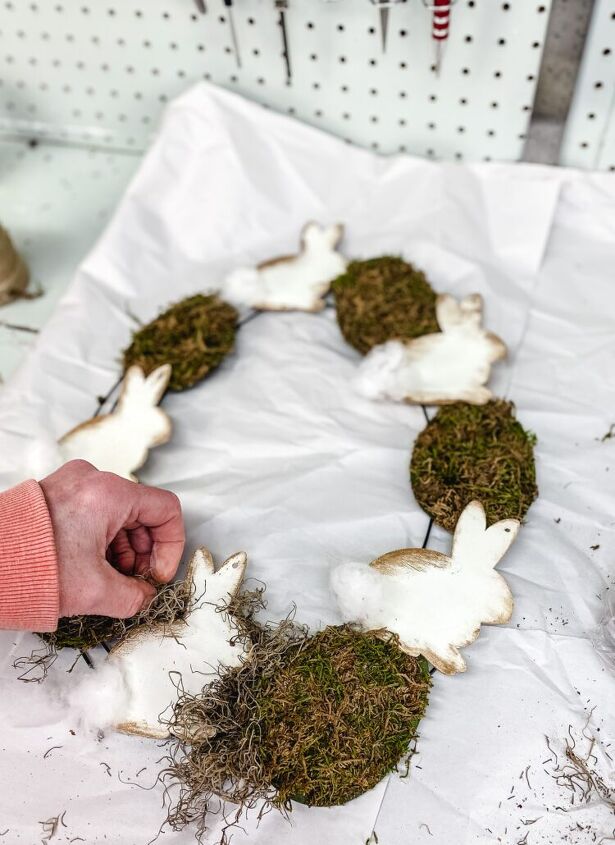
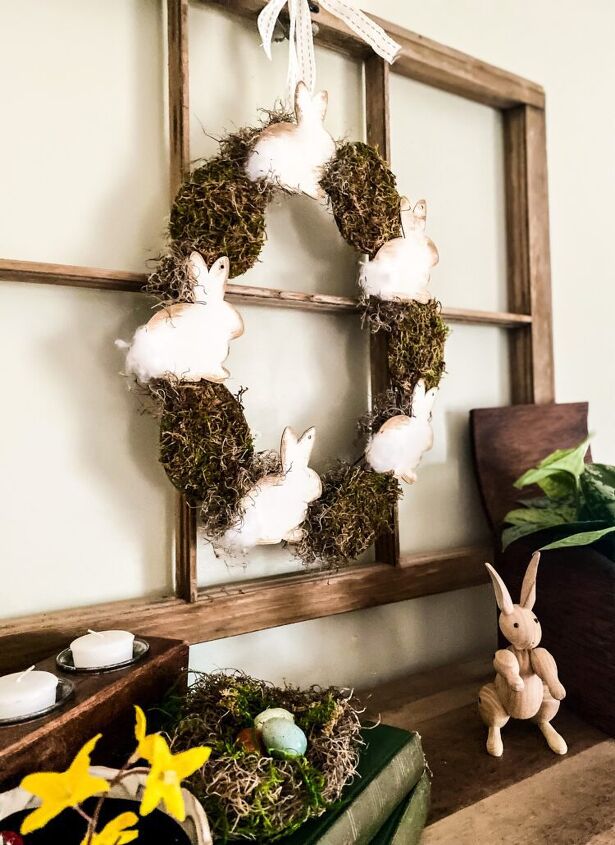
And here’s the finished Easter egg wreath! It’s amazing how you can transform a few Dollar Tree items into a far more expensive-looking piece to use this Spring!
And since we are in the Easter mood…I think you will like my DIY Speckled Eggs tutorial and check out my Artificial Tulip Bulb planter...it's one of my favorite all-time Spring projects!!
Resources for this project:
See all materials


Comments
Join the conversation
-
So cute, and simple 😻
-
Really looks nice!


Frequently asked questions
Have a question about this project?