


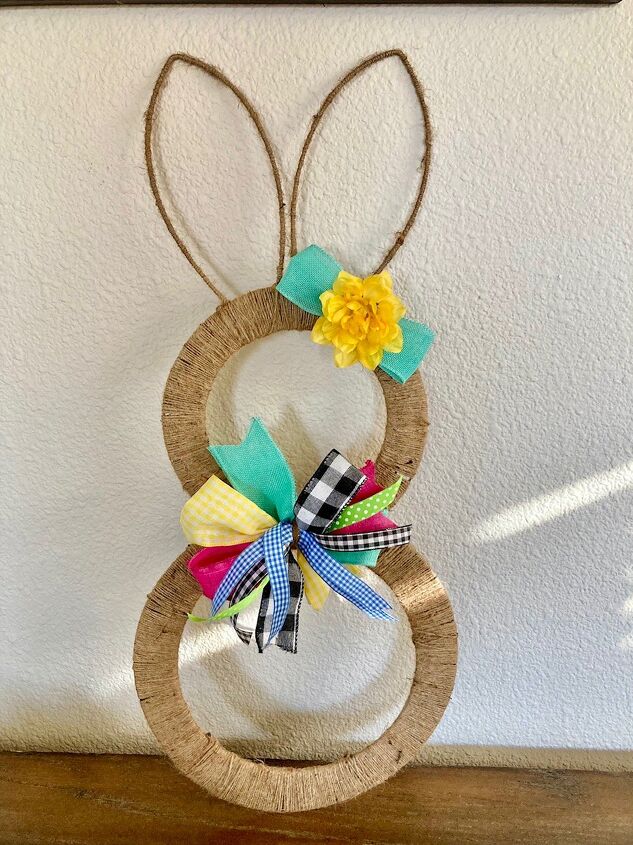
Easter Bunny Wreath

I was making my rounds at our local Dollar Tree, and I couldn’t pass up these bunny ears wreath! They are so cute! So, I figured, if I added another circle wreath for the body, it would be a full size bunny wreath. Most of the materials I used, I found at the Dollar Tree! Can’t pass up a bargain!
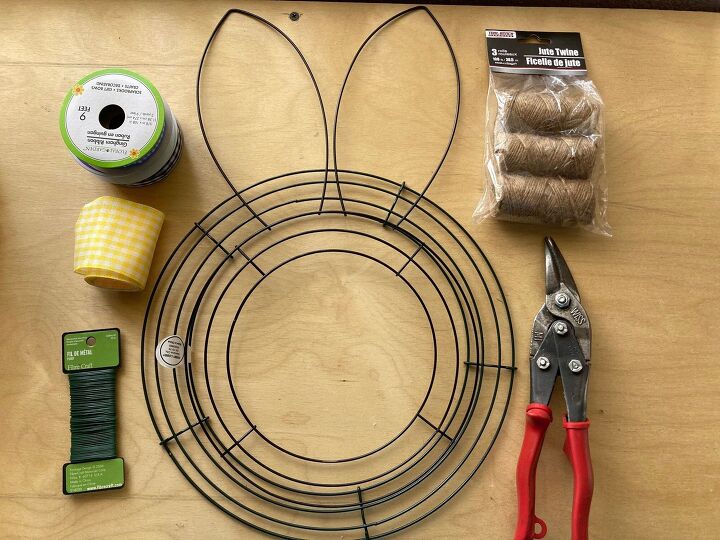
Supplies Needed:
Bunny ears wreath
12” wreath
Jute twine
Floral wire
Hot glue (not shown)
Spring ribbons, various sizes and colors
Artificial flower
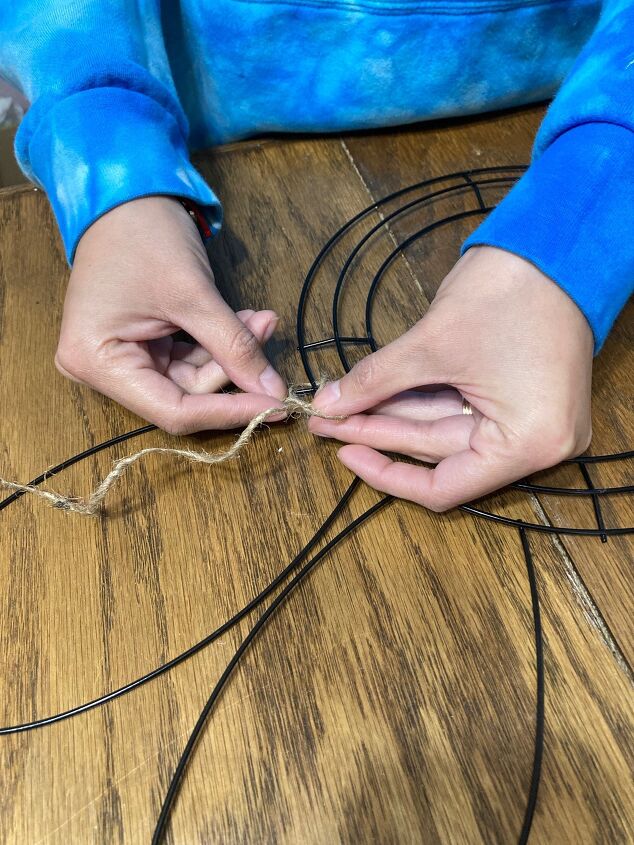
Step 1: Tie a knot, with the twine, to the frame, where you want to begin.
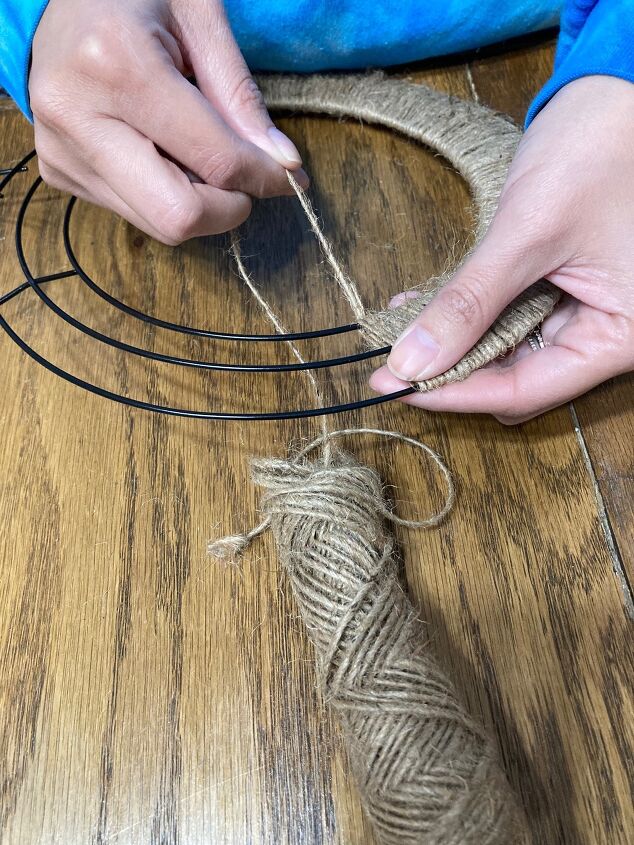
Step 2: Cover the wreath completely with twine. Make sure that you tie a knot, at the beginning or end of each roll.
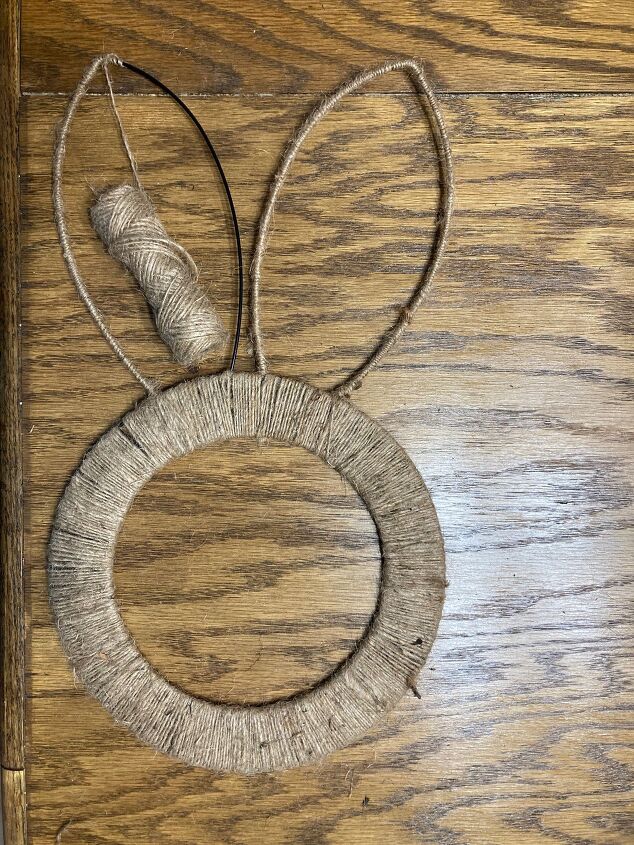
Step 3: When you cover the ears, tie a knot around the end of each ear. I also added a dot of hot glue to secure it.
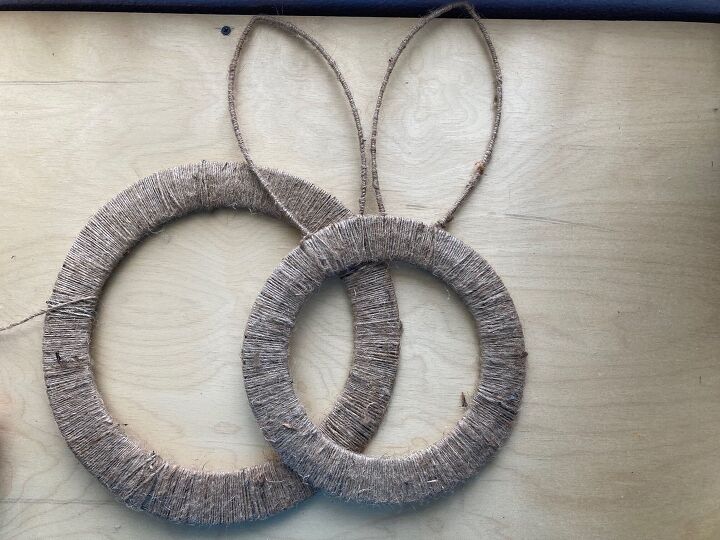
Step 4: This is how the wreaths look after they are completely covered with twine.
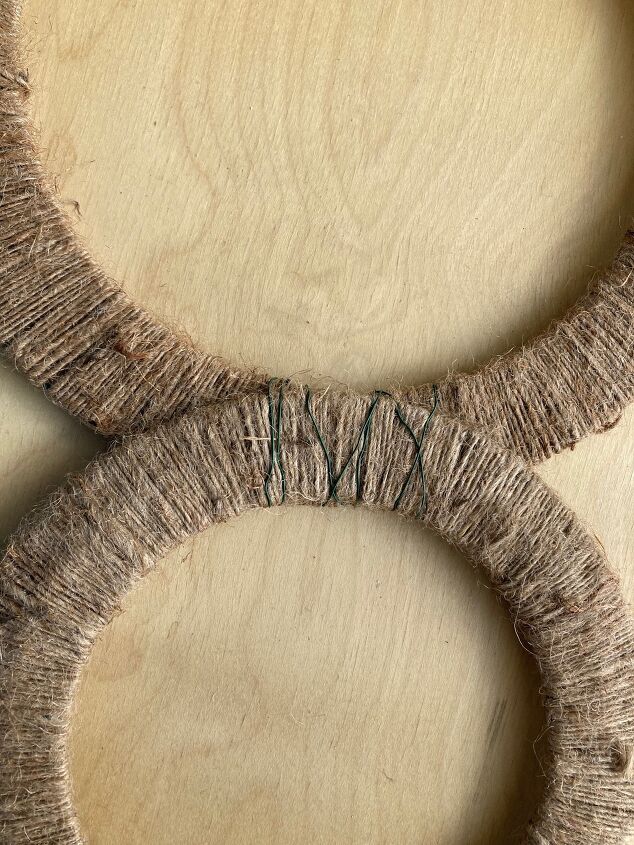
Step 5: Then, I attached the ears to the body with floral wire.
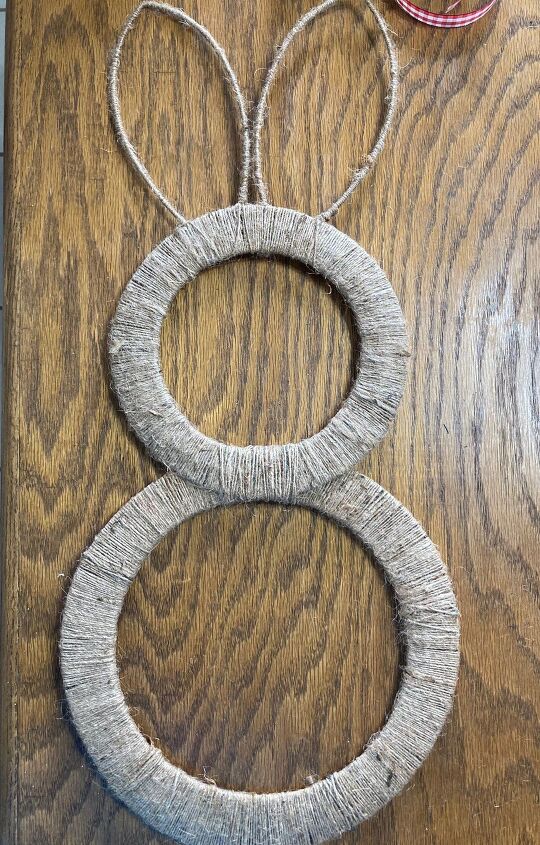
Step 6: I used more twine to cover the floral wire.
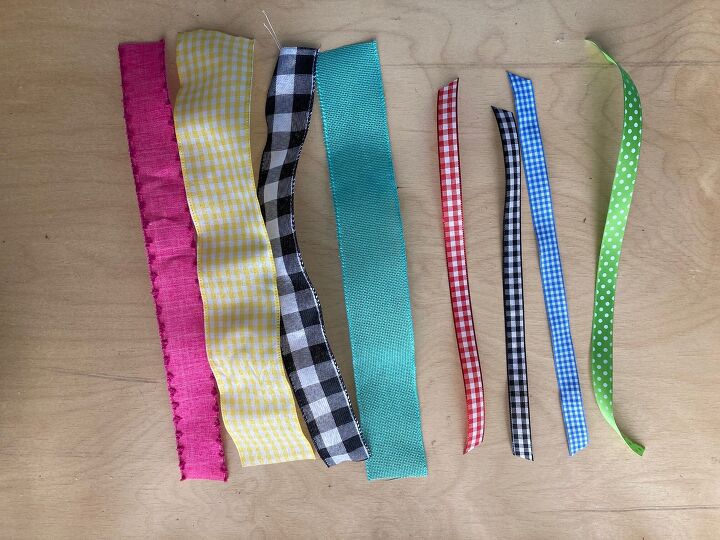
Step 7: To make the bow, I cut eight pieces of different color ribbon. Four pieces are 18" long, and those I folded them half-wise.
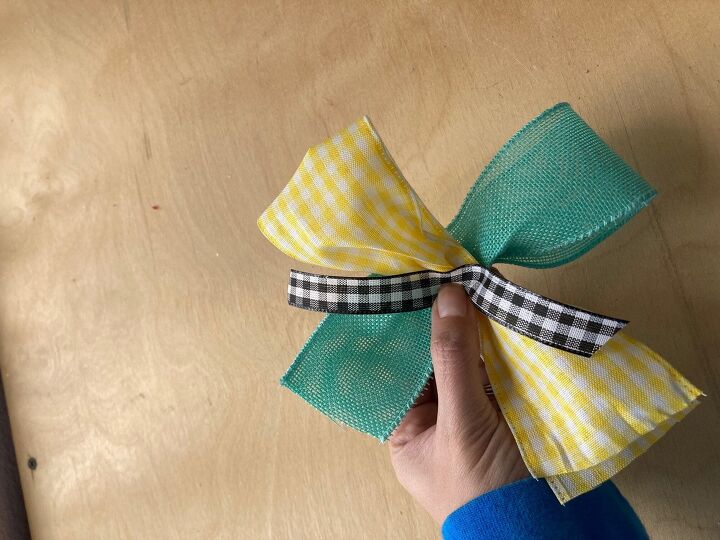
Step 8: The other four pieces are ten inches long, and I intertwined them with the four folded ribbons.
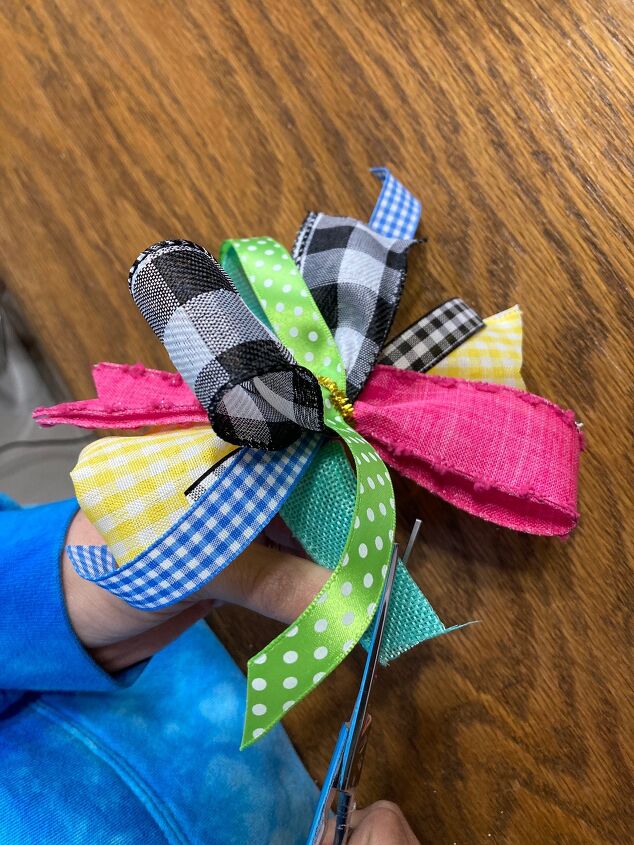
Step 9: Then, I gathered all the ribbons, in the center, with a pipe cleaner. Some ribbons have dovetails cuts, and the others are slanted.
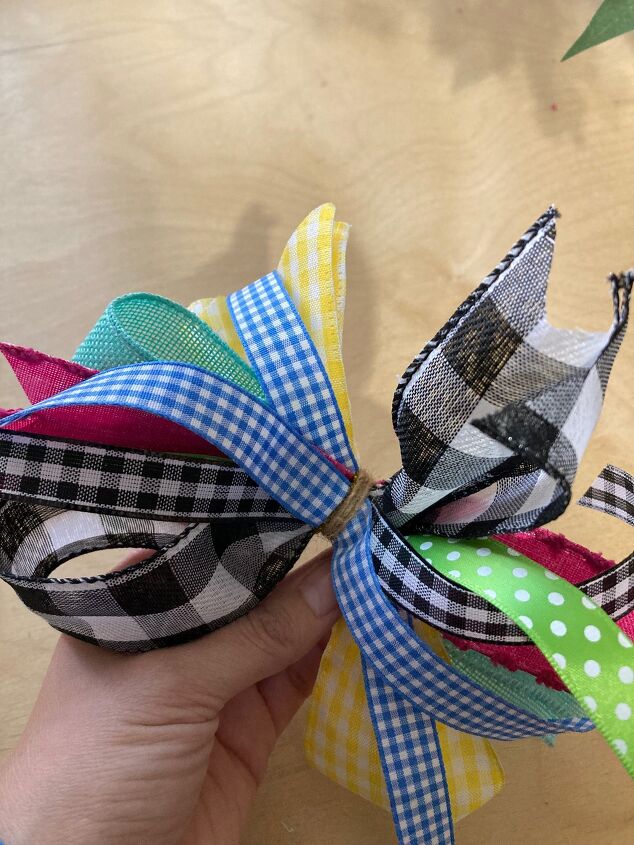
Step 10: I covered the pipe cleaner with more twine.
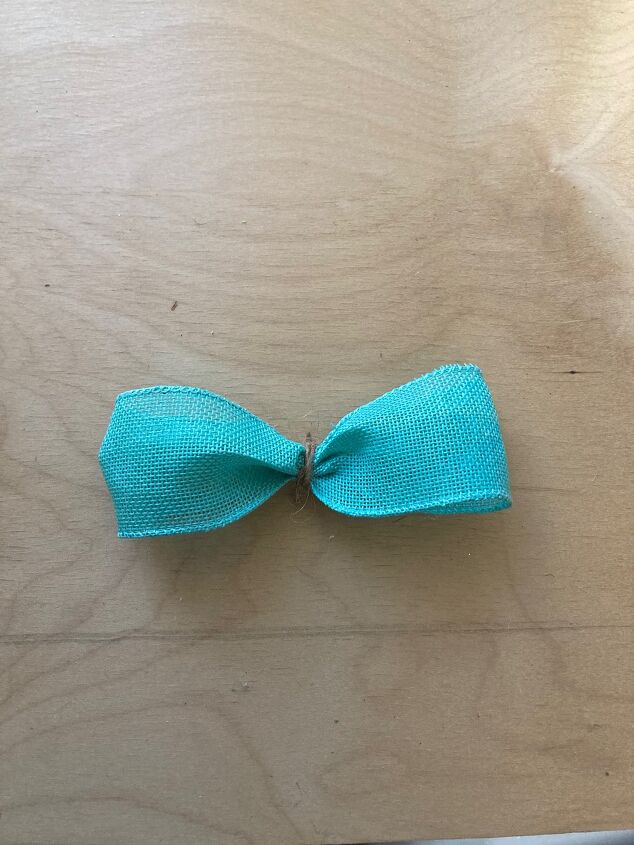
Step 11: I added a simple bow made with a 12 inch ribbon. I secured the bow with twine.
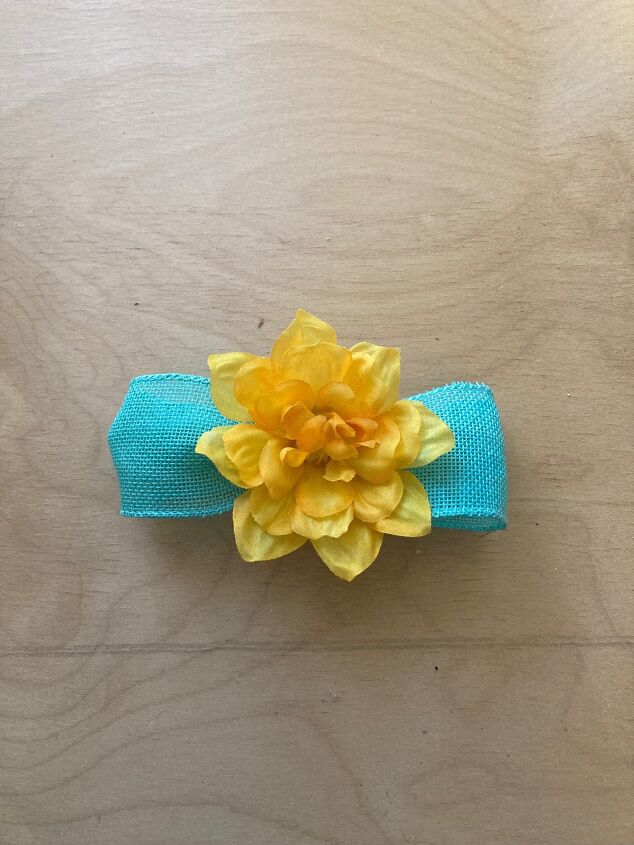
Step 12: I hot glued an artificial flower to the middle of the bow.
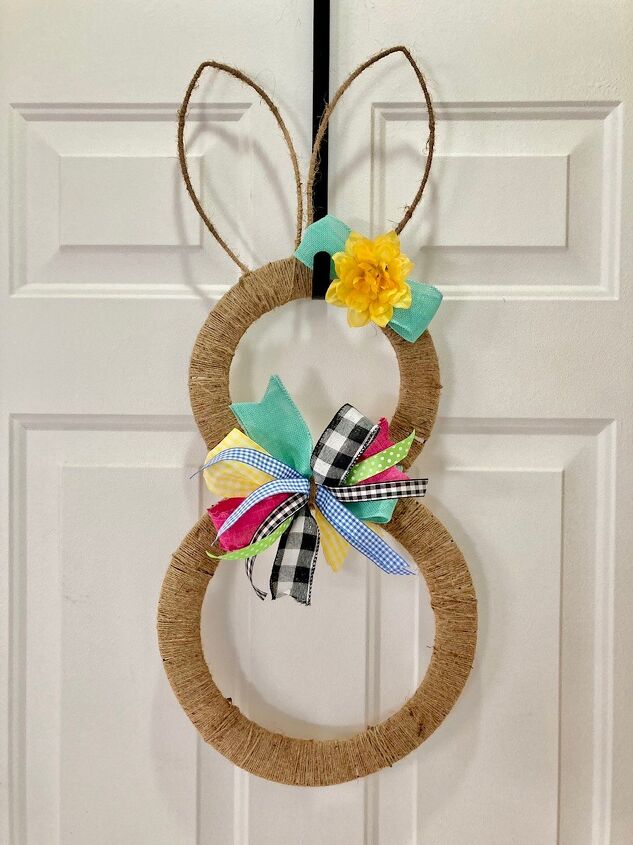
Step 13: And, finally, this is my finished product!
Resources for this project:
See all materials


Comments
Join the conversation
-
TOO STINKING CUTE, great instructions!
-
Thank you!


Frequently asked questions
Have a question about this project?