


Easy DIY Fall Grapevine Wreath - The Antiqued Journey
$45
1 Hour
Easy
Easy DIY Fall Grapevine Wreath
Posted on
September 24, 2021
in DIY Projects
I want to share a fun project today to help usher fall into your home. Here is an easy DIY fall grapevine wreath!
Posted on
September 24, 2021
in DIY Projects
I want to share a fun project today to help usher fall into your home. Here is an easy DIY fall grapevine wreath!
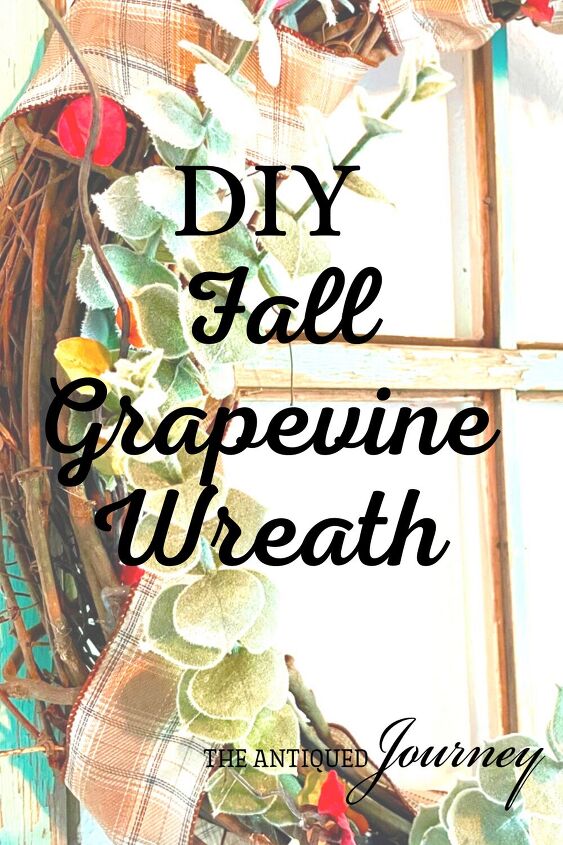
A simple, pretty wreath on your front door is so welcoming. It presents your home as a peaceful and inviting space. Follow along with the tutorial below and be inspired to create a fall wreath for your home. This post contains affiliate links. That simply means I make a small commission on any purchases at no extra cost to you.
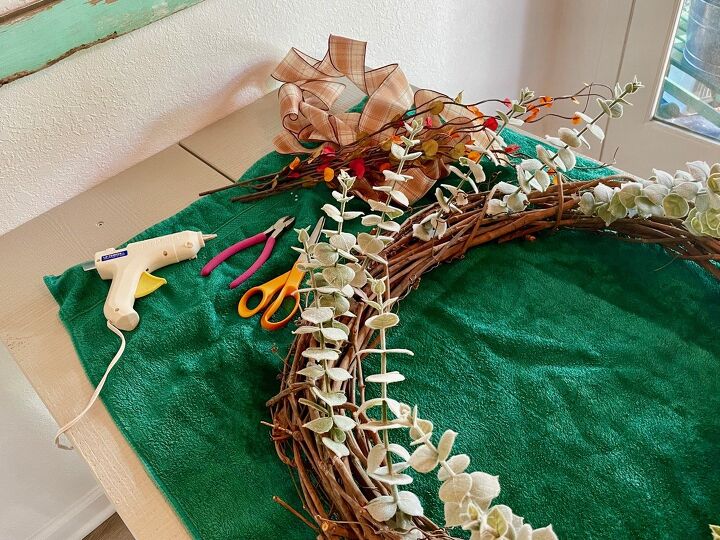
Materials to Gather
- 1 grapevine wreath
- faux eucalyptus stems
- plaid ribbon
- fall faux stems
- hot glue gun and glue sticks
- floral cutters
- a work surface cover (like an old towel)
Let it heat up for a good 15 minutes before starting. Lay your grapevine wreath on a flat, covered work surface.

You might notice that my eucalyptus stems are already glued down here. I’m re-using the same wreath from a previous project and it was easier for me to keep these in place for this project. If it’s easier for you to glue your stems down first then wrap your ribbon, go for it! Place your wreath on the table the exact way that you would like it hung on the wall. Sometimes grapevine wreaths have some pointier edges on them so just be sure you like the way it is laying before you start gluing. It is helpful to have an old towel or sheet underneath it to catch any stray glue. Wrap the ribbon.
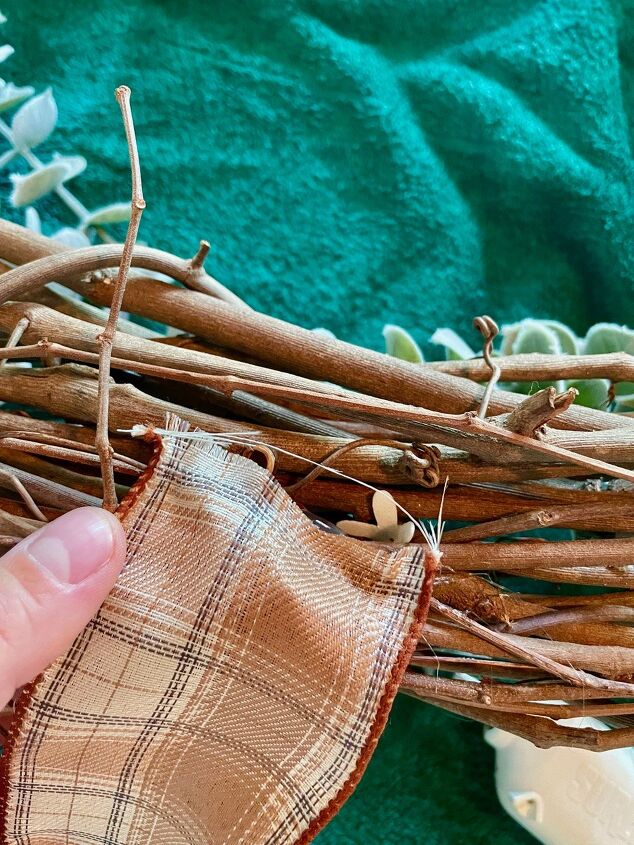
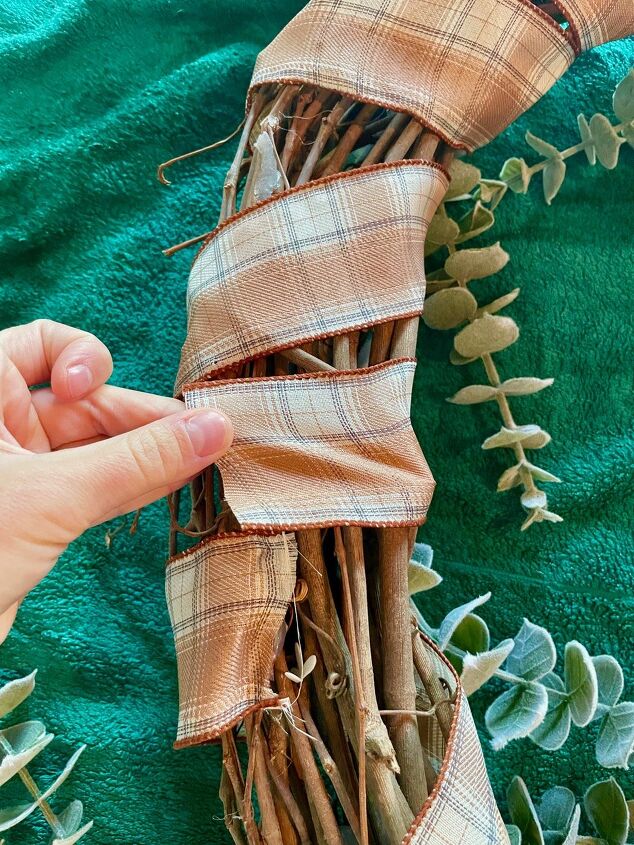
Pick a place on the wreath that you would like to start your ribbon. Squeeze a small line of hot glue on the back of the ribbon and hold in place for a few seconds.
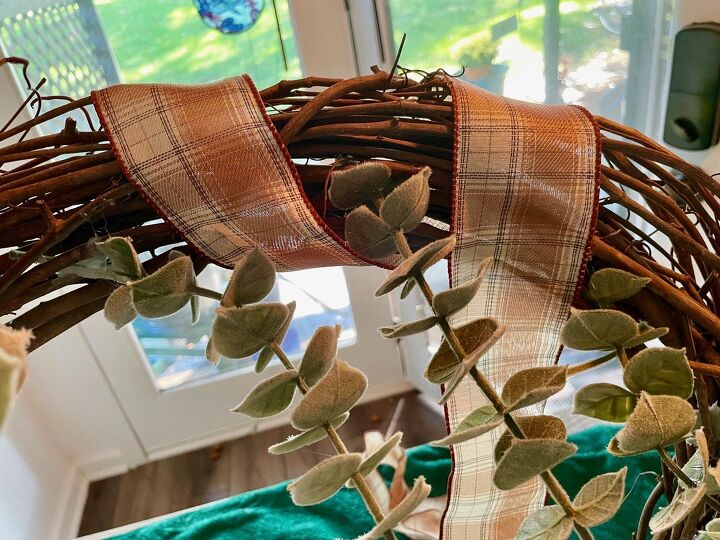
Continue to wrap your ribbon around the wreath until you arrive back at the spot that you started. Again, squeeze a small line of hot glue on the back of the ribbon to adhere it in place.
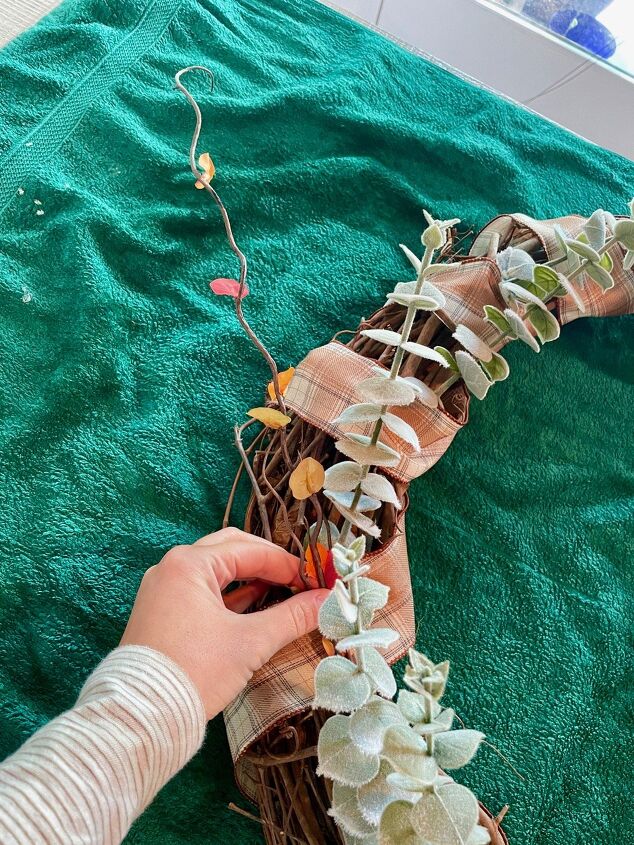
Arrange the eucalyptus stems.
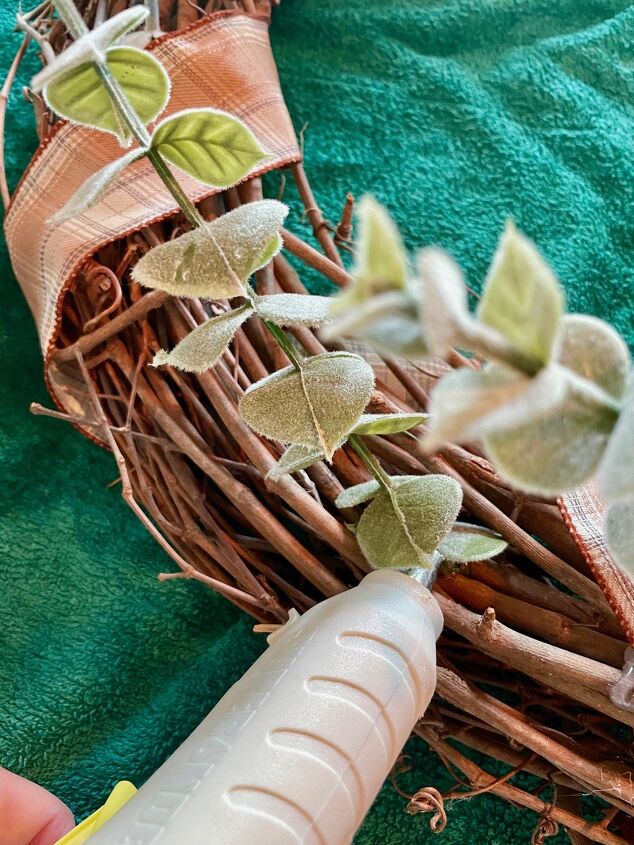
Do this in a way that you think looks pleasing to you. You can do this in a few ways. They can be arranged around the whole wreath in a circular way in between the ribbon or try clustering all of the stems in one spot (like on the left or right bottom). Glue down the eucalyptus stems.
Using your hot glue gun, squeeze a dime size amount of glue where you are placing your stem and hold in place for a few seconds. Continue this process until you have the amount of eucalyptus stems that is pleasing to you. Allow those to dry for a few minutes before continuing. Cut and arrange the fall stems.
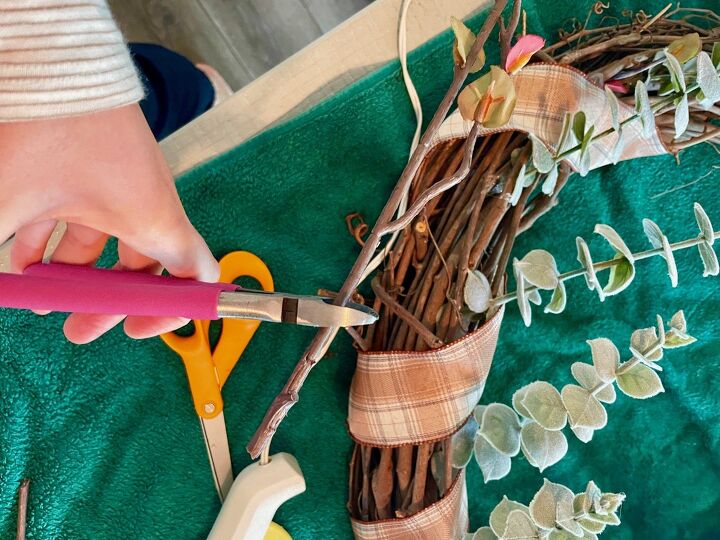
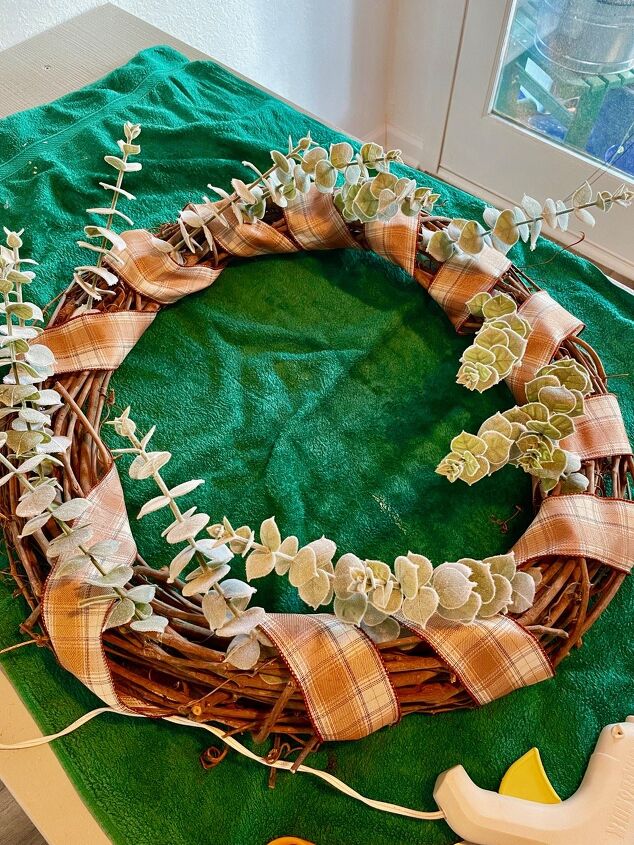
Using the floral cutters, cut the large stems into smaller stems. Then, arrange these stems amongst the eucalyptus stems.
For this wreath, I was going for rustic over refined. My fall stems stick out further than you may want yours to and that’s totally fine! This is your project. I’m merely giving you guidance, so you arrange everything according to your preference. Once you have achieved a look that you love, hot glue the fall stems down. You only need a little amount of glue to adhere these stems to the wreath. Allow those to dry for a few minutes. Clean up any loose ends.
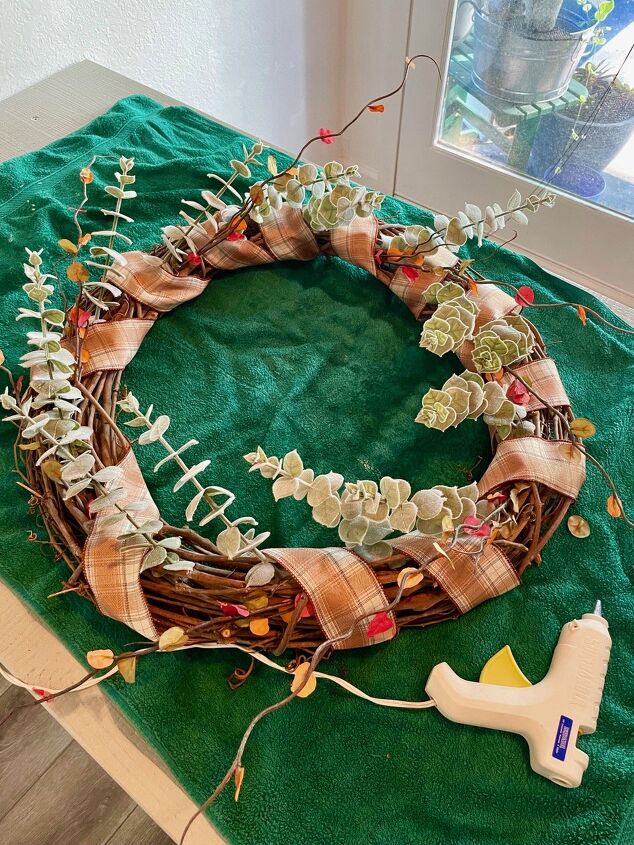
Pull off any lingering hot glue strings or threads that might be hanging. Make sure all your stems are placed in a way that you like. You can always pull them off easily and re-glue them before hanging up your wreath. Display your pretty wreath!
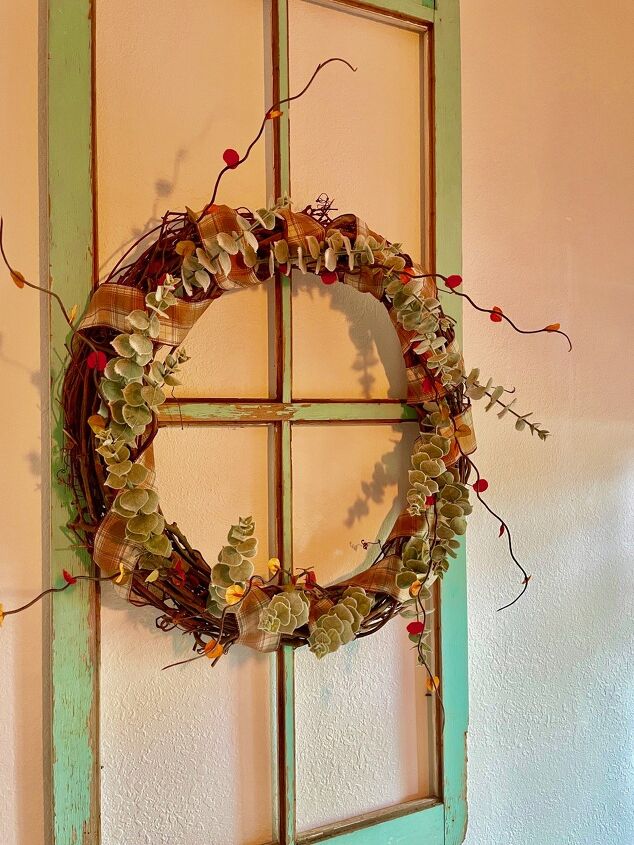
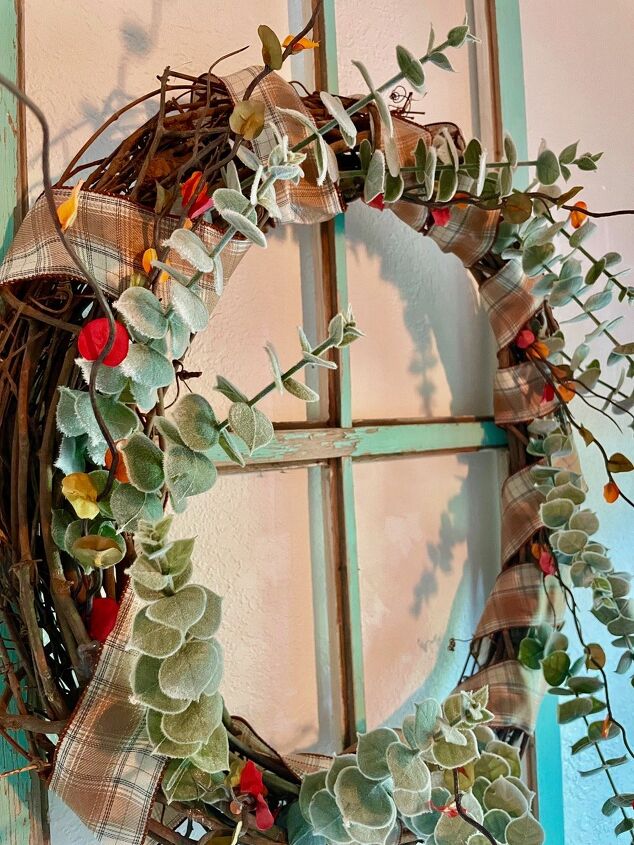
Hang up your wreath! It will look beautiful wherever you choose to display it. Besides hanging it on your front door, here are some other places to try: On a vintage window as decor, on a porch, hung with ribbon over your kitchen window, or in your entryway. I hope this easy DIY fall grapevine wreath inspires you to create one of your own! It truly does add a very simple touch of fall to your home. This wreath also brings in an abundance of texture as well as natural elements to your space, making it feel grounded and well-rounded. May you find the slowness in the day to day and embrace this new season!Let me know in the comments how this wreath turned out for you! Find more DIY wreath tutorials for a spring wreath and winter wreath! Find more simple home DIY projects here.

Want more details about this and other DIY projects? Check out my blog post!


Frequently asked questions
Have a question about this project?