


Embroidery Hoop Holiday Wreath
9 Materials
$10
3 Hours
Easy
I was given some nice, wood embroidery hoops from a friend and I knew one of them would make a perfect wreath.
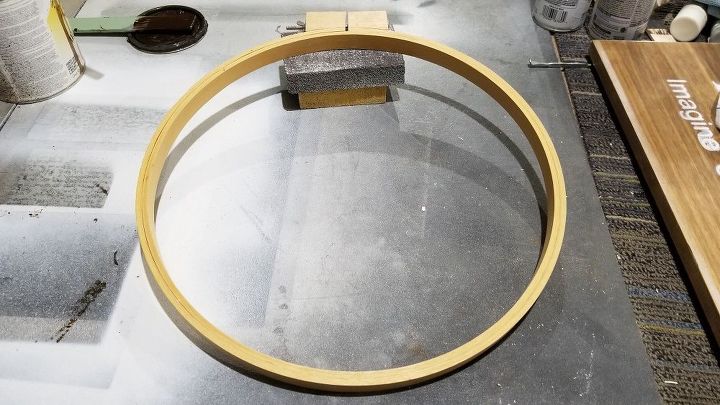
I started by staining the hoop and cutting and staining small pieces of wood to create two small frames.
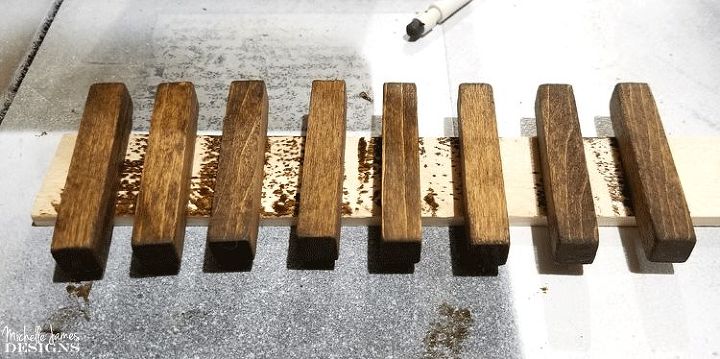
These are square pieces of basswood trim that I used to make the frames. Each are 3 inches long.
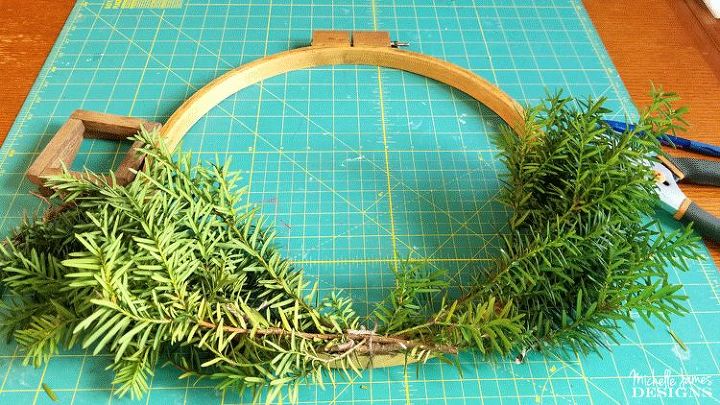
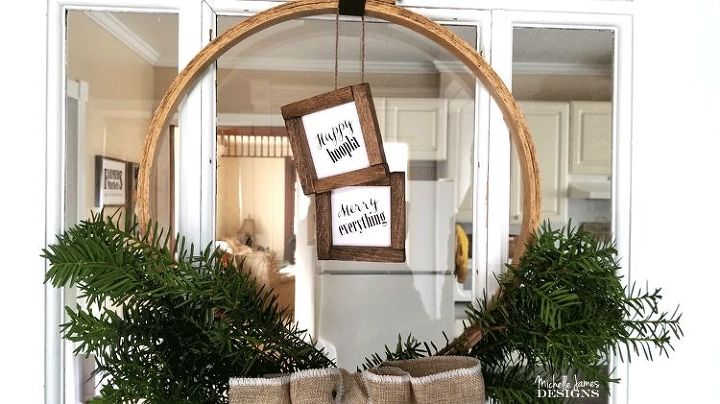
When the stain was dry I used some real greenery and tied it onto the bottom/sides with twine. Wire would work nicely too.
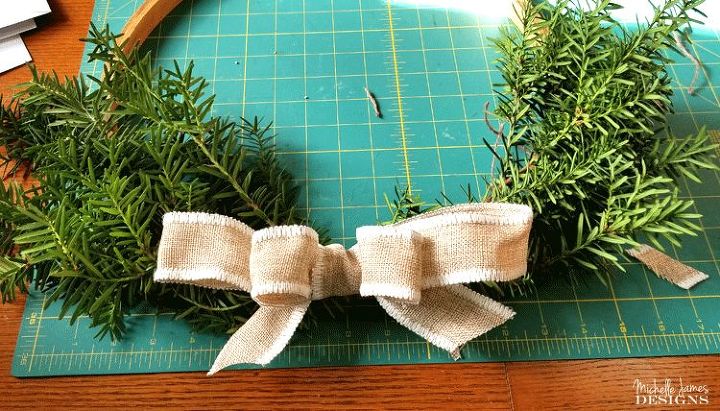
Then I made and added a bow. This is wired burlap ribbon. I used twine and hot glue to add it to the wreath.
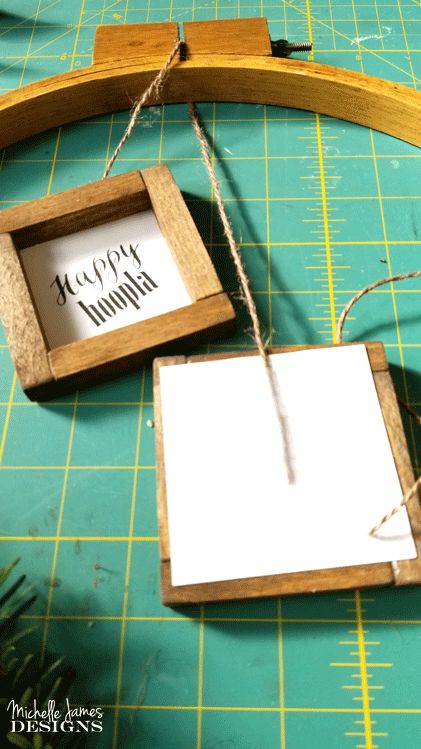
The small pieces of wood from earlier were glued to make frames then I added some printed pieces of card stock to the back.
The two frames hang in the middle of the wreath so I used a piece of the twine and taped the ends to the back of the card stock.
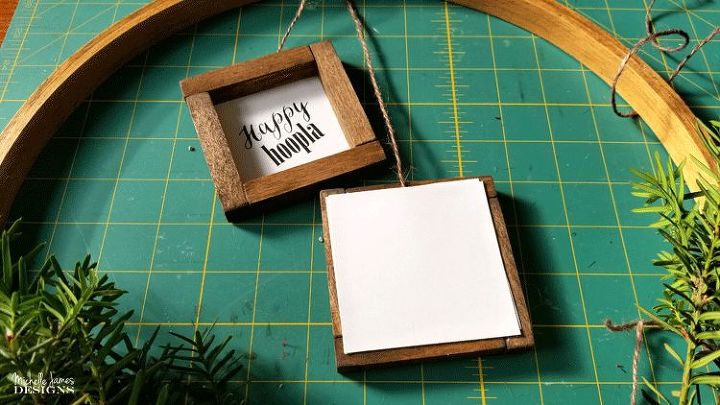
Then I cut another piece of card stock to cover the twine and the tape to make it look more finished. You can download the printed sayings for the frames from my post.
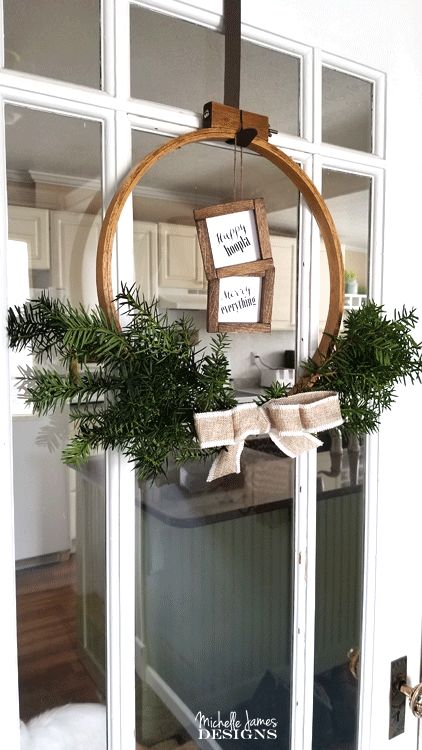
And there you have it! A fun wreath. I had all of the supplies already and the embroidery hoop was given to me so it cost me nothing at all! I love it.
If you like this you will probably like some of my other projects as well. Sign up for my email/newsletter and you will get a weekly email with links to projects I have done.
Resources for this project:
See all materials


Any price and availability information displayed on [relevant Amazon Site(s), as applicable] at the time of purchase will apply to the purchase of this product.
Hometalk may collect a small share of sales from the links on this page.More info

Want more details about this and other DIY projects? Check out my blog post!
Comments
Join the conversation
2 comments
-
I just found a big hoop and this was the inspiration I needed! Thank you!


Frequently asked questions
Have a question about this project?